Here are more of the items sifted from the cleaning-out of my father-in-law’s house. Some of these treasures were left behind, but many of them are now ensconced in the barn.
As I get older I gravitate more and more toward rulers rather than tape measures (especially at the bench), notwithstanding the reality that a Stanley 12-foot Powerlock tape fits perfectly and resides in my coin pocket virtually 100% of the time I am not at church or the doctor’s office. In Dick’s menagerie was this four-foot folding cabinetmaker’s rule, and it is now nestled in my carpenter’s tote.
Many years ago my pal MikeM made a vest pin out of a Shinola brand shoe polish tin, a much loved artifact that remains in my collection. When coming across this bottle of shoe polish how could I not bring this back home to go into the gallery in the barn? Perhaps I can even use it to analyze the utterances of public officials to see if I can distinguish, uh, stuff, from Shinola.
Being a real guy, Dick probably went out and bought a new tool when he could not find his other one (at least I have been told that this is a tendency; hmmm, it might explain my half-dozen caulk guns), which would justify the three torque wrenches in the garage. I brought one home and gave the other two away to good homes. I cannot recall the last time I needed a torque wrench myself, probably when I rebuilt an industrial planer in 1982, but if I have to do it gain I am equipped.
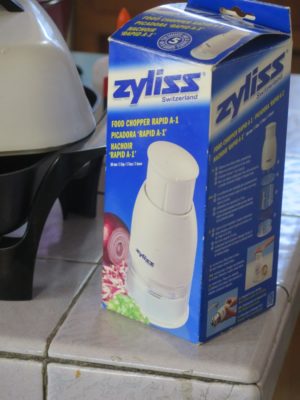
One of the items I left behind was something that truly surprised me. I had not known that the Zyliss company made more than the renowned vises, of which I own a half dozen and find them nearly irreplaceable when making Gragg chairs of teaching marquetry. Lo and behold there was this NIB food chopper in the kitchen cabinet. I almost wish I had brought it back.
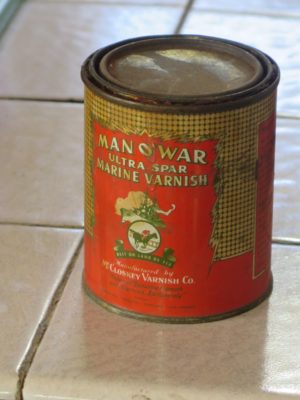
The final item, and one which holds great sentimental value for me, was this can of the revered Man O’ War brand of spar varnish. It was of an indefinable age, but nearly full and the contents were in perfect condition. I remember using Man O’ War on some very expensive porch furniture (not mine) back around 1975, and it was sublime in both workability and performance. I left it behind because it would have been problematic to ship it back from The Peoples Republic of Kalifornistan, for the same reason that I refuse to ship Mel’s Wax to Cali.
Though it was superb I could not justify shipping home a vintage 4-inch Wilton torpedo vise or the tool boxes full of pliers, screwdrivers, wrenches, and socket sets.
If you have never seen someone finger-picking on a double bass, give this video a look. Niels-Henning Orsted Pederson is perhaps the jazz bass player against whom all others are measured, sort of the double-bass version of Billy Cobham on drums, Oscar Peterson on piano or Johnny Hartman on vocals.
Even if you are not a jazz aficionado this is worth the glance. The production quality is dreadful but the performance of one of my favorite songs is mesmerizing.
Living in a place where my nearest permanent neighbor is a mile away suits my preferences almost perfectly. The national psychotic spasm over the past year-and-a-half has pretty much passed us over, as our population density enables “social distancing” on any day ending in “Y.” Most days the only people Mrs. Barn and I encounter are each other.
But all is not perfect, in that while we have a clinic in town a visit to a specialist is an all day event requiring a trip over either three or four mountains, depending on which doctor is being visited. Ditto real shopping, we have a convenience store, a feed and seed co-op, and a Dollar General but the nearest grocery store is an hour away, most general shopping is a half hour further.
Trip to the DMV? Whole day. Trip to the lumber yard? All day.
Spring is always a hectic time around here with the gardens being planted, the grass needing mowing every third day, and this year we have had the calendar augmented with nuisance medical issues requiring a lot of back and forth trips out of the mountains. I for one am very much looking forward to getting the debris inside my creaky knee vacuumed out next month.
All that to say that things are hopping here and blogging just ain’t at the very top of the daily “To Do” list. That might make me a bad blogger, and I will give that concern all the attention it. deserves.
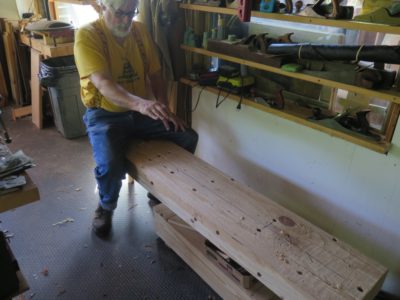
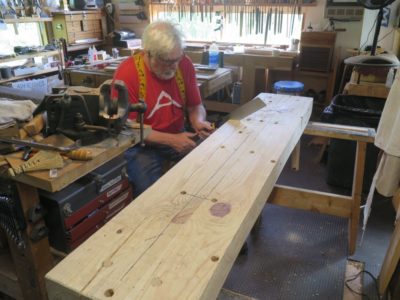
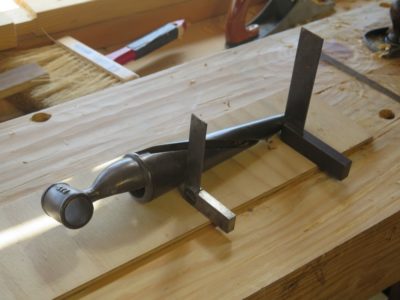
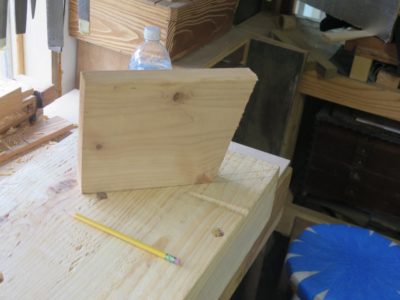
One of the intriguing features of the low benches out and about in the woodworking blogosphere and LAP books is a notch cut into the side edge of the bench to allow workpieces to be wedged into it for cutting on the ends. I decided to give this concept a try on my bench, if it was not to my liking I would just fill the notch back in and move on to other ideas.
The first step was to figure out where to cut the notch, which depended on my own body and working habits. So, I sat down and held out my hands to mimic a long sawing posture, then located the notch a little closer to me than that.
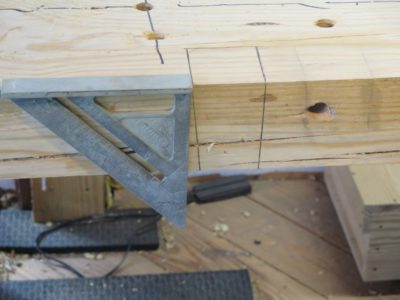
I then laid out the notch to have a square rear shoulder and a tapered front shoulder into which would fit a wedge of that bevel. The exact measurement of the taper is unimportant, it just needs to be slight. I did not even measure mine, I just struck it where it seemed right to my eye.
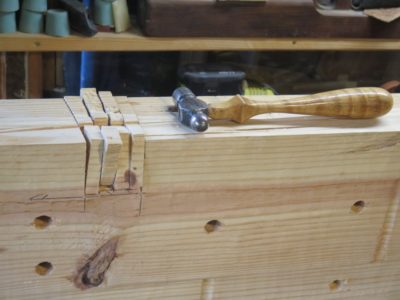
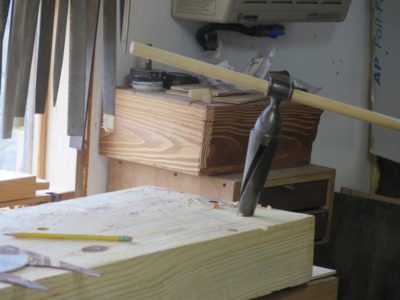
As is my preference for a lot of large-ish joinery sawing I grabbed a trusty Japanese saw and set to work.
My typical procedure is to cut the shoulders of the joint first, then make several cuts in the waste to aid removal.
Then I whack the waste with a hammer to remove as much as I can, leaving the remainder for the hammer and chisel, followed by a rasp.
With the notch cut I fashioned a wedge to fit the taper and gave it a test drive. I will no doubt make a number of similar wedges of differing thickness (or perhaps a series of spacing shims) to accommodate a great variety of workpiece thicknesses.
I worked it a few minutes and liked the concept very much.
Recently we had the good fortune of attending the ordination service for my beloved nephew A (it is my brother-in-law with the hand on his shoulder during the dedication prayer). We are very much delighted at his diligence in formal studies related to the life of faith he has demonstrated since he was a child.
Those living under his Biblical ministrations will flourish almost as much as he will in providing that loving care.
He is a remarkable young man, the proof of whose wisdom is that he often seeks his cranky old uncle for advice. He also married very well, and is now the shepherd of my year old grand-nephew.
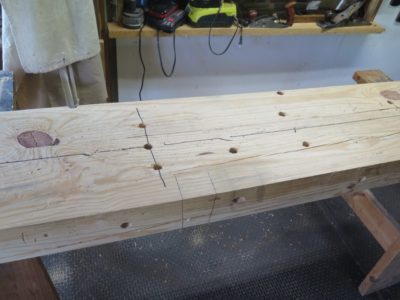
With the slab established and the staked legs in place and trimmed to length the time had come to start tricking out the bench. Needless to say I blended existing ideas with some new flavoring of my own. In this episode the emphasis is on 3/4″ holes. Lots of them. My slab was over 4-inches thick so I was not too worried about weakening it. If it were a 2-inch slab I would have been more cautious, but a 4-1/2-inch slab is inherently stronger than 2-inch by a factor of almost eight (cross sectional strength being the ratio of the two cross-sections to the third power).
The starting point was the reality that I was using a recycled planing beam for the bench slab so some holdfast holes were already in place, sort of. This was particularly relevant on the edges of the slab. All I had to do was deepen the existing holes in order to make them amenable to holdfast use. Edge holdfasts are not usually incorporated into low benches, but here the opportunity was too rich to pass up.
In addition to the edge holes, a low bench requires a number of vertical holes through the slab in order to use both holdfasts and aligning/wedging rods to facilitate upright edge planing. With a spacing strategy that will become more apparent in a couple weeks, I drilled and added these devices.
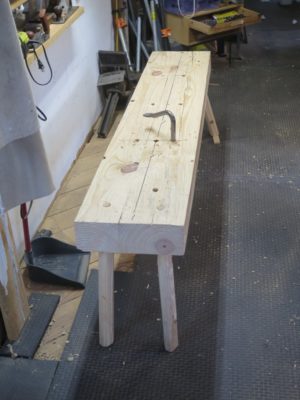
I am not entirely pleased with the splay of the staked legs on the end closest to the camera so I may re-drill them. This is the end I will be sitting on most of the time when using the bench. I am perplexed as the angles of the far end legs are perfect. I must’ve not had the template in the right orientation (closer examination suggests this as the most likely culprit) or was distracted by some compelling point in a podcast or a captivating riff on a CD or whatever.
I often tell first-time homeowners that, “From this point on, one of your ‘hobbies’ better be working on the house.” It has always been that way for me, although I am finding the scope of the projects are getting smaller as my bones get creakier. Small things, okay. Large things like re-chinking the cabin and the upcoming new standing seam metal roof? Better leave those to younger and more nimble folks. The problem is exacerbated by the dearth of a labor pool in the hinterlands. To get skilled tradesmen to attend to a specific need you might have to wait up to a year or so once you “get on the list.” Any man available for hire as an hourly wage laborer is available for a reason. I’ve got leads for a couple of younguns to help out on the homestead on occasion but I have to wait for school to get out to firm up those connections. We’ve got Amish moving into the community which I hope will alleviate some of this shortage.
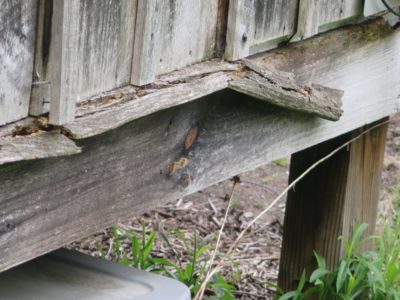
Recently I had a nice little project that was pretty important. Ironically it was on one of the newest pieces of wood on the cabin, on the rear side of the mud room built around 2008 or so. The beveled sill at the bottom of the board-and-batten siding had decayed to the point that it was literally falling off. unfortunately it was originally made from soft white pine so its life span was bound to be short.
With very little effort I was able to excavate the detritus and make the necessary measurements for a new one. My first inclination was to make the new sill out of PTSYP, but given the current price of lumber (~$14 locally for an eight foot PT 2×4) and my depleted stock of PTSYP I went in another direction, one that was actually more appropriate; I recycled some of the chestnut framing lumber from the old shack up on the hill.
I re-sawed a full 2″ x 4″ stud to the size and configuration of the piece being replaced. Given the “run of the mill” character of the chestnut I had to hand plane it a but to get it less curv-ey so that it would just slide into place. It did, and a handful on mondo finishing nails later it is in place looking like it was always there. Well, it will look that way after a few weeks of weathering.
This whole side of the cabin gets the brunt of the weather so I will certainly have to re-visit it at some point.
Since my father-in-law died two days after my mom’s memorial service in January, we have been up to our eyeballs in alligators working to settle his estate and clean out his house. As Mrs. Barn and I noted last night, even after almost four months it is still a shock to not be making a phone call to him every evening at 7:30.
Fortunately my sister-in-law is the executor and point of contact for all the estate stuff, but we have been actively involved in the house-cleaning-out process, spending almost a month in total on the ground and getting dirty. It is a humungous task as my father-in-law was a child of the Depression who lived in the same house for sixty years in a SoCal suburb. So, there’s lots of stuff.
Much of my time over a couple of recent weeks has been to clean out the garage, which had a tunnel for the car but I called the rest the Wall of Voodoo. It was exhausting work as there were literally tons of junk to move out and stack for the disposal crew to remove, and to also sort through the Wall of Voodoo to separate the treasure from the trash. In addition to the hundreds of used spark plugs, the dozens of carburetors and alternators, there were tools. Lots of tools. Mounds of tools. He was a mechanical savant and a mechanical engineer, so the inventory of those implements was huge. Among the treasure were a few things that I was able to ship home to the barn. Here are a few of them.
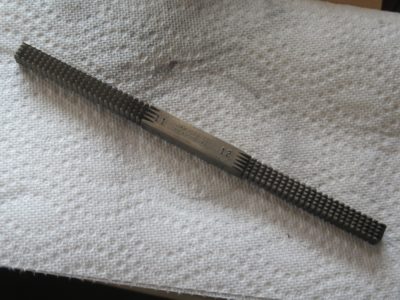
A tool I have always wanted was a square broach style thread file. Now I have one.
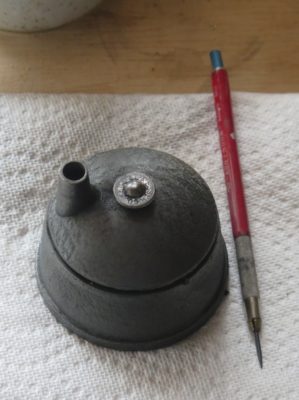
I’m so old that when I took drafting classes we had to sharpen our own wooden pencils with a knife and sandpaper. It was in the “advanced” classes where the students were using retracting-lead pencils with precision sharpeners that could put a needle sharp tip on the lead. Dick probably had this from when he went to engineering school back in the 50s. Since I have saved or acquired a half dozen of these pencils, I rejoiced at finding this sharpener in a box of paperwork.
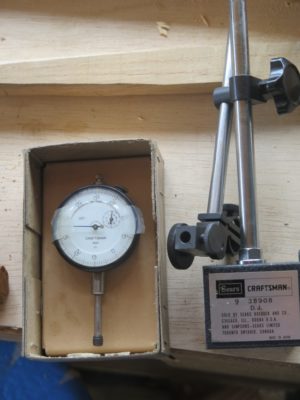
This is the year for bringing all my metalworking capacity on line, including pair of machinists’ lathes and a horizontal milling machine. To tune up these machines an indicator gauge in a requirement. Now I have another, so that each machine can have one permanently.
Though I did not bring this home, I was delighted to find this can of an old, revered varnish. The contents were still in perfect condition. I left this at the house in SoCal but may try to figure out how to get it home to my menagerie here.
And, there are still more treasures, some en route from West to East. I’ll report on them anon.
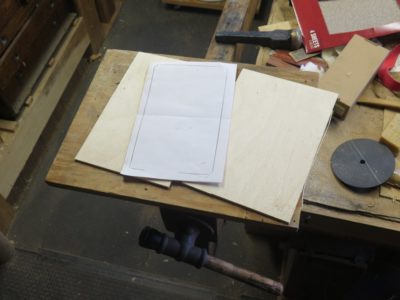
The design of the new Kindle case for Mrs. Barn’s smaller Kindle was a bit tricky as my idea was to create a version of a Victorian card case, in which the Kindle would reside. This meant that the tolerances for fitting it were closer than with mine, although that is a snug fit, but this one needed to slide in and out of one end of the case without being too loose or too tight. Armed with my home made plywood panels and a precise tracing of the Kindle I set to getting the pieces cut to size.
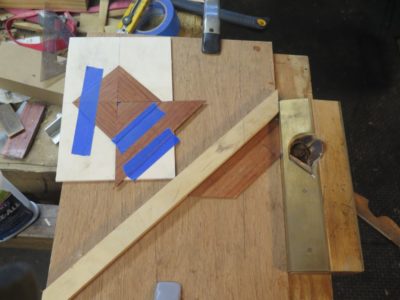
From there I began laying out the veneer patterns using some left over scraps from other projects. Unfortunately my first effort was a catastrophe as I failed to tape the elements in place before gluing them down under free weights. I tell myself that I was trying to keep too many Christmas gift projects in the air at once, but the simple fact is I just forgot to do what I should. Thus, the veneers shifted during gluing and were in the wrong place. Since I was using PVA the effort to remove and re-start would have been odious so I just tossed that piece and started that panel over.
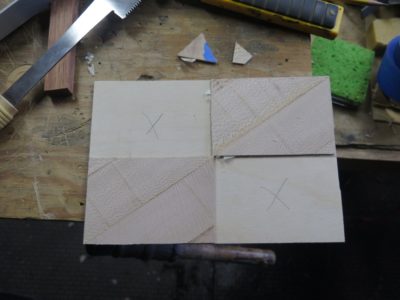
I made sure to get it right the second time as I was almost out of the sawn rosewood veneer.
The second panel was done with sycamore, its bold fleck providing some real dynamism to the composition.
I made sure to tape the veneer compositions in place this time, and they turned out as they should.
Given the “new growth” nature of the wood it took only short time to get the bench slab flat enough to move on to the staked legs.
For the leg material I was able to recycle the hunk from the edge of the original slab when I ripped that to the width I wanted. I made five leg blanks just in case.
To guide my tapering of the ends I made a quick template based on my tapered spiral reamer, bought for a song at a tool flea market.
I laid out the holes for the legs by insetting them four inches from the side and end, then angled out at 12-degrees on the diagonal. I drilled 3/4″ holes all the way through from the underside, then reamed them with the spiral taper until the taper intersected with the top. In retrospect I should have made the angle a bit more, perhaps 16 or even 20 degrees, but I think this will suffice. If it does not, I will simply move the hole location and drill new holes.
Once I had the leg ends tapered with a drawknife and block plane I just drove them home into the reamed holes with a small sledge. They seated with a crisp thunk. I tried several heights for the bench with a series of mock-ups, and once I determined which height worked best for me I measured the legs and cut them off.
Rolling the bench over and putting it in place this step was finished. Now it was time to begin tricking out the bench.


Recent Comments