2016 Toolapalooza I – The Bench
Once again this year I made a point of making the pilgrimage to the mother lode of vintage “user tools,” namely Martin Donnelly’s July “cleaning out the warehouse” auction in Avoca NY. Not only is the tool selection mind-numbing (3200 auction lots of 50,000? tools) but it is a highlight to spend time with friends old and new. My pal MikeM and I have been tempting the fates this way for it seems like almost two decades. This year our circle included Martin from Toledo, Jon (and the lovely tool mavenette Christine) from NJ, Tom from southern Maryland, long-time friend Craig from Michigan, and the Hyperkitten himself, tool merchant extraordinaire Josh Clark. More about exploits with Josh in a subsequent blog.
If you have never been to the MJD Auction there is no way to describe it perfectly. Tents and tents and tents of old tools, just waiting to be pawed over and examined. And bid on.
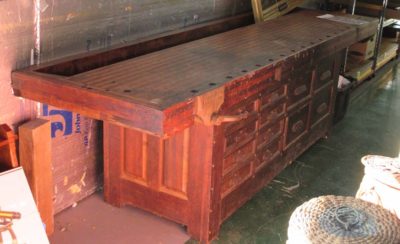
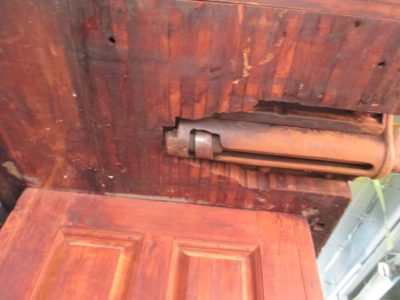
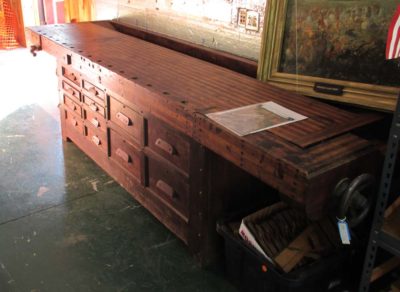
But for me this year the main interest was the chance to see and examine this workbench. It is simply amazing in its scale and mass, and the exuberance of its design and workmanship. The 10′ top is a full five inches thick made from walnut and maple lamina. In form the bench is an idiosyncratic hybrid of a German cabinetmaker’s bench and a piano-maker’s bench, with a finished cabinet of twelve drawers, some of which seemed cavernous. I did not get to see the rear side of the bench base, but I was told there were more cabinet spaces with fitted doors. I thought about trying to check them out, but an initial tug on the bench suggested it weighed only slightly less than an elephant.
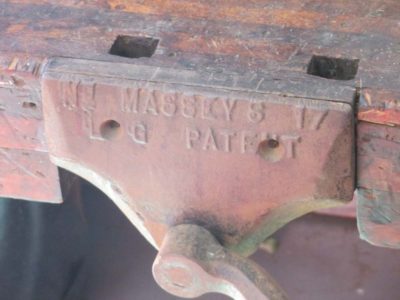
In addition to the jaw-dropping aesthetic of the bench design I was very much struck by the face vise. At first I was somewhat startled at seeing the cam-lever vise where a wheel-handled vise should have been. Oh goodness, I thought, did someone go to all this trouble to create this magnificent bench only to vomit out a Sheldon vise on the most prominent location? Imagine my surprise when I manipulated the vise and found a cam and rack vise that was a precision tool, tight and smooth in its action. I’ve never seen one before but am on the lookout now. I’m not the most serious vise historian but I definitely want to know more about Massey.
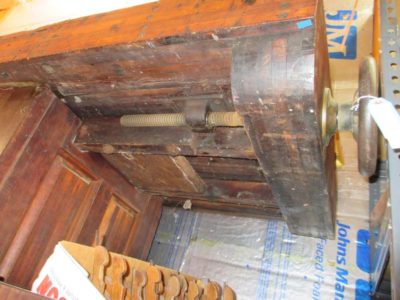
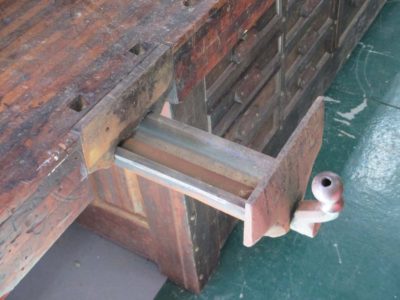
The end vise was equally peculiar, being a wheel handled L-vise. The space holding the bench was so confined I had no chance to get a sense of its workings since there was a shelving unit immediately abutting it.
As I departed (the bench was lot #2,500, with 700 more to go before then and with me facing almost eight hours of driving to get home) I chatted briefly with Martin Donnelly, congratulating him on the sale. He was grousing good-naturedly that now he had to deliver the bench to its new owner. I don’t know the location logistics for its new home but it wouldn’t surprise me if it took a half dozen guys to get it maneuvered there. We think this may have garnered the highest price ever for a workbench at auction. It was certainly the highest gavel price for anything this year.
I’ll be speaking with the new owner in a couple of days, and look forward to working with him to gain greater understanding of this “Wowser” workbench.
Up next – pre-auction grazing


Recent Comments