Oh wait, there wasn’t a Day 5 because everyone got finished building their benches a day early and headed for home. It was exceedingly gratifying that the concept I borrowed from David Barron could be adapted successfully to a group event.
So instead of a fifth day of the workshop I puttered around the barn putting things away and cleaning up. I also reflected on those things that worked, and those that could work better.
First, I’ve decided to not hold any events in July any more. The risk of weather-based unpleasantness is too high. As it was the temperatures were in the mid-80s with high-ish humidity, and it was the only week all summer where we needed the fan on all night in order to sleep well. Had the event actually included all the bodies I was expected it would have been a disaster as we would have done all the assembly on the fourth floor, which is pretty oven-like this time of year.
Which brings us to #2, that being my realization that for me and The Barn the perfect number of attendees for a hands-on workshop is four. So, from now on, four it is. My parquetry workshop in ten days has three students (a fourth slot is still open for anyone still interested) and that will be great.
Which brings me to #3, namely that I need to do a much better job in providing adequate space for all the attendees and all the processes they need to execute. I’ve already started working on this and moving more and more stuff off of the main floor. And quit using the classroom space as little more than my storage closet.
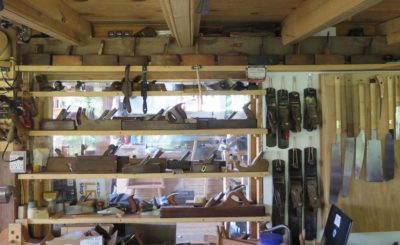
Fourth, in collaboration with the students we derived a good tool list for attendees of any future workbench-building workshop. For this first time event I was more than happy to draw on my own substantial tool set to get the job done.
Fifth I was grateful beyond words for both the days of fellowship but the ideas and skills the attendees brought with them. For example my solar panel array had been on the fritz for six weeks, and despite numerous interactions with the system manufacturer the problem was not resolved. Bill knew of the problem and took it as a personal challenge to solve it. Which he did!
Finally I have a number of ideas about the bench-building process itself, and that there are some specific changes I will test drive before the next one.
At the moment I am tentatively scheduling the next workshop for building laminated Roubo workbenches either the last week of August or the first week of September 2017.
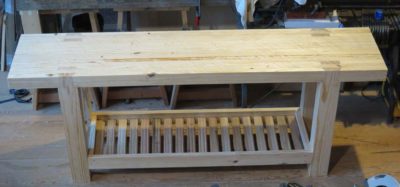
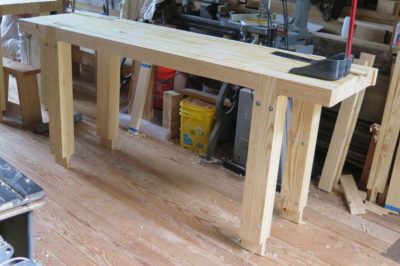
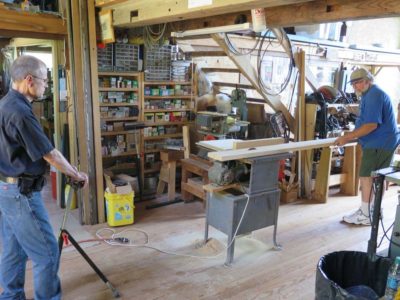
The fourth day brought everything together. Since everyone had their benches on their feet by the end of Day 3 we were in really great shape and I was confident that the scheme I devised for the workshop would result in everyone going home with a completed bench. But this was the day with lots of odds and ends.
The day involved a lot of sawing. For starters I asked everyone to trim the tenons protruding through their bench tops as a good warm-up. Using a selection of saws from my collection everything was done in a flash.
Following that we trimmed all the benches to finished length, then flipped the benches on their sides on top of low saw benches and sawed the legs to each person’s preferred height. Like I said earlier, the small number of participants allowed us fair latitude to customize each bench.
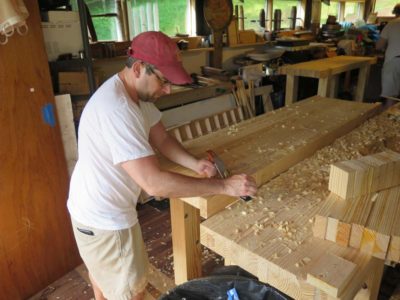
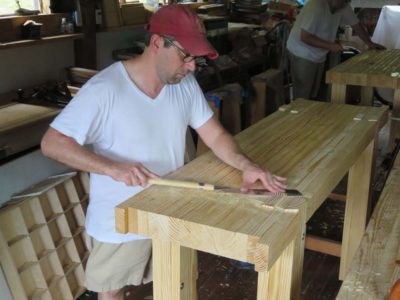
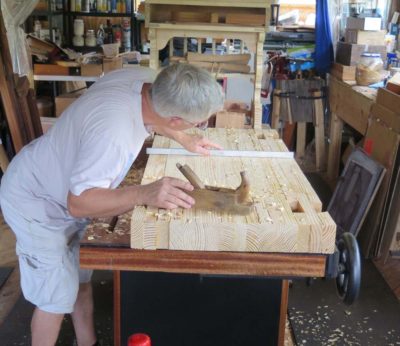
With the tenons trimmed and the legs cut to the desired height the task was then to get the tops flattened. Much like the undersides, a few minutes with a scrub plane was followed by perhaps an hour or so with a fore plane. This put the benches in shape to be used for work right away. The final smoothing of the bench tops will not occur until next spring after they have gone through a year’s seasoning.
As we were ramping up for the planing I tuned each plane they would be using, then gave a brief tutorial on the method I use for sharpening. It may or may not be the correct technique, but it works for me and now they know how I do it. Whether or not they use the same approach is for them to decide.

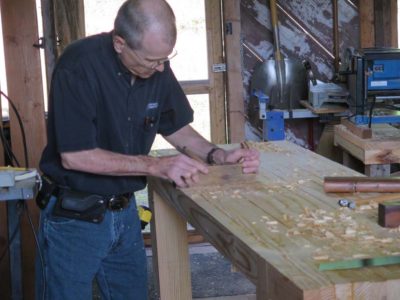
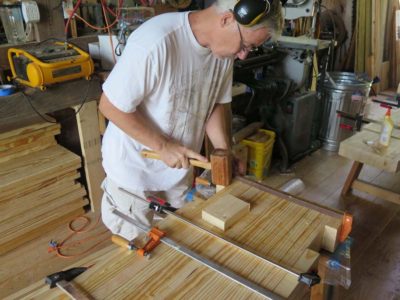
Once the tops were flat it was time to chop the mortise for the planing stop. I had intended to create these mortises in the same manner as the leg mortises but just forgot to do it at the right time. So, chopping.
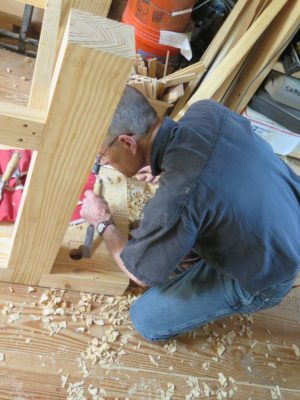
Once the mortise was half chopped from the top we flipped the benches over and finished them from the underside. A little time with the rasp and the planing stops were a snug and functional fit.
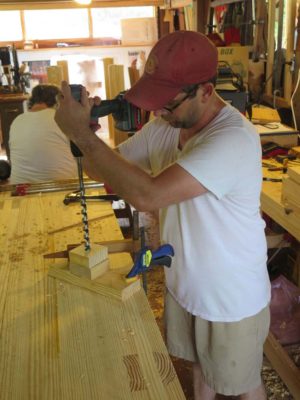
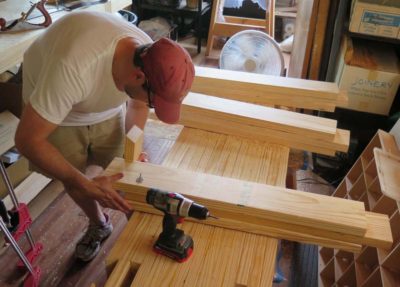
Once the guys were done with their planing stops they used an ultra-high-tech precision jig I made to drill their holdfast holes.
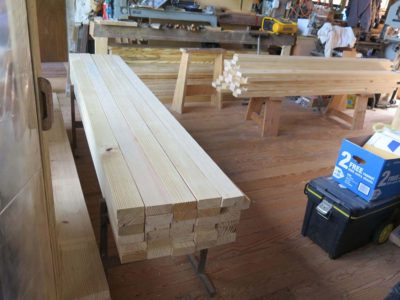
While all of this was going on I cut the stretchers and slats for the shelf under the bench. For the most part these were simply packed up as four of the five benches were being disassembled for the trip home.
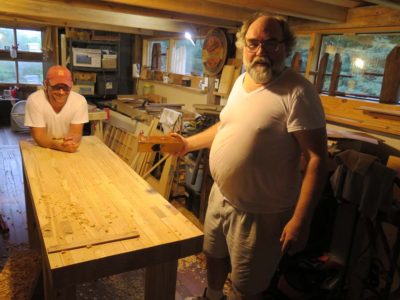
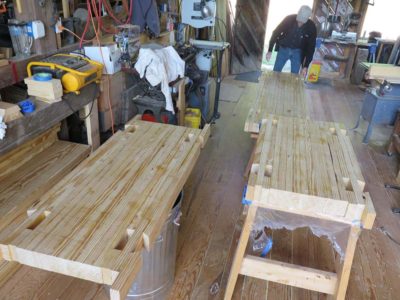
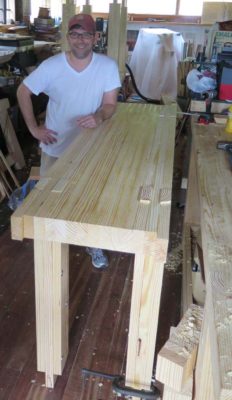
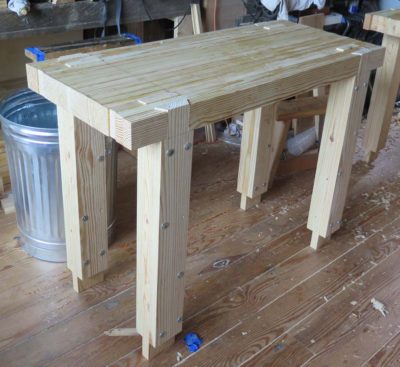
During our traditional Thursday night ribfest everyone confirmed that they were done with constructing their benches and wanted to pack up and head home the following morning. So we trudged up the hill for the glamour shot, then disassembled the benches and loaded them. Since the legs were a precise snug fit driving them out of the mortises was no trouble with a block of wood and the two-pound sledge.

And with that, the First Fellowship of the Workbench was disbanded and scattered to the winds.
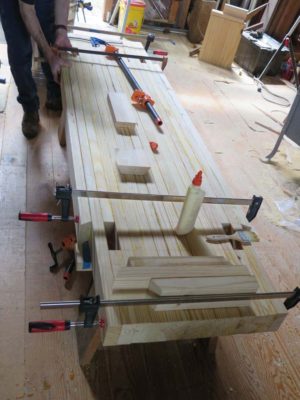
As the third day commenced we were greeted by the sight of all the bench top slabs ready to move forward. Removing all the clamps and seeing them we had to put the desire to move forward with them, and set them aside for a while.
Day 3 was all about the legs. Prepping the stock, gluing them up, and fitting them into the joinery already in the slabs.

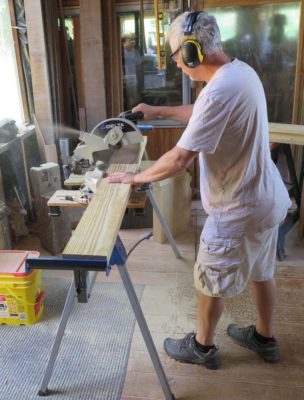
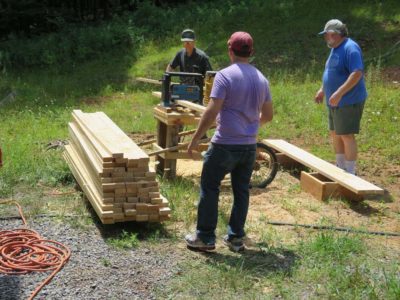
We began much as we did Monday morning, ripping the 8-foot 2x12s but into two pieces rather than three, followed by chopping them to 36″. They would be trimmed to each maker’s preferred length on Day 4.
Then out to the planer to get them all cleaned up. We checked the thickness periodically to get it a perfect match to the laminae of the slabs as the design of the joinery depended on the laminations of the leg tenons fitting the mortises perfectly.
With the cleaned laminae ready, the assembly began. The center lamina was off-set by 4″ inches given the configuration of the joinery and the thickness of the top slabs. Since the legs were being cut to length the following day it made no point to cut them twice, so we just left the center piece longer. Besides. if the fit was really tight we had a sacrificial surface to address with a sledge hammer.
The legs were assembled with deck screws and fender washers serving as the clamping system. It is a method I use increasingly for components that will not be finished furniture. This allowed us to get them all glued up without external clamps, and we set them aside until after lunch.
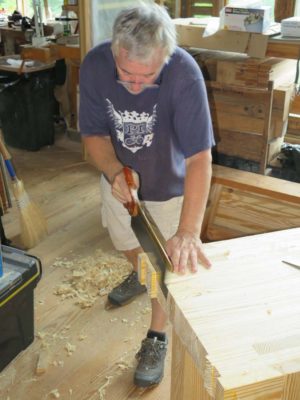
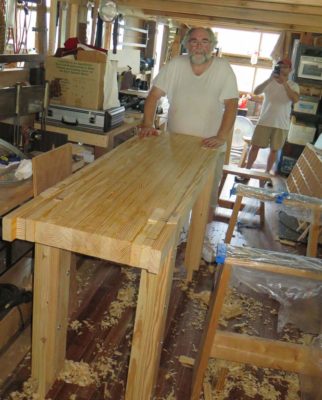
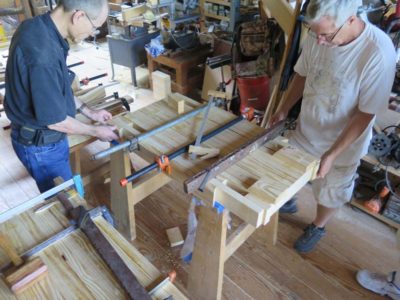
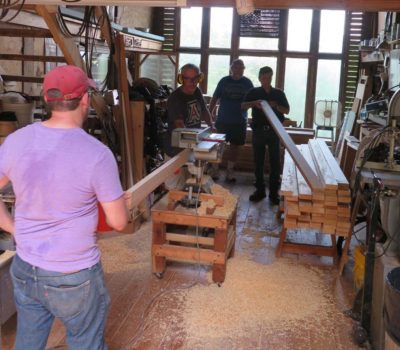
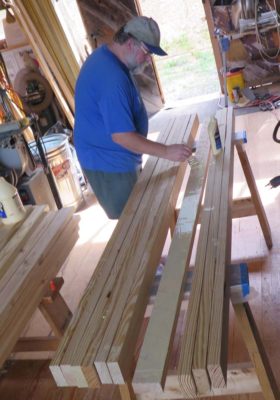
In the mean time we turned our attention to getting the slabs ready to receive the legs later in the day. That meant that the underside of the slabs needed to be flattened enough to provide a solid base against which the legs could be seated. A few minutes with a scrub plane and a few more with a fore plane was sufficient for our needs. Here is Bill flattening the larger of his two benches. This one would be fitted with an Emmert K2 after it was finished. I was green with jealousy about this as I don’t own a K2 and in fact had never seen one complete in the flesh.

After lunch we took the screwed-up laminated legs out to the planer and got them edge planed to a width of exactly 5 inches, which was the width of the mortises we had already built.

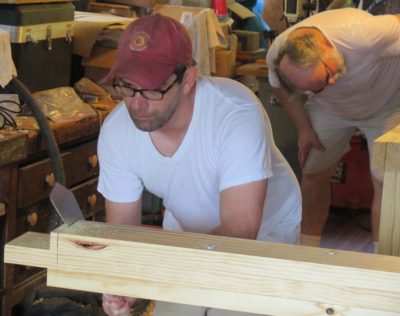
With the legs now prepared fully it was time to cut the dovetails. The only space in the barn outfitted for the task was my own workshop, so all five of us were packed into that place to do the deed. It was some pretty close fellowship and actually turned out to be a lot of fun to work so closely together in a small space doing very confined tasks.
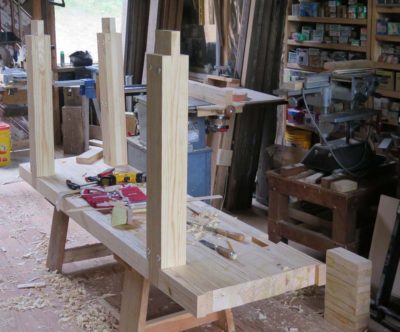
In a pleasant surprise(?) after sawing and a little but of tuning with a joiner’s rasp each of the twenty legs went into place with at most a gentle tap of the two pound sledge. No fierce beating was required whatsoever. Stewart, a comparative newcomer to furniture making (he had never before hand-planed a large surface and these were his first dovetails) was the first to get his bench up on its feet, followed in short order by the others.
Thus endeth Day 3, on schedule or even ahead of schedule.
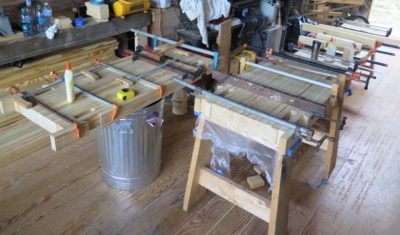
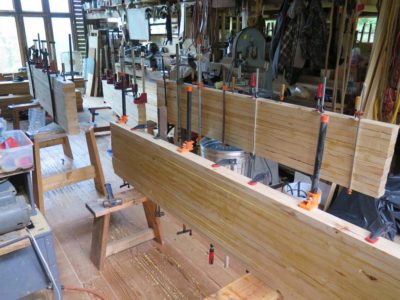
Day 2 was all about finishing up the laminated tops. On Day 1 we got the core laminae glued up, that is the portions in between the leg joints front-to-back, but now it was time to get the stack laminated joinery cut and glued up.
No matter how much I fussed with the chop saw it was not adequate for the job of cutting the mortises and dovetails so I did all that on the table saw crosscut sled.

We started out by cutting the glued-up core slabs to the preferred length. Since there were only four folks I decided to let everyone customize their benches however they wanted. John wanted a 7+-foot bench, Pete and Stewart wanted six-footers, and Bill wanted a 54-inch bench, which left him with 40-inch piece left over. So of course he decided to build two benches.
The joinery laminae were built up one side and one layer at a time, ending with them all being in place and clamped at the end of the day.
The day had finally arrived to begin transforming a stack of mostly #1 SYP into heritage workbenches at the Workbench Building Workshop at The Barn, in what I hope will become an annual event. Professional Refinishers Group members Pete, John, and Bill were joined by Stewart for what we hoped would be an excellent week of work. While I had originally envisioned up to ten participants, it turns out that four is the perfect number. If I reprise the event that will be the number of students.
Immediately on their arrival I showed them both the Roubo and Nicholson prototypes I built in preparation for the event. It turned out that each of the four decided to build the laminated Roubo bench I adapted from that of English woodworker and tool maker David Barron. Since one of the longstanding hurdles for many workbench workshops was that few if any participants actually get done with theirs, it was my ardent desire that everyone get out the door on Friday with a completed bench. To accomplish that I standardized the construction methods and simplified the benches so that they could be finished. Ex poste add-ons like leg vises or crochets could be incorporated later after the benches got home, but I really did want them ready to get to work the following Monday back at home.
With the choices the attendees made the plan for the week got even simpler.
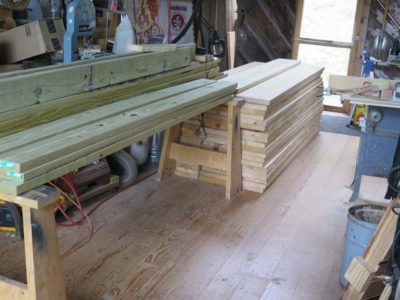
The first set of tasks was to rip the 8-foot 2x12s into the necessary pieces to build all the bench tops. With a good dose of teamwork we proceeded apace.
Once the pile of pieces being ripped to be laminated was complete, we moved out to the planer to clean them up. The weather was cooperating just fine.
We then edge joined the pieces and they were ready for the central core of the benches to be glued up.
I’d instructed all comers to bring as many clamps as they had, and we were just barely adequate in that department. But, by evening we were glued up and done for the day.
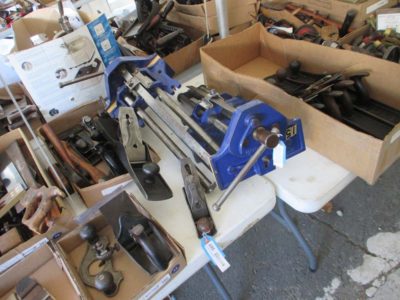
There are several benefits to sitting with Josh Clark at a tool auction. In addition to his good nature and cheer, he is there to buy lots of tools for his most excellent Hyperkitten Tools web site. So, we get to vicariously share the riches of his treasures and the thrill of getting good tools at a fair price. Adjunct to that is the reality that he buys quality mostly-vintage tools in order to sell them at a modest price to craftsmen who will use them at the bench, and our posse is more than willing to take inventory off of his hands even before he packs it up (which we usually help him with).
This year I had another banner auction buying from Santa Clark.
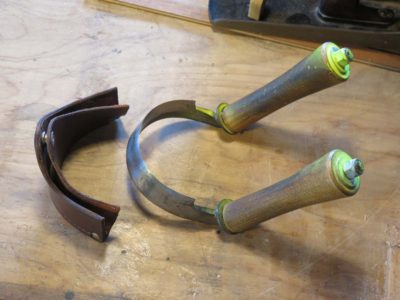
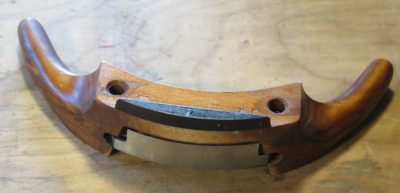
Since I have building some Gragg chairs on the schedule upcoming, I was delighted that Josh got some lots from the sale of tools and inventory of Mike Dunbar’s windsor chair making school following Mike’s retirement. I was able to get a travisher of unknown origin but in excellent condition, and a Barr inshave/scorp with a fitted sheath. These will definitely come in handy when swailing out the seat of the bentwood chairs.
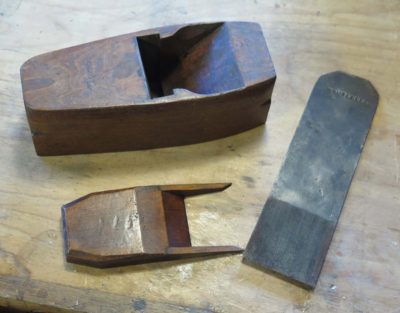
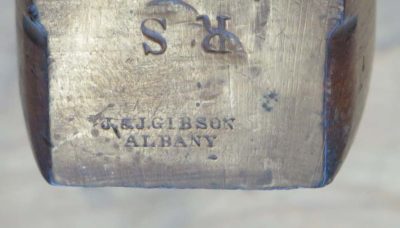
Then came a lovely toothing plane in nearly unused condition. The body was pristine and I am not sure the blade had ever been properly sharpened. My pal Mike is from the Albany area and was excited to see the name of an Albany maker stamped in the tool.
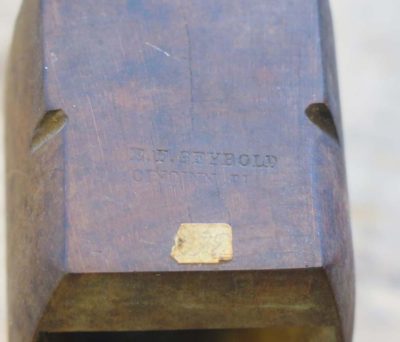
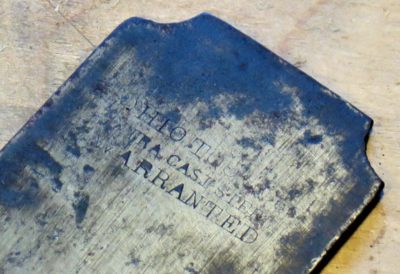

No sooner was the first toother stowed under my seat then along came another equally wonderful toothing plane, this one from a Cincinnati maker. Did I need it? Well, perhaps not technically, but “need” is such a vague word. Besides, since Freddy Roman is intent on buying all the toothing planes in the known universe I was compelled to purchase it too.
Some people might whisper that I have “a toothing plane problem.” They would be wrong. I have a good variety of toothing planes. There is a difference. I use them frequently, almost every day in fact.
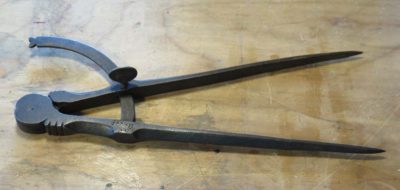
Next thing I know Josh is passing round this magnificent pair of dividers that were hiding in the bottom of a box of stuff he bought. I bought them from him. Just because.
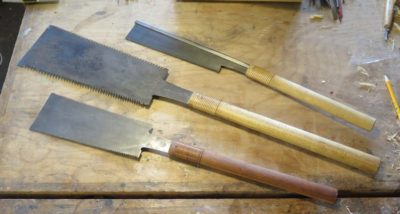
Finally he bought a lot that included some Japanese saws he did not have any use for, so I took those off his hands as well.
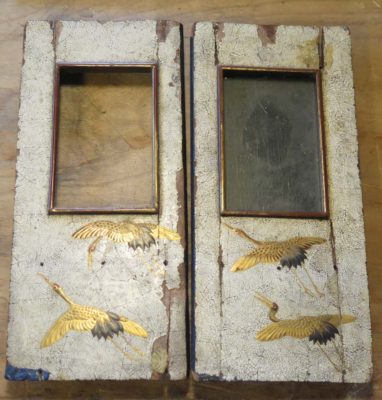
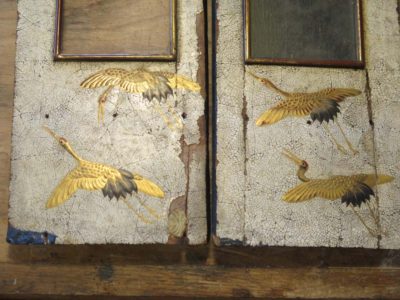
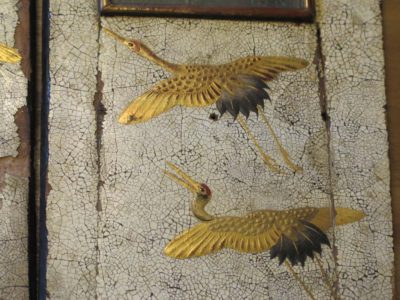
The circle of beneficence got larger as we were observing the bidding when a friend of Josh’s approached me and told me he followed this blog and was thinking of me when he got these two tiny doors (~4″ x 9″)at a flea market in New York City. He said I was supposed to have them and refused any payment at all. Thank you Sir! These are pretty spectacular objects in the style of fine Japanese eggshell craqueleur lacquerwork.
This haul has even inspired me to pull out previous years’ Toolapalooza treasures and get them ready for work.
More about that later.
This year I had my eye on three lots among the 3200 that were being auctioned between 2PM on Thursday and 5PM Saturday. At a pace of four or five lots per minute you have to pay attention.
At this point I am really only interested in tools that are specific to projects I have underway or scheduled to begin shortly. I am quite disciplined at auctions, establishing my top bid in my mind and sticking to it. With that strategy I got two of the three things I wanted, but that is not to say I did not bid on several lots that were interesting and vastly underpriced at the time of my bidding.
The first thing I wanted a got was this Lie Nielsen beader with all its cutters. I’ve been building an early-19th-century writing desk and it involves a lot of double and triple beading on curved edges. So far I have been using a home made scratch stock and an English carriage maker’s beader and neither was really satisfactory. Had I not been able to get this one I was going to order a new one and have it waiting for me back home, but this one was mine.

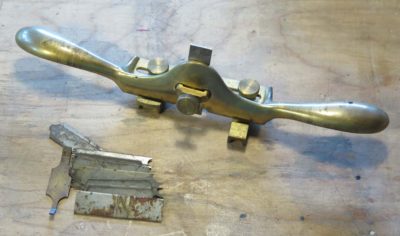
The next thing on the list was a peculiar and I am presuming craftsman-made shooting plane. Since I am doing more building now and in the future this will be an excellent addition to my workbench. I will build a shooting board soon.
The third item I did not get. It was an Emmert K1 missing one part that I could easily make, but the price went too high for my taste.

It did bid on this sweet little bench but but got passed like a go-kart on a NASCAR track. It was tight and in fine shape, and could have sufficed excellently for someone working in a confined space, and I happen to know someone for whom it would have been a perfect fit. I probably bid on another dozen or so lots when they were in the “steal” price range, but dropped once they got too high.
Thus endeth my successes and failures in the bidding wars. But it was not the end of my treasures from Avoca.
It’s always fun to see the effect of the mountains of tool treasures at the annual MJD Auctions “Three Days of Peace, Love and Tools” shindig in Avoca, central New York. This year it was our friend Craig’s turn to walk around with eyes bugging out and head shaking like leaf on a windy day. It’s almost like Robin Williams in the Moscow on the Hudson supermarket scene where he is so overcome with the largess on the shelves that he faints.
Every year at MJD it seems bigger with more and better tools. In chatting with Josh Clark, who obtains a huge portion of his Hyperkitten sales inventory at Avoca, he observed the same thing. There were more good quality tools, and in better condition, than ever before.

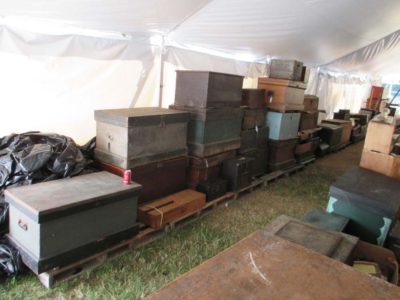
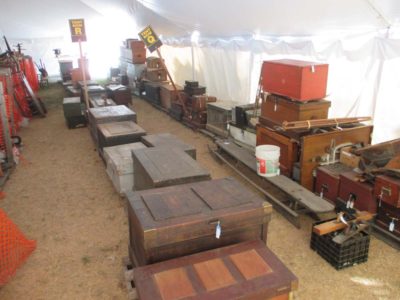
Here is a what awaits the auction attendees. This was just one of at least a half dozen tents! Each box shown is part of a single lot, although some lots include several boxes together.
Need a tool chest? They got dozens of ’em.
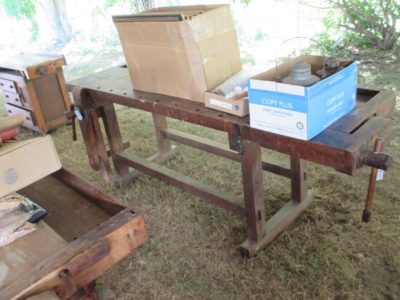
Workbenches.
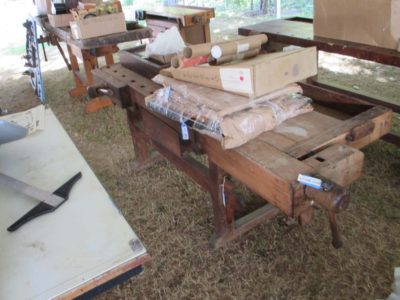
More workbenches.
And more workbenches. I think there were about two dozen this year. No, make that three dozen as I forgot all the benches from Mike Dunbar’s chairmaking school now that he has retired.
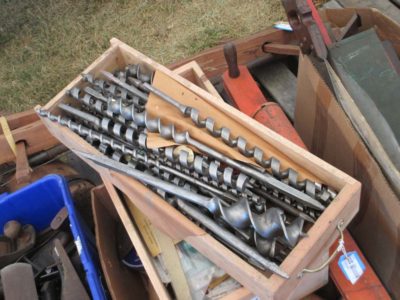
Need a lot of brand new auger bits?
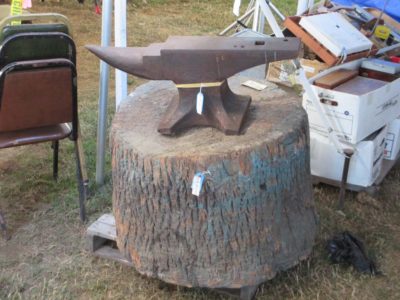
This anvil was only one of many there. This one was a 340 lb anvil sitting on several hundred pounds of stump.
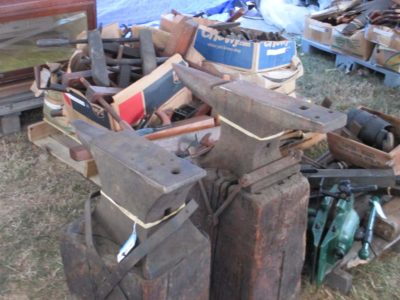
Unfortunately(?) the growing presence of old blacksmithing tools has brought in buyers who serve the Amish communities, and they snap up a big truck load of stuff.
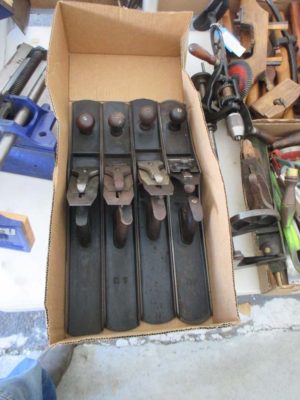
Many of the lots were pretty standard fare, such as this box of four jointer planes.
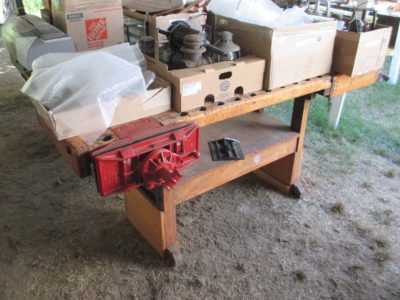
Lots of Record bench vises from Dunbar’s school.

Some (many?) tools had their prices established by rarity. Here the green turtle back Emmert patternmaker’s vise went for about $250 if I recall. They are somewhat common. The other patternmaker’s vise on top was an Oliver, their analog to the Emmert K1. It was around a thousand bucks out the door due primarily to its rarity, I believe. K1s go for about half that.
So that’s a tease of the taste upcoming. If you haven’t been to a great tool auction you should go for the cultural eperience if nothing else. I’m planning on going again next year, and you should too.
Just don’t bid on anything I want.
One of the frequently voiced concerns(?)/legends about hide glue is that it should or should not be used because it is so moisture sensitive and joints are prone to failure. From one perspective this feature makes it an unreliable adhesive, from the other it is a near-perfect glue for working on historic artifacts.
A couple weeks ago I used 192 gram strength hot hide glue to assemble a portion of a 7/8″ stock dovetailed box (I will be blogging about the project as a whole once I am done with it) and for some reason the joint dried with a bit of twist. Not a ton, but it was aggravating and probably the result of me inattentively setting the workpiece onto an unlevel surface. So I decided to undo the joint with some water and re-do it correctly (which I did ex poste) this past weekend.
I swabbed the joint inside and out with water and returned a couple hours later.
No effect.
I wrapped it with a wet rag and let that sit over night.
No effect.
Finally I immersed the entire joint in a pan of water and left it to sit and soak. And soak. And soak.
It took two days for the joint to come apart.
If that is “water sensitivity” I can only imagine how robust my joints are when I crosslink the hide glue in situ.
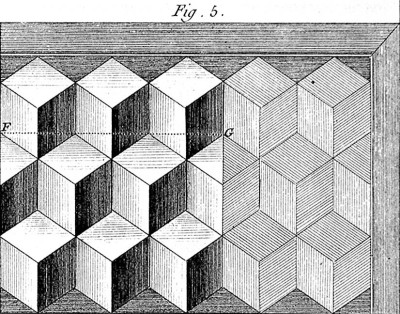
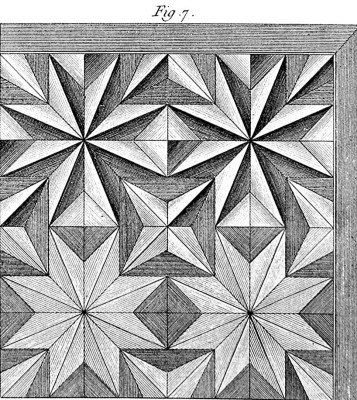
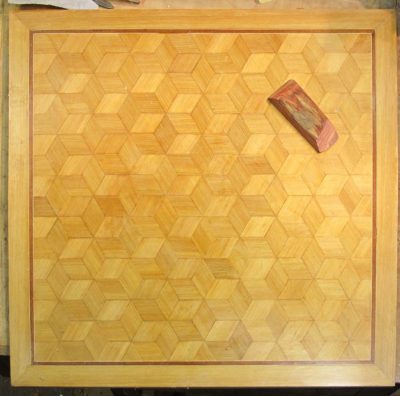
The final of the summer workshops at The Barn will be held August 19-21, 2016, and involve the replication of three principal patterns for parquetry as documented by Roubo’s L’Art du Menusier, from which we have created To Make As Perfectly As Possible: Roubo On Marquetry.

Unlike some of my earlier workshops in marquetry and parquetry, this weekend will focus entirely on the replication of the techniques (lots of precision saw and planing jigs involved) rather than making a completed project. From the review of the design, the sawing of the veneer stock and the individual elements, the participants will leave with completed jigs integral to the techniques and a solid foundation for incorporating these designs into their own work.
Drop me a line here if this interests you.

Recent Comments