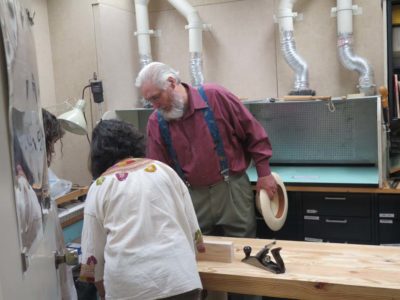
My recently scheduled barn workshop, “Make A Traditional Workbench,” was mercifully “cancelled” due to the fact that all four of the scheduled registrants notified me they were not coming. No students, no workshop. I say “mercifully” because it would have started the day after Barndaughter’s wedding weekend, and I was already worn to a nub. Nevertheless, my friend John, who participated in the workshop last year and was scheduled to be my teaching assistant for the week, decided to join me anyway for a grand week of man-time in the man cave, a/k/a The Barn.
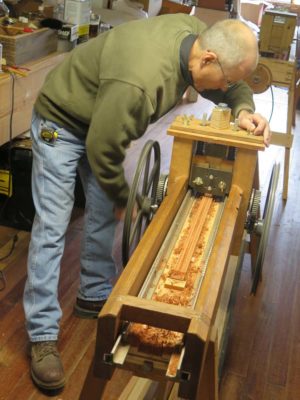
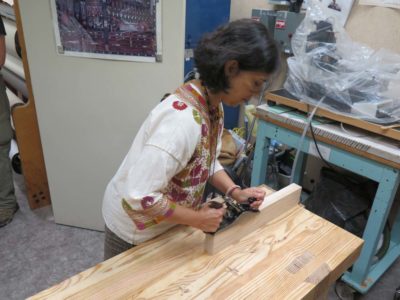
We had a delightful week of fellowship and working on projects; John concentrated on modifying and tuning up the Moxon-style ripple molding cutting machine while I emphasized bringing my FORP workbench from many years ago closer to completion. In addition, John being a trained theologian and well-engaged citizen of The Republic, our conversations were vibrant and varied, and by the end of the week we were almost sentimental about our shared experiences.
The success of the week can be summarized in the observation that by Friday afternoon it looked like a tool-and-shavings bomb had been detonated there. I’ll recount our adventures in greater detail in coming posts. Stay tuned.
Recently I was a presenter at the SAPFM Blue Ridge Chapter on the topic of saw sharpening. I would not call myself an accomplished saw sharpener mostly because my results are inconsistent, generally due to the lack of hours at the task. But there are times when the result is excellent, for example my favorite old back saw that I last sharpened sometime in the 1980s and has cut hundreds of joints since, and remains sharp and the cuts crisp and clean.
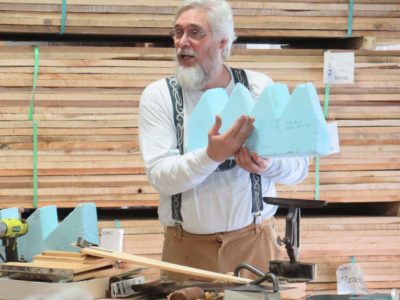
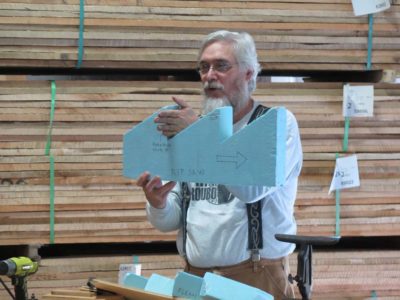
Using some oversized props I reviewed the notions of tooth spacing and shape (rake, and fleam), and how these come into play for crosscutting and ripping at varying degrees of scale, precision and effectiveness.
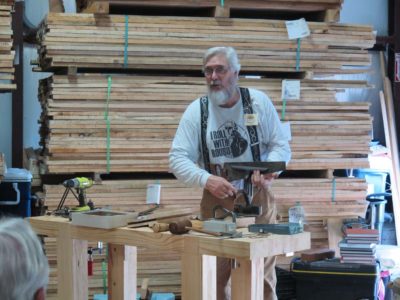
I the moved through the nearly unlimited options for holding the saw during sharpening, and finally set up to actually doing some sharpening under less-than-ideal conditions of a large lumber warehouse with diffuse illumination. I find that getting the lighting correct is perhaps the most important thing when sharpening a saw, and this setting wasn’t it.

My explanation of the process was certainly better than the actual sharpening during the demo, but I think the attendees got the idea.
As an aside, I was delighted I had my petite Roubo bench with me and realize that it has become a treasured part of my traveling side-show kit, as it fits neatly into the back of my S-10, is moved easily with a hand truck, and performs most excellently.
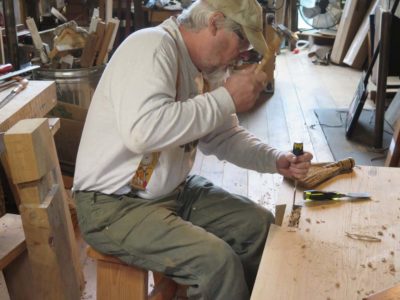
Recently when I was visiting plane maker extraordinaire Steve Voigt I had the chance to use his Sterling plane setting hammer, and I liked it and said to myself, “Self, you gotta have one of those. Right now.” Since even in the era of the interwebs, on-line purchasing does not provide instantaneous delivery so I got up the next morning and made a plane setting hammer for myself, using scrap from my inventory of stuff.
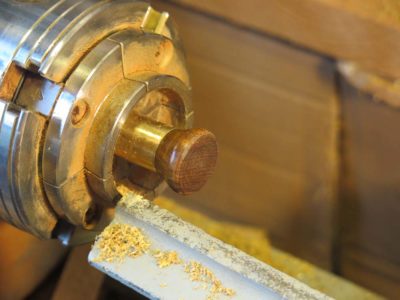
My first step was to take a piece of brass and turn one end of the head on my wood lathe, which is easy enough to do when using turning chisels set up as scrapers rather than turning gouges (virtually all of my turning is with beefy scrapers with very rare use of gouges; it’s an old habit from my early years in the pattern shop). I then turned a wooden end of the head from a scrap of lignum vitae, then drilled and tapped both sections and screwed and epoxied them together.
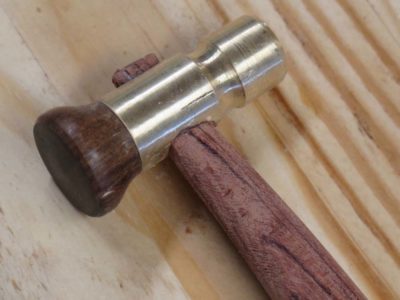
Then I grabbed a piece of exotic wood from the waste bin (probably bubinga) and made a handle in about ten minutes. I drilled the hole in the head through which the handle passed, then used material from an ivory piano key as the wedges for the handle in the head. All told I spend maybe 90 minutes on this hammer.

The result was immensely gratifying and its weight and proportions and performance have made it my “go to” tool for this purpose, and several folks I have shown it to have expressed interest in purchasing one. Who knew? I guess I will have to get set up to do it. I might have to actually order some supplies.
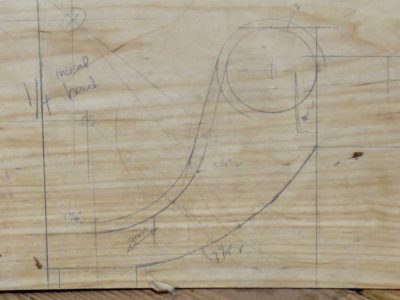
Many, many months ago I was commissioned by a client who asked me to create an interpretation of an early 19th Century desk. I approached the original artifact caretakers, requesting a set of the drawings I knew had been made for that artifact. My request was declined, so my first task was to derive a working set of designs based mostly on images from the web.
About the time I was set to begin work on this project I crossed paths with an angry wheelbarrow, and the resultant broken hip left me out of action for many months. One thing I could do was sit at my laptop and noodle up some templates. I started with the images from the web and the handful of measurements that were also on-line and got to work. My importing the pictures into Photoshop and distorting them I got something resembling “face on” images for the critical elevations. Still, some was spitballing at this point with details to be resolved at a later time.
By importing these manipulated Photoshop images into a vector drawing program, in my case CorelDraw, I was able to ascertain the various measurements and contours I needed for the construction templates. If I was either younger or more computerily cognizant I would have use SketchUp, which I believe can do most of this processing almost automatically, but at this point in my life I am trying to forget computer applications, not learn new ones.

Should you be in a place to need construction details, measurements and proportions based solely on photographs it is best to have images where the camera is square to the desired face of the furniture, at point zero on both X and Y axes, with the longest possible distance from the object . From there it is a piece of cake to get the details darned near perfect, provided you have at least one or two firm dimensions known. At some point upcoming I will write bout the best way to capture the images with an eye towards creating drawings, but I have not written that missive yet.

For this project I was able to derive all the dimensional and profile details I needed, so soon enough I was off to the bench. Working in the manner to which I was accustomed from my time in the pattern shop I drew out the detailed drawing at full scale on a sheet of clean plywood. Once I was satisfied with the results it was time to get started with the building.

But first I needed to gather the necessary lumber. Stay tuned.

One of my interests for some time has been “Every Day Carry” practices and even forums on-line discussing the stuff we have on us every day, with a special emphasis on emergency situations. I find the ingenious creativity in manifesting the ideas to be captivating sometimes, and over-the-top zombie apocalypse silly at other times. The current issue of Backwoods Home magazine, one of the two or three periodicals I take these days, had a feature article on the subject that prompted me to reflect on my E.D.C. in the shop. Since pretty much everything I need is within reach or a few steps at most, the inventory is much, much smaller than when I worked in Mordor and my tactical vest was packed to the gills.
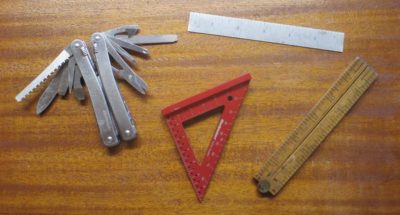
This is what I carry virtually every day, all day long when in the shop.
First off is my Victorinox Spirit multi-tool, which I carry any time I have pants on, whether in the shop or not. Over the years I have owned and used a couple dozen multi-tools and this one is the best I’ve owned, hands down. Certainly pricier than the $10 knock-offs at the Dollar General, but I use mine hard every day with nary a complaint from me or it.
Next is my DelVe square from Woodpeckers, invented by my friend Tom Delvechio. Simply the perfect layout tool for the hip pocket. I bought an extra one just in case this one gets lost or stolen.
An antique folding two-foot boxwood rule is my newest addition to the ensemble, and I just love its utility and compactness. I picked it up for not much money at a tailgating session at MJD Tools one summer and it has been part of the kit ever since.
A 6″ Starrett machinist’s rule has been in my carry tool kit for as long as I can remember. They never go bad nor out of fashion.
Finally, the only thing I did not have in the picture was an LED flashlight, probably because I just forgot to pull it out of my pocket. My favorite value in this tool category is the Ozark Trail pocket flashlight that I buy in the camping section of Wally World. I have several, and they perform admirably and seem almost indestructible. I make use of a small flashlight usually several times a day.
That’s it. Even in my own workshop, I have tools in my pockets all the time.

With the walnuts raining down and the their leaves yellowing, and the sound of chain saws off in the distance, we are definitely moving from the cusp of autumn to the reality of it. Last week my dear friend Bob came over to bring down several dozen tons of trees for me to prepare, mostly for next winter and perhaps the one after that. We already have more than half of what we need for this coming winter but I really want to get way ahead of future demands. The local tradition is to enter every winter with two years’ worth of firewood in hand, and that is my goal as well. Our objective for this cut was to select several trees that were either damaged or in the wrong place (I am trying to establish a cleared path to the southwest of the barn so I will no longer lose winter sun at 3PM), get them on the ground for me to work with, and emerged unscathed ourselves. In two hours we accomplished all of the above.

Working with Bob is a great learning experience as he has been felling large timbers ever since he was a boy. I am fine with cutting it up once it hits the ground, but I’ve heard there is unending paperwork if you drop a twenty ton tree on yourself so I defer to him in this enterprise. He stands at the base of the tree looking at its trunk and crown, judging both the direction it would like to fall and the degree to which that trajectory can be altered. Then he sets to work, back notching then felling the tree. In every instance of the two dozen trees we (and by “we” I mean “he”) dropped it came down exactly where he wanted it to come down.

Now it is up to me to cut them into short bolts, process them with the hydraulic splitter, and stack them to season. Starting next week I will begin filling the firewood crib and the front porch with a mountain of BTUs.
The most beautiful sound in the depths of winter is when Mrs. Barn remarks, “Hmm, kinda warm in here, isn’t it?”
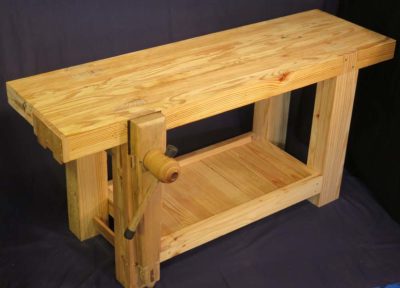
A couple weeks ago I ventured into the barbarous climes of Mordor to deliver the workbench to the Library of Congress Book Conservation group. If the traffic and multitude of high-dollar construction projects are any indication, the travails of the provinces are not being felt in the capital city. In fact it looks like a boom town that has four trillion of our dollars at its disposal every year. And since we apparently are not motivated enough to demand that they stop spending those four trillion dollars every year on us, that trend line will remain unchanged.
The logistics of getting into a secured facility (and in Mordor virtually every facility is secured) is a challenge. It turned out that the most efficient way to get the workbench into LC was for me to drop it off at the curb in front, with LC staff taking delivery of it there. Once I parked and rejoined them we were able to get through the security checkpoint and proceed to the conservation lab. Admittedly, I felt under dressed with my Victorinox Spirit muti-tool sitting in the van outside.


The path to the final home for the workbench was uneventful, and the crew there was delighted to get their new tool. Particularly pleased were the petite members of the staff, many of whom wrote me a “Thank You” note for taking their physiques into consideration when fabricating the variable height configuration of the bench.
The bench fit perfectly into the tiny Tool Room space they have, and after I spent a little time explaining its features it was given some tryouts almost immediately.
And then I escaped before the Dark Eye poisoned my heart any more.
The newest PopWood arrived int he mail recently and it contains my latest article for them. If the topic interests you, I hope you will join me at the Marc Adams School of Woodworking where my workshop on parquetry will revolve around making and using these jigs.

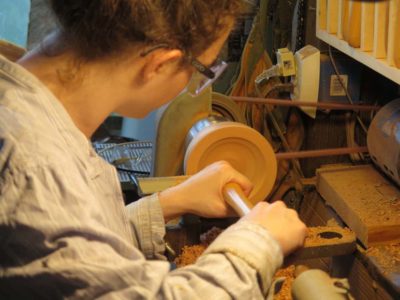
As we run-up this week to nuptials for Younger Daughter we were blessed with a visit from her last weekend. Much of the time she spent with Mrs. Barn doing wedding-y stuff, but she spent a few hours in the shop with me turning a bowl. The wood for this bowl came from a plum tree in the Maryland house yard that died of natural causes some years ago (she remembers climbing the tree as a tyke), and I harvested the wood and set it aside for something special. This definitely fits the description.
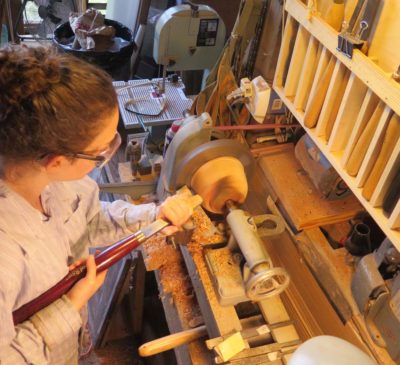
I had in recent months found the faceplate for the lathe and ordered a threaded insert from Woodcraft so it could be put to work. Before she arrived I mounted the piece on the faceplate and roughed it round (she is not yet experienced enough to bring a really rough piece to round comfortably). The lathe is a bit high for her, so in the early stages she was most comfortable with the scraper tucked in the armpit. I will be building a lower base in the coming weeks.
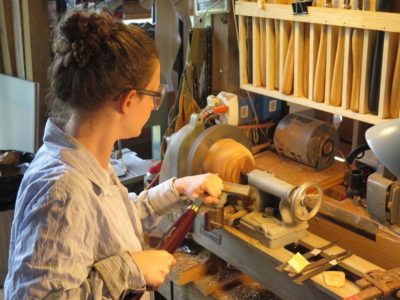
I gave her only a few pointers as she developed the outer shape she wanted.
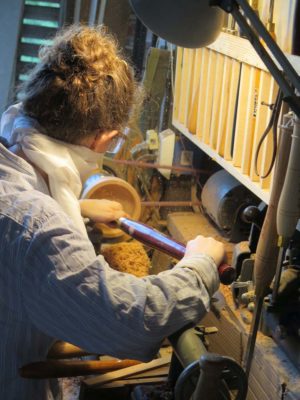
Before long she had the outer surface defined and embarked on an initial sanding and polishing.
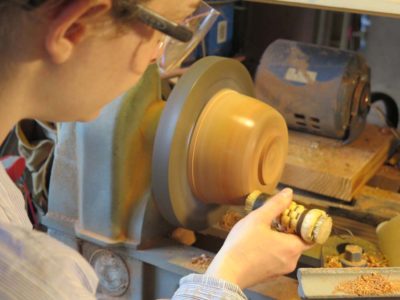
With the base established and the shape determined it was time to remove the faceplate in favor of the small bowl chuck and get started excavating the interior.
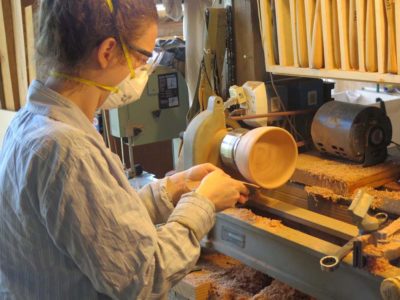
Soon she was in pretty deep.

We stopped for the night, but on returning the next day she refined the shape and surface.

To be sure the watchful papa bear was never far from the action. The working height was just plain awkward for her but she hung in there without complaint.
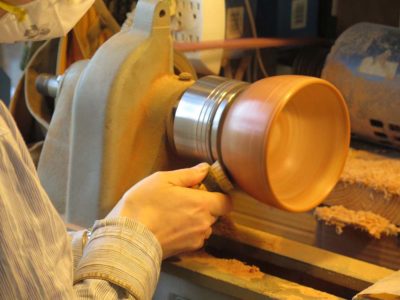
After the final shaping she moved to sanding and then polishing with beeswax melted into the surface, buffed with a linen rag while turning. She particularly liked my method of placing a dry sponge between the hand and the sandpaper, it allows greater vigor with less heat.
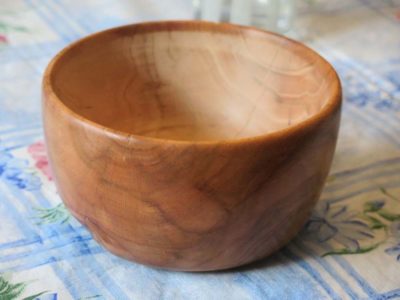
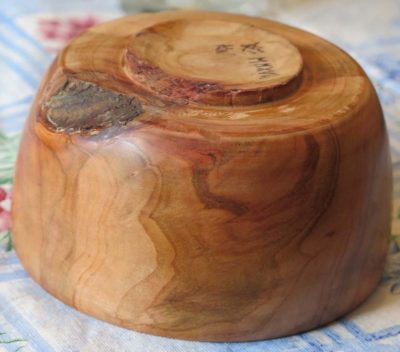
And here it is, an heirloom with a priceless memory attached. In all likelihood it was our final private time together with her as Miss Barndaughter until those moments just before I walk her down the aisle, and it was a precious treasure.
Doggone, something must’ve flown into my eye…

Recent Comments