
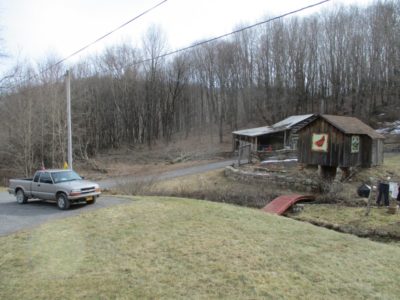
The view from a couple years ago.
With the first hints that Winter may be drawing to a close and Spring will soon be upon us a young girl’s fancy turns to… gardening! With that in mind last week I hired my pal Bob to come and fell a bunch of trees surrounding the old log barn. The barn did not care, but the trees had become so dense and tall that they were shading a small garden plot Mrs. Barn has been cultivating for a few years, including some small pear trees, right next to the garden shed behind the stone wall. The trees have not flourished as she had hoped primarily because the the limited direct sunlight in that spot.
So, the trees had to suffer mortal wounds. Only three or four of the trees were very large as these things go, perhaps a foot or so at the base, but even that tree weighs a couple tons and could really ruin a day. Plus a number of the smaller trees, 6-8 inches at the base, were sorta leaning the wrong way for me to drop them easily and in the right direction. that’s where Bob comes in, having been a woodsman much of his life he really knows how to “read’ a tree and get it to go where he wants it to go. even then we had to “push over” several of the trees once he could to a critical point in the cutting. On tree immediately behind the barn was too large and leaning too much for us to get this time, I’ll have to hook up a winch to pull it in the right direction when we cut it in the future.
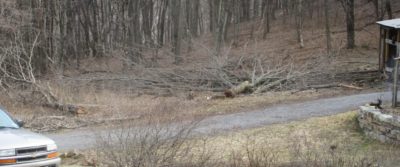
But for now we have a whole lot of new sunshine coming through, and nearly a full winter of firewood on the ground.
It is fascinating how the metrics of life change over time, and in relation to the context of the moment.

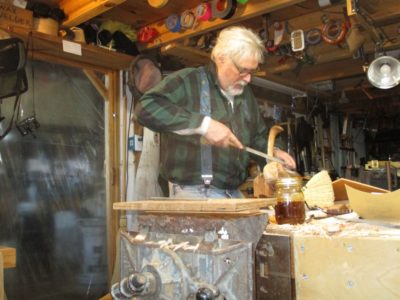
Evidence of another good and productive day at the workbench. Who knew that some day I would smile at assessing a day based on how much I needed to sweep the floor in the morning?
On top of that we are in the midst of several days of warming temps and brilliant sunshine.

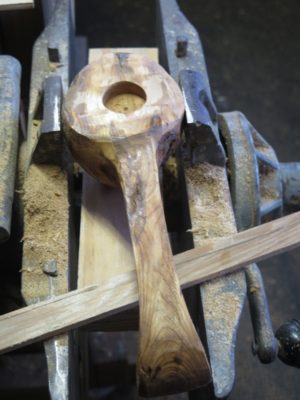
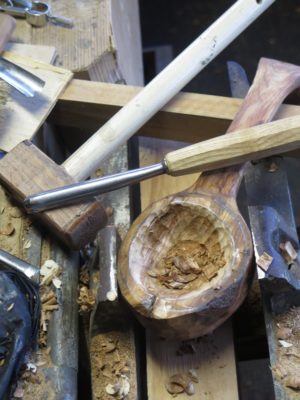
The process for excavating the inside of the ladle continued as previously described — saturated with dilute epoxy followed by hollowing with curved gouges until soft wood is hit, followed by more epoxy impregnation followed by more sculpting… — until I arrived at the shape I wanted. Unfortunately I failed to take any photos of these subsequent dozen or more sessions.

Interspersed with those sessions were exercises in refining the outer shape of both the handle and the bowl, mostly using rasps since the wood was so squirrelly. Once the shapes were close to finished I needed to thin the bowl so that it would be a somewhat elegant piece.


To protect the inner bowl and support the bowl wall while working towards the wall thinness I wanted I needed to devise some way for an almost form fitting support. To accomplish this I looked throughout the barn for things that were the right size and shape, and the closest thing I found was this doming hardie from my collection of metalworking tools. By draping the dome with several layers of drawer liner I got the fit pretty near perfect, the finished bowl shape slipped right into place and stayed put while I was working it with fine rasps and floats.

As with shaping the inside of the bowl, the protocol for working outside the bowl was epoxy >>>toolwork>>>epoxy>>>toolwork, etc. With a gentle touch I slowly worked towards the final wall thickness of about a shy 1/8″.
If I did not already own one I would be interested in bidding on this 4-foot (!) veneer saw at the upcoming May tool auction at Live Free or Die Tools. If you have case of the Roubos coming on, this might be the medication.

Live Free or Die Auction Preview (mjdtools.com)
Lot SC21-411
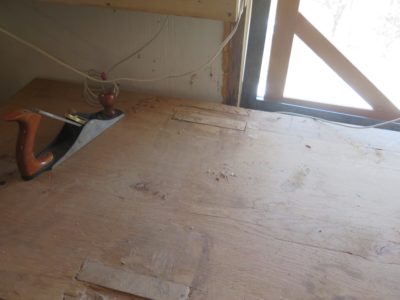
One of my quirks is that I usually like to lay a piece of sacrificial sheeting on top of my workbench most of the time, and today was my day to swap out the old one for a new one on the FORP Roubo bench. As I was making the swap I noted that it was also time to address one of the two main manifestations of Seasonal Affected Disorder that afflicts (?) wood in the natural course of events, sometimes called hysteresis, sometimes called rheological cycling, but generally known to us folks at the workbench as “wood expands, wood contracts.” One of the consequences is that when there are pieces of wood assembled with different grain orientations eventually they get out of sync dimensionally. In a Roubo workbench this become manifest as the tops of the leg tenons eventually protruding past the top of the slab.

As I was fitting new pieces of luan plywood to lay on the bench top I noticed that the tenons were quite proud of the slab, perhaps 1/16″. I only assembled the bench a couple years go and did not notice the issue when I laid the initial sacrificial covering at the time, but it was there now.
You might have thought that since the bench was initially fabricated eight years ago it should be fully settled into its new environment. Maybe, maybe not. If the old adage that wood seasons at the rate of “one year for every inch of thickness” is true then the answer would be “yes.” Since I moved to the hinterlands and talked to some of the local wood guys I have come to appreciate their view of seasoning woods, especially dense hardwoods. To them “one year per inch” does not hold true; instead they use a formula of “one year for the first inch, two additional years for the second inch, three additional years for the third inch,” and so on. By that metric my five-inch-thick bench top will pretty active for 1 year + 2 years + 3 years +4 years + 5 years, for a total of 15 years.
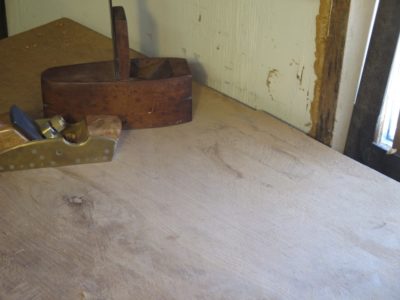
I dealt with the tenon ends directly in about an hour this morning, and will address the slight crown of the overall bench perhaps at the end of summer.

It might be worth reiterating that once I get a slab bench top flat I prefer to hit it with a toothing plane to give it a little texture. I lose none of the planarity but gain a lot of grip on the workpiece.
My original strategy for sculpting a lovely kitchen accessory for Mrs. Barn’s Christmas was to gently work both the inside and outside of the workpiece until something beautiful and functional could be obtained.
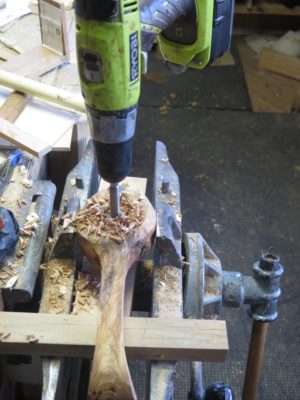
As I mentioned earlier I knew right away that cheating via drilled excavation was the way to proceed with the inside of the bowl. The nature of the piece’s morphology would constrain me to slow and gentle work, no wailing away on this one. Still my plan was to carve and excavate, drill a little, then carve and excavate some more until it was finished. 3-4 mornings max, no problem.
Sure.

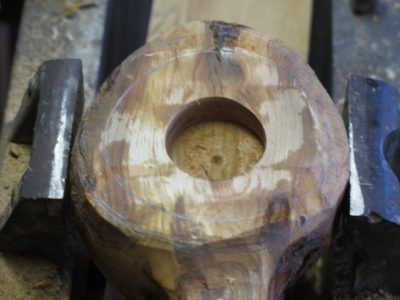
As I got deeper into the bowl of the spoon/ladle I encountered my worst “working burl” nightmare. The cherry burl was crumbly, as burls sometimes are, and caution and a turtle-like pace was called for. But even caution and a slow pace was not adequate for this piece of wood. It needed enhancement.
So, my routine for the next several dozen hours of working on the carving, spread over a dozen weeks, was to soak the entire bowl end of the workpiece with epoxy, allowing it three days to set fully, then carving until I hit crumbles again.
I did not use straight, full strength epoxy — that would have been a catastrophic failure on so many fronts — but rather my old faithful West System, diluted roughly by 1/3 with acetone to allow for greatest penetration when I slathered it on until the surface was fully wet. Even so the effective saturation was only so deep.
With this protocol, slowly but surely the piece began to take shape. My dream of getting this done by Halloween and moving on to other things was not dead but it did require some creative scheduling. I did this for little time, then I did that, then the other thing. Actually if fit rather nicely into my ADHD.

Recent Comments