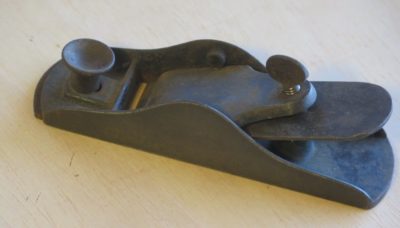
During a recent dive into my inventory of block planes needing restoration the lines of this one caught my eye. It was comely, with a very low angle so I immediately thought it would be a good candidate for me to restore for my son-in-law. Sure it was void of any adjusting controls but he knows how to adjust a plane manually with an iron-setting hammer.
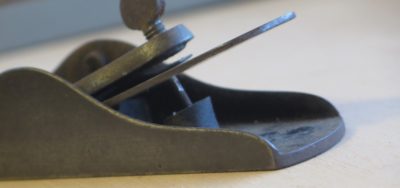
At second glance there was something hinky going on with the plane. Was the iron sitting in the pin?
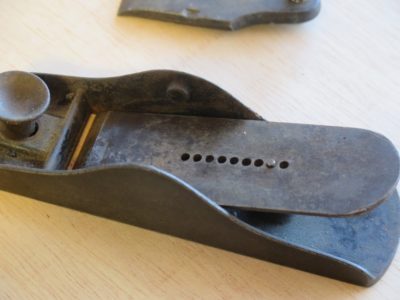
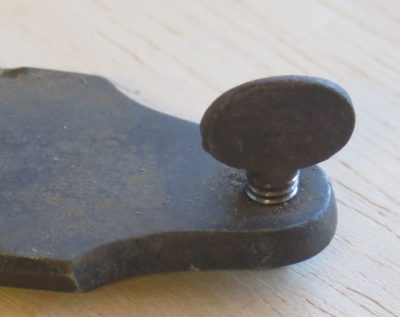
Once I took it apart the confusion set in. What the heck? The way I read this tool, with the iron not resting over the pin but impaled on the pin, the iron is utterly and completely un-adjustable! In one sense the tool is on the “primitive side” given the ostensible lack of mechanized adjustments. Bur completely un-adjustable? Given the general quality of the plane design and quality execution, I’m just left scratching my head.
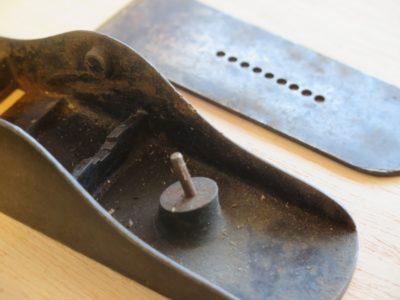
At this point I’m noodling soldering on a block over the pin and using the tool as I first figured it was designed. Or is the pin malleable and designed to be whacked back and forth with the iron?
Any thoughts?
Yes, I know it is Friday. Travel disruptions… So sue me.
With the end point approaching on the design and construction of my Romastonian Low Bench (Roman low bench of two millennia ago + Estonian benches still in use) there are a last few elements to integrate and affix to the bench. This week it’s the crochet to engage a workpiece for edge planing.

Since I wanted to make sure I did not crack my kneecap on the crochet more than necessary, it being at precisely that height and also immediately adjacent to the door of the shop, I used a piece of 2-inch chestnut from the scrap pile, aligned to be parallel to the bench slab rather than projecting at an angle that would make it even more weapon-ish. I cut the inside taper to allow for workpieces up to 1-1/2″ thickness (it is highly unlikely that I would ever work thicker stock on this bench).
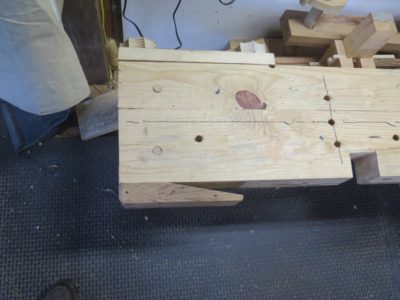
Using four of the 12×3″ old-style flathead wood screws from Blacksmith Bolt I put it in place and stood back to admire my handiwork. As you can see the crochet is on the same end as the twin-screw vise (at the moment; I have the twin screw threaded sockets running the length of the slab edge so the vise can be laced anywhere along that side) and fits neatly behind my knee crook when I am seated.
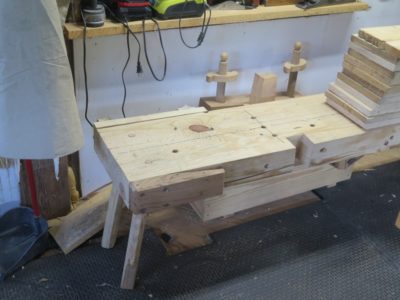
I would say “I can’t wait to us this bench” but as is evident at the edge of this image, I am already piling it up with the stock for my big project for this coming winter.
Two more features and it will be done.
As a general rule I think of “cut lists” as further indication of the inexorable decline of Western Civilization. Still, one of the participants for next August’s “Making A Gragg Chair” workshop at the barn has asked me for a list of parts for the chair. Since he is not likely to be the only one with interest, here goes (these are all nominal sizes, the finished elements are somewhat smaller):
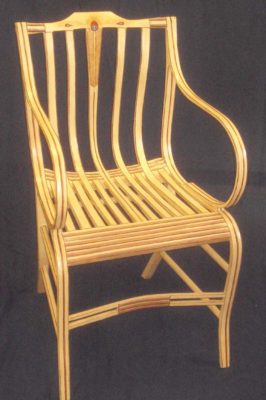
long serpentine (2 pcs) – 1-1/8″ wide x 1/2″ thick x 50″ long
arm (2 pcs)- 1-1/4″ wide x 1/2″ thick x 36″ long
rear leg (2 pcs)- 1-1/8″ wide x 1″ thick x 23″ long
curved seat/back splat (5 pcs) – 1″ wide x 3/4″ thick x 32″ long *
short seat slats (6 pcs) – 3/4″ wide x 1″ thick x 14″ long
Crest rail (1 pc) – 2-1/4″ wide x 2-1/4″ thick x 19″ long **
Rear seat rail (1 pc) – 3-1/2″ wide x 3-1/2″ thick x 19″ long **
Front seat rail (1 pc) – 4″ wide x 1-3/4″ thick x 22″ long **
front stretcher (1 pc) – 1-1/2″ wide x 1/2″ thick x 21″ long
side and rear rungs (6 pcs) – 3/4″ oak dowel x 19″ long
*the center curved splat is widened by tapered glued elements at the top
** these are sculpted elements, not steam bent
Another thing I am working on is a set of full scale construction drawings for the students of the workshop. If there is interest I could see about having them for sale in the Barn Store. Stay tuned on that one.
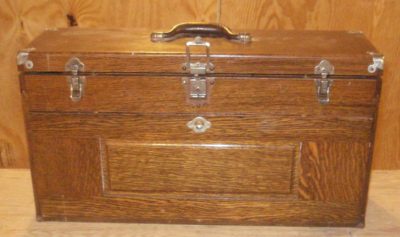
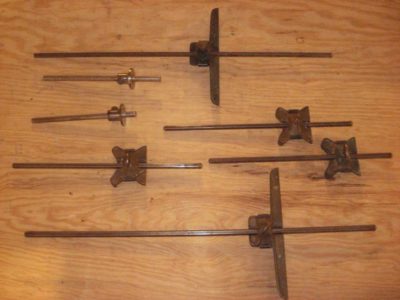
At first glance the patternmaker’s tool kit might seem nearly identical to that of the furniture maker. Scribes, squares, dog-leg paring chisels, marking gauges (of which this kit had more than a half-dozen) etc., are identical even though their uses may be a bit different. But the tools are the same.
Even their differences might be chalked up to meaningless peculiarities, but they are not. Here is a brief review of some if those items unique to patternmaking, or uses of typical tools for particular applications.
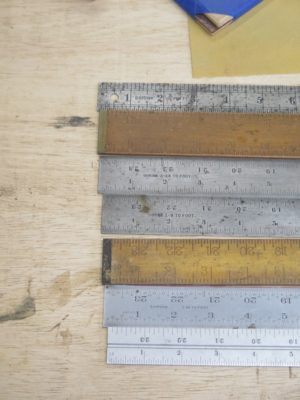
Shrink Rules/Scales
Especially at the industrial scale resides the inescapable fact that molten metals shrink when they cool and solidify, and the degree of shrinkage depends on the metal alloy in question. For this reason the patternmaker’s kit includes a variety of precision rules that take shrinkage into consideration, and when a new pattern is commissioned the drawings are transferred to a full-scale master made on a new piece of hardwood plywood with the dimensions established by the shrink scale. In other words if the item being designed is to be 12″ long, in true measurement it would be 12 inches plus some fraction, but all of the scale delineations are created proportionally. Thus when we were making pump shell patterns for dredging operations, our main business, sometimes those patterns would measure 6, 8, or 10-feet in diameter (or even bigger). When cast in grey iron the patterns for a 10-foot shell diameter were actually 10′ + 10/8ths inches in diameter (10′- 1-1/4″) since the shrink rate for iron is 1/8″ per foot of dimension. This issue is rarely a fundamental consideration for the scale at which I cast these days. For example when calculating the shrinkage on the Studley mallet bronze shell, with an overall dimension in the neighborhood of two inches given the shrink rate of bronze as 3/16″ per foot, the mallet shell casting would shrink 1/6th of 3/16″ or about 1/32″. Even though I will use a shrink rule to lay out the pattern, I could probably get by without it. Once I get done casting the mallet heads I will be moving on to patterns for the Studley piano maker’s vise, and that will be large enough to use the shrink rule for sure.

Dividers and Trammel Points
Dividers are critical for transferring the shrink-layout dimensions to the pattern itself. This speaks to the importance of the master layout, usually executed on a pristine piece of hardwood plywood, as patternmakers realize and generally live by the ethos that “measuring is the enemy.” If you get the master layout correct it is a regular routine to use dividers and trammel points to transfer and establish all dimensions for constructing the pattern from the layout. In fact once the master layout is completed the only thing I can recall using the shrink rule for was when planing the laminar sections for stack laminated construction that was the norm when I worked in the trade. I think it is pretty much a dead trade, nowadays everything is done with compewders and CNC/3D printing fabrication.

Beveling Gauges
Tapered angles are a huge part of a pattern, particularly in the tapers of edges that are more-or-less perpendicular to the parting line, This bevel is known and “the draft” and to my knowledge always resided around the neighborhood of 2-degrees. Thus a machinist’s combination square set with a protractor head was used almost every day, augmented with a bevel gauge for transferring the draft angle to the table saw and sanding machines (see below). I probably used my protractor head with a 24″ rule more in one week at the pattern shop than in the 40 years since.
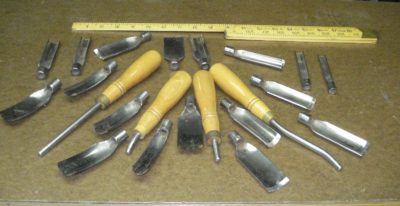
Sculpting Tools – Inside (Gouges and Draw Spoons)
Whenever a pattern shape has to be derived by handwork rather than lathe work, the two tool types employed for working the inside curves were gouges, of which there were a dozen or more in the full kit, and draw spoons, usually numbering a half dozen in graduate sizes. The gouges are peculiar in that they have interchangeable handles, shanks, and heads, and usually made from high-chromium steel with very thin walls, and several are in-camber. These are pushing tools, not striking tools.
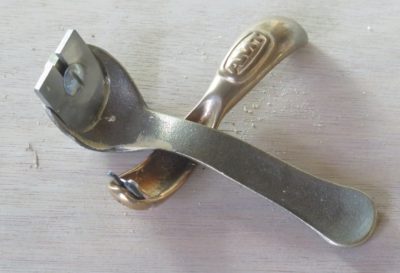
If you have followed my work on Gragg chairs you have seen frequent use of draw spoons for working the swale of the seat deck. They were used in a similar manner for working for the pattern shop as large, sweeping interior hollows were shaped delicately with the draw spoon.
Sculpting Tools – Outside (Spokeshaves)
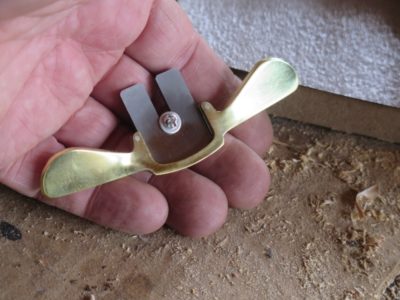
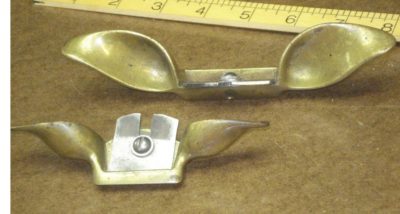
Virtually all of the outside sculpting was accomplished with spokeshaves, seemingly undersized by furniture makers but capable of really hogging off material when necessary, or feathering a finished surface. Patternmakers usually owned and used at least a half dozen brass spokeshaves.
Fillet Irons
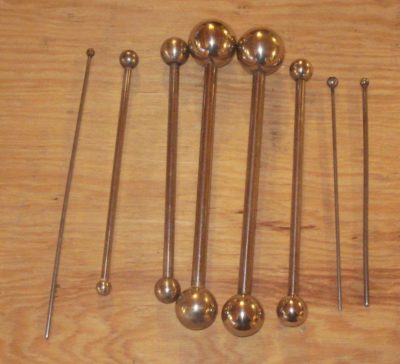
Another truth about metal casting and shrinkage is that whenever two surfaces meet at a right angle or anything near, the crisp inside corner needs to be filled with a cove molding to soften the transition from one plane to the other, otherwise the casting will crack at that line. In my experience this cove was established by shaped wax sticks, called fillets, which were purchased in bulk as literal cove moldings in wax. I recall many, many hours carefully heating both the polished steel ball serving as the anvil, and the long wax sticks, then pressing the warmed wax molding into the inside corner using the fillet iron of the correct size.

This set of fillet irons even came with a scribed pattern block for making scrapers for each iron.
If it went well there was very little scraping afterwards to achieve a perfect inside corner, other times required some shaping with home made scrapers, one for each size of fillet.

Fillet Cutters
In the days before my time in the foundry fillets were cut from the edges of very thick pieces of leather using fillet cutters to create the roughly triangular fillet. These tools would be pulled across the edge of the leather sheet, usually along a straightedge, resulting in a cove-ish strip of leather to use as the fillet. These leather fillets were applied using glue and brads, and the whole assembly was finished by heavy burnishing with the fillet iron. I never had to use this method but since I have a set of the cutters and live in cattle country, come the zombie apocalypse I will be ready.
Core Box Planes
In the Golden Age of Foundries there was probably no bigger component of the industry than that of making pipes. Think about the civic infrastructure whether on a single building scale or a national scale. It was all made from or connected with pipes or pipe-like elements. Making an outside sand mold to cast pipe-ish shapes is no big deal, all the expertise was applied to the problem of making a sand mold “core” to establish the cylindrical hollow insides. For that process a special “core box” had to be made for each unique casting. Often the shape of the box was achieved with core box planes, of which there were many varieties.

Some looked more akin to a set of hollows-and-rounds,
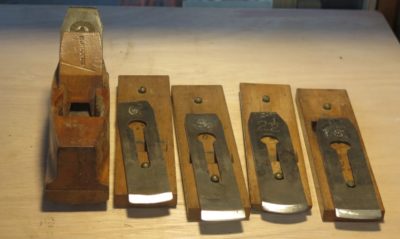

others were similar to the H&R set but instead of full body planes they had a single body with interchangeable soles and irons,
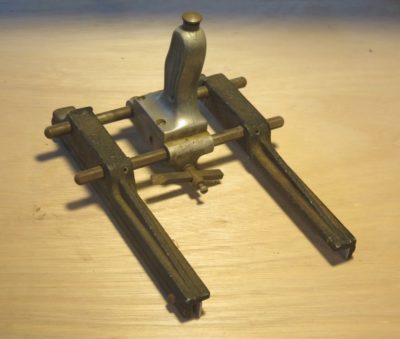
and undoubtedly the weirdest ones were metal frames with notched outriggers to ride on the outside of the core box and were equipped with ratcheting rotating cutting arms that advanced a few degrees around the compass to complete the half-core. Oh, and these mechanical core box planes looked suspiciously like a Klingon warship. There is yet a fourth version that is essentially a right-angle sole bisected by the iron, but I do not own one of those. NB – metal casting of almost any kind involves core box work regardless of the shape so long as the casting has a hollow configuration.


Power Tools and Accessories
Patternmaking since the mid-1800s has employed a variety of machines for fundamental work. Included were power planers (I just use my lunchbox planer but if I did lots of patterns I would get my Mini-Max 14″ combination machine up and running) that could quickly and precisely dimension stock to the peculiar measurements required especially for stack laminated patterns, tables saws, disc sanders and oscillating spindle sanders to allow working to the middle of a cut-scribed layout line at a precise bevel angle usually 2-degrees.
If you follow my trek down the metalcasting road you will see all of these tools demonstrated over time. Well, maybe not the core box planes as I have little intention of casting large pieces of iron pipe.
Stay tuned.
PS I was wondering if I should make a start-to-finish video on metal casting, but I gotta get the Gragg video done first.

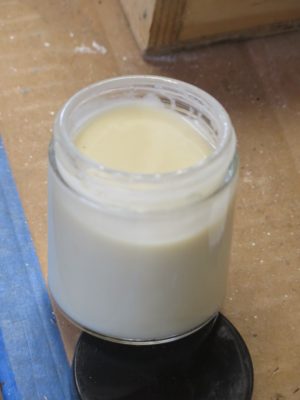
Normally at this point of the formulation the molten polish is an almost transparent amber liquid. It usually does not obtain this white-ish opacity until after it has been transferred into the jars and cooled for an hour or so, a little longer on a warm summer day.

With a recent batch of Mel’s Wax behaving oddly, becoming white-ish much earlier in the process than I have come to expect but nevertheless attaining the expected appearance when fully cooled. This batch remained almost fully liquid when it should have congealed into a soft lotion, and I set it aside for several days to cogitate over the cause(s).
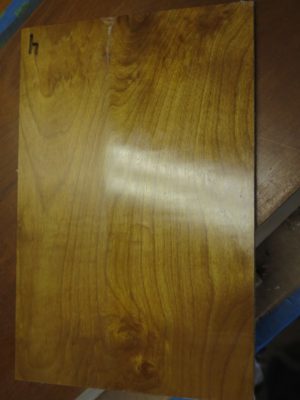
Just to make sure I was not completely misguided I tested a bit of this liquid polish to judge its performance, and it did just just fine. So I did a contemplation deep dive to consider what might have “gone wrong.” In retrospect “gone wrong” was not the correct perspective, it had just developed differently than previous batches. But still, the question was “Why?” (A second question was, “Is this a new product?”)

When I returned to the jars after letting them sit undisturbed for a week I noticed an even more distinct stratification of the contents than had been suggested immediately after the making. In fact the top quarter inch of every jar was a near-pure fraction of solvent.

Using a disposable pipette I decanted the free solvent from the top of every jar, depositing the excess into a single large paper cup. According to my digital scale the contents in each jar included 20% excess solvent. Hmm.
Once the excess was removed the emulsion polish fraction underneath the solvent fraction was much more like the polish should be, and again performed precisely as it was supposed to. This observation made me reflect not only the original formulation from 15 years ago but also my materials used the previous week. It was a noumenological exercise, a/k/a “thought experiment,” that in the end bore great fruit.
Next time – The Cause.

After air abrading the two block planes in preparation for their becoming Christmas gifts for my son-in-law, I re-flattened the soles and sides with a finer grit abrasive draped over my granite block, I think it was 120. I taped off these new surfaces and sprayed the planes with gloss black enamel then set them in the window sill to dry really hard, rotating them daily for a couple weeks to make sure the sunlight got everything as cooked evenly as possible.
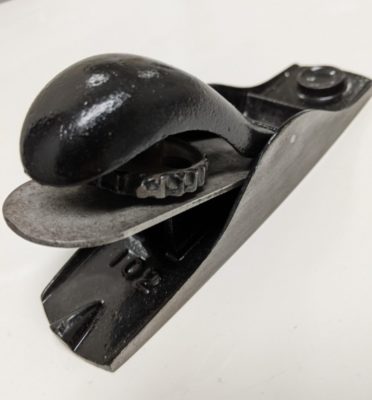
Removing the tape and sharpening the irons to a mirrored edge that could remove gossamer wisps of wood, oiled every place that might need lubricating, they were ready to wrap as stocking stuffers.

Rehabilitating then gifting block planes is a great way to introduce someone to the experience of a high performance tool.
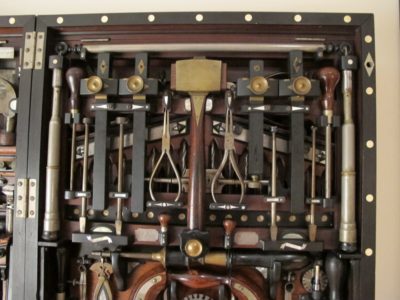
With the decks finally cleared, well mostly cleared at least enough for me to get going down a path whose map has been known for several years, I gathered all the reference materials needed to make the casting patterns for the bronze heads of the HO Studley infill mallet. In addition to the detailed measurements I made when examining the original while assembling the book and the exhibit of the tool cabinet and workbench I had some additional resources. First, as I have mentioned previously, are the hundreds of photographs. Second are the set of silicon rubber molds I was allowed to take from the original. Third, I move forward with the encouragement of the owner of the tool collection itself; I contacted him when the idea for making replicas was first coming into focus. He was enthusiastic about the idea and I believe very appreciative of my consideration in asking his permission. He is indeed a very conscientious historical steward and as I have stated explicitly, he is exactly the right owner and caretaker for this treasure.
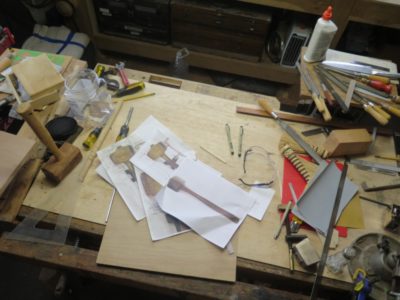
In many respects the first two items are combined as I have noted the detailed measurements on the detailed photographs.
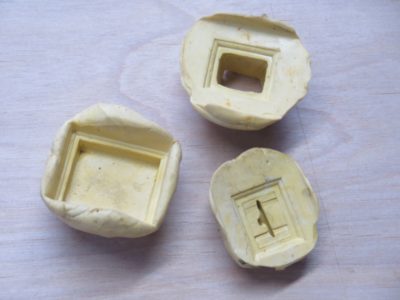
But even detailed images and numbers are not the same thing as three-dimensional representations of the real thing. Taking the silicon molds I made several study castings in wax so that I could more faithfully represent the original in my own pattern modeling. Given the dimensional inertness of the molds and the wax castings made from them I can get truly precise measurements and relationships from exact representations of the mallet head itself.
Time to set up a dedicated space, get my tools and go to work.

I’ve got one opening for a student in the six-day “Make A Gragg Chair” workshop, the last week of August, and two openings for “Historic Woodfinishing” over Columbus Day weekend. If you are interested drop me a line at the “Contact” page.
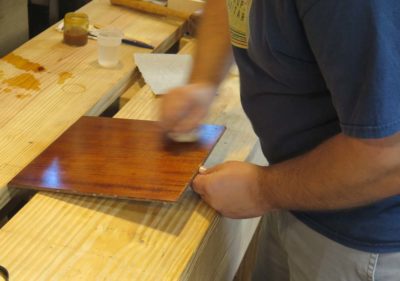
I have not made any more progress on the Romastonian Low Bench since the last posting on the subject, so I thought I would give you a sneak peek on the next workbench project. This bench will be the most excellent nearly full-sized portable workbench 2.0, a newer and much improved version of workbench #2 from 1990.

The beauty of this new version is that it remains fully portable, roughly 50 pounds and fully collapsible, yet has an astonishingly high degree of functionality.
***************************************************************************
I am hoping that the pace of activities slows down here in Shangri-la, but lately we have had a lot of travel across the mountains for medical appointments in the Valley. Nothing particularly earth shattering, but every trip to the doctor is an all-day affair.
I am now in the second week of physical therapy on my knee, the joint remaining pain-free and according to the PTs, “Way ahead of schedule.” I would gladly take the credit but I had nothing to do with it. One morning I went to sleep with a hurting knee joint, and two hours later I woke up pain free. At this point the agenda for my sessions and ongoing daily exercises is to 1) strengthen the much weakened musculature throughout my left leg, and 2) get that hamstring stretched and supple. Due to my limping over the past couple of years that muscle has weakened and shrunk, and lengthening it is an unpleasant undertaking. The only pain I have now is from that process. Interestingly I can now sense the gentle ache from arthritis in the knee; before the surgical housekeeping that sensation was being masked by the sharper pain from the torn cartilage.
NB — I cannot recall if I ever wrote about this on the blog. If not, fine. If yes, you get to read it again.

As I am in the midst of pattern work and prototyping for producing replicas of the HO Studley infill mallet I have been using my retinue of patternaking tools, which naturally draws my memory back to the day 15 years ago when I responded to an ad in Craigslist; I used to scour the Tools section regularly.
The ad was, to say the least, terse and enticing.
Fine woodworking tools. call 703 *** ****
That’s all. Fine woodworking tools. I called, and the fellow’s location was just off I-66 and since I was heading out from Mordor for a weekend in Shangri-la the following day, we arranged for me to come to his home to check it out. I arrived with all the cash in my Tool Acquisition Fund ($400) and he ushered me into the basement room where the tools were.
As we went down the stairs he said “I’m not even sure what all of these tools are, but my Dad was a patternmaker in the Houston shipyards and I am moving into a smaller townhouse on Capitol Hill and just need to get rid of stuff.” Even before we reached the bottom landing my heart was racing.
You see, ever since Mrs. Barn and I got married (40 years next month) and I left the pattern shop for us to go back to college, she was getting an MS in Plant Pathology and I was giving undergraduate coursework a third and final try, I had been looking for tools from the patternmaker’s kit to add to my own. My time in the pattern shop as extraordinarily formative, it was where I learned the definition of “precision woodworking” and practiced it probably more than at any point in my life.


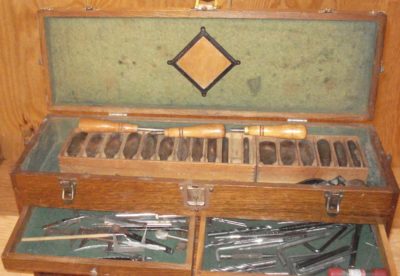
And there it was, a more complete patternmaker’s tool set than I even used in the foundry pattern shop, residing in a pristine but vintage Gerstner patternmaker’s tool chest.
As he opened the drawers the seller said, “I don’t even know what this stuff is, can you tell me what it is?”
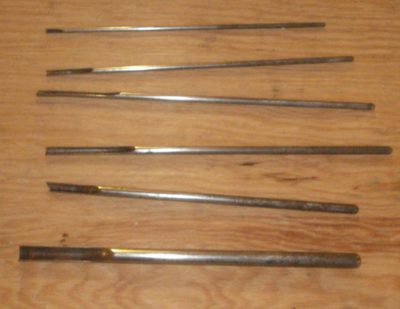


For over an hour I walked him through the case’s contents, describing what each tool was. Admittedly the set of orthopedist’s chisels made me scratch my head a bit.
Then came the moment when I asked him what he wanted for the collection. Remember, I had $400 available for the transaction.
“I don’t know,” he said. “What is it worth?”
I replied, “Well, here’s the good news and the bad news. The good news is tool set is incredibly complete and probably worth something like $2000-3000 at least. The bad news is $400 is all I’ve got.”
I was not going to cheat him out of a family heirloom.
I thanked him for the opportunity to browse through his father’s tool chest, which included even his union card and dues account book.
“Someone else will come along who can give you a fair price for this, so just wait for them to call you,” I said.
I left and drove to Shangri-la with mixed emotions. On one hand it was a terrific opportunity to re-live a foundational period of my life, but on the other I really did have a fixed budget of $400. I would never draw money out of the family budget to buy this so I knew that the opportunity was gone.
Two weeks later, much to my surprise he gave me a call. “You were right,” he said, “I got a lot of interest in the tool set. But everybody is trying to chisel me on the price, and that really p!$$e$ me off. So if you can pay $400 and promise to keep the set together and use it for patternmaking, come and get it.”
I picked it up the next evening and he held back only two tools which were too valuable to include in the bargain; a 36″ Starrett Vernier gauge, and a 36″ Starrett bevel-gauge rule, the kind with the 2″ wide scale.
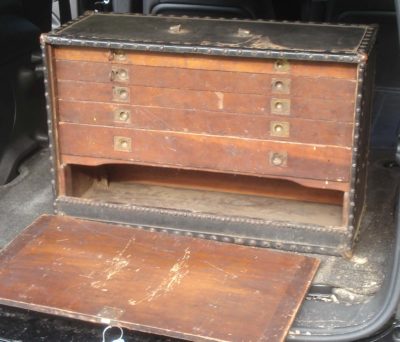
Over these years I have fulfilled my promise and kept the tool set intact and used it for patternmaking work, including the ongoing Studley mallet head project. The only thing I have done is to disperse some of the tool collection into a companion Gerstner patternmaker’s tool chest, a fairly unusual form acquired at one of the MJD auctions.
I did not conduct a detailed inventory and valuation for the set, it is worth whatever it is worth and my heirs can deal with that in thirty or forty years. The only exception was that I must admit to checking on the tool cabinet itself. At that time a vintage Gerstner Patternmaker’s Tool Chest in excellent condition, which this was and is, was around $800.
Don’t you just love a story with a happy ending?


Recent Comments