Now that I’ve got the space envelope dealt with via isolation and insulation — i.e. keeping the outside out and the inside in, a concept I invented — let me turn to how I deal with the third point of the triangle, namely generating heat. As a facilities designer once told me, “If your envelope is tight enough you can heat the space with a light bulb.” Well, mine isn’t, and besides, in the Age of the Nanny State incandescent bulbs are apparently part of some crazy scam having to do with Gaia Apocalypse. You just can’t make this stuff up sometimes.
Anyhow, I had long been skeptical, at best, about kerosene heaters in a tightly enclosed space. After talking to my friend Dennis, whose hardware store I have patronized since the days when his dad was in charge, I decided to take a chance and give it a try. They do have the distinct advantage of being relatively inexpensive to purchase, especially if you buy them in late March like I did, and before the current anti-energy regime in Mordor on the Potomac they were cheap to run (this witless cabal promised to raise fuel prices to the moon, and they did their best to keep that promise!). But I was concerned about the stench of them in a closed shop, and their ultimate safety from fire and toxic fumes.
As I have learned in the past months these concerns, while not irrelevant, are not of the level I had thought.
Regarding the odor of the kerosene heaters, I learned that all kerosenes are not alike. Some are stinkier than others, and even if they are K-1, I can tell the difference between local kerosenes. I naturally purchase mine from the better supplier. Second, it is really important to keep a clean wick in the burner. If you notice the smell of burning kerosene when you first come into a heated space, you need to think seriously about swapping the old wick for a new one. I plan to make it a routine to swap out mine at the end of the winter every year. And third, I make sure not to hit the “Off” lever on my heater until after I take it out into the unheated (and better ventilated) part of the barn. This is because the wick is on a spring loaded rack, and it snaps off in an instant when you hit “Off.” This means that the hot wick frame will volatilize some of the kerosene on the wick and introduce a tiny bit of the kerosene vapor into the air. It’s not a hazard, but it does stink.
As for fire risks, they seem to be pretty small as almost all modern kerosene heaters have automatic cut-offs when the units are jostled hard or even if they were knocked over.

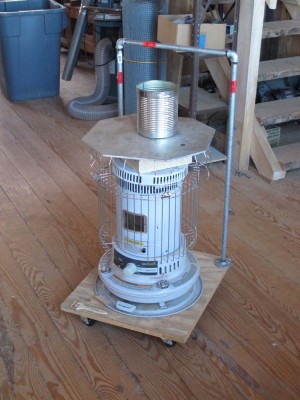
In use I employ a few enhancements for my heater which in my observation increases dramatically it utility and efficiency. These allow a single 18,000 BTU heater to keep a 3000 cubic foot space comfortably usable, but not quite to the level of cozy.
First, I removed the carrying handle from the unit and placed it instead on its own rolling cart, complete with a handle made from hardware store pipe. This allows me to move the heater without having to pick it up or handle it directly. Second, and perhaps the most important thing, I placed a couple of fire bricks directly on top of the combustion chamber. The bricks heat up and then radiate the heat into the space rather than working solely by convection. I feel that this increases dramatically the efficiency of the heater. Yes I know it does not “create” more BTUs, it just captures them and distributes them differently, and in my experience, better.
I add even more thermal mass with an octagonal shelf of 1/4″ aluminum diamond plate resting on the top grill. This not only increases the heated mass and thus the radiant heat distribution, but it beneficially disrupts the convection coming up through the combustion chamber and distributes it more widely by diverting the hot air around the shelf, pushing it out into the room. Besides, it’s nice to have a warm shelf for the glue pot to sit on, and sometimes my tea kettle for tea (or hot chocolate if Mrs. Barn isn’t watching).
So, how well does it work? I think pretty darned well. There are times when I am only in the shop for a while, or first thing in the day before the cast iron stove gets cranking, and the kerosene heater raises the temperature in the shop 15, 20, or even 25 degrees. That is not bad. I find that in the dead of winter I use about 1/10 of a gallon of fuel per hour with the kerosene heater, which for me works out to about $20/week. From where I sit, making a cold shop usable space for $20/week is a great deal.
My final concern was health, but once I thought about it I realized that the primary byproducts of kerosene combustion are soot and water vapor. I don’t mind the water vapor at all, and as long as I use premium kerosene and have a clean wick, it’s not a problem. Still, I keep a carbon monoxide monitor hanging on the wall a few feet away, generally a good idea whenever you are using open-combustion heat source in an interior space.
In short, I am exceedingly pleased with how my kerosene heaters perform (I actually have two, but only use one in the studio with the other out in the main barn space for whenever I need localized heat for something). I’m even thinking of getting a much smaller one to keep in the bathroom which isn’t heated, the use of the unheated bathroom bringing back memories of using the open air privy in the dead of winter when my dad was pastoring a tiny country church in Minnesota. Now THAT was cold!
Up next, supercharging my cast iron stove.
PS As I head up the hill to the barn, it is snowing sideways. Literally sideways. We are expecting several inches of snow and 50 mph winds today. It is good to have heat!
For the past couple of years as I have been struggling to move into and assemble the new workshop in the barn, I have been plagued by one corner, right inside the entrance to my studio. I am not by nature a neatnik, and the corner wound up being the repository for odds and ends that I didn’t know what to do with. It wasn’t situated well, nor was it large enough for a “real” workbench as the total space was about five feet square. About the only good feature of the corner is that it was a natural home for a large trash can.
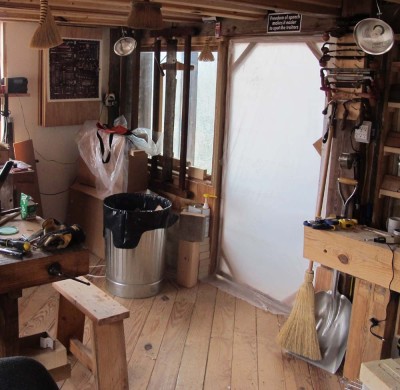
Thanks in part to the inspiration of Jonas Jensen, whose blog is one of my favorites and often features immensely ingenious and impressive projects he makes from scrap materials in his spare time in the mechanical workroom of the ships on which he works in the North Sea, I realized there was no excuse for this state of affairs. Combining Jonas’ creativity with both a very limited improvised space and salvaged materials, along the impetus resulting from a recent visit to my friend Bob’s cozy gunsmithing shop, I was spurred on to action so that this very valuable real estate was reclaimed from being consigned to be nothing more than a junk-catching corner.
This new initiative, combined with a little salvaged Sjobergs workbench, resulted in a work space that is destined to become a favorite. I had originally deposited the tiny workbench in the barn’s classroom because even though it was wholly inadequate for full-scale furniture making, I had worked it over enough that it was now a pretty good little bench (after my rescuing it from the trash many years ago). Guess what? I measured it and it fit into the corner as if it had been made for it.
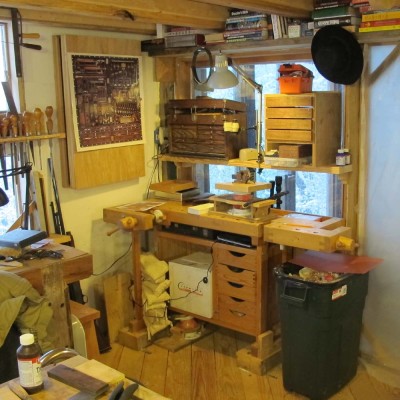
After finding new homes for the stuff in the corner, and acquiring a new rectangular trash can to fit in with the newly positioned workbench, I now have a delightful work station for doing my “fussy” work that is so frequently part of my projects, including carving, jewelry-type fabrication, filing, sawing and the like. My two bowling-ball-and-toilet-flange vises used for carving, engraving, and checkering are now there, along with my stereomicroscope, myriad dental tools, die maker’s files and rifflers, checkering tools and carving chisels. There was even space for a few books overhead, and a permanent (read: rememberable) location for the First Aid kit.
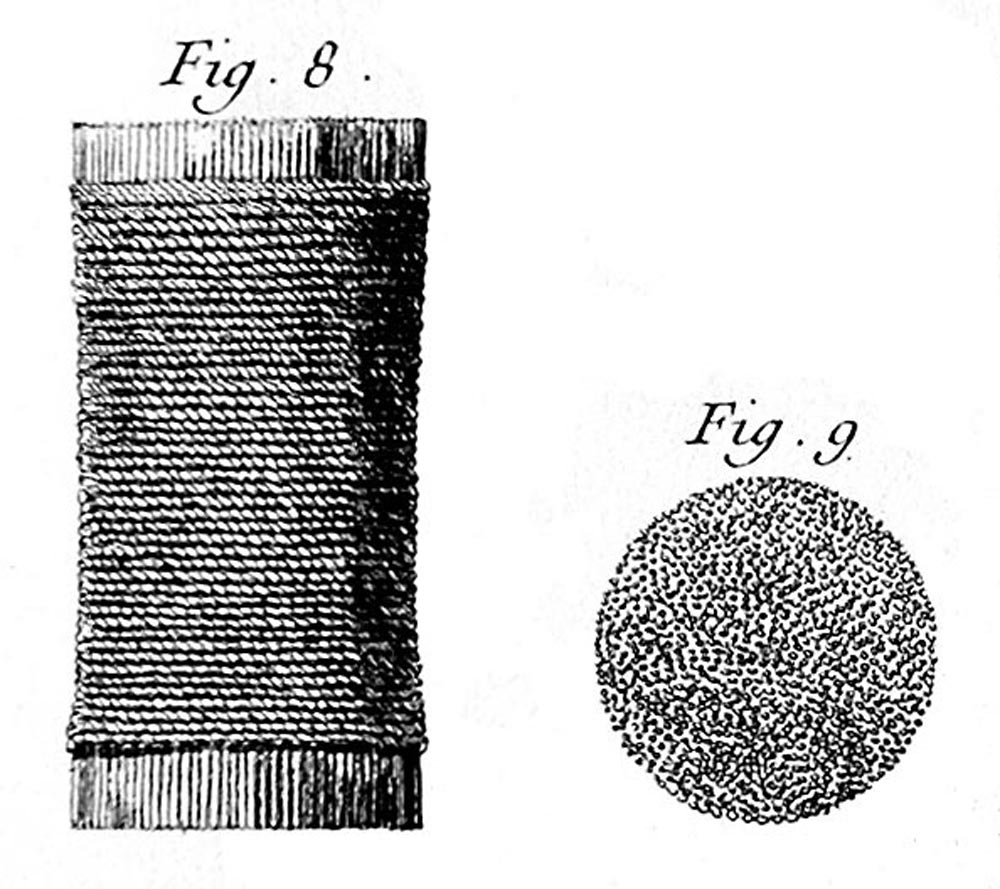
We’ve recently debuted a new style of polissoir, based on the one depicted in and described by the accompanying text for Roubo’s Plate 296. Not too surprising, I have dubbed this the Model 296 polissoir. The Lie-Nielsen website featured it in their “Tom’s Toolbox” page of episodically available specialty tools.

This polissoir as close the original as we can make it, using full length broom straw bristles and ultra-heavyweight waxed linen cord wrapping to accomplish the overall diameter of somewhere between 1-3/4 and 2 inches. It is somewhat looser than the woven 2-inch polissoir, but not really enough so that you can sense any difference in how it works.

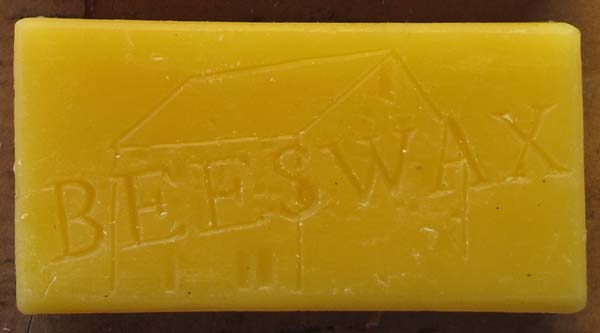
This polissoir is available from both The Barn On White Run and Lie-Nielsen Tools for a retail price of $36. They are also carrying our 1/4-pound hand processed beeswax for $10.

I am delighted to take note of the recent Gift Catalog from Lee Valley Tools, which I believe offered the Original 1-inch Polissoir from The Barn On White Run, and the accompanying 1/4-pound block of hand processed beeswax. Yes indeed, our interpretation of Roubo’s finishing magic has gone international, and I am truly appreciative of the vote of confidence from Rob Lee! I don’t know if it will remain a specialty item for them or migrate into their standard catalog, so check it out.

Their retail prices are the same as mine, $24 for the polissoir and $10 for the block of wax. So, you now have two sources for the same wonderful products.
Go forth and polish.
With the Virtuoso manuscript out of my hands until the page proofs sometime in the coming weeks, and Roubo on Furniture not requiring my all-day-every-day reviewing just yet, I have begun to spend more time outside and in the shop. Since I haven’t even unpacked all my tools yet, much less arranged them in an orderly fashion, it feels good to be up the hill puttering and actually doing productive work on projects.

It has been a fairly mild December thus far, which is a nice break after the brutal November. One of the primary issues for the barn workshop is, of course, heating my work space in a locale with bitter winters. Last winter my pal Tony installed a cast iron stove he’d found for me on one of his remodeling jobs. It was a Coalbrookdale Severn stove, a bi-fuel Brit import no longer being made as far as I know. Despite its compact footprint it weighs in at just under 500 pounds.
Since I was pretty busy with a lot of other things last winter I did not spend much time in the barn shop, so I only used the stove a few times because it takes so long to build up enough heat to be useful to me, while the kerosene heater gets the space warm in just a few minutes.

Now that I will be working out there more, and for longer stretches at a time, I have been playing with the Severn stove. Yep, once it gets going, it is a terrific heat source. But, its firebox is fairly small and I found myself going down about every hour to stoke it (it is in the basement underneath my shop, and the heat radiates nicely up to my space above). I was talking to some of my wood harvesting pals about the use of coal as a fuel in this stove, and Bob said he had a pile of hard anthracite coal for me to try with. I fired it up with coal yesterday and love it! It takes a long time to get up to temperature, but once it does it burns long and hot, usually 8-12 hours per charge. Even though I have not yet mastered the nuances of the stove — starting a coal fire is more complex than simply starting a wood fire, in fact the latter must precede the former — its performance is pretty impressive. Yesterday it had the shop in the high 60s, which is a good 15 degrees more than I need.

I’ve seen the future, and it is black. At least the “heating the barn” part. I’ll burn my way through Bob’s coal pile then for next winter order a couple pallets of bagged anthracite to heat all winter long. Soon I will add an in-stovepipe heat exchanger to extract even more heat from the pipe running up through the shop. With January soon upon us, and the locals talk about January with a mixture of warning and respect, I hope to be ready.

We had a heavy overcast with more than a foot of snow today. No solar, but hydropower is working fine. Actually it was nice having the power house under a foot of fluffy snow as it made the soft turbine whine evaporate altogether.

The view out the dining room window was pretty impressive.

I ventured out only long enough to pick up my new computer, onto which all my old files were transferred without a hitch. Tomorrow morning I will finish setting it up with the printers and get my nose back to the Studley manuscript grindstone.

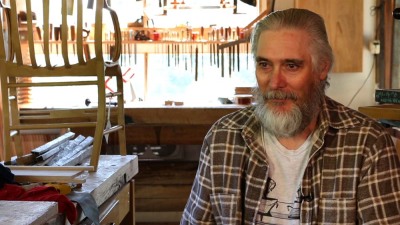
Charles Brock of the video series Highland Woodworker visited me a few months ago to film at The Barn, and the episode came out today. They did a nice job of making me seem sensible. It was an ordinary day in the shop, I didn’t get all dressed up or anything.
New compewder tomorrow. They were able to save the files on the hard disk, so it looks like all is well.
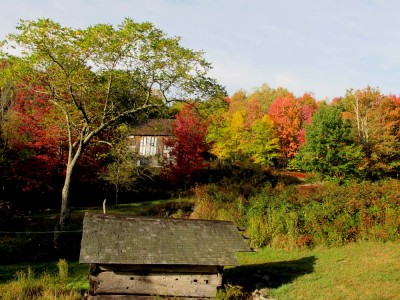
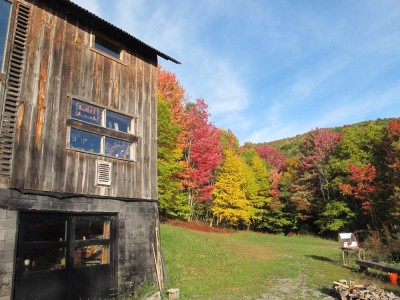
In previous years our sporadic presence in the mountains often meant that we missed autumn, which comes and goes pretty quickly. The trees reached full color only a week after beginning to turn, and will be gone in another week. When the sun is shining the maples are practically neon.
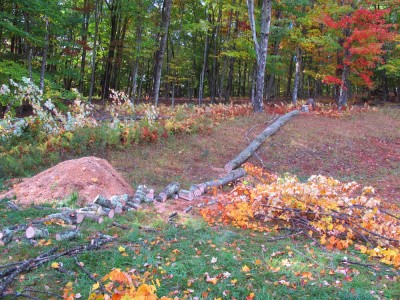
I continue to chop up trees, and this is maple the first large tree I felled completely by myself. It was about 60’tall and 18 inches at the base. I definitely need a larger, more powerful chain saw. The firewood inventory continues to increase, the local habit is to have next year’s firewood pile sitting and seasoning through the coming year. I’m thinking I may be approaching that point fairly soon.
Also I am moving the tree line back to the southwest of the barn. In winter the trees, even though devoid of leaves, are thick enough such that I loose sunlight by about 2.30. I’m hoping that by moving the tree line back 100 feet I can extend that by an hour.
Since I am ramping up for mega beeswax production (about 500 pounds to process and pour into blocks for sale), I thought I should make a new rubber mold more to my liking. My previous mold design was a spur of the moment sorta thing that I needed in a hurry. It has served me well for a while, but I never really liked it all that much. So it was time for a new one.
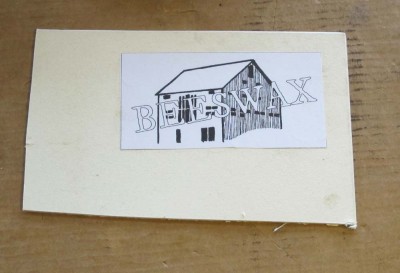
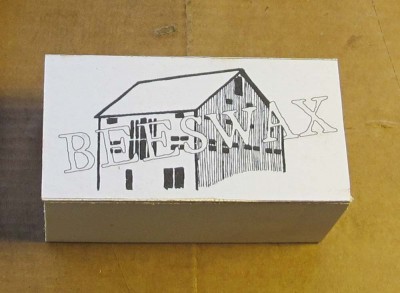
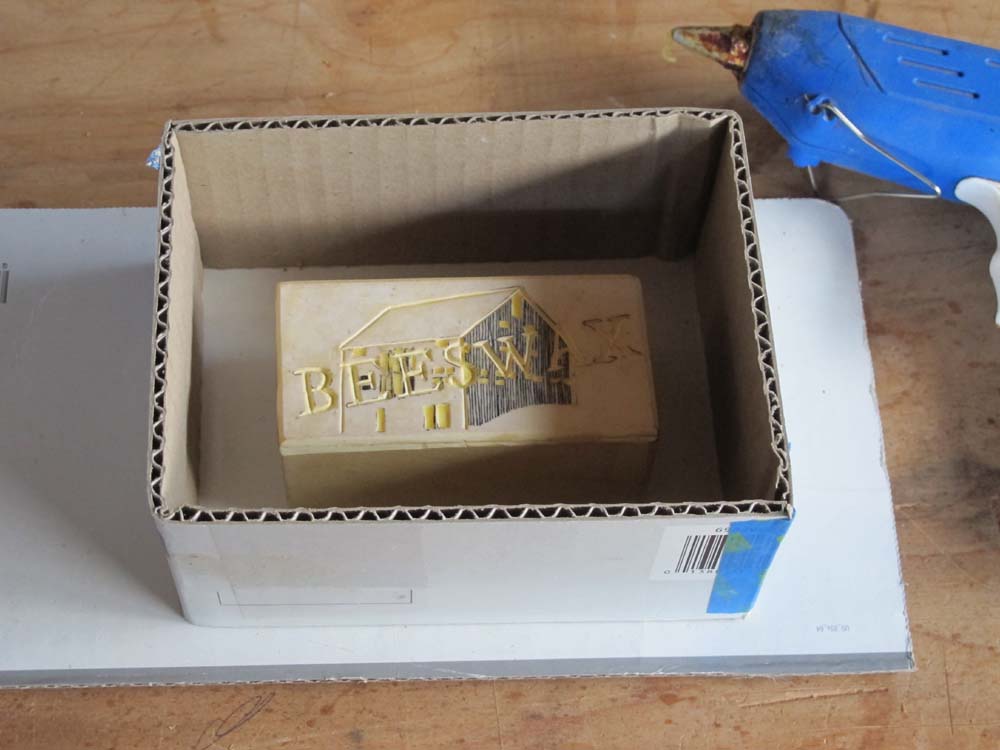
The new one is based on a poured-wax block of 1/4 pound, whereas the previous one was approximately 6 1/2 ounces, not exactly a nice round figure. Once I determined the new mold size of 4 inches long by 2 inches wide and 1-3/4 inches thick, I needed to make a design to match the size of the face. I settled on a background of the barn with the word “BEESWAX” overlaying it.

I printed out the pattern I created, and using spay adhesive glued it to some 1/8″ mat board,
then glued that to a wood block.
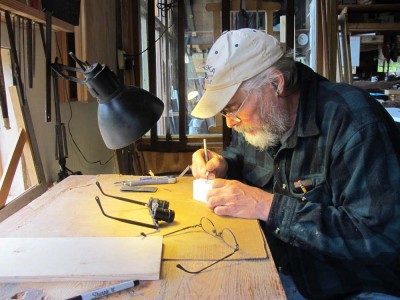
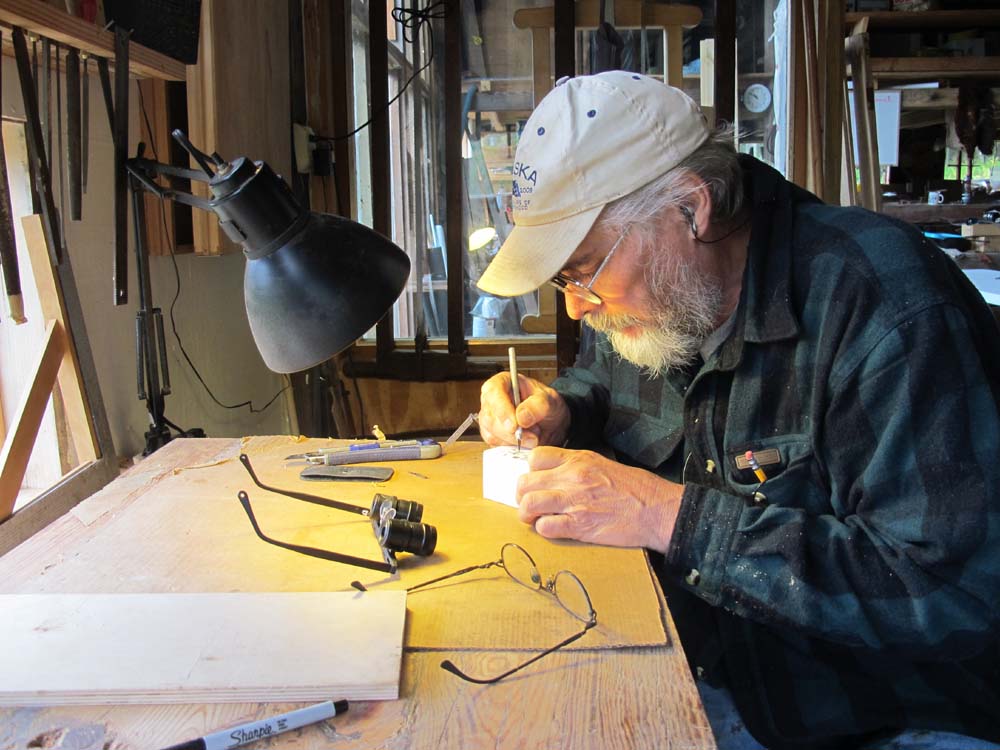
With a scalpel I incised the completed design,
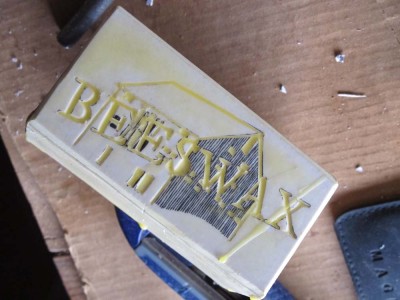
then dipped the whole thing into molten wax since the edges of the paper were a tad ragged in some places.
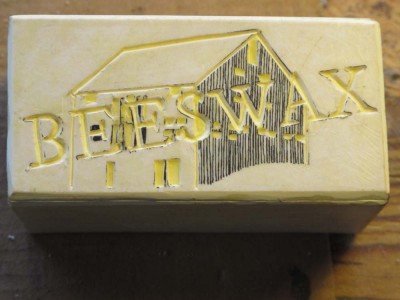
When the wax hardened I re-carved the master pattern to show some various relief levels in the design,

and readied everything for pouring the rubber mold by first mounting it to a piece of cardboard using hot melt glue.
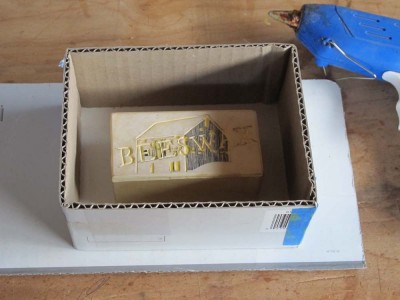
Then I built the cardboard dam around it (I could not find my molding clay and Lego blocks I normally use),
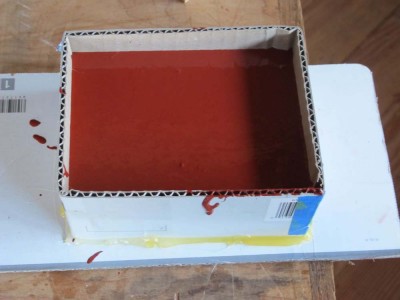
and filled the flask with RTV silicon rubber.
Done! I can’t wait to see how it turns out.

After a lengthy hiatus due mostly to the upheavals of moving, writing several books simultaneously, planning and hosting a gathering of fifty people at The Barn…, I am resuming my practice of conserving furniture and decorative arts, with the primary activities now being conducted in The Barn.

With likely projects including a pair of mid-century modern chairs, 19th Century tortoiseshell boxes, an 18th century long rifle, a 17th century Italian sculpture, a pair of mirror frames., a 19th century gilded French clock… I expect to be busier than ever soon enough even though R2 is off to editing and out of my consciousness for a moment and the Studley manscript will be off my plate in about three months.
Provided my clients give their consent, I will be posting about these in-studio projects as they unfold.









Recent Comments