
I am delighted to be teaching a pair of classes for Joshua Farnsworth this summer, Historic Wood Finishing (July 17-19) and Introduction to Parquetry (August 21-23). The workshops will be held at Joshua’s place near Charlottesville VA. You can get the particulars here, and I believe he will be posting the course schedule imminently. I hope to see you there.

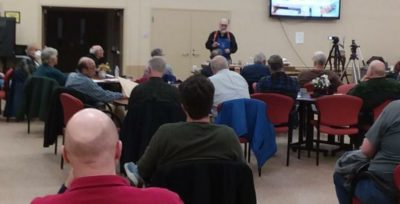
Last Saturday we were in Columbia, Maryland, first for my presentation to the Howard County Woodworker’s Guild, where a rollicking good time was had by all. I’ve spoken there twice before, most recently on the sober, memorable day of the second Space Shuttle disaster in 2003(?). There was no memorable public disaster last Saturday, other than the ongoing collapse of Western Civilization.
I had a such a terrific time! I sometimes forget how much I enjoy teaching traditional wood finishing. The large-ish audience was very engaged and I had some difficulty getting things wrapped up and loaded afterwards as person after person came to ask questions as I was packing up.
For this 75-minute demo I selected the highlights from my 3-day workshop Historic Wood Finishing. They might invite me back to teach that event, and I am pretty sure Joshua Farnsworth will ask me to teach it at his school near Charlottesville this summer. Check their respective web sites to catch any updates for that.
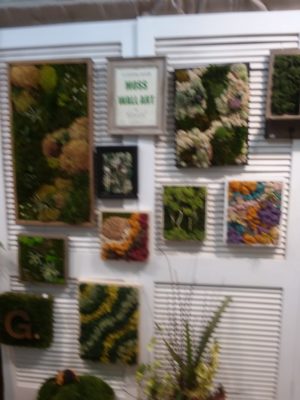
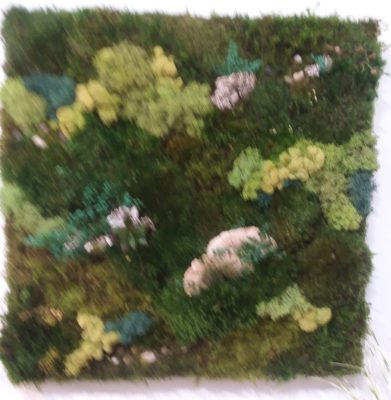
After this we met with long-time dear friends K and N to tour the moss art studio where she works, and consuming a delightful meal with them. We bought several of the moss art works as we were both enamored with them.
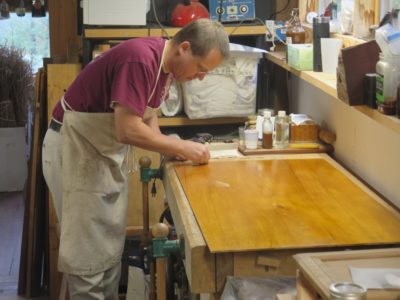
(I know, I am really lousy at taking pictures with my phone.)

This week by mail and email I got the announcements (several of them, actually) for the upcoming conference Working Wood in the 18th Century at Colonial Williamsburg, January 26-29, 2023. The topic is certainly of great interest to me and since they have rescinded all their previous Covid restrictions I am likely going.
Over the past dozen years I think the only times I have gone is when I was a presenter, so this will be a pleasant experience. I know most of the presenters and look forward to visiting with them, and hope to run into friends old and new. I promise to be mostly congenial but have to brush up on some social skills that may have become dormant in recent years.
If you’re going let me know.
Back to harvesting firewood for winter 2023/2024 and well beyond. There’s a lot of storm-fall out there.
After two years of mostly inactivity teaching-wise I’ve got several now on the calendar, all more or less in the vicinity. Over the next couple weeks I will be diligently preparing for my presentation at the SAPFM Mid-Year in Fredericksburg VA, on the topic “The colonial craftsman’s finishing kit,” with a special emphasis on locally available materials. If you are there you can come and see it, if not, not.

For this presentation I am creating a set of sample boards to reflect the information I am presenting.
No sooner do I return home from that than I will be assembling all the materials for the three-day Historic Woodfinishing Workshop near Charottesville VA. I’ve done this workshop several times and have settled on a well-defined syllabus to leave the students with greater confidence in the finishing process.
Over Labor Day weekend my friend Tim, for whom I built the ginormous workbench a couple years ago, will be hosting an 18th century craft shindig at his place just a few miles form here. He has asked me to demonstrate historic wood finishing and tordonshell work. Ought to be a boatload of fun.
It’s the best of all worlds in a way. I get to teach and interact with talented people in a range of skilled trades without having to even travel!
Even though I have decided to de-emphasize (read: discontinue) scheduled workshops at the barn, I am not inclined to give up on teaching altogether. Recently I was approached by Joshua Farnsworth of Wood and Shop, inquiring about my interest in teaching at his traditional woodworking school near Charlottesville VA. My answer was an enthusiastic, “Yes,” and after some conversations we decided that I would teach one class this year and perhaps more next year if things work out well.
My first offering for Wood and Shop will be “Introduction to Traditional Woodfinishing” this coming July 14-16. You can contact Joshua for registration and course details. I am not entirely sure when the announcement/registration goes live on his web site.
I will still teach at the barn by request. If you and a few friends want to commission a workshop at my place, just drop me a note and we can talk about it.
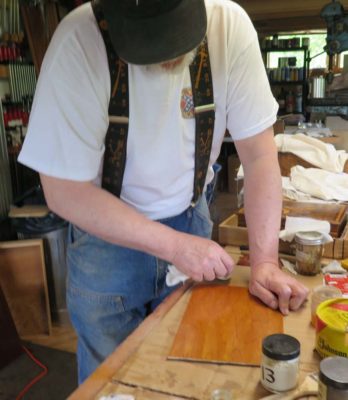
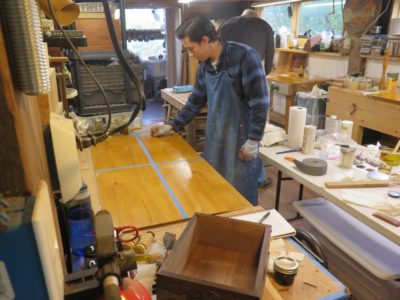
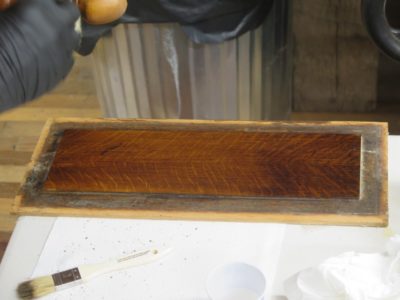
For the home stretch of the jam-packed three-day workshop the final set of exercises involved the giant panel. It had already served its first purpose, getting the students comfortable with laying down an exquisite brushed shellac surface over a large area. Since the panels were roughly half the size of a dining table, I’m thinking any hurdles of intimidation have been overcome.
At this point the panel was subdivided into four quadrants, each of them to be treated in a unique manner. The first quarter was easy — just leave it alone as an example of laying down an excellent base of three-inning shellac.
A second quarter was spirit varnish pad polished to a high sheen, demonstrating the option of creating a not-grain-filled padded surface.

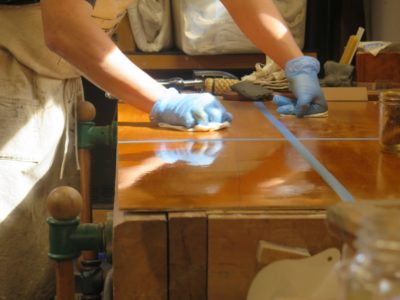
The third quarter was hand polished with abrasive powders, first 4F pumice then rottenstone in mineral oil, using a polishing pad identical to the spirit varnishing pad. This was followed by a light application of paste wax and buffed when the wax was firm.


The final quarter was burnished with Liberon 0000 steel wool saturated with paste wax, and as with the rottenstone polishing, rubbed until you just get tired. When the paste wax was firm ex poste it was buffed with flannel to a brilliant glow.
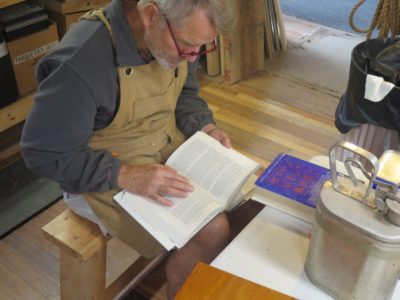
As always there is at least one somebody who gets seduced by my library.

When we wrapped up the event it was clear that they had all mastered the techniques wonderfully, and departed with confidence and a set of sample boards to guide and inspire them for decades to come.
If scheduling a workshop identical to the one these fellows completed, drop me a note. I will no longer “schedule” any workshops but only host them on request.
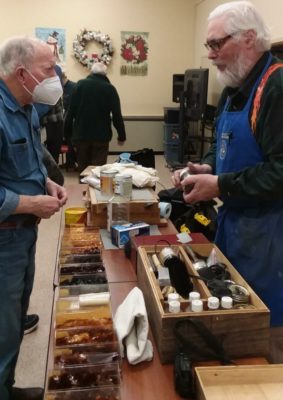
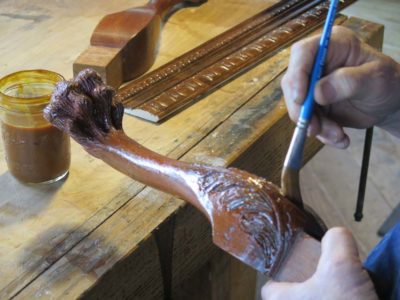
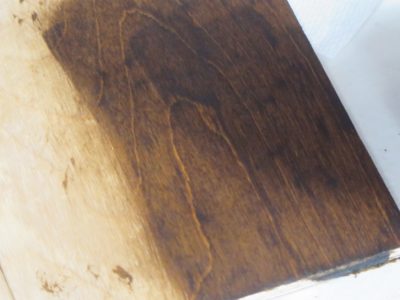
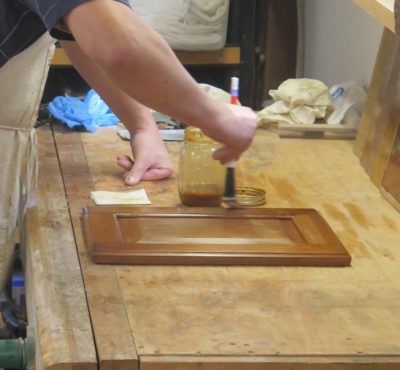
In the finishing trade we often quip that our job is to make wood, “Brown and shiney.” Historically one of the main methods employed for the “brown” part was asphaltum, or tar. I knew of using tar as a toning glaze in gilding, where the tar would be diluted with white spirits and used to accentuate the gilded surfaces. I had not used it for wood until about fifteen years ago, responding to the evangelism of Alan Noel, a/k/a “The Czar of Tar,” and famed Atlanta based finisher and restorer and long time friend


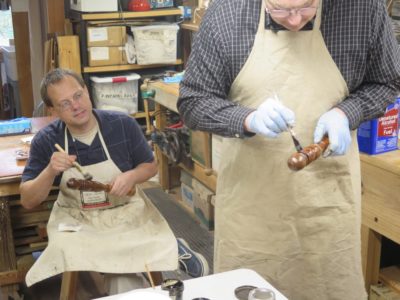
For the workshop I’d asked Knoxville Dave to provide instruction on both pad polishing and asphaltum glazing, since he does so much more of that than I do. Yes indeed, that is a can of fiberless parging asphalt that he is mixing and diluting to glaze consistency.
We both using glazing as our “go to” technique for coloring, since it is so much more controllable than any penetrating colorant, and can be controlled to perfection. Sometimes staining works perfectly, but is is “just off a little bit” enough to take that technique off the table for me.
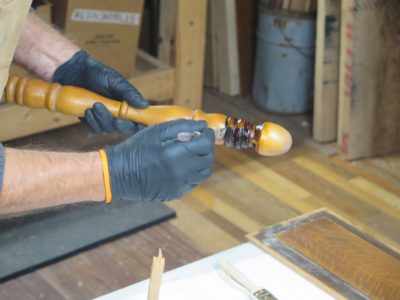


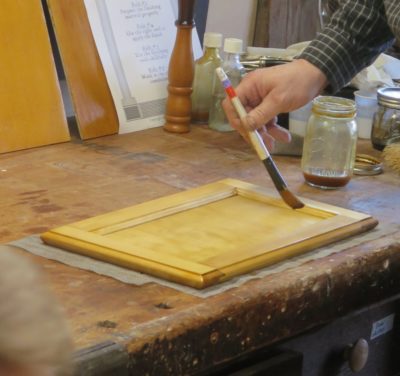
The exercise that really showcases the asphalt glazing technique was toning the turnings. They were first shellacked then burnished, leaving a magnificent foundation on to which you lay the color. The dilute asphalt was spread on the surface, then manipulated with cloth pads and fine bristle brushes to provided subtle shading to the presentation surface.
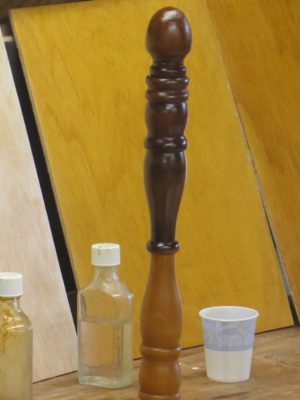
One of the beauties of asphaltum is that it performs almost like a dye, yet can be manipulated to provide both understated and exuberant change.


Dave also demonstrated using the glaze on a flat panel to great effect, mimicking the “ammonia fuming” so prized in Craftsman furniture finishes.


With that, the students were turned loose on the workpieces.

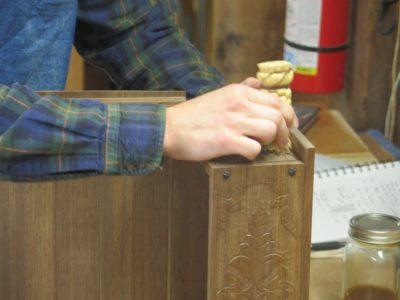
One of the fellows did some asphalt glazing to his new carved Bible box to great effect.
After the asphalt dried the surfaces were sealed with another coat of the shellac varnish.
The only thing left for the workshop was final detailing for the mega panel. Stay tuned.
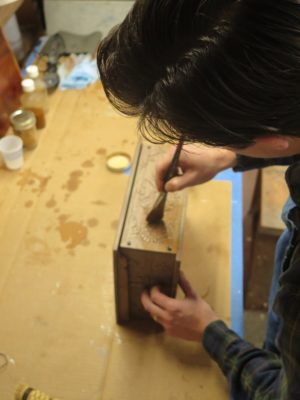
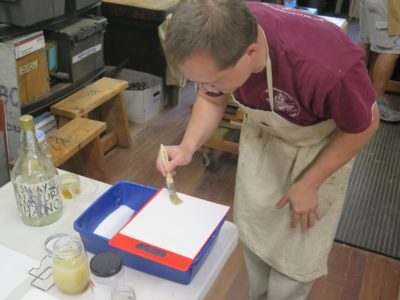
One area of great frustration, fear and failure for many woodworkers is the challenge of applying a hand-finish to voluptuous surfaces, including carved and turned objects. While I could not provide a syllabus with examples of every possible option in this exercise I was able to introduce the principles, practices and tools requisite for the task. The key to success in varnishing the curvey parts is to use the correct tool, in this case an oval wash or Filbert Mop brush for watercolor paintings.
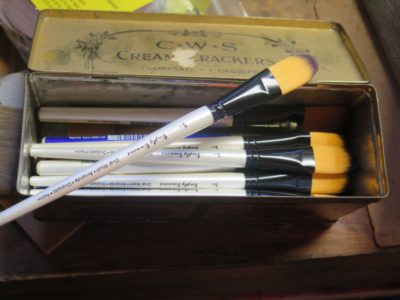


There are many excellent brands of watercolor brushes for artists that work brilliantly for wood finishing, but I have sorta settled on Simmons brushes in part because they were widely available at Michael’s. Even their cheapest brush, the “Simply Simmons” line, can provide an exquisite brushed surface. I have a few of the middle-quality brushes, the Simmons Sienna line, and they are even better. Of the premier line, the Simmons Sapphire, I have about a half dozen, and they are sublime, a blend of nylon fibers and sable bristles.
Regardless of which one you choose, and the price range is around $10-15 for the Simply Simmons to $75-100 for the Sapphire, you will have excellent results on undulating surfaces because the Oval Wash/Filbert Mop configuration does not have the square corner typical for most brushes. Those corners are the source of nothing but headaches on the carved or turned surface as it is the corners that “squeegee” off excess varnish, leading to the runs, drips, and errors that are the curse from finishing with the wrong tool.

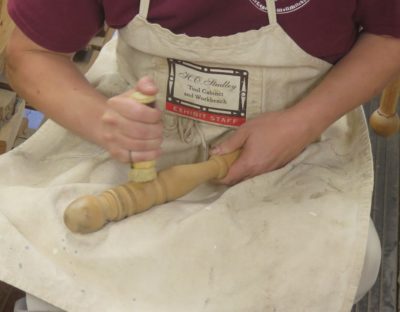
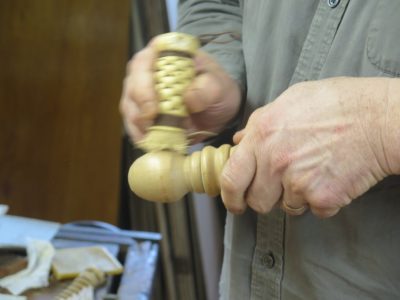
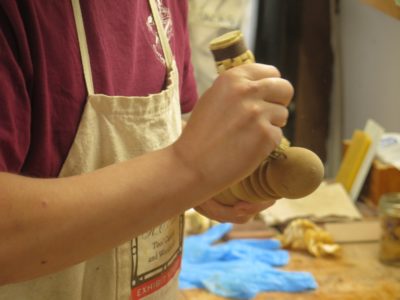
In this workshop I had a pile of turned spindles and frame-and-panel cabinet doors to provide the battleground for the exercises. As almost always the starting point is to burnish the entire surface with a polissoir, and I have designed a “Carver’s Model” polissoir with 3/4″ bristles for just this instance.


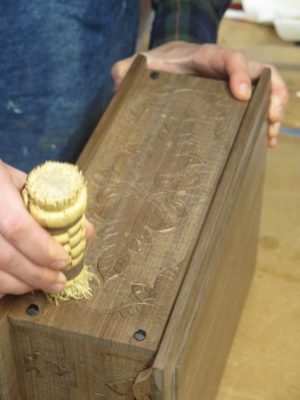
One of the real delights for the workshop was that one of the students had just made a carved Bible box the week before, and brought it along for the class.

The transformation of the raw carved surface by the application of a few minutes’ worth of burnishing was truly astounding.

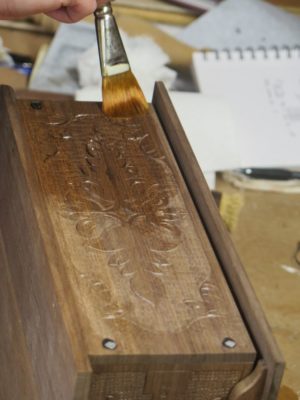
Then it was time to get to brushing the shellac varnish, and the draping character of the oval brushes – almost literally clinging to the irregular surface – was life-changing to the students as they were able to lay down multiple flawless applications of varnish.
Suddenly, what had been an aspect of wood finishing imparting fear and loathing became something to anticipate with celebration.
… or more precisely, glass paper.
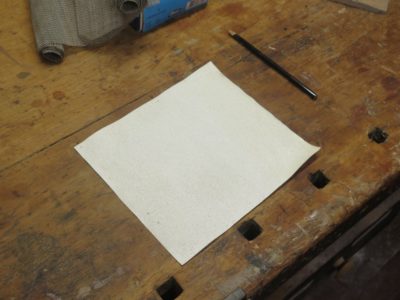
Though certainly not used to the degree of our current time, when it is ubiquitous in every shop I have ever visited, sandpaper was in the furniture maker’s and finisher’s tool kits in days past. There are many probable reasons for it being much scarcer in the 18th century, not the least being the cost of all paper-based products. We know only the time when paper and all its descendants are cheap and plentiful to the point where it is simply mindlessly disposable. 250 years ago, not only was the paper essentially hand made (yes, I know the process was being industrialized even then) but so too was the associated product of “glass paper.” Abrasive paper sheets were undoubtedly also industrialized to a great degree, but thus far I have never read an authoritative period account of glass-paper making. If you know of one please let me know.

One of the delightful rabbit trails I’ve been incorporating into historic finishing workshops in recent years has been to include making a sheet of glass paper by each student. As in olden days the abrasive itself was ground glass, known as frit, and the adhesive gluing the abrasive to the paper was hot hide glue. Using 135 gws glue to saturate 100% rag paper, then sheet was sprinkled with the fine frit (approximately equivalent to 100-grit sandpaper). Not to self — when photographing this exercise for the book, DO NOT use white frit over white paper.

Set aside to dry for a day, the result was a usable sheet of abrasive paper. Were I to incorporate this product into my normal shop activities I would take the additional step of “hardening” the glue with a chemical crosslinker applied to the back side of the paper. Historically the chemical would have been formaldehyde, but nowadays I would use Heico NH5 photo gelatin solution.
The third inning for the big board exercise was perhaps the simplest and certainly is receiving the sparsest treatment on the blog.

The preparation for the third application set was to scrape the entire surface briefly with disposable razor blades. Scraping finishes is a long standing tradition going back probably three centuries, but rather than go through the practice of preparing and using burr-edge scrapers it was just easier to use razor blades for such a limited time.
Following the scraping to the point where the surface was uniformly matte, the final application set was accomplished with another 4-6 complete coats of the ~2-pound shellac varnish.
The board was then set aside for the rest of the second day, to be used for the rub-out exercises on the afternoon of the final day.

Recent Comments