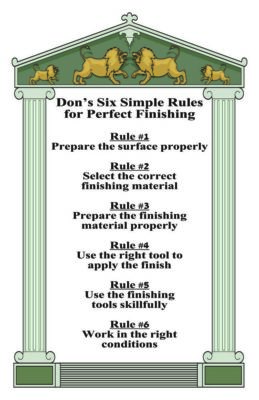
Last week was my almost-annual workshop in Historic Finishing, three days spent introducing the notions of systematic work with shellac and beeswax. This year I had three students which allowed for a lot of great fellowship and one-on-one instruction and problem solving.
It began with a discussion of the strategy of finishing I developed many years past, emphasizing the Six Simple Rules for Perfect Finishing. As always my goal is to not only teach and inform, but to change attitudes. Usually woodworkers are indifferent at best and terrified at worst to finishing, and again this year I saw the students leave with a whole new level of confidence. I cannot say they departed with my own mindset of looking forward to any finishing task, but at least they were no longer fearful of it.
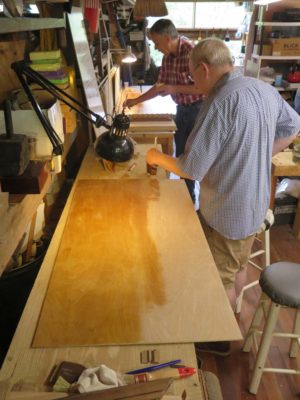

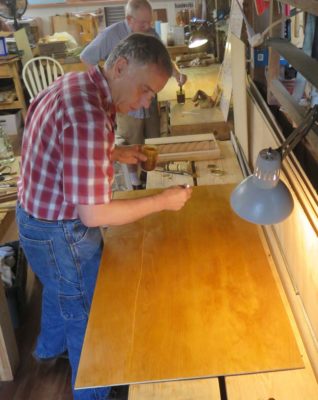
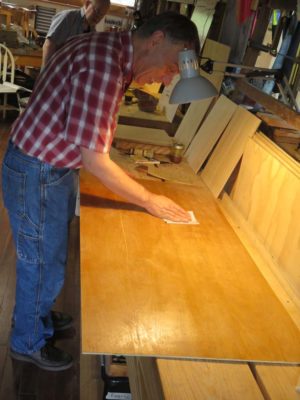
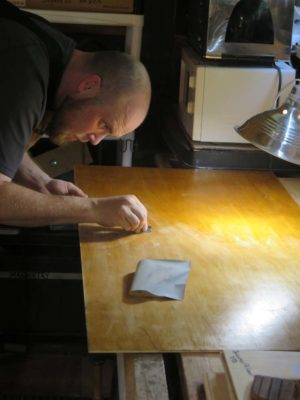
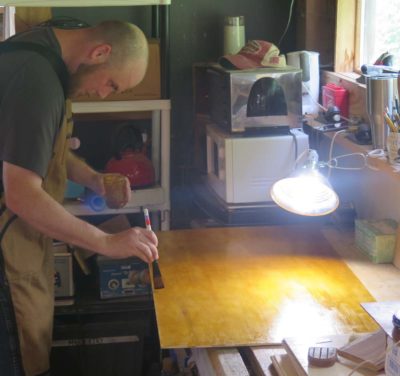
After the opening lecture they got to working on the first of a dozen exercises I had devised for them. This one was brushing shellac on a large panel, building up about a dozen coats in three application sessions, or “innings.” Using only a one-inch brush this exercise develops excellent hand skills at applying a finish evenly over a very large area, and lays the foundation for some Day 3 exercises.
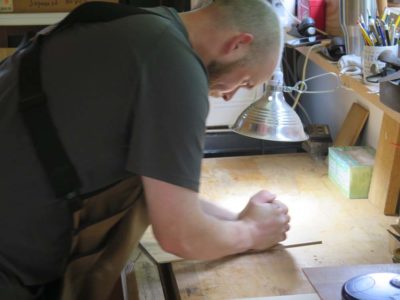
We then moved on to the means of preparing surfaces in general (the initial large panel exercise has to fall a bit out of order since it required three sessions to complete the applications; the start of Day 1, the end of Day 1, and the start of Day 2). Thus much of the day was spent building up Popeye-like forearms, a/k/a using a polissoir.
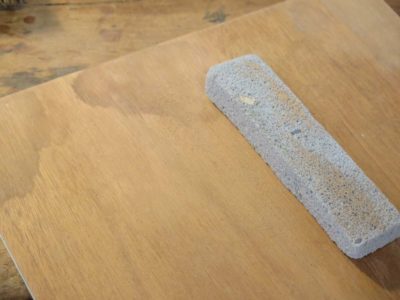
I also demonstrated the use of a pumice block for smoothing wood. This was a very common procedure in ancient days, an analog to our own use of sandpaper.

Preparing panels with the polissoirs and then a polissoirs-plus-cold-beeswax occupied much of that afternoon, followed by a light sanding of the large panel and re-application of the 2-pound shellac from the morning.
And thus endeth Day 1.
Historic Woodfinishing workshop starts in an hour or so and I’m rarin’ to go.

the classroom is all set
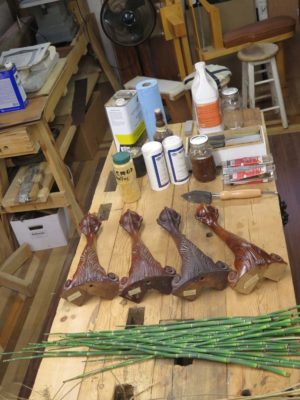
some show-n-tell

my ultra-high-tech syllabus
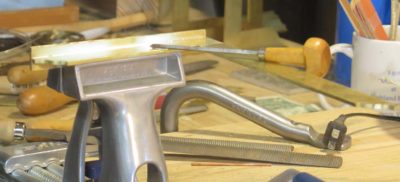
I use some version of the following techniques for cleaning the interior corners of a soldered/brazed joint such as that created at the shoe-and-beam joint for the Roubo squares. If my brazing technique is on its game this only takes a couple minutes from start to finish. If not, more minutes. Actually, were I a better metalsmith there would be no cleanup at all, but this is the kind of joint I usually have after the torch work.

My first step is to clean the excess solder with a half-round Vixen file, which is the metalworking version of a float. I lay the flat side of the file down flat on the workpiece and press the edge between the flat and half-round sides into the joint to remove any excess. Then I repeat it on the other flat face.
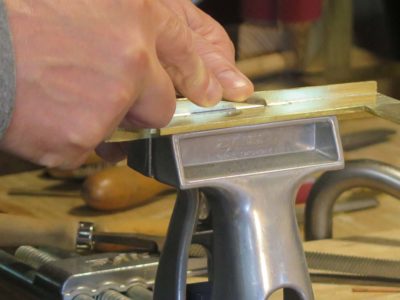
Once any excess solder is cleaned off I strike the joint with a diamond shaped burin, or engraver, to establish a nice clean corner. The spatial circumstance of the task does not allow for me to hold the burin properly, I just hold it sorta like a paring chisel.


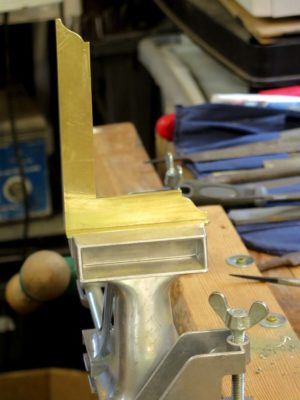
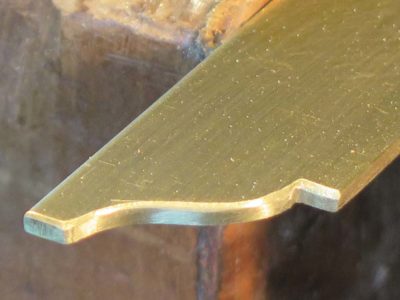
Finally I find the halfway angle for a triangle fie and undercut the joint ever so slightly for an elegantly clean look.

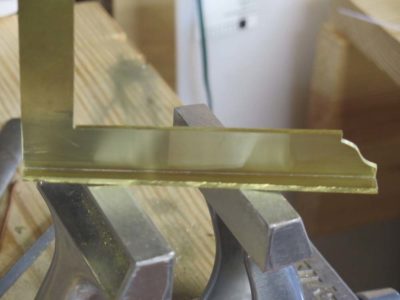
After that I’ve got a nice surface ready for polishing with a light abrasive to make it finished. Once I get the edges finished this one will be ready to go.
Day 3 was almost entirely a continuation of Day 2, bringing the squares closer to completion. It was pretty insistent that each student had at least one square all the way done to guide them once they got back home. I’m pretty sure each of them headed hme with at least a couple finished.
There was a little sawing as the shoes were trimmed as necessary following their brazing.
The sounds of filing and sanding permeated the air as squares were trued, followed by the gentler sanding with finer paper in getting the surfaces polished to the point of being “done.”
As we continued our work we were able to reflect on a grand time of fellowship and learning.
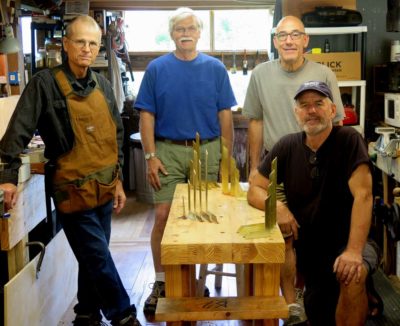
Thanks for a great workshop, gentlemen. Counting my own projects, I think the grand total for the weekend was 30 squares, eight or nine triangles, and several pounds of scraps and filings.
Now it’s time to turn my attentions to this month’s workshop on Historic Finishing.
One of the tools emerging from the recent Making Roubo Squares workshop was a diminutive 30-60-90 triangle. This tool is integral to much of my/our shop life for areas ranging from cubic/pinwheel parquetry to laying out the dovetailed tenons of a Roubo bench leg-and-slab double mortise-and-tenon construction.
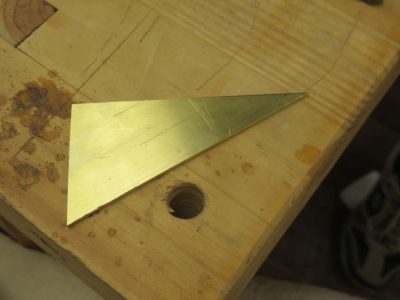
With the surplus rectangle of brass plate left over from the making of our nested set of cabinetmaker’s squares during the workshop there was plenty of brass plate left over for making other, smaller layout tools. Included in these were some small triangles that were roughly laid out with a plastic drafting triangle and rough cut on the bandsaw.
I took the opportunity to demonstrate the truing of the triangle to the workshop students, reminding them of the simple truths they learned decades ago in seventh grade Geometry class. Instead of using a micrometer or something similar to establish the tringle side lengths, a much easier, simpler, faster, and frankly more accurate method is only a compass or divider away.
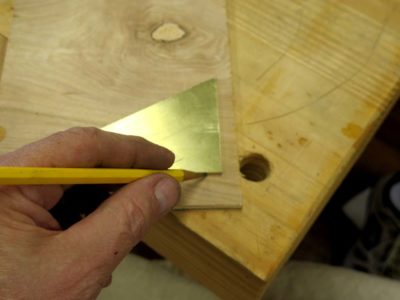
After establishing the perfect square corner between the two shorter legs of the triangle it was possible to achieve a perfect set of 30-60 degree angles by using just a scrap piece of plywood, a pencil, and a set of dividers. For work like this I almost always revert to a pair of dividers from an antique navigational drafting set that I bought for practically nothing many years ago. These German Silver (alloy of brass plus nickel) tools are simply lovely and a pleasure to the eye and the hand.
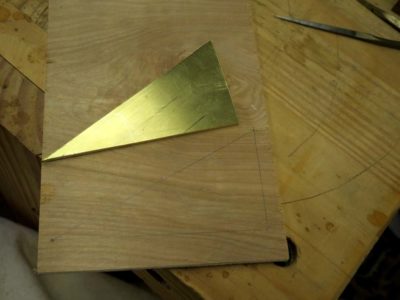
First I traced the rough triangle onto a piece of scrap plywood, and set my dividers to the exact length of the shorter side adjacent to the right angle.

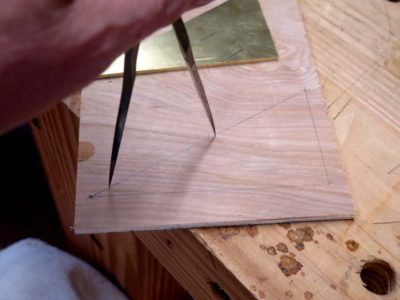
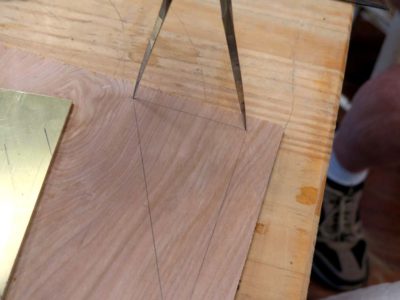
Then swinging the dividers to the hypotenuse I stepped off two of those lengths. If you will recall, for a perfect 30-60-90 triangle the hypotenuse is exactly two time longer than the shorter side of the right angle.


Once I determined that two-times-longer distance along the hypotenuse I re-set my dividers to this exact distance then transferred it to the longer side of the right angle, redrew the hypotenuse on the plywood, then transferred it to the brass.

Five minutes later I had cut and filed the new hypotenuse and had a perfect 30-60-90 triangle ready to braze on the foot and put to use in a multitude of applications.
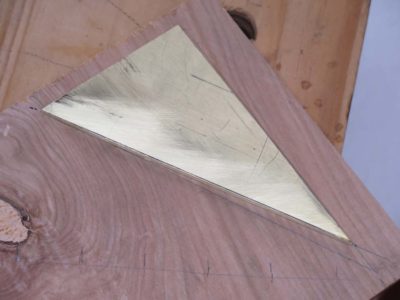
All with zero measuring, although to be honest I did grab my dial caliper afterwards to check. I wound up being off by almost 0.002″ which probably amounts to a couple seconds or so of angle degree (or, about 1/1800th of a degree). I can live with that.
To quote my mentor in the pattern shop, John Kuzma (cleaned up considerably for a family-friendly venue), “Measuring is the enemy. Layout and transfer are your friends.”
I cannot recall my 7th grade Geometry teacher’s name but I do remember Mr. Fiske, who taught me Trigonometry in 11th grade almost fifty years ago. Together these men impressed on me the importance of triangles in every-day life. Thank you, gentlemen.
By the start of the second day everyone’s trains were barreling down the tracks and all we had to do was keep on keeping on. Even as I entered the barn the sounds of sawing, filing, and sanding filled the air.

I had given each of the students one of these DARPA funded, MIT developed tools to work on the ogee tips at either end of the squares. One side was flat and the other was round, and when wrapped with sandpaper the tool was perfect for the task of finishing the shape. The uninitiated might think these were simply a 3/8″ dowel split in half on the bandsaw, but they would be properly ignorant of the national security dark technology pedigree of the tool.


Pretty soon the tips were more-or-less derived.

One procedure that was replicated perhaps a hundred times that day was returning to the abrasive covered granite blocks to bring the squares closer to “true,” a process that would be continued until after the torch work and the “square-ness” was perfected versus the Vesper final word square.


Len was the first to get the brilliant idea of creating a 30-60-90 triangle from the remaining scrap of rectangular brass plate left over from the four nested squares. Using my older version of the Knew Concepts Mark III saw he set to work and soon had the inside design cut out.


Meanwhile Dave, John and Pete got their tips shaped and polished.

Len finished the interior of the piercing of the triangle.

All the while the pile of brass filings and shavings built up at every work station. This continued until the very end and we compiled an impressive pile of scraps and waste filings, I’d estimate somewhere around five pounds worth.

All of this was prelude for the tasks presented after lunch as the shoes for the beams were brazed in place with silver containing solder. Once the mating surfaces were perfected it was time to move to the torch work stations.
The set-up was designed for efficient and safe torch work. I will blog about making a perfect set-up for bench top brazing in the next couple of weeks.

Fortunately I had all the things I needed on hand; fire bricks, kiln shelves to use as brazing platforms, and inexpensive lazy susan bearings so each place could turn. I placed three work stations on top of cement backer board from a home improvement center. For this project it was important to isolate the workpieces from the shelf and the bricks as much as possible to reduce the amount of heat loss from direct contact during the brazing. That is why the work pieces are raised up from the shelf by two small pieces of scrap brass.
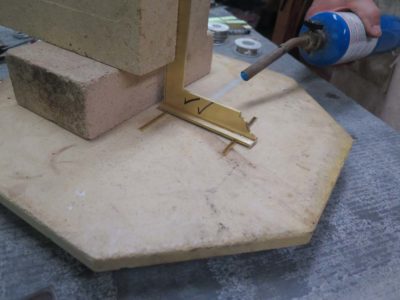
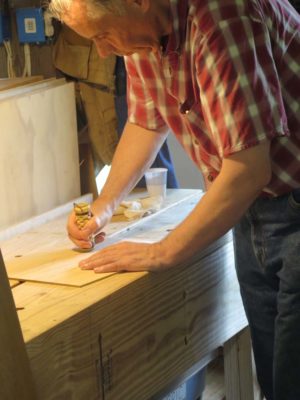
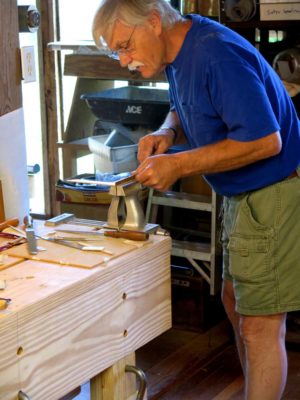
After slathering on the flux to the contact edge of the square it was placed on the horizontally situated shoe, in the center. Then the torch was lit and the heat turned up. We were using both propane and MAPP torches, the first was fine and the second faster.

Once the assemblage was heated up and the brass began to get a coppery tone it was time to simply flow the coiled solder into the back side of the joint and let the heat draw it underneath the joint toward the flame.

Dave gave the quenched joint a fierce testing, and was impressed at the strength of it.


Then everyone set to brazing on the bases of their respective squares, then began the cleaning up process.


And that’s how we spent the rest of Day 2.
Last week I hosted a workshop that reflected my peculiarities as a craftsman, a woodworker who loves metal work. Four skilled craftsmen, Dave, John, Len, and Pete joined me for three terrific days of fellowship and making. In this case making a nested set of Roubo-esque solid brass squares a la Plate 308, Figure 2.

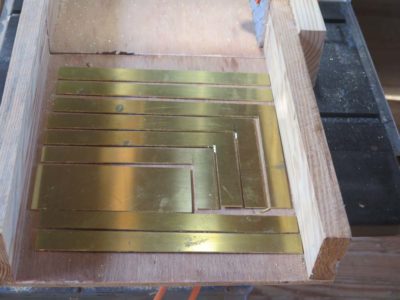
The starting point for the three days was a 9″x12″x1/8″ brass plate.

Using my puny table saw and sled with a waste block to reduce the shrapnel, everyone cut a series of descending size squares.

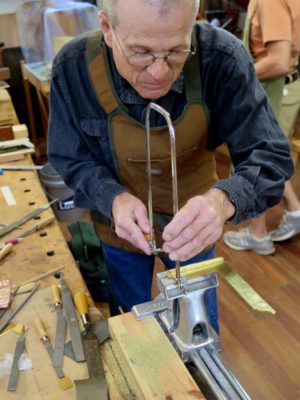
After the table saw cuts, stopped to avoid over-cutting at the intersection of the inner edges, the cuts were finished with deep-throat fret saws and #6 jeweler’s blades which I provided. Pete had his wondrous Knew Concepts coping saw that worked like a charm.


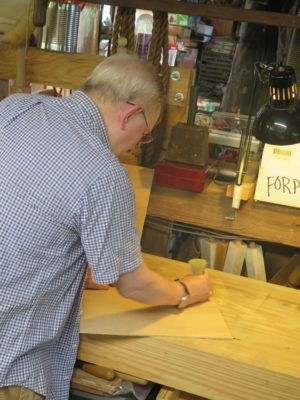
And then the filing began. To protect the inner corner of the squares we ground off one edge of the mill files that everyone brought, starting with the disc sander followed by a diamond stone. This allowed for pretty aggressive work in the corners.


The filing was done on both inside corners of the cut squares and the outside corners of the remaining rectangles in preparation for cutting out the next smaller square, followed by truing on sandpaper over a granite block. (You can see the sublime Vesper square that was our “final word” truing reference for the workshop.)

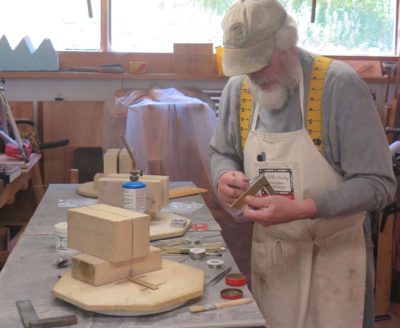
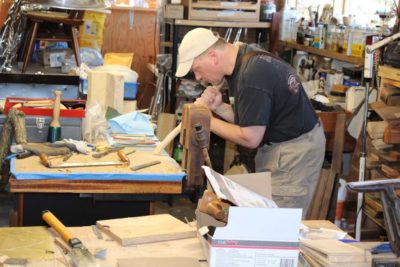
This scene pretty much sums up the whole day. I was working right alongside the students making another set of the squares. I find this approach works best for the students to see me working on the same exact project, several times they came to look over my shoulder at some point in the day.


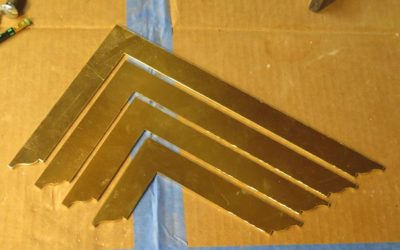
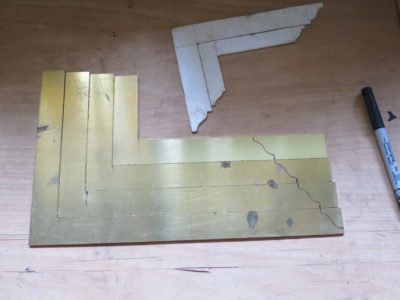
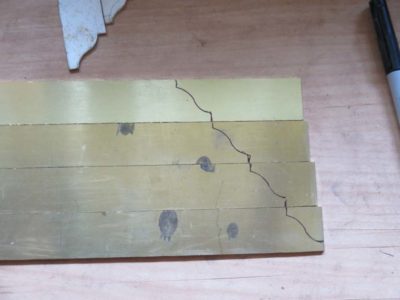
Before long everyone had their four rough squares ready for the next step, which was to trace and cut the offset/stepped ogees on each end. The small rectangle of brass remaining from the first four squares could be used later for a petite pair of squares and a couple of 30-60-90 triangles.


These were roughed out on the bandsaw, ready for filing the rest of the way.


That’s where we were at the end of the first day.
Stay tuned for Day 2.
A few weeks ago my friend B came for a couple days to test drive the shoulder knife making workshop that will be at The Barn later this summer (August 23/24). We had a great time of visiting while he was working on a natural branch from a fallen tree, cleaning it up an fitting it to his torso for use as a marqueteur’s shoulder knife.
He made great progress and we are anxious for the real event in a couple months. If you would like to come and make a shoulder knife for yourself, just drop me a line.
As for my current activities I have been busying myself getting ready for the students arriving for the Make A Set of Roubo Squares workshop later this week.

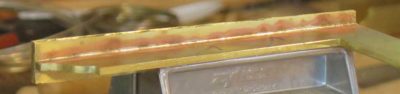
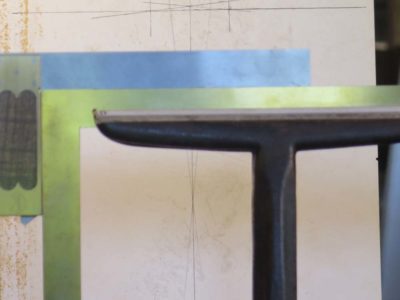
The upper piece is straight off the table saw, and the lower piece has been prepped with a file and abrasive paper.
Once the main body of the square is cut out and the ends shaped it is time to “true” the outside edges. There will be several opportunities to fine tune the squareness as we go along, but the first thing is to get those outer edges true. This provides a couple of functions. First it establishes the square-ness of the tool overall, and prepares the edge for the soldering of the shoe.
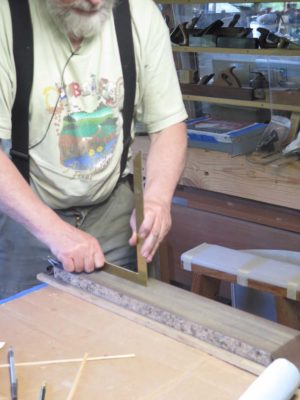
The main tools for this process are a clean, new-ish mill file and a granite block festooned with an abrasive belt. The objective is to both stablish one surface (the beam) amenable to soldering and one (the bade) that is perfectly square to the first one. Truing the inside edges comes later.
For this task my reference is one of Chris Vesper’s incomparable squares. I had let him know what I was needing and he prepared one for me with a run-out of only 0.0002″ over the length of the blade. If you need something more square than that, you are not a woodworker. You are a jet engine mechanic.
Every participant will begin with a slab of brass which we will cut on the table saw to yield the preferred number of graduated squares.
Once these have been cut and the corners cleaned up, they will be laid out for the graduated nesting sizes.
Ogees are cut and filed into the ends, and all the detailing is finished in preparation for the silver soldering of the shoe on the outside of the beam.

If this workshop interests you, drop me a line via the Comments or Contact functions of the site. It will be June 20-22, and the tuition + materials is $425. You will leave with a completed set of squares.
===================================
Other workshops at the Barn this summer are:
Historic Finishing
Make A Roubo Shoulder Knife
Make A Ripple Molding Machine

Recent Comments