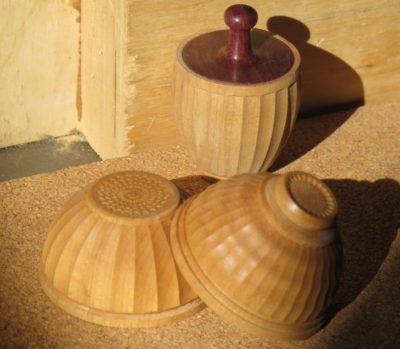
During his recent visit to help set up for next August’s Gragg Chair Workshop my pal John presented me with these three little vessels for me to experiment with as I build an inventory of fauxrushi experience. I can hardly wait to get to them. John has a Rose Engine Lathe and is always looking for new avenues of artistic expression with it. I made sure to send him home equipped with several wood chunks with which he can play, including a bolt from a holly tree, some tulipwood, and others. I await the results of explorations from his end.


With the two halves of the Kindle case ready, I glued on band of leather to bring the two of them together. The gluing was only to the faces of the case with the back edges unglued so that the case could be folded open with the two halves face-to-face.
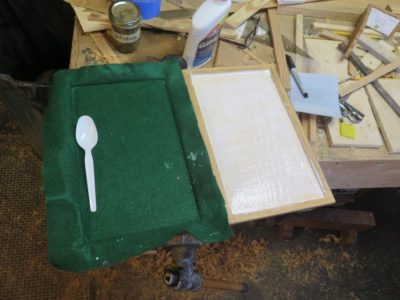

Once the two halves were put together I took some scrap felt from my rag bin and glued that into the cavity holding the Kindle. That was a nice effect, except for where I slipped with the razor blade while trimming the felt and cut off some of the cypress veneer. I hate when that happens, and will repair it when I get a chance.

With everything together and complete I spent a little time padding on some more shellac. I will probably repeat this periodically to build it up a bit more, but I wanted the case to get to work. I stuck on some velcro dots at the two corners to hold it together when not in use and called it “finished.”
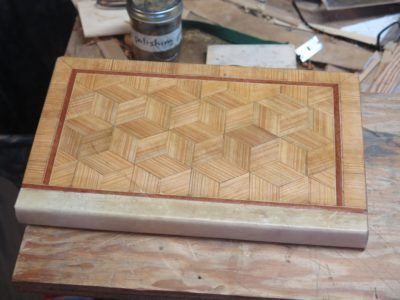


In laying out the first of the parquetry patterns I was finding peace and solitude while listening to an audio book rather than news or similar podcasts. As always I laid out the patterns on kraft paper, gluing the pieces in place with a dab of stick adhesive. Once I had built the pattern beyond the boundaries of the field I flipped it over and glued it “face down,” this time with PVA since I needed an adverse-environment-resistant construction. Using a foam sheet between the paper and the plywood caul assured the pieces would conform intimately with the substrate. Their irregularities on the surface are irrelevant as the surface will be smoothed to a finished foundation.
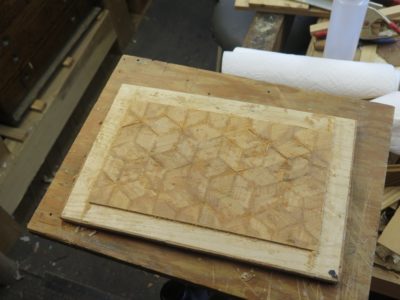
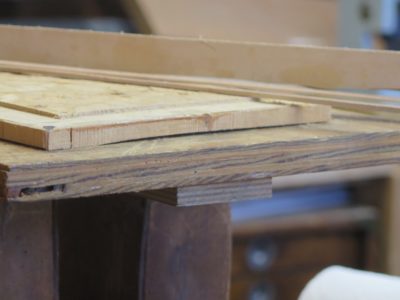
Using a straight edge and my Japanese mortise saw I trimmed the field to the designed size. I noted with interest the amount of curve that was introduced to the homemade epoxy/veneer plywood through the use of the water-based PVA emulsion to lay down the parquetry. Fortunately that cupping diminished in about 72 hours.
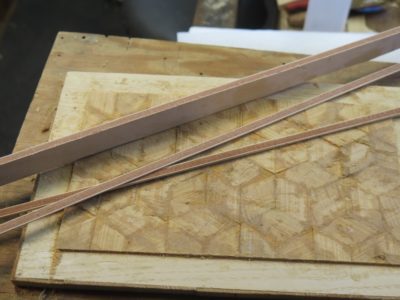
It was then time to saw the simple banding strips from a block I made long ago, fitting the corners with a 45-degree shooting board, then glued them in place along the perimeter of the field.
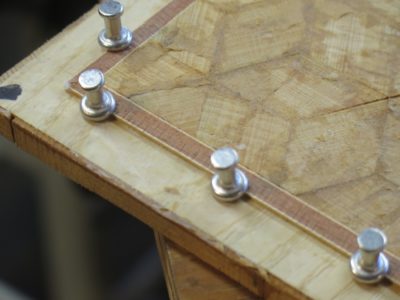
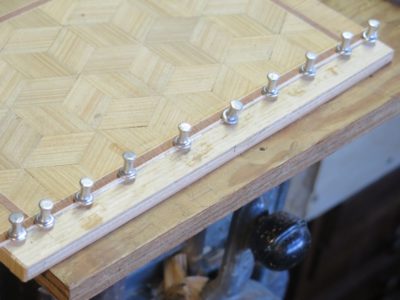
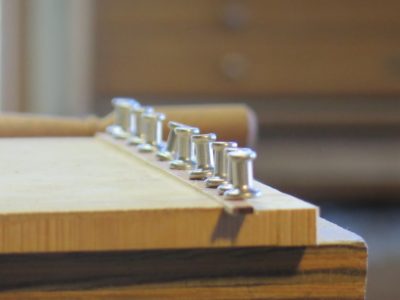
I have found the best method for holding the banding in place during the gluing is essentially the same as described by Roubo — wide head pins.
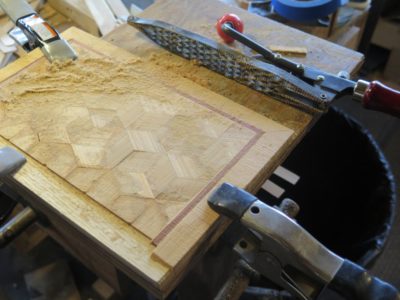
The next day I laid the edge decoration, which was just thin, cross-grained pieces of the sawn veneer. Once those were done I began the process of removing all the thickness variations and creating the perfect foundation for the finished surface.
In the aftermath of my “attempted suicide by lawnmower” I spent the afternoon in low intensity activity in the shop. Most of that time I spent finishing off the negoru finish on my sandpaper box. I cannot exactly recall where I found this box years ago but it suits my need perfectly for a place to house the 1/8th sheets of sandpaper that I use for most of my work. In the past few weeks I’ve been using this project and others as diversions to recharge my batteries when I get tired of writing.

For the past several few years the box has been performing its tasks while only partially dressed, wearing only a nice coating of my favorite primer called “Sanding Putty” from Fine Paints of Europe. Crazy expensive but worth every penny. In the past few weeks I’ve been using this project and others as diversions when I get tired of writing. I’m sorry I do not have a picture of the box at this point, the project was just a whimsy at the beginning. I have another box I am likely to use for the same finish, and when I do I will document it more carefully.
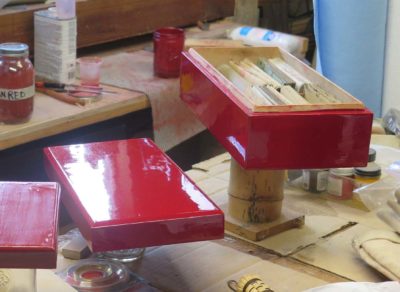
After sanding the primer I laid down two coats of Schreuder Hascolac red paint to provide the chromatic foundation for the final presentation. This also comes from Fine Paints of Europe but I think they have changed the product nomenclature since I bought mine. Like the Sanding Putty these paints are simply incomparable to anything else I found in the market. I wet sanded between coats with 600 sandpaper.
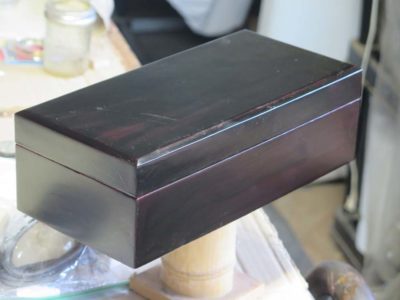
Once the foundation was ready (I usually wait a week between each coat of this oil paint) I wet sanded again and added a single coating of the Schreuder black paint.
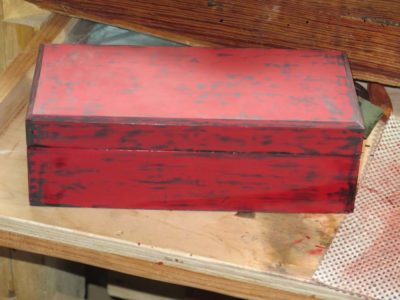
Then using 400 wet-or-dry sandpaper I abraded away most of the black to an appearance I liked.


This was followed by several applications of Epifanes Spar Varnish, a European analog to Waterlox Original Gloss Varnish. I had never used Epifanes before but it is highly regarded in the architectural restoration world and I had some so I thought I would give it a try. It certainly does lay down nice. As before I gave it a nice sanding between coats.
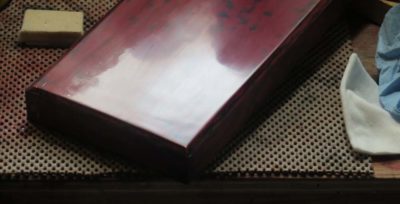
Once it was all done and the varnish was hardened, always an issue with spar varnishes as they are formulated to not get as hard as regular varnishes, I set out to polish it up. This began with a wet sanding of 1500 grit sandpaper, followed in turn with 1 micron and .05 micron agglomerated microalumina abrasives. For flat surfaces such as these I use homemade blocks of 1/2″ soft-ish felt glued to a thin plywood backing, with mineral spirits as my slurry liquid

All that is left is the very final polishing with whiting on my dampened fingertips, a maintenance coating of Mel’s Wax, and it will be done.

Not bad for just a time-killing whimsy.

Today I wrapped up (mostly) three of the “rubbed through” boxes and have put two to work to hold some of my smaller Gragg sculpting tools.
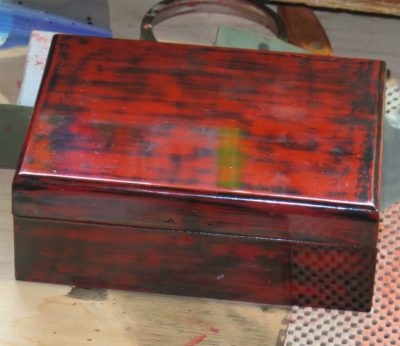
This one is black-over-red.
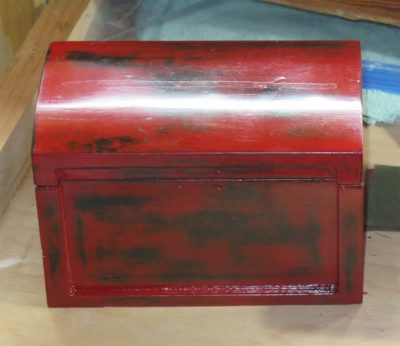
This one is red-over-black.
I did both of these with pigmented shellac with lemon shellac as the film forming component. I added Bone Black and Vermillion Red powders to taste, then three or four clear coats over the top after composing the pattern with wet sanding. Since these will get jostled at least if not outright “beat up” I have no plans to bring them to a mirror surface. I might rub them out with some Liberon steel wool and Mel’s Wax once the surfaces get really hard in a few weeks.
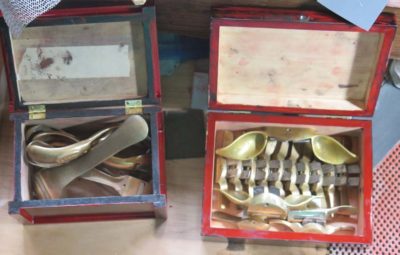
It is nice to have most of my smallest brass spokeshaves in the same box. I bought four sets of the ones offered by many tool merchants 35(?) years ago and am delighted to have them on hand. With duplicate sets I have total freedom to modify them as needed. These tiny tools are amazingly productive but it takes strong finger tips and a good “feel” for using them. Fortunately Mrs. Barn lets me massage her feet for a couple hours most evenings so my hands are up to the challenge.
Very often in the midst of a lengthy undertaking I need a brief diversion to recharge my batteries. Given my current work on building Gragg chairs and recording the process for video and the seemingly endless work on A Period Finishers Manual I’ve been finding myself sitting at the finishing bench for an hour here or there to continue my exploration of the Asian lacquerwork aesthetic by other means. The particular projects are inspired by the Accidental Woodworker’s frequent exercises building small boxes for his tools, combined with my need to keep better track of the multiple small spokeshaves and spoon-shaves I use when sculpting a Gragg chair’s edges and shape. I’ve also got my sandpaper box that has been primed for years and awaiting its final decorative surface.
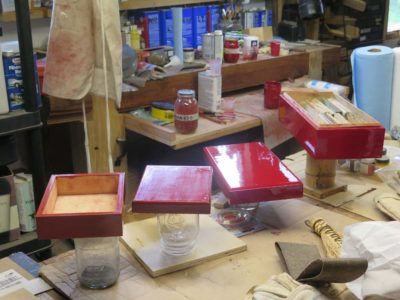
I am particular taken by the lacquerwork aesthetic of the negoru finish, or “rubbed through” surfaces, almost always executed in red and black. Rather than building boxes from scratch I used some of the paulownia or pine boxes from Michael’s that I have acquired over the years as teaching projects for japanning classes. In this case I was working black-over-red, but also had some red-over-black boxes that were never finished.
For the sandpaper box I used oil paint, for the others I used shellac. I have yet to complete a box with polyester but will soon. Some day I’ll post a blog series on these decorative options.
With some of my major time-gobblers finished or at least with the ends in sight — the gunsmithing partner’s workbench, the cedar siding, refinishing the dining chairs, the book manuscript (still a lot to do but at least the train is moving steadily down the tracks) — I am refocusing on a small handful of interests in the shop, including my efforts to replicate Asian lacquerwork.
I am noticing that with increasing age my general allergy sensitivity is getting worse so I am not likely to try using genuine urushi, it being the refined sap of a poison sumac tree and all. It is not impossible, but unlikely given the toxicity of the emulsion. Still the performance of the final finish is such that it has been the theoretical model of “the perfect finish” for decades or even centuries. Anything that can be applied and polished to a mirror surface while being impervious to anything other than boiling nitric acid or long term UV degradation is a finish to not disregard entirely.
My allergic sensitivity is being driven home this year as we had a late, cold, wet spring (we had snow flurries three weeks ago!) so the “early pollen” and the “late pollen” are emerging back-to-back, resulting in the Mother of All Sneezefests. I’ve been breathing through jello for almost a week now with the resultant gurgling loveliness. Rather than compounding my miseries with liquid poison ivy (the same toxic allergen, urushiol, is present in poison sumac, poison ok, poison ivy, and mango skin) I am instead going to be employing a variety of alternatives to accomplish “fauxrushi” objects.
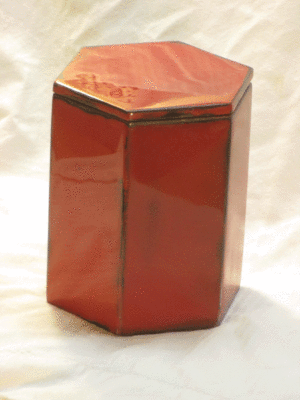
I have already written about West System 105 Epoxy and the variations of their catalysts as the basis for my fauxrushi (Popular Woodworking April 2017) and I am currently looking at three different polyester compositions as a test comparison. Polyester is reputed to be tougher and harder than epoxy but I have never used it for anything other than laying fiberglass fabric. It does have the distinct disadvantage of being much stinkier that West Epoxy but that is not an insurmountable problem.
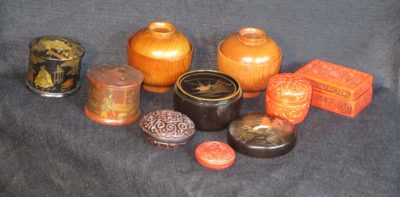
My little menagerie includes Asian lacquered pieces ranging from contemporary to probably 17th/18th C, and 19th C English japanned paper boxes (the two round pieces on the left).

I think this is my oldest piece, it is certainly the most complex. Red and black urushi are applied in alternating layers and then carved to reveal the layers. Urushi work is dominated historically by those two colors with the occasional blue piece with other colors even more scarce.
From time to time I pull out my own meager collection of genuine lacquerwork for inspiration and instruction, and delve into my library on the subject. These sources spur me on to explore this art form, and when the resin base, whether epoxy, polyester, or even urushi, is combined with silver, gold, ad pearl, the sublime can emerge under the eye and hand of a master. I am hampered by the near-complete absence of artistic talent but I nevertheless intend to stride down this path either until I lose interest (unlikely) or simply cannot physically do the work. My hands are still steady so I am hoping it will be a long journey.

This modern bowl has a molded fabric core, and remains one of the most beautiful artworks I have ever seen.
…a/k/a “stuff that falls in my lap.”
Many years ago I was contacted by a lady who was cleaning out her late father’s garage. In it was a box she thought I would find interesting and useful. Apparently back in The Depression he owned a factory/warehouse building and one of his tenants, a pearl button maker, simply disappeared, leaving behind all his inventory. She said it was a box of pearl button blanks and offered it to me provided I pay for postage which I gladly covered.
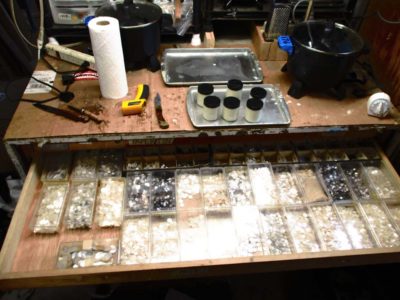
I arranged for the shipping through parcel delivery service and waited for the arrival of what I figured would be shoe-box size of who knows what. Much to my astonishment two weeks later a two-foot cube of a box arrived filled with a couple hundred thousand pieces of mother-of-pearl!

I sorted it into storage containers which now fill three drawers of my large map case. I haven’t done much with it other than that and using it for the occasional inlay, but perhaps the time has come for me to inventory it more completely and offer it through the donsbarn.com store. There’s no way I can use it all.
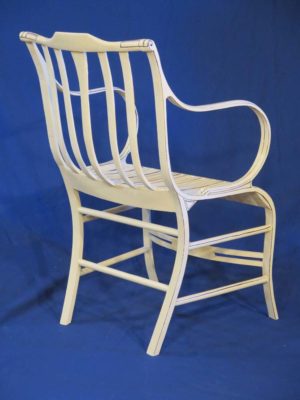
With some degree of anti-climax the pinstriping was touched-up and the final coats of satin oil varnish applied, and all of a sudden after eighteen months of intermittent labor the replica Gragg Fully Elastic Chair number MMXIX-I was finished.
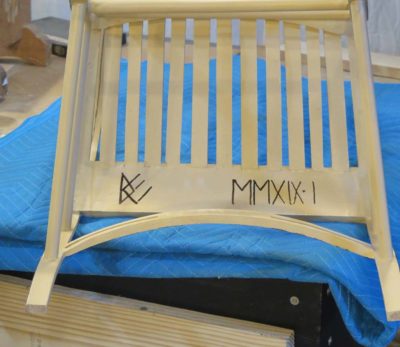
It went with me to Georgia as I traveled to FORP III, and on Wednesday delivered it to the new owner. He graciously allowed me to display it during our evening open house, and everyone who wanted was able to sit in it.
The moment of my lodging hostess giving it a test sit was captured here, being watched by FORP student Andrew and his lovely wife Katie.
One of the true challenges for decorating the Gragg chair is that to be faithful to the original requires the commitment to execute almost 80 yards of pinstriping on curved surfaces often awkward to get to. (Several areas of striping are multiple applications of adjacent lines).

Back in the day when I was doing commercial custom refinishing and such I was fairly good at striping since a lot of it was part of the equation when creating painted furniture finishes for beach front condos. For years afterward I was seeing pink and yellow striped moldings in my sleep. But that day was many, many moons ago.
I’m guessing that doing the pinstriping will take me three or four days. Stay tuned.


Recent Comments