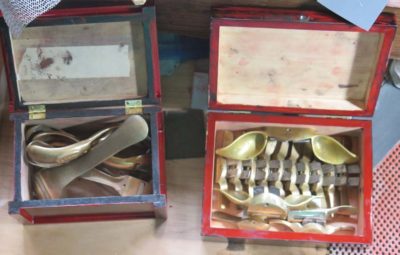
Today I wrapped up (mostly) three of the “rubbed through” boxes and have put two to work to hold some of my smaller Gragg sculpting tools.
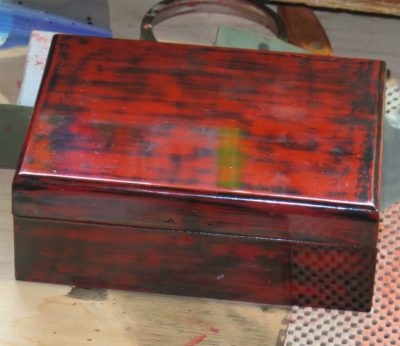
This one is black-over-red.
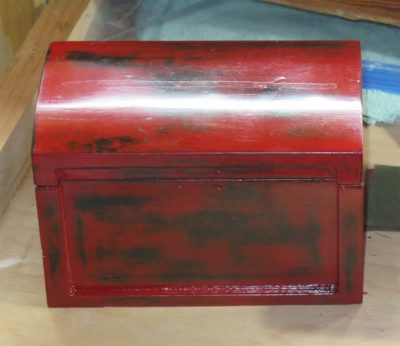
This one is red-over-black.
I did both of these with pigmented shellac with lemon shellac as the film forming component. I added Bone Black and Vermillion Red powders to taste, then three or four clear coats over the top after composing the pattern with wet sanding. Since these will get jostled at least if not outright “beat up” I have no plans to bring them to a mirror surface. I might rub them out with some Liberon steel wool and Mel’s Wax once the surfaces get really hard in a few weeks.
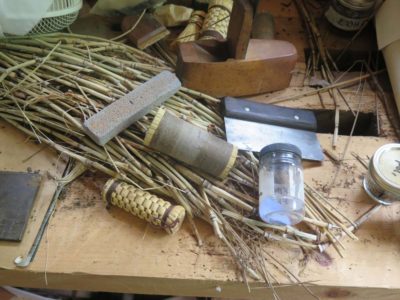
It is nice to have most of my smallest brass spokeshaves in the same box. I bought four sets of the ones offered by many tool merchants 35(?) years ago and am delighted to have them on hand. With duplicate sets I have total freedom to modify them as needed. These tiny tools are amazingly productive but it takes strong finger tips and a good “feel” for using them. Fortunately Mrs. Barn lets me massage her feet for a couple hours most evenings so my hands are up to the challenge.
Very often in the midst of a lengthy undertaking I need a brief diversion to recharge my batteries. Given my current work on building Gragg chairs and recording the process for video and the seemingly endless work on A Period Finishers Manual I’ve been finding myself sitting at the finishing bench for an hour here or there to continue my exploration of the Asian lacquerwork aesthetic by other means. The particular projects are inspired by the Accidental Woodworker’s frequent exercises building small boxes for his tools, combined with my need to keep better track of the multiple small spokeshaves and spoon-shaves I use when sculpting a Gragg chair’s edges and shape. I’ve also got my sandpaper box that has been primed for years and awaiting its final decorative surface.
I am particular taken by the lacquerwork aesthetic of the negoru finish, or “rubbed through” surfaces, almost always executed in red and black. Rather than building boxes from scratch I used some of the paulownia or pine boxes from Michael’s that I have acquired over the years as teaching projects for japanning classes. In this case I was working black-over-red, but also had some red-over-black boxes that were never finished.
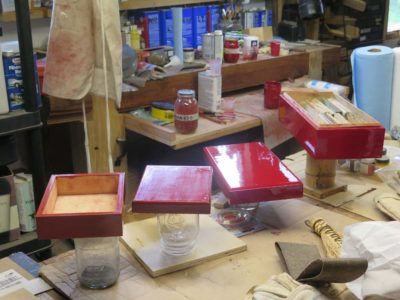
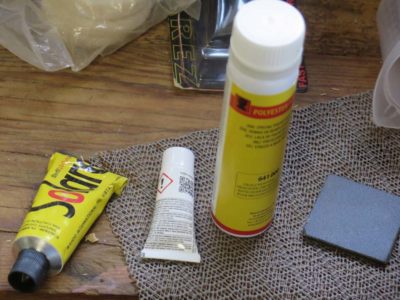
For the sandpaper box I used oil paint, for the others I used shellac. I have yet to complete a box with polyester but will soon. Some day I’ll post a blog series on these decorative options.
In my ongoing efforts to replicate Asian lacquerwork without the use of urushiol, the resinous sap from the poison sumac tree that is refined into the coating material, I have been trying a number of alternate options including epoxy, oil/resin varnish, shellac (of course!) and varieties of polyester coatings. The air flow through my studio is controllable and just about perfect for any non-spray finishing from a clean environment perspective. However, virtually all of the polyester products produce noxious fumes when the coating is reacting. Not enough to be hazardous to my health, but plenty stinky enough.
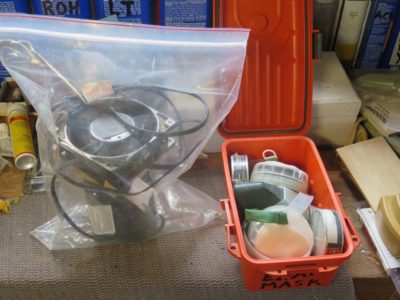
To deal with the problem I have dusted off my old favorite respirator, the 3M EZ Air that fit my head and face perfectly and is comfortable enough that I can wear it for hours. Naturally since it was such a satisfactory product it is no longer available on the market. The organic vapor cannisters are available so this will remain my “go to tool” for respiratory comfort when working on the polyesters,
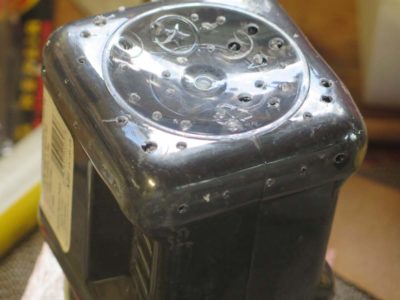
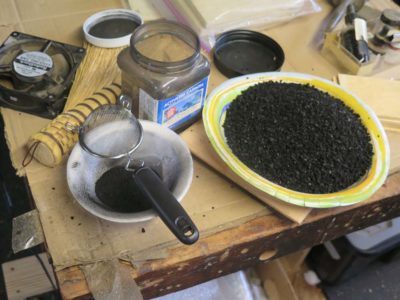
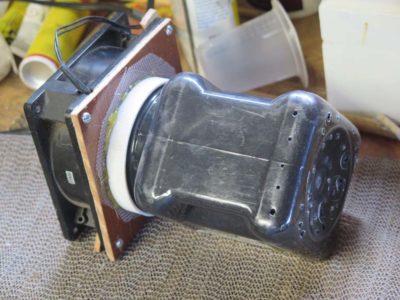
Though a satisfactory solution for ambient odors I also came up with another one for scrubbing the air inside a curing chamber. When I can, I place the newly coated object in a box along with an air scrubber I made just for those occasions. The unit starts as the jar containing activated charcoal flakes, normally used for aquarium filters.
I cut a hole in the lid and affixed a compewder fan and a screen, and drilled a series of small holes in the bottom of the PET jar.
I sifted the activated charcoal to remove any powdered charcoal dust, something I do not want blowing around inside the drying chamber with a wet coating in the immediate vicinity.
I placed the clean activated charcoal flakes back in the jar and closed up the whole system. Now I can coat the object the the polyester, flip a large cardboard box over onto it to enclose it, and turn on the scrubber. By sucking in the air gently and blowing it through the container of the activated charcoal (which adsorbs the organic molecules off-gassing from the polyester) it removes the odors and I cannot really even notice them while I am at work nearby. When the coating is cured I remove the object and the smell is negligible. I find that if I leave it all in over night there is barely any odor at all.
When the air scrubber or respirator are not in use I leave them in sealed containers to extend the working life of their filtering components, whether activated charcoal flakes or organic vapor scrubber cartridges. The fan scrubber goes into a gallon-sixed freezer bag and the respirator into a little sealed box.
With some of my major time-gobblers finished or at least with the ends in sight — the gunsmithing partner’s workbench, the cedar siding, refinishing the dining chairs, the book manuscript (still a lot to do but at least the train is moving steadily down the tracks) — I am refocusing on a small handful of interests in the shop, including my efforts to replicate Asian lacquerwork.
I am noticing that with increasing age my general allergy sensitivity is getting worse so I am not likely to try using genuine urushi, it being the refined sap of a poison sumac tree and all. It is not impossible, but unlikely given the toxicity of the emulsion. Still the performance of the final finish is such that it has been the theoretical model of “the perfect finish” for decades or even centuries. Anything that can be applied and polished to a mirror surface while being impervious to anything other than boiling nitric acid or long term UV degradation is a finish to not disregard entirely.
My allergic sensitivity is being driven home this year as we had a late, cold, wet spring (we had snow flurries three weeks ago!) so the “early pollen” and the “late pollen” are emerging back-to-back, resulting in the Mother of All Sneezefests. I’ve been breathing through jello for almost a week now with the resultant gurgling loveliness. Rather than compounding my miseries with liquid poison ivy (the same toxic allergen, urushiol, is present in poison sumac, poison ok, poison ivy, and mango skin) I am instead going to be employing a variety of alternatives to accomplish “fauxrushi” objects.
I have already written about West System 105 Epoxy and the variations of their catalysts as the basis for my fauxrushi (Popular Woodworking April 2017) and I am currently looking at three different polyester compositions as a test comparison. Polyester is reputed to be tougher and harder than epoxy but I have never used it for anything other than laying fiberglass fabric. It does have the distinct disadvantage of being much stinkier that West Epoxy but that is not an insurmountable problem.
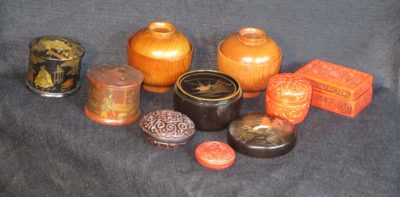
My little menagerie includes Asian lacquered pieces ranging from contemporary to probably 17th/18th C, and 19th C English japanned paper boxes (the two round pieces on the left).
I think this is my oldest piece, it is certainly the most complex. Red and black urushi are applied in alternating layers and then carved to reveal the layers. Urushi work is dominated historically by those two colors with the occasional blue piece with other colors even more scarce.
From time to time I pull out my own meager collection of genuine lacquerwork for inspiration and instruction, and delve into my library on the subject. These sources spur me on to explore this art form, and when the resin base, whether epoxy, polyester, or even urushi, is combined with silver, gold, ad pearl, the sublime can emerge under the eye and hand of a master. I am hampered by the near-complete absence of artistic talent but I nevertheless intend to stride down this path either until I lose interest (unlikely) or simply cannot physically do the work. My hands are still steady so I am hoping it will be a long journey.
This modern bowl has a molded fabric core, and remains one of the most beautiful artworks I have ever seen.
This afternoon I emailed the second of a great many sections of A Period Finisher’s Manual to my initial reviewers. I am trying to send them texts in their proper sequence even though that is not how I write them. This one was the introductory soliloquy on Surface Preparation (of wood). The surface preparation during the application of the finish will come much later.
My plan is to send another section every week or ten days, probably longer than today’s 1300 words. I know that the next one, the conclusion to Surface Preparation, is several times longer.
Many tens of thousands of words to get into the hands of the readers. I got my Eames Chair knockoff repaired so I’m good to go in massaging all these parts together.
A couple weeks ago I blogged over at Lost Art Press about the initial distribution of manuscript pieces for A Period Finisher’s Manual to my first-tier reviewers, four hearty volunteers who have pledged to stay with me to the bitter end. I assure you they will be just as tired of the project as I will be by the time it makes it into print. Thanks again Bill, Bob, Gina, and Josh for your yeoman’s work to make this esoteric topic into an engaging and informative volume.
The first broadside was the “Introduction,” a non-technical roadmap for the project. Later this week I will be sending them at least part of (maybe the whole of) the first section, “Preparing the Surface.” There is nary a drum sander or jitterbug to be found.
I look forward to their feedback. Once it gets integrated into the manuscript text, that “final” version will be winging electronically to my second tier reviewers Bill, John, Len, and Mike for any final thoughts before the whole pile lands on The Schwarz’ desk. I have only so many words in me, so periodically I fall silent here as I restock the lexiconic inventory.
The only current unexpected hurdle is that a bolt on the rocker mechanism for my Eames knockoff chair broke on Friday so I have to get that fixed pronto. It’s my writing nest in The Waxerie, where I spend part of every day massaging words.
I am delighted to report that after a few weeks of being out of stock, as of ten minutes ago I am now replenished with Model 296 polissoirs and they will begin shipping again immediately.
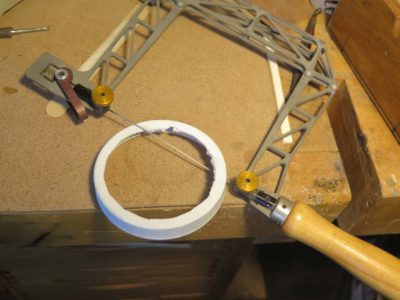
One of the true challenges for decorating the Gragg chair is that to be faithful to the original requires the commitment to execute almost 80 yards of pinstriping on curved surfaces often awkward to get to. (Several areas of striping are multiple applications of adjacent lines).
Back in the day when I was doing commercial custom refinishing and such I was fairly good at striping since a lot of it was part of the equation when creating painted furniture finishes for beach front condos. For years afterward I was seeing pink and yellow striped moldings in my sleep. But that day was many, many moons ago.
I’m guessing that doing the pinstriping will take me three or four days. Stay tuned.
Finally comes the time for priming the Gragg chairs, the foundation for the decoration to come. In my earlier Gragg exercises I used a gesso base followed by pigmented shellac, but that was before the technical analysis of the original Gragg paint was conducted. This analysis revealed his work to be almost entirely executed in oil paint. I have revised my current procedures to reflect that newer knowledge.
My scheme for the early finishing schedule is roughly as follows:
Fill the most egregious voids with putty. I made my own putty my mixing some of the oil primer with additional whiting until I got a thick paste.
After sanding off any excess putty, prime the surface with a solid coat of Zinsser shellac-based white primer.
Once that primer coat is dry, apply two coats of Brushing Putty from Fine Paints of Europe. I tinted this with a little yellow ochre.
Once these two coats are fully dried, sand the surface completely with 120 sandpaper.
Finally, apply two coats of flat white oil paint strongly tinted with dry yellow ochre pigment. Somehow I failed to get a picture of this final prep, or it is on my other camera.
Unfortunately, due to the competition between my calendar and Chris’ calendar we did not get these steps on video camera. We will have to film it on the next chair.
I was wandering around youtube the other night and stumbled cross this half-hour video we made as a bonus for my PopWood video on Historic Wood Finishing. I vaguely recall making this but did not recall it was now residing on youtube. I’m pretty sure I have not posted this video before, but if I did I’ve forgotten and you get it once again.
Enjoy (and I hope you laugh in all the right places).


Recent Comments