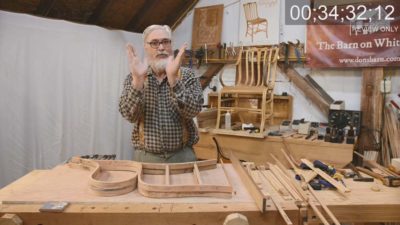
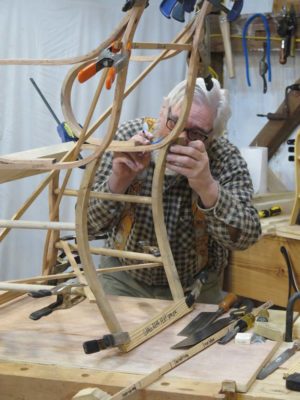
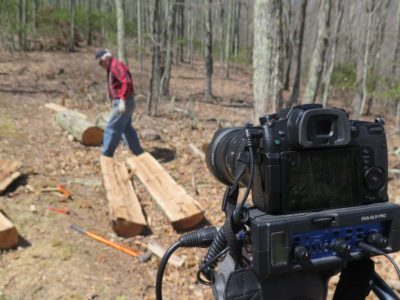
A few weeks ago Chris Swecker and I spent anther couple days documenting the ongoing construction of a pair of Gragg Chairs I am building for clients, one a renowned furniture historian in Virginia and the other a historic architectural millwork contractor in Georgia. (These clients have been most patient with the timeline of this project, which is why I have not made them pay anything until the chairs are delivered.) Neither my bank account nor the other ongoing projects I have permit any faster pace of work, and we had to take a 5-month break over the winter due to the unheated-ness of the studio space.


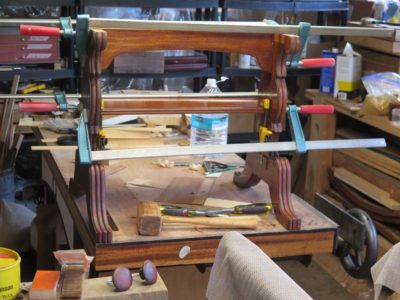
As we were working the chairs began to take shape beyond merely the jumbled pile of steam bent parts. Actually they were never really “jumbled,” but they were not truly assembled either. It was exciting for Chris to see these former tree parts become chair-ish right before the camera. Beginning with the dry assembled side elements I laid out the side rungs and chopped the mortises and cut the tenons. Then I resembled the side units with screws and glue, just as Gragg had done 200 years before.

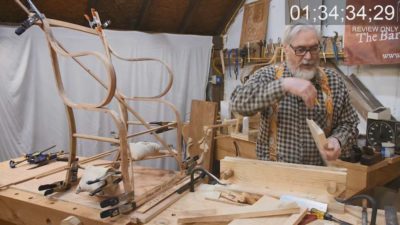
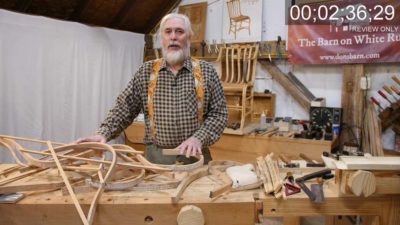
Then came perhaps the most visually appealing portion of the project to date as the two sides were connected with the lateral horizontal elements, becoming something that sorta looked like a chair. This required a bucket full of spring clamps and a few diagonal struts to keep things in the right configuration while moving forward.

By the time the two days were done we had another 7 gigabytes of video recorded. We are working so efficiently that I expect a yield of usable video to raw recording to be about 60%. In reviewing the completed materials I am thinking the finished product to be in the 10-12 hour range.
A couple weeks ago we had two excellent days of videoing for my Make A Gragg Chair video. As my pal MikeM observed, doing video slows everything down by at least three-fold.
We are now to the point of actually assembling the pile of bentwood pieces into a chair, beginning with the sides of the chair in an assembly jig (after attaching the side rungs via mortising them into the legs) and then starting to fit the cross elements.
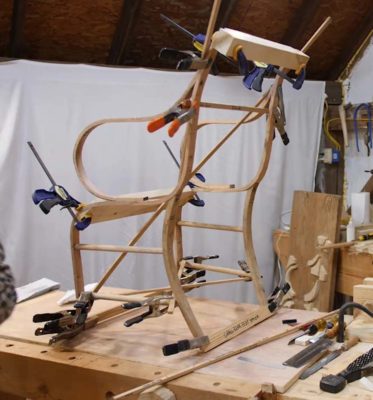
One thing is for sure, it’s pretty important to have a large number of simple spring clamps and temporary bracing to keep everything together.
This is a really exciting project for me, and my earlier projections are falling by the wayside regarding the length and detail of the final product. I’m sorta guessing this might be in the 10-12 hour range once we get all finished.

I am also getting a better sense of how to create a six-day workshop for making Gragg chairs. I just might be able to pull it off. When the video is finished I’m going to embark on a focused exercise to see if it is truly possible.
Stay tuned.
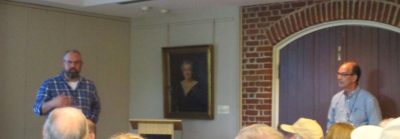
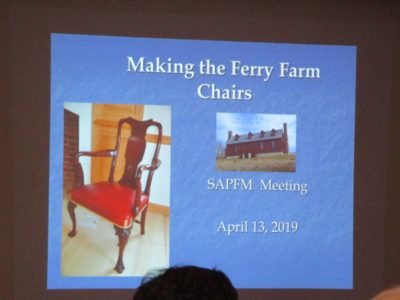
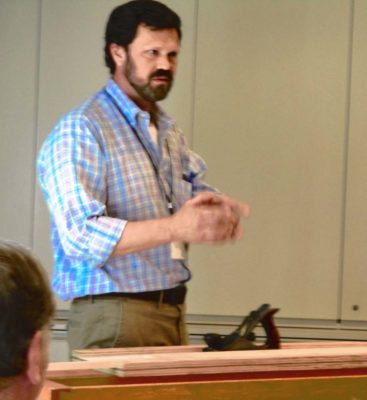
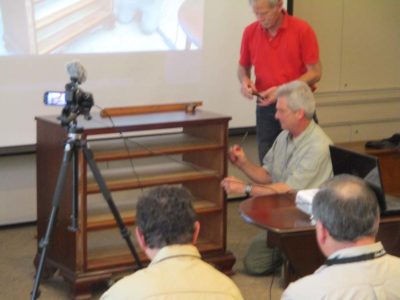
Last month I had the delightful experience of attending a superb Blue Ridge Chapter meeting for the Society of American Period Furniture Makers held in Fredericksburg, Virginia, organized by my friend Steve Dietrich and his wife Barb (if you are not yet a member of SAPFM, why not?).
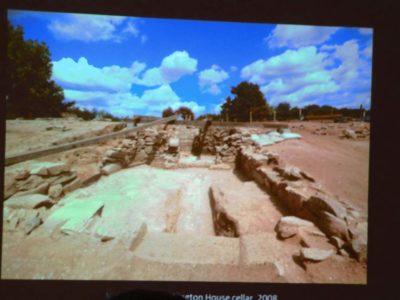

The topic was the newly reconstructed childhood home of GeoWashington, Ferry Farm, just outside of Fredericksburg, under the auspices of The George Washington Foundation. Or, to put it more precisely, the topic was and the presentations were about the inspired program of replicating the furniture for the house. Since the written inventories were all that documented the house furnishings the Foundation commissioned dozens of pieces “of a type” that would have been probable to the household, pieces from Williamsburg, Fredericksburg, Richmond, etc. Several of the woodworkers who created the replicas were on-hand to describe and demonstrate their processes of making, then were later in attendance as we toured the home. Literally every piece of furniture in the house was made in the style and manner of what would have been found there in 1750. I will post about the house and furnishes themselves soon.
I apologize for the pictures, I was just taking them from my seat in the hall.
Among the presenters and presentations were Calvin and Ben Hobbs discussing the dozen dining chairs they made, a project with the logistical complications of being fabricated in North Carolina but carved in Kansas.


Kaare Loftheim presented on behalf of Brian Weldy about the diminutive tea table made at the Williamsburg Anthony Hay cabinet shop.
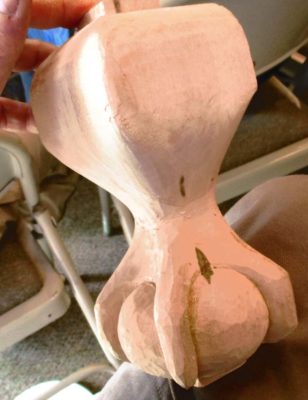
Richmond furniture maker Reid Beverly discussed the trials of fabricating a complex upright secretaire with boodles of compartments made from ultra thin SYP stock, and the frustrations of carving southern yellow pine. He passed around a model in tulip poplar of the feet that were carved for the cabinet.
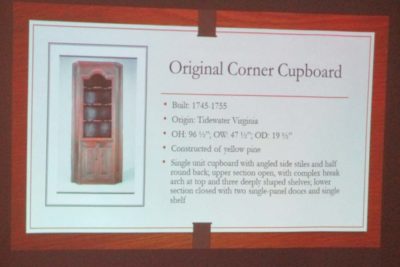
Another Williamsburg piece was this built-in corner cabinet from the joiner’s shop.
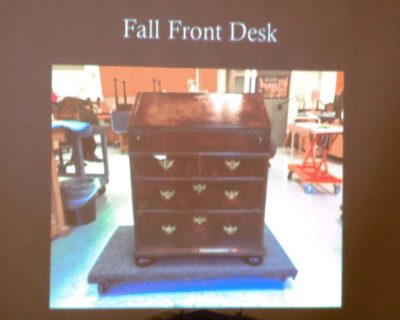
It was great to see some younger makers there as well. One of them made this desk,


and another this drop leaf table. Their work was superb.
Jeff Hedley and Steve Hamilton assembled their chest of drawers right in front of our eyes.

Wrapping up the morning(!) session Steve Dietrich covered the seven pieces he built, including several rope beds brightly painted.
Congratulations to The George Washington Foundation for such an inspired strategy (and the resources to pull it off), to the makers of the faithful representations of furniture making in the era, and Steve and Barb for a terrific weekend.
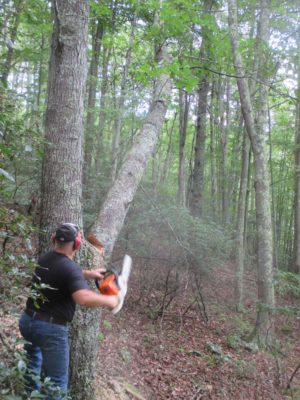
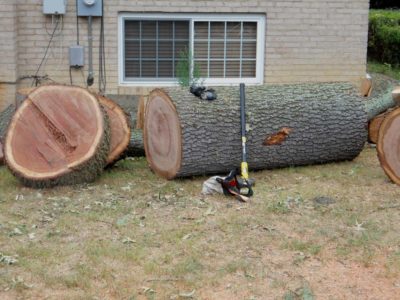
After struggling with my previous attempt to harvest oak from my own mountain, disappointed by the fact that even those large trees, or at least sections of their trunks, yielded so little usable material, I had for the moment hope for two long, straight sections that I had not yet processed. The tree from whence these bolts came had grown tall and straight in a very dense cluster of trees. Those facts led me to my optimism. So recently I headed up the hill with my implements of destruction in-hand.
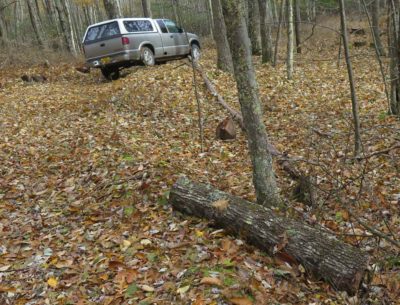

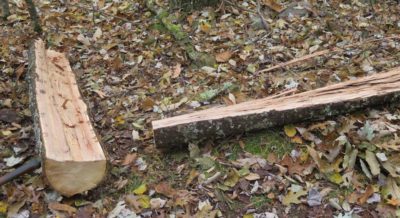
Cutting up the long straight trunk produced the first two segments to be split.
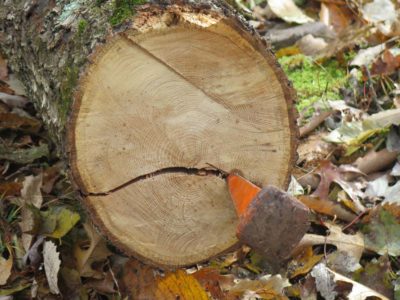
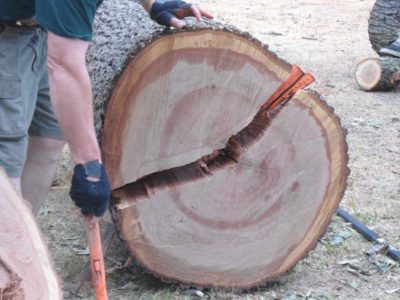
I studied the first of them to decide where to place the first wedge. I drove it in and immediately my heart sank when the split wandered off toward California.

With a deep breath and some impolite utterings under my breath I tried to salvage the situation by putting the second wedge in a place to continue or re-establish the split line I wanted in the first place.
It worked.

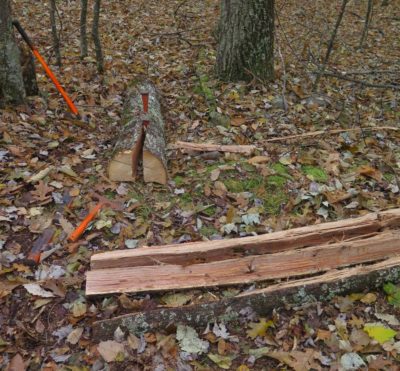
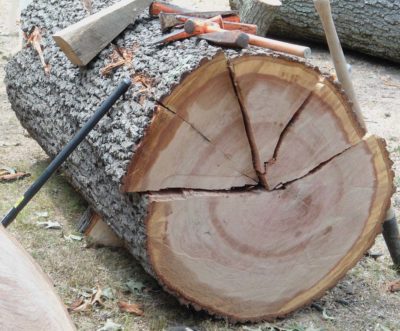
Carefully working down that line with more wedges, a nice split was established.
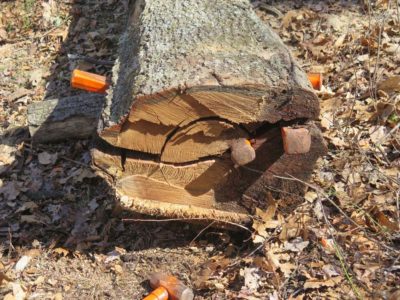
My only concern at this point was the interlocking that emerged but since it was restricted almost completely to only the pith it was no cause for hysteria. A few whacks with the roofer’s hatchet, my “go to” tool for this task, and the problem was resolved as I hoped. It was only a little loss to a region of the trunk I didn’t want in the first place.
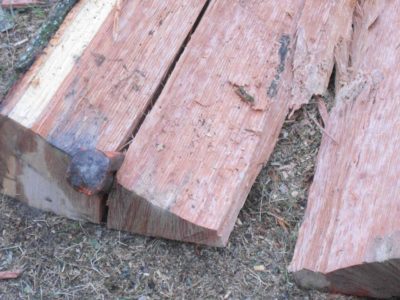
Soon enough I had two halves of a trunk, then four quarters, and in the end, eight wedges.
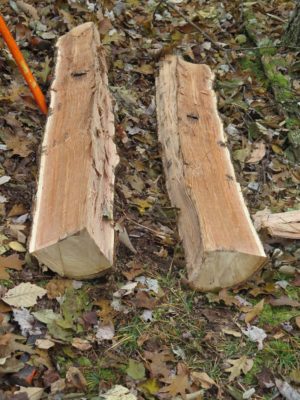
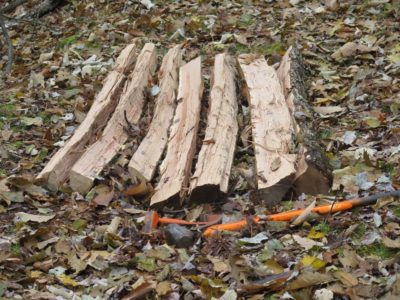
I was pleased with the minimal amount of overall interlocking and wind.
My friends, there be some chairs.
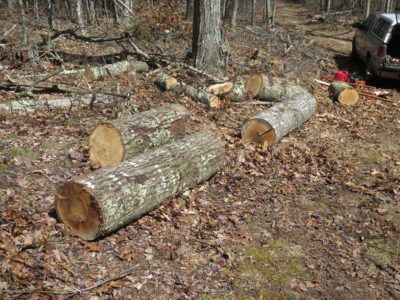
In concert with both ongoing firewood harvesting and shooting a video Building A Gragg Chair I replicated some of the work undertaken at my neighbor Bob’s house five years earlier, this time with oaks felled up the mountain from the barn. There were three large trunks that had nice lower sections and and one smaller but straighter one about fifty yards away, set-aside for the harvesting efforts. Interestingly the larger trees, grown in a dense forest setting, were quite problematic with lots of wind and interlocked grain. My yield from them was about a quarter of what I got from Bob’s “urban” trees. I have no explanation for this phenomenon.

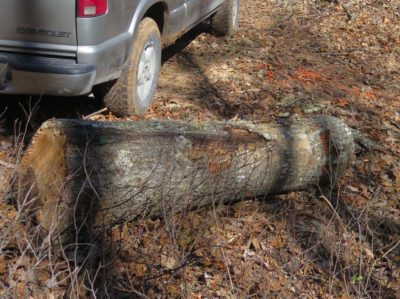
The largest of these trunks was also the largest disappointment. While seemingly sound and straight, the first split caused me to go, “Hmmm.”
As the splitting proceeded the disaster was readily apparent as the entire trunk segmented into an interlocked mass of uselessness, and ate all of my wedges and guts to just get torn apart. The pieces were cut into short bolts for the firewood splitter.
The two smaller of these three trunk sections were better, but still not great. The wood was straighter and more sound, but with more interlocked grain than I expected.
The smaller, straighter trunk was, I hoped, a somewhat different story. It had grown in very tight setting, much, much more crowded than the larger trees and the grain showed it. I was hoping it was more promising than the first trunks, which mostly wound up as firewood. More about that later.

With the trunks on the ground, sectioned and ready for me, I came after supper and lit into them. They were heavy enough that even with logging tools they were impossible to handle so I first split them along a horizontal plane, then halved the top half of that, then halved that again.


With some help from the appropriate tools I was able to extract the long wedges, which were processed further with splitting in half repeatedly.

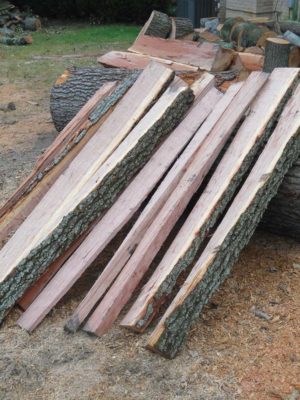
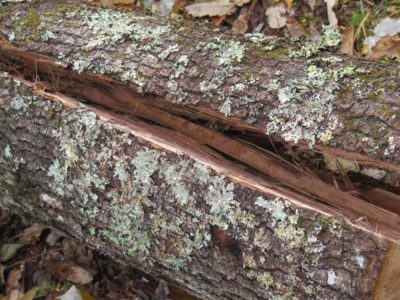
Eventually I wound up using a froe for some riving on some of the pieces, and yielded a great many pieces. Much to my astonishment I discovered zero nails, bolts, or fencing. Quite a surprise for an old tree in a domestic setting.

In the end I wound up with four truckloads of splits, and piled them cross-wise a layer at a time, up off the ground. The final pile was six feet by six feet by four feet high. After a year in the open I sorted them and moved the best of them inside to the first floor of the barn where they remain until I need them. The rest were also useful, they kept me warm.
Much like the recently concluded account of replicating the early 19th Century legislator’s writing desk, over the next few months I will run a series of posts recounting the c.1810 Gragg “Elastic” chairs I am currently replicating in the shop. Though I have posted on Gragg chairs several times over the life of this blog I am hoping this series will renew your interest in them.
The story for these chairs (I am building two commissioned by clients and another for myself) goes back to a couple years after the completion of the original replica I finished in 2011. I published the proceedings of the project in that year’s American Period Furniture, the flagship publication from the Society of American Period Furniture Makers, you can read that article here. I am still pleased with that article but en toto these posts should be dramatically more complete in both my descriptions of work, with the continued refinement of technique and process, and my reflections on the challenges of making these chairs.
While reverse-engineering Gragg’s methods I learned a lot about not only how he worked, a combination of sinuous elegance and brute force, but also the kind of wood that would be best suited for making these iconic chairs. Like Gragg I confirmed the material that suited the project best was something like air dried red oak from very large trees (he used red oak, white oak, ash, and IIRC hickory). I remain so fascinated by the form that I continue exploring other routes to the same end point and will comment on those paths as appropriate.
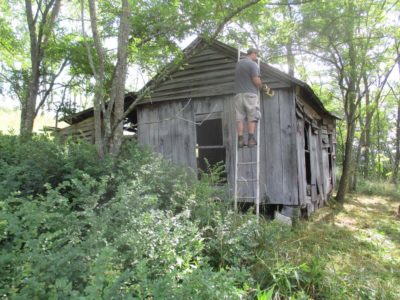
A bit over a year after finishing my first full-blown Gragg my neighbor Bob told me he was having several over-mature oak trees removed from his yard. Though still mostly-healthy their decline was underway and it was only a matter of time before they became an imminent threat to his house. When the lumberjacks arrived I asked if the boles could be sectioned into five or six foot pieces and left intact on the ground for me to harvest. I had to be elsewhere for much of the day so I did not get to watch them bring these behemoths down.
When I returned home later that day I inspected the bolts with anticipation, and spoke with Bob (and his teen-aged grandchildren who were lounging around) that I would be arriving after dinner to begin the harvesting. I’m not suggesting the yutes did not believe me when I showed up with a sledge and a bag of steel wedges and wooden gloats and told them I would be turning these 5,000 pound hunks into manageable pieces from which I would eventually make chairs, but truth be told the looks on their faces indicated they did not believe me. Over the next couple of days their eyes bugged wide more than once.
The light at the end of the tunnel was glowing brighter with every day.
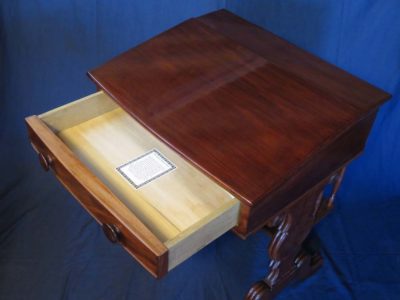
I created an archival label for the desk, describing its antecedent heritage, the making process, the patrons, and me as the maker. I glued it into the drawer and with that the creation of the desk was complete.
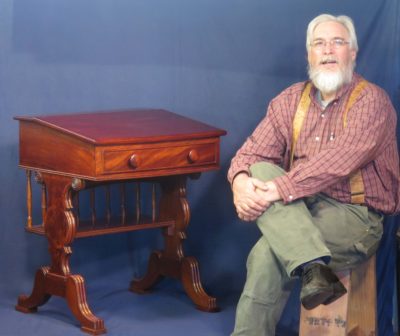
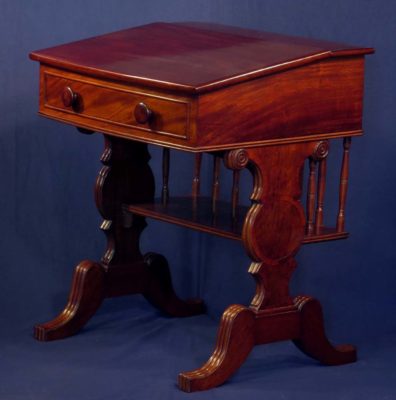
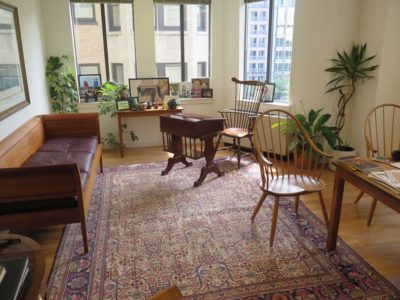
After that the only tasks were the glamour (?) photography, including the obligatory selfie, and delivering it to its new home.
All it took was almost two years from the initial client inquiry, my suffering and recovering from a broken hip the first year and a broken arm the second, a pile of prototyping, and a ton of hand-work as the project mandated.
I was not displeased with the ultimate outcome.
Throughout the project and its aftermath I assiduously acquired enough vintage select genuine mahogany, stored mostly underneath my planing beam, to make another half-dozen of the desks. All I need now are the clients to make it happen. If you know anyone who wants one, let me (or them) know.
One of the challenges of “downsizing” is finding furniture to hold your stuff and fit in the new, smaller space. This was particularly nettlesome for us as we moved from a 16′ x 24′ bedroom to one that was half that size. For several years we had been searching antique shops for a small cabinet to hold some of Mrs. Barn’s clothing (fortunately we are blessed with two large closets here) but never could find something to fit nicely. There ws only one place in our little bedroom for such a cabinet, and the size was very specifically determined by that space.
Instead she did something that had not occurred in more than three decades of connubial bliss — she asked me to make a piece of furniture for her. Not just a piece of furniture but one made from vintage chestnut, a wood she likes very much.
So I did.

My source of vintage chestnut was unsurprisingly the old shack that my brother, nephew and I tore down three summers ago, a grand week of camaraderie whose ending punctuation was me laying in the hospital with a broken hip. The shack had been a living quarters, probably in the 1930s according to the newspapers pasted to the wall. The entire roof structure was chestnut, and the walls and floors were white oak. The haul was pretty impressive.
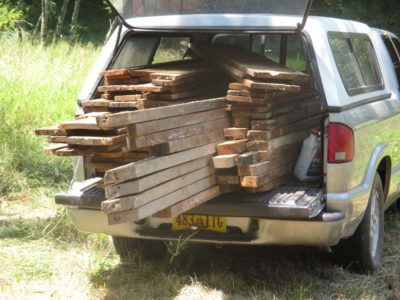

In the intervening time the wood was stacked nicely in the lower log barn awaiting my attentions.
Up next – prepping the stock and joinery
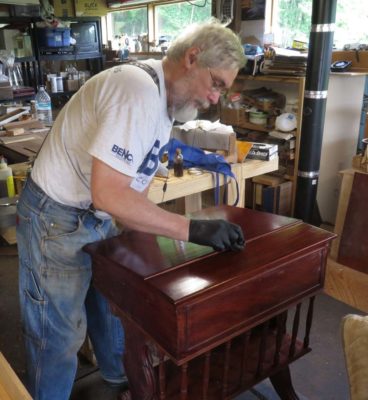
Once the finishing process was essentially complete it was time to rub out the surfaces and glue-up the desk. Since my goal for the surface was to present an unfilled, lightly-worn, ancient-but-well-cared-for appearance and character I rubbed down all the surfaces to accomplish those ends.
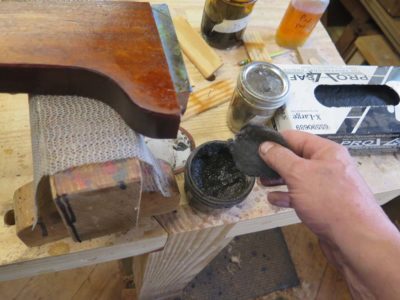
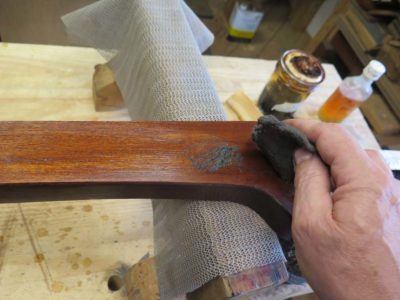
My typical procedure for this undertaking is to abrade the surface with ultra-fine steel wool saturated with paste wax or conversely a 4F pumice/paste wax blend, incorporating or succeeded by the inclusion of tripoli/rottenstone to leave subtle traces of “ancient schmutz” in the crevices.

In this instance I mixed up a paste wax/rottenstone blend to use with the steel wool, and proceeded to rub every exposed surface until the outcome arrived at the destination I was aiming for.


The “glow” and subtle grain of the resultant surface was so glorious I had to just look at it for a while.
This comparison of a rubbed-out (L) vs. raw surface (R) is demonstrative of the transformation.

This is the address I was looking for.

With the finishing mostly done I glued everything together with hide glue, and suddenly there was a complete piece of furniture staring me straight in the eye. There were only a couple of final steps to take, applying another round of pad finishing to the writing surface before rubbing that out, and buffing off the rottenstone-laced dried paste wax.


Recent Comments