When we acquired Shangri-La in 2001 I was especially delighted that there were standing outbuildings suitable for a variety of purposes. The largest of these was a small-ish chestnut log barn that had previously housed livestock. For our use as a storage facility the original tiny doorway was a hurdle, it being only about 5-feet high. In short order I sawed the next higher log section to open the entrance to one that was not an undue burden to use, even though it was still not large enough to pass through without ducking.
After opening the doorway I had a piece of chestnut log about 3-1/2 feet long by a foot wide and perhaps eight inches thick. It had been notched with edge tools when originally built so that log scrap had a flat side from the git-go. Some time around then I saw The Woodwright’s Shop with guest chairmaker Don Weber who described what he called “a bodger’s shave horse.” John Alexander’s 1978 Make A Chair From A Tree, was already a long-time part of my personal library, and his infectious evangelism for primitive woodworking inspired me even though my own work was not centered in this direction. Those two paths intersected with the chestnut log chunk and it wasn’t very long before I took that and a bunch of other pieces from the scrap box and made a short length three-legged shaving horse. I used it for many years as a traveling demonstration tool.

During the ongoing video project to document making a Gragg Chair I was vexed at being unable to locate and use this small shaving horse and instead had to use my gigantic one (6′ long), another almost-castoff I bought cheap at auction since the pivot rod housing was busted. I fixed it in an hour. It is a fine tool but not my favorite.

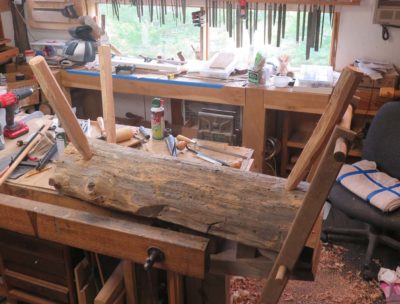
Recently I was rooting around the basement of the barn and came across the remains of the scrap chestnut horse. I do not have any memory of it making the trip from Maryland eight years ago, so I wonder of someone else tossed it into the big rental truck. I say “tossed” because all three legs were missing, and two of them had broken off inside the tapered mortises.

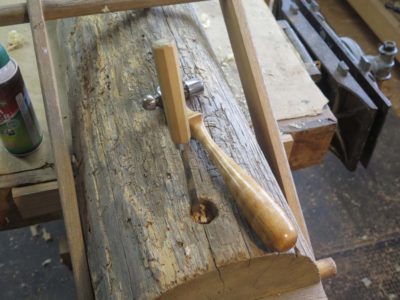
I cleaned out the detritus in the mortises then re-reamed the holes with this sweet tapered spiral reamer I got at a tool flea market for $12. It is beefy, precision-made, and still sharper than all get out. Two or three complete rotations is all it took to get the mortises perfect for new leg tenons.
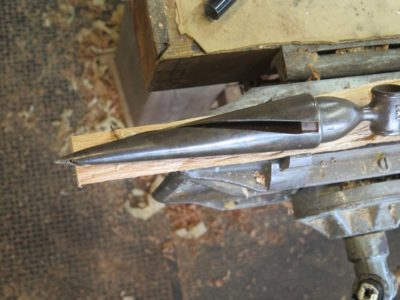
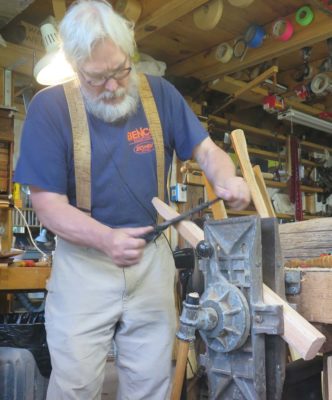
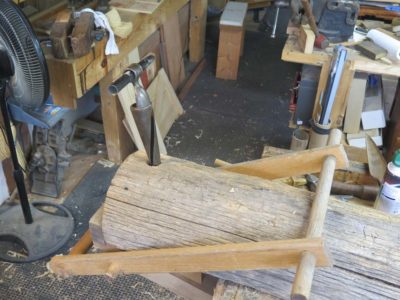
Using the reamer as the pattern I shaved three new legs from waste stock up in the Gragg workshop/video studio up in the fourth floor attic.
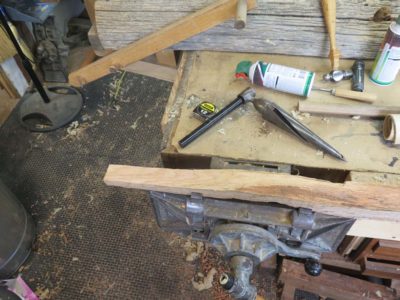
In about an hour of total time I had the new legs cut, tapered, installed and trimmed to length. I flipped it over and it was ready to be put to work.
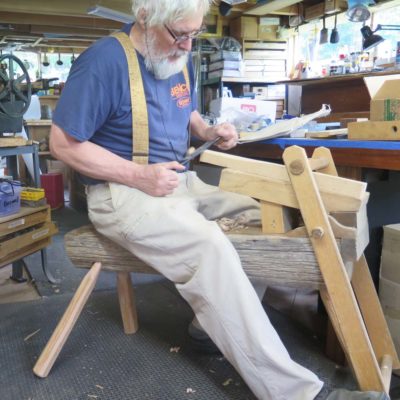
It is good sometimes to have scraps just laying around.

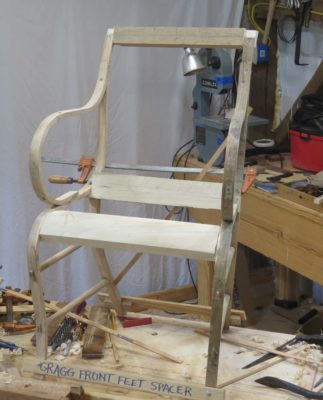
The front seat rail is the easiest so I start there. This is around Hour 9-1/2.
I spent the entirety of hours 8-16 roughing and fitting the cross elements of the chair; the front and rear seat rails and the crest rail. The front seat rail and crest rail are fairly straightforward as their “joinery” is simply shaped lap joints that need very little “fitting other than getting the dimensions correct and the joint faces aligned. Admittedly each presents its own minor challenge, in the case of the front seat rail the lap joint is curved at the frond frame bend, while the crest rail requires shaping in two axes but I accomplished that easy enough with my mni bandsaw. Sawing entirely by hand would have taken another 20 minutes or so.
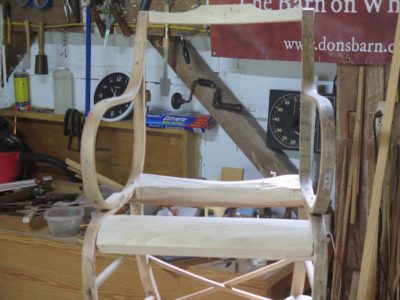
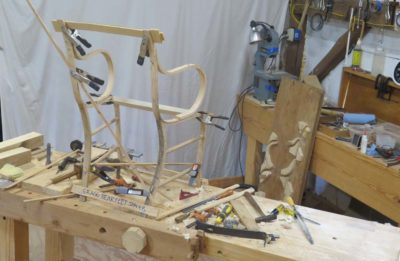
The chair sometime around Hour 13.
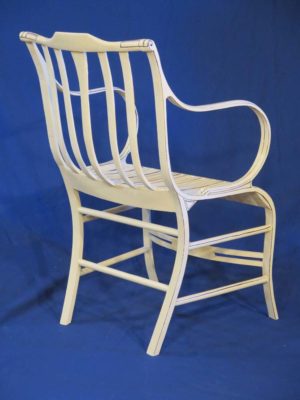
Of this second eight-hour set I spent more than half of it making and fitting the rear seat sail, simultaneously the most important structural element of the chair and by far the most difficult to fabricate as its ends are beveled on two axes and the compound curve must be “just right” to fit the five single element back-slat-and-seat-bottom pieces.
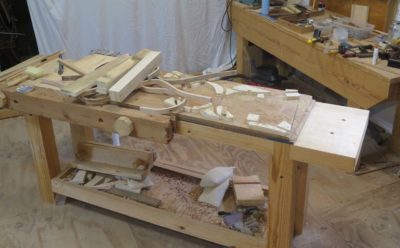
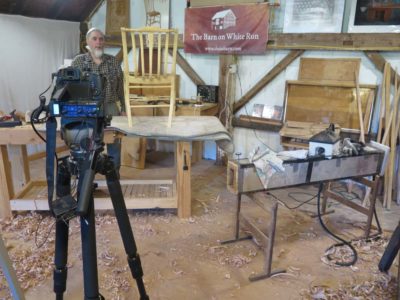
@ Hour 16.
As the project proceeds I am growing cautiously optimistic that I can get a chair constructed in 40 hours. Not finished by any means as the final shaping, sculpting, and painting takes another 40 – 60 hours at least, but fashioned and assembled. If I can get to the 40-hour mark and have a completed chair sitting in front of my I will offer this as a six-day workshop next summer. I’ve already had two people reserve spots should it occur, and since there would only be four students for this event it just might happen. The cost would reflect the fact that I would have weeks of preparation for it, but I am enthused nevertheless.
PS – I was asked about my choice of adhesive for this project, and yes I am using PVA purely for convenience. When I build chairs for real I generally rely on hot animal hide glue. Cold hide glue just takes too long to set up for me to proceed at the pace I need for this exercise. In fact, given the temps in the barn attic at this time of year, hot hide glue would present a bit of the same problem since it is so hot up there as you might expect from the heat radiating down from the almost 3000 s.f. of asphalt panel roofing on a bright sunny day.
PPS – The time lapse video is working wonderfully thus far, and my projection of the completed video at a bit more than one hour’s total length seems to be about right. I have to set aside some time to learn how to post to youtube.
As I embark on the Gragg Chair Challenge I thought I would provide some background rationale for the undertaking.
I’ve never built a chair straight through from start to finish so my original thought was to do just that. I figured if I could get one assembled in five days, then I could with some confidence offer a six-day workshop in making Gragg chairs at the barn.
At issue in part was the starting point. Frankly there is absolutely no way a six day course could have any degree of success and satisfaction if the harvesting, processing and steam bending of the chair components was part of that syllabus. Given that, I decided to see what could be done if the starting point was a full compliment of all the chair parts including the steam bent pieces. Providing this complete set to each student would be a substantial undertaking but I am willing to go down this path provided my success this week.
That is not to say that the harvesting, processing and bending of the chair elements would not be included in the syllabus, just differently than a strictly linear content. If the class happens I will build into the schedule ~two-hour blocks for one-on-one time going through that entire process with each student so they will have the sense of how I got them to the starting point. What they will not have to endure is the two or three weeks it will take me to get them there.
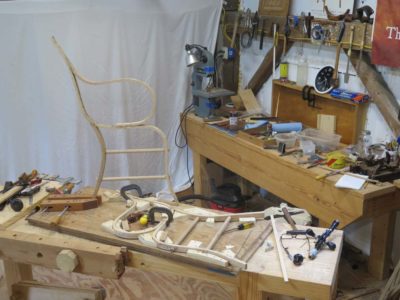
Like them, in this exercise I started with a pile of parts sitting on a workbench. As I proceed I am noting the tool list and also recording the event with my friend Kevin’s GoPro camera in time lapse mode. At this point I am guessing the finished time lapse video will be about an hour long.
The only hitch in my plan thus far was the realization that I will not be able to set aside 40 consecutive work hours for building the chair. Not to be daunted I will simply keep close track of my bench time and note the intervals so I can gauge the progress.
For the first eight hours, a/k/a Day 1, I fitted and assembled the steam bent parts and rungs into two identical side units. Fitting the steam bent parts together is straightforward and pretty quick as everything is simple or beveled butt joints, and at this point, just screwed together in a fitted assembly template (each student would have one). I would expect this process to be complete by lunch during a class.
The first slow-down in the pace is fabricating and joining the side rungs into this framework. I make the rungs first, cutting them to length and cutting the tenons on both ends.
The unit was disassembled and the mortises are chopped though the legs, a fairly quick task as the legs are relatively thin and the mortises only 1/4″ wide. When all the pieces for a side unit fit together it was re-assembled in its entirety then glued and screwed together. As soon as a side unit is complete I can pry it out of the assembly template and lay it flat for the glue (PVA) to set a little.
Once I had the two completed side units in hand I began to fix them in their correct relationship to each other, adjusting the splay angles and using spring clamps and spacing templates to get everything just-so. This takes a fair bit of time to get everything right and can be a vexing task as we are dealing with a lot of parts with no precise joinery to help us out. But getting this right is critical for fabricating and fitting the cross rails, which is what comes next.
I generally start with the front seat rail, mostly because I have direct access to that area while the chair is in its upright mode. I notched and placed it where it belonged, held overnight by a pair of spring clamps.
Thus endeth Day 1.
It’s been many moons since Chris and I were able to schedule some time together in the video studio as he has been overwhelmingly busy with a new full-time job, a new old house that needed a lot of work, and a new baby that was born last month in the back seat of the car while on the way to the birthing center. Plus, we’ve all been under house arrest for over three months so there is that disruption. At least my travel schedule has been light; eleven of my eleven teaching/lecturing commitments for the year were cancelled.

But we are back to planning some video next month, and in the mean time I am trying to wrap up chair #2 to get it delivered to a phenomenally patient client. In order to capture the final piece of the video we need I will actually start another chair and get it to that point of the filming. And, I have penciled in the week after next for my pedal-to-the-medal exercise in building a chair in five days to see if I can schedule a workshop on that project for next year. If that works out and the pandemic has run its course I might offer a Gragg Chair and a ripple molding machine workshop for next summer.
Stay tuned.
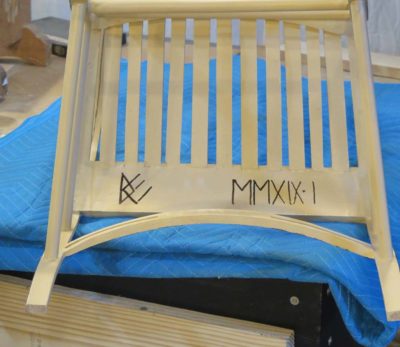
With some degree of anti-climax the pinstriping was touched-up and the final coats of satin oil varnish applied, and all of a sudden after eighteen months of intermittent labor the replica Gragg Fully Elastic Chair number MMXIX-I was finished.
It went with me to Georgia as I traveled to FORP III, and on Wednesday delivered it to the new owner. He graciously allowed me to display it during our evening open house, and everyone who wanted was able to sit in it.
The moment of my lodging hostess giving it a test sit was captured here, being watched by FORP student Andrew and his lovely wife Katie.
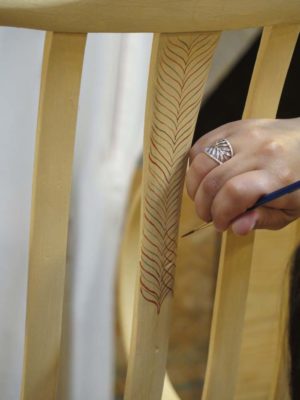
One of the true challenges for decorating the Gragg chair is that to be faithful to the original requires the commitment to execute almost 80 yards of pinstriping on curved surfaces often awkward to get to. (Several areas of striping are multiple applications of adjacent lines).

Back in the day when I was doing commercial custom refinishing and such I was fairly good at striping since a lot of it was part of the equation when creating painted furniture finishes for beach front condos. For years afterward I was seeing pink and yellow striped moldings in my sleep. But that day was many, many moons ago.
I’m guessing that doing the pinstriping will take me three or four days. Stay tuned.

After months of anticipation and labors the time had come for my friend and protégé Daniela to come and paint the peacock feather(s) on the chairs I was constructing for clients and for the documentary video we were shooting. She had painted the peacock feathers for me previously and was able and willing to pitch in again.
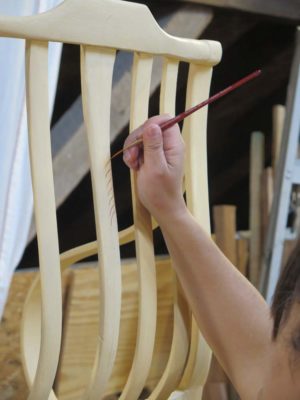


We had only a very narrow window of time to work with as it was the weekend of the county fair, which is a VERY big deal in these parts; our county of 2100 people can see crowds twice that for the tractor and truck pulls. Videographer Chris needed to be at the fair on duty for his day job by 1PM, so Daniela and I set up the night before and were on duty by 8AM on the day of the filming. Actually she painted a full-scale feather on the back of the chair as a warm-up exercise during the set-up evening (I painted over it subsequently).
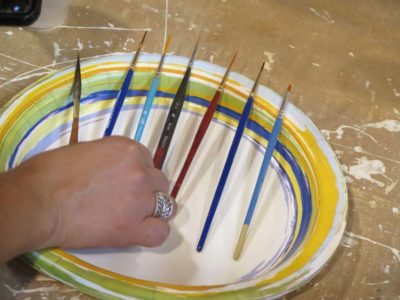

It was almost intoxicating watching her slowly build the design with the fine tools, confident eye and sure hands of a trained decorative painter and conservator.

Fortunately the weather was wonderful so Daniela’s husband and children put in a full day of revelry at the fair while we were hard at work the following day with the cameras running. Actually Daniela was hard at work, I was just watching her create magic.
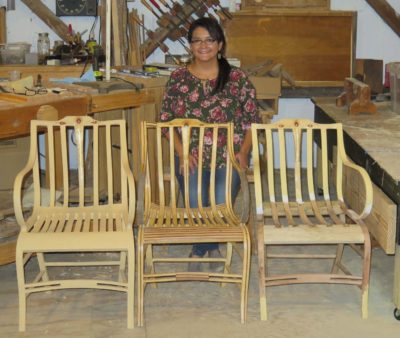
And there you have the lovely chairs and the even more lovely lady who helped create them. She is excited, as am I, to reconnect for the next round of chairs as I intend to include them in my agenda for the foreseeable future. Daniela, being Daniela, refused my efforts to pay her for these labors but I did persuade her to take about $500 worth of 23k gold leaf home with her.
Daniela’s creative genius was all captured on camera and microphone (I was interviewing her almost the entire time she was working) and will be included in the completed video, which at this point is looking likely to be longer than Roots.

With the sanding putty smoothed I concocted the top coat of paint and applied three coats of it. The base for this paint was 2 parts Zinsser oil-based primer and one part gloss Pratt and Lambert 38 varnish, tinted with yellow ochre powder pigments to match the color I wanted. The remaining historic Gragg chairs have a range of base coloration somewhere in the same zip code, and it is pretty much the chromatic neighborhood where my chairs will reside as long as I make them.
The combination of flat primer and gloss varnish yielded a nice satin surface, smooth enough for further work but with just enough tooth to hold the pinstriping and peacock feather decoration yet to come.
Stay tuned.
Finally comes the time for priming the Gragg chairs, the foundation for the decoration to come. In my earlier Gragg exercises I used a gesso base followed by pigmented shellac, but that was before the technical analysis of the original Gragg paint was conducted. This analysis revealed his work to be almost entirely executed in oil paint. I have revised my current procedures to reflect that newer knowledge.
My scheme for the early finishing schedule is roughly as follows:

Fill the most egregious voids with putty. I made my own putty my mixing some of the oil primer with additional whiting until I got a thick paste.

After sanding off any excess putty, prime the surface with a solid coat of Zinsser shellac-based white primer.

Once that primer coat is dry, apply two coats of Brushing Putty from Fine Paints of Europe. I tinted this with a little yellow ochre.

Once these two coats are fully dried, sand the surface completely with 120 sandpaper.
Finally, apply two coats of flat white oil paint strongly tinted with dry yellow ochre pigment. Somehow I failed to get a picture of this final prep, or it is on my other camera.
Unfortunately, due to the competition between my calendar and Chris’ calendar we did not get these steps on video camera. We will have to film it on the next chair.
Now that the construction of the first Gragg chair is finished and the second one close behind, I got to thinking again, “Could I offer a workshop in building one of these?” Since I have never built one start-to-finish uninterrupted I simply do not know. Up to this point when working on these chairs I was constrained by the realities of video recording as I had to make sure my work was presented to the camera and my running commentary was comprehensible to a viewer. So, how quickly could I work without consideration of the camera nor pretending to be a friendly soliloquist?
Some time over the next couple months I am likely to find out as I undertake the making of one while “on the clock,” talking only to myself with an endless stream of criticism.
I believe that the only way to get one built in six days would be for students to start with all the necessary parts and with complete set of jigs. That is where I shall begin on some upcoming Monday morning. Then, with a time lapse camera running, I will see if I can get one constructed in five days. If I can, I would think a student could do it in six.
The workshop could not begin with a tree, as I do with the chairs I’m building, and not even with the raw riven material. Nor could it begin with steam bending all the parts, although that would be covered and demonstrated one-on-one with each student in a staggered schedule. The raw stock takes too much time to prepare for this context and the bent pieces need too much time settling down ex poste for this to be a realistic starting point so I would by necessity have all the stock prep and bending done in advance. However if it goes much faster than I am estimating I could enfold some of that by-passed content into a real syllabus.
I’m thinking my exercise will take place in late November or early December of this year. Wish me luck. If I do get the chair built in five days, working 9-6 with a lunch break, I will feel more confident in offering a six-day workshop in autumn 2020 for four students to come and build their own.
Wish me luck. I will be providing a daily update on the progress as the challenge unfolds.

Recent Comments