Since my father-in-law died two days after my mom’s memorial service in January, we have been up to our eyeballs in alligators working to settle his estate and clean out his house. As Mrs. Barn and I noted last night, even after almost four months it is still a shock to not be making a phone call to him every evening at 7:30.
Fortunately my sister-in-law is the executor and point of contact for all the estate stuff, but we have been actively involved in the house-cleaning-out process, spending almost a month in total on the ground and getting dirty. It is a humungous task as my father-in-law was a child of the Depression who lived in the same house for sixty years in a SoCal suburb. So, there’s lots of stuff.
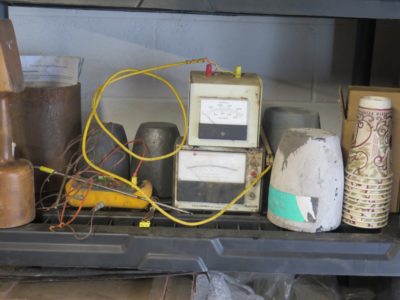
Much of my time over a couple of recent weeks has been to clean out the garage, which had a tunnel for the car but I called the rest the Wall of Voodoo. It was exhausting work as there were literally tons of junk to move out and stack for the disposal crew to remove, and to also sort through the Wall of Voodoo to separate the treasure from the trash. In addition to the hundreds of used spark plugs, the dozens of carburetors and alternators, there were tools. Lots of tools. Mounds of tools. He was a mechanical savant and a mechanical engineer, so the inventory of those implements was huge. Among the treasure were a few things that I was able to ship home to the barn. Here are a few of them.
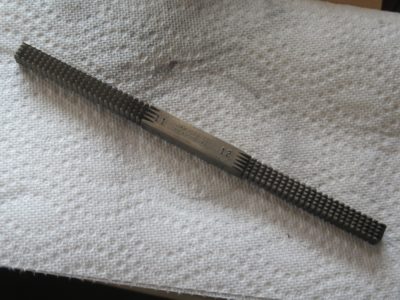
A tool I have always wanted was a square broach style thread file. Now I have one.
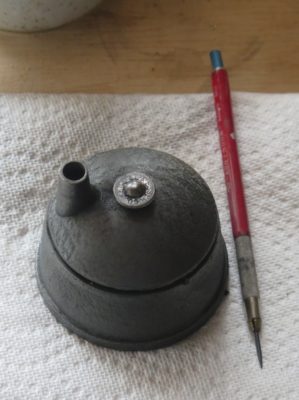
I’m so old that when I took drafting classes we had to sharpen our own wooden pencils with a knife and sandpaper. It was in the “advanced” classes where the students were using retracting-lead pencils with precision sharpeners that could put a needle sharp tip on the lead. Dick probably had this from when he went to engineering school back in the 50s. Since I have saved or acquired a half dozen of these pencils, I rejoiced at finding this sharpener in a box of paperwork.
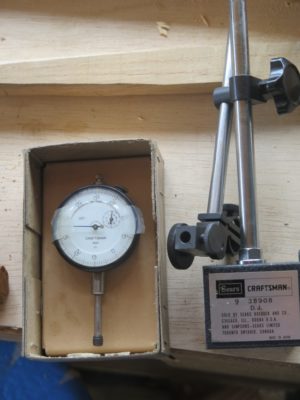
This is the year for bringing all my metalworking capacity on line, including pair of machinists’ lathes and a horizontal milling machine. To tune up these machines an indicator gauge in a requirement. Now I have another, so that each machine can have one permanently.
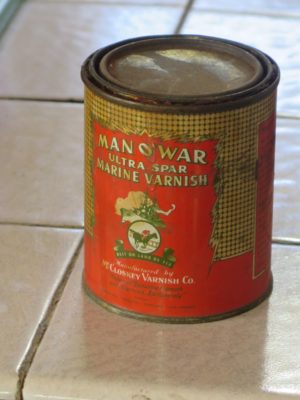
Though I did not bring this home, I was delighted to find this can of an old, revered varnish. The contents were still in perfect condition. I left this at the house in SoCal but may try to figure out how to get it home to my menagerie here.
And, there are still more treasures, some en route from West to East. I’ll report on them anon.
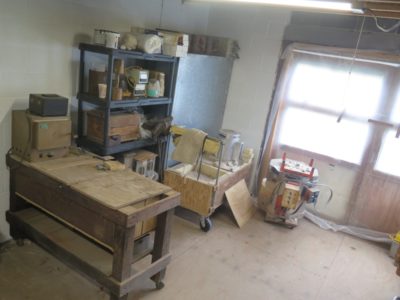
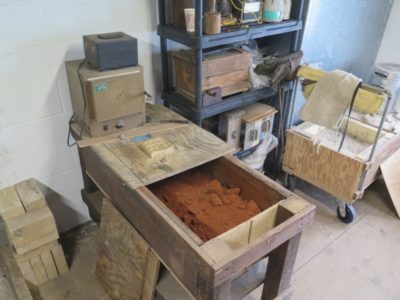
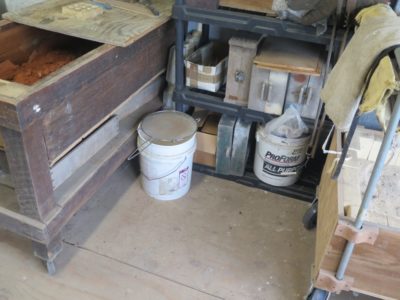
Since escaping Mordor and relocating to the holler at the end of the road, most of my metal casting set-up has been piled in the corner, patiently awaiting my ministrations to bring it all back on board. That status changed last week when I set aside a day to tidy up that section of the ground floor adjacent to the wood/coal stove, and unpacked all the foundry accoutrements and set it all up. It was really satisfying to get everything out and get reconnected with my brain, eyes, and hands. Now the only things left to do are drop a 220v line for the kiln (for firing the refratory molds used in lost wax casting) and to rebuild the doors to the first level adjacent to the foundry.
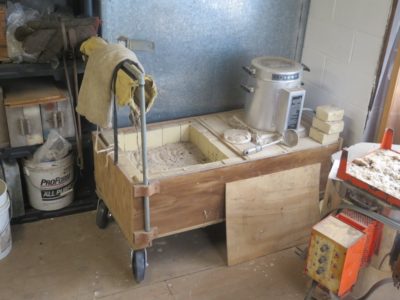
My plan is to roll my mobile foundry cart outside whenever I am casting; I’ve never had a foundry accident, but inadvertently spilling white-hot molten metal inside a 125-year-old wooden structure is a vignette that might not have a happy ending. The doors at the opening were badly damaged in a terrific storm a few years ago and making new ones will be easier than repairing the old ones.
On top of that, in recent months I’ve made the acquaintance of a gifted Amish blacksmith who recently moved to Shangri-la and am giving him one of my smelting furnaces so together we can set up a larger foundry in his shop. That endeavor will require its own set of postings, although I must admit that I have never asked him about photographing there and am not familiar with Amish custom in that regard.
Soon the Don’s Barn blog will regularly feature even more metal work, including detailed inventory of my foundry equipment, supplies, and processes.
Beginning probably next week I will relate the account of recreating some metal moldings and medallions for use in the conservation/restoration of a late 19th century cabinet that was missing its base along with the cast metal moldings and fittings. I do not think I have told that tale here before (I’m at almost 1500 postings but much of that is not easily searchable, much less rememberable) , but if I did you get to see it again.
As my Year of Metalworking unfolds I am drawing on lessons from my far distant past. About forty years ago I started a stint working with Don Heller, Silver Objects Conservator at Winterthur Museum. A gruff, curmudgeonly fellow with a heart of gold, Don spent a lifetime as a traditional silversmith before coming to the museum. While most of his job was caring for the stupendous collection of silver artifacts in the museum, a much smaller component was teaching the graduate students of the University of Delaware Art Conservation Graduate Program (I was the first recipient of the undergraduate degree from the same program). Don was constantly vexed by a student or two who only wanted their projects to be, “shiny, not finished.” By this he meant that they wanted to short-cut the process instead of working systematically through the time honored practices of moving deliberately through the steps of getting from Point A to Finished. Instead they would simply make it “shiny” while leaving behind all the marks of the intervening processes, marks that needed to be removed in order for it to be “finished.”

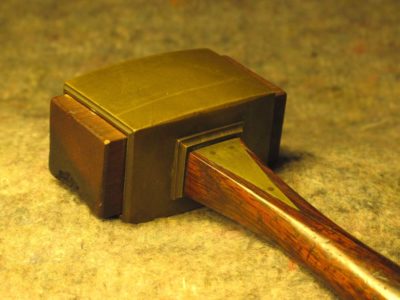
I am once again reviving those lessons from Don in working the shell castings for the Studleyesque infill mallet heads. When they arrive the side surfaces have been cleaned of their cast texture, but that is just the starting point for me. (NB – My assessment of Studely’s original is that the surface is essentially straight from the sand mold, lightly cleaned. Whoever cast the shell was a genius.)

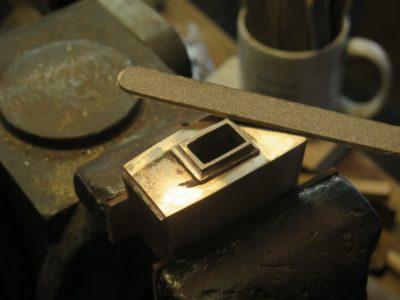
Harkening back to Don’s instructions I step through ever finer abrasive papers to get to the point I want. I do this by first using 80 grit working perpendicular to the pattern left by Bill Martley in his cleaning of the original casting. When I get to the point that none of the original “direction” from Bill is evident I can move to the next step with a finer abrasive.
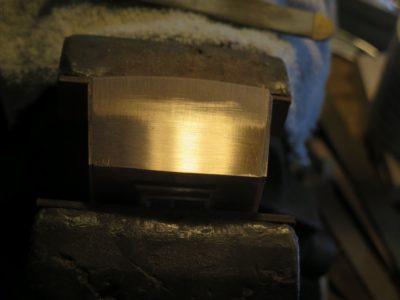
Then I switch to 150-grit paper, working perpendicular to my 80-grit pattern until all the 80-grit markings are eradicated.
Then 220-grit, perpendicular to the 150-grit until all the 150-grit tracks are gone.
Then 320-grit.
Then 400-grit.
Then 600-grit. And all the evidence of the previous steps has been eradicated, but that absence is proof of their being executed. Finished, not Shiny.
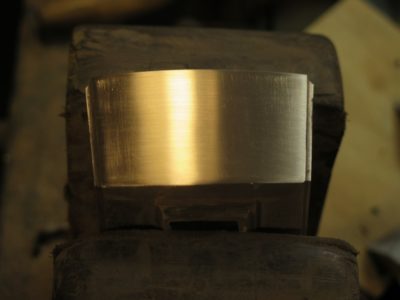
At this point the surface is ready for my final treatment of it.
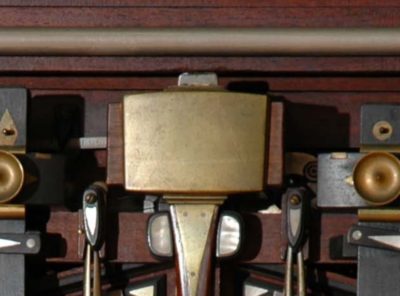
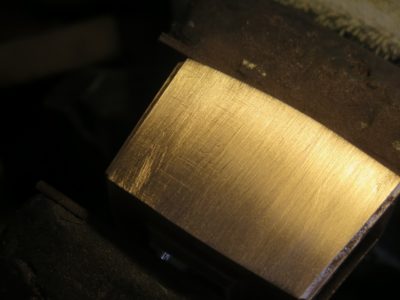
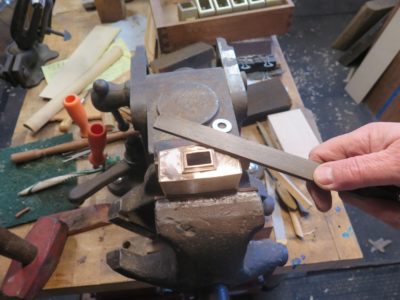
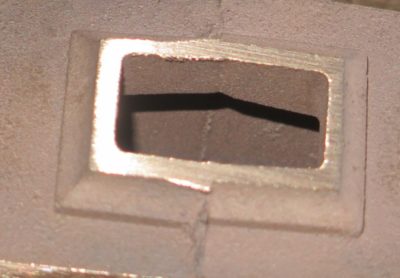
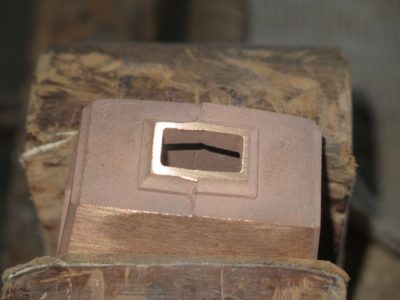
One of the challenges to replicating Henry O. Studley’s incomparable mallet is obtaining the surface texture when it is all done and finished. As someone who comes out of the foundry trade myself I can only shake my had in amazement at the shell he used in his mallet. There is no hint of who produced the brass casting, all I know is that is was provided by a virtuoso. Hmm, that sounds like a good title for a book about Studley. When I originally saw the mallet in person I thought that it was like many of the “finished” casting for the foundry where I worked; the pieces were cut off the sprue tree, ground and filed, then tossed into some sort of bead blaster to achieve a final surface.
However, once I got really up-close-and-personal I realized that was an unlikely proposition as the shadow of the parting line from the casting was still evident, about 1/3 up from the bottom. Abrasion blasting would have almost certainly removed that evidence. Thus I am left with the possibility that the shell casting used by Studley was essentially straight from the sand mold, at least in regards to the surface texture.

As nice as the new castings from Bill Martley are, they are not of the same quality as Studley’s (to be fair to Bill I have never seen contemporary sand castings of the quality evident in Studley’s menagerie) and the surfaces need to be worked extensively by hand to eventually get to a similar place, at least aesthetically.
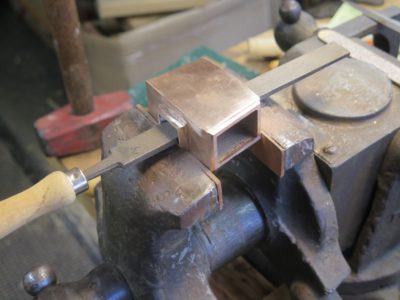
I already referred to establishing the cove profile with a 1/4″ chain saw file, and then cutting the flat edges of the same elements with barrette files I bought from Slav the File Pusher at Handworks last time.
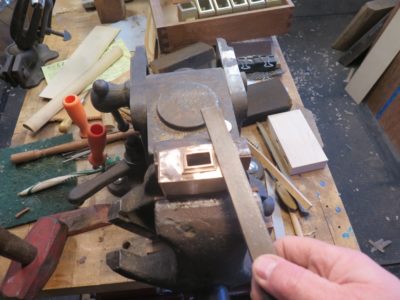

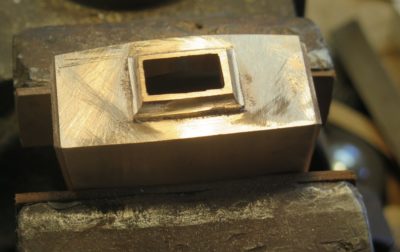
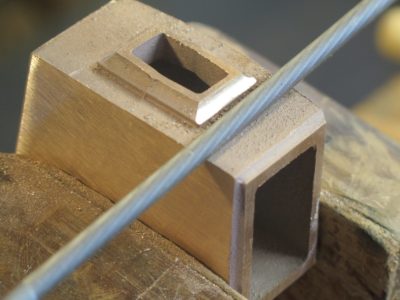
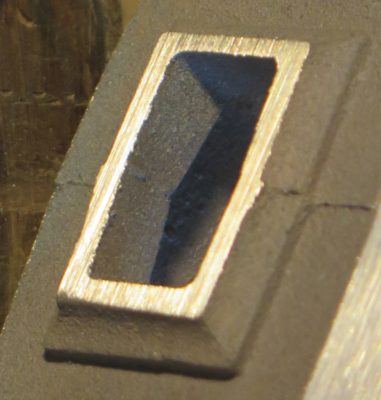
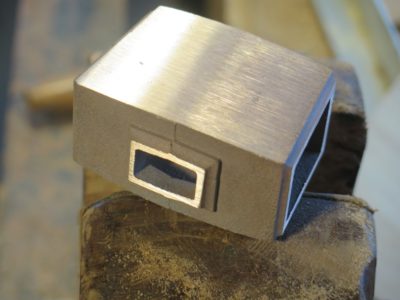
I then proceeded to work on the top and bottom of the mallet shell around the square collar, an always challenging proposition when trying to achieve uniformity on a surface that is not uninterrupted. The first goal is to get everything flat, working parallel to the sides of the rectilinear collar. I did this mostly with a small-ish mill file on which I had removed the teeth on one edge to as not to continue cutting where I did not want to cut.
Once I got to flat I began to work with sandpaper sticks to begin reducing the tool marks left by the file. I literally used them flat, “rounding the corners” on the shell surface, working my way from 120 grit up to eventually arrive in the neighborhood of 600. The ultimate goal is to achieve a surface that has as little character as possible.
At that point the workpiece is ready for some additional contouring before the final surface treatment. The real design/detail genius of the Studley Mallet is that the primary corners are sharp at the faces of the mallet but quite rounded at the center point of the arc where two planes meet. I’m thinking that might be a seat of the pants exercise. I also began to work on the openings for the infill and handle.
Next time – working the surfaces of metals to “done.”
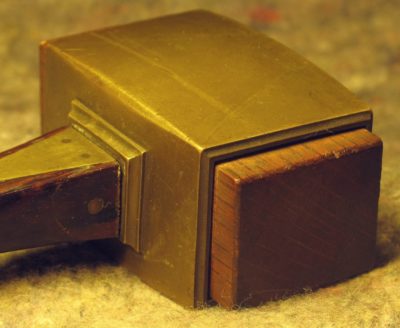
I’ve been working on the first set of Studleyesque infill mallet head shell castings from Bill Martley, getting an idea about how to get these from rough castings to finished tools comparable to the mallet ol’ Henry had. That is, of course, my favorite tool in the tool cabinet. Even though these castings are not the alloy I want to end with, this gunmetal bronze is simply a little too red for my needs, getting these prototypes to “finished” is a critical step in the creating mallets for sale.
I need to learn how, and how long, it will take for me to get from rough casting >>>> ready-to-sell, since that will determine the price for a finished item. I can pretty much promise it will not be competitive with Harbor Freight mallets, or even Crucible Tools. The$e mallet$ would be $everal multiple$ more pricey. And, if there is zero market for them, well, I will have quite an inventory of expensive gifts.
One of the most important aspects of the process is getting the cove detail just right on the handle collars and around the faces. Since I have a collection of chainsaw files of varying sizes I was able to find just the right tool for that task. I just lay the round chisel in the groove of the cove and gently move it along the groove, making sure to not rock the tool in use. That way I can get a clean, crisp surface.

The next step will be to establish the surface texture. Stay tuned.
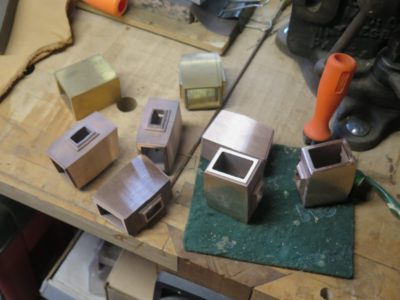
I was recently alerted to the ongoing project by foundryman Bill Martley to replicate the shell castings for the beloved mallet of Henry O. Studley. Well, beloved to me at least. Bill and I corresponded and I ordered the raw castings in his original alloy, a red-ish bronze. You can tell the coloration difference between Bill’s castings and the brass shells I have worked on in the past.
The castings are quite nice and I am working through finishing them to make myself a mallet or six. The amazing thing is that Bill got the pattern really close to the original, without even having access to the Studley book! He said he was relying on pictures I posted on this blog. I sent him a copy of the book as part of our transaction, so he can move forward with the definitive information in-hand.
Bill has been selling these rough castings through his Instagram page, mystic_pickers. If you are interested in acquiring one of the rough castings from Bill you can contact him directly through the Instagram page. If there are hiccups let me know and I will check with him to see if he wants me to post his contact information here.
Since the color of the alloy is wrong for me I have ordered two addition sets of castings from Bill with yellower alloys to see how they look and work.
At the same time I have been tinkering with my patterns for casting the mallet shells myself, just because. (I am determined that 2021 will be a year of metal casting at The Barn with several projects in the pipeline) Once I get the patterns to a point where I am satisfied I will cast them in both silicon bronze and brass in the barn. Since I have the detailed information based on my many examinations and with the blessing of Mister Stewart I am confident that the end point will be successfully achieved. (Let’s just keep it between ourselves, but my ultimate goal is to have finished “authorized” mallet replicas for sale at Handworks 2021.)
I’ll be recounting the project from my end as things proceed and I hope you will enjoy the ride.
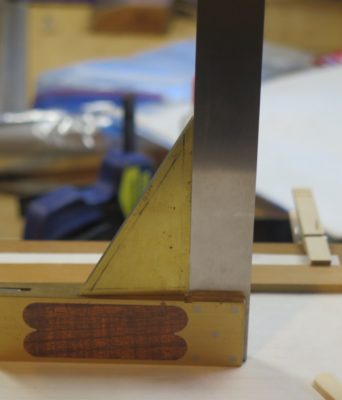
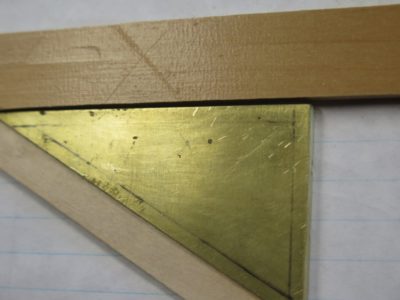
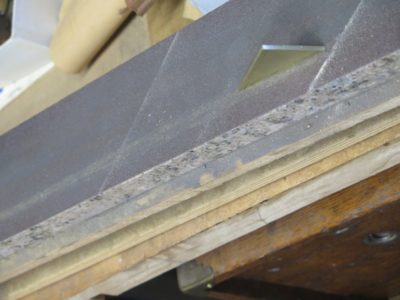
To judge and tune the angles of the square I first establish the right angle to be as perfect as possible with my Vesper square, which is the reference I use for anything 90-degrees in the shop.
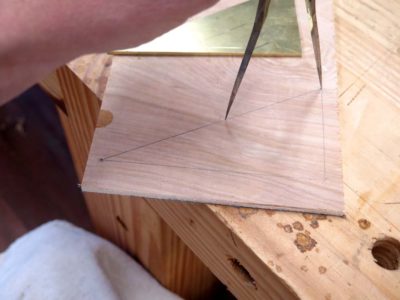
With with my brass triangle laid out as closely as possible to the geometric model of the base being exactly 1/2 of the hypotenuse, I begin to mark the 30-degree angles cumulatively to form a half circle or even an entire 360-degree construct. I have found that simply marking the angle with a pencil and building the angle construct from that is not accurate enough to get it exactly 30-degrees.

When I am creating the sawing and shooting jigs for parquetry I have to keep in mind that in order for the assembly to be perfect the pieces have to fit tightly together by incorporating twelve lines — six starburst pieces with two sides each. For every fraction of a degree of angle the triangle square is off, that error will be magnified twelve times in the final assembly.
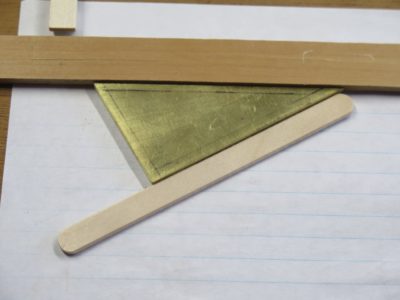
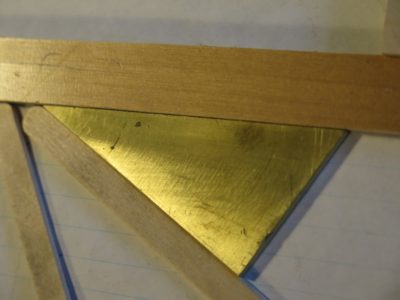
Once that is accomplished I set the square down against a line, then lay a popsicle stick along the angled line.
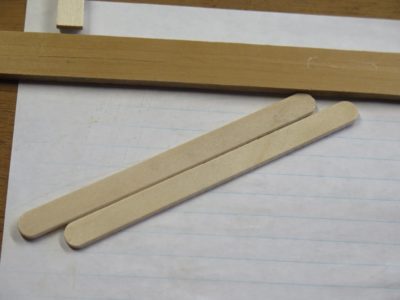
Removing the square and placing a second stick as the mating surface I now have the reference line to establish the second 30-degree angle. I continue this process until I get to the stage where, if perfect, the first line and the last line are perfectly in accord.

This never happens, the aggregate is always off by a tiny bit and the hypotenuse needs a bit of adjusting, in this case less than 1/64th”.
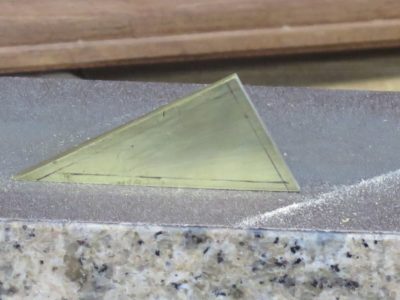
I do this on my granite block with a roll of 60-grit sanding medium, gently pressing the toe or the heel of the hypotenuse to kiss the angle a teensy bit one way or the other.
It usually takes me a few brief sessions at the granite-and-sandpaper before I am satisfied with the six-angle exercise.

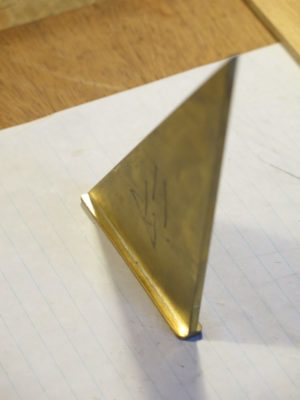
Once I get to that point I can solder the shoe on the short leg of the square and finish it off, calling it “done.” This example is the bigger sibling of the current one, made during the workshop two summers ago. I trued this square the exact same way, and it is a joy to hold and use.
In many instances, cutting dovetailed open mortises through a Roubo bench top for example, a 30-60-90 layout gauge only has to be “close enough,” however you define that term. All one layout line has to do is match another layout line, and as long the two lines are struck with the same tool off the same reference plane all is well.
During last year’s workshop we all made one or two of these triangles, and like I said above, they work just fine. Laying out the hypotenuse with dividers was all that really needed to accomplish (the hypotenuse of a 30-60-90 triangle is exactly twice the length of the short leg), using my Chris Vesper sublime refence square for the 90-degree corner.
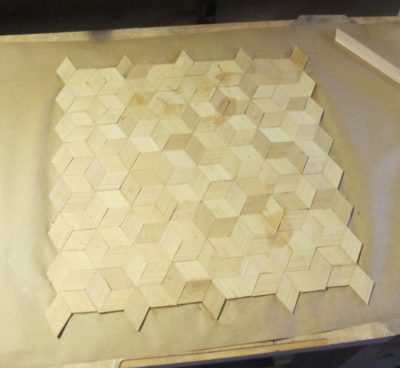
But what happens when you have to create a series of lines coming from different places, and they establish the perimeters of pieces that must match each other precisely? That is exactly the case of laying out a basic “starburst” or “dice” pattern parquetry composition. I used to be content with simply laying out a sawing jig using a small plastic triangle from a middle school geometry class set, but since I have moved to shooting the edges of all the lozenges to minimize the joints even more, I needed to make myself a truly precise triangle square to set the fence for the shooting board.
Starting with one of the brass triangles left over from the workshop two summer ago I determined to make a 30-60-90 square that fit the bill. Once I had the angles perfect I could then solder on the shoe to the short leg of the triangle.
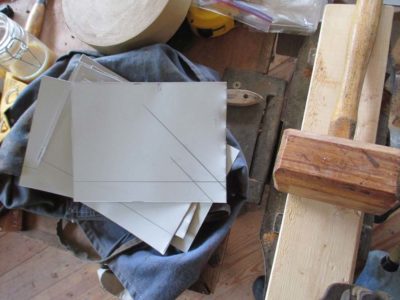
Tomorrow I will show how I did just that with a bench top geometry version of a Covid/PCR test, using a piece of paper and two popsicle sticks.

Somewhere in the distant mists of time I obtained two propane-type smelting furnaces, thinking I was going to get into metal casting in a bigger way than I have. I now have no expectation of this, instead focusing on smaller castings using my electric smelting furnace. These two have simply become space eaters and I just want them gone from taking up space that is more valuable for storing yard equipment and firewood. If you want them or know anyone who does, just let me know.
These do not have burner nozzles nor the requisite plumbing but that is pretty straightforward AFAIK.
For over 35 years I’ve been shopping at the same family-owned hardware store near our house in Maryland. In virtually every instance the experience has been a delight; they have one of just about everything, they know where it is, and they can explain how to use it. Besides, I can often get in and out quicker than I could find a parking space at the home improvement center. Sure, I pay a premium in slightly higher prices but that is a trade-off I will make every day and twice on Saturday.
What doe this have to do with the subject of today’s blog?
Well, the siblings that ran the store for most of my life had a vague idea about what I did for a living, but they mostly knew that I would buy stuff and use it for something other than the intended purpose. Like using powdered wallpaper adhesive to make a poultice to leech out a stain on some marble, for example. They were always entertained by my reports of how I used their products. They would often introduce me as “the guy who uses things for the wrong purpose.”
Recently I had a project wherein I needed to make a pile of bent aluminum flashing that was just smidge bigger than my mini-brake/shear could accommodate. Since it was aluminum I could have easily made it conform but I wanted the bend to be clean and quick.
As I was poking around for scrap parts to make a bending jig I actually bumped into the corner of my saw sharpening vise (it was a painfully memorable moment), and “Viola'” a light went off in the dark space between my ears.
I cut the aluminum roll into the pieces I needed with a square and a utility knife, and marked out the bending line.
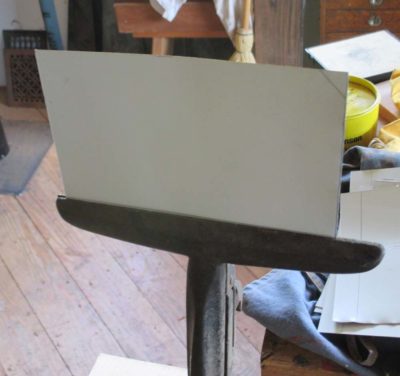
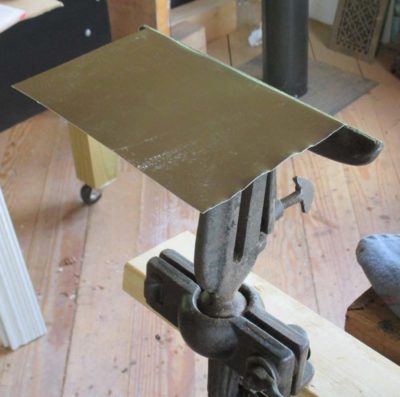
I placed the sheets in the vise with the bend line along the tip of the vise jaws and simply bent them with a scrap board.
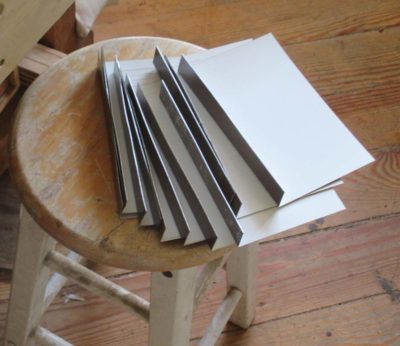
In about ten minutes I had the entire pile finished and ready for use.
I love it when a path to completion includes the route through the land of “for the not intended purpose.”

Recent Comments