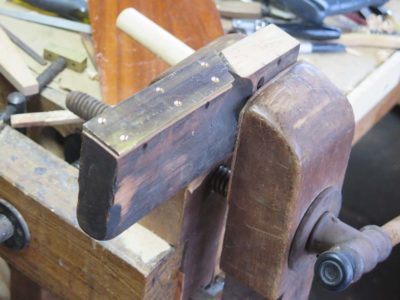
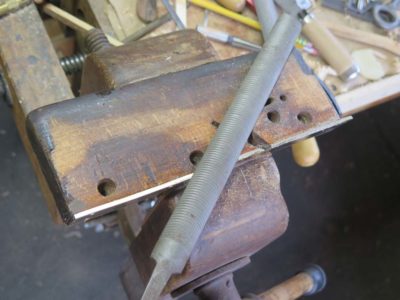
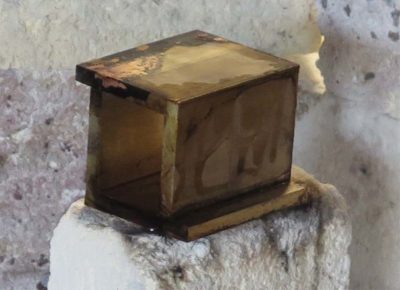
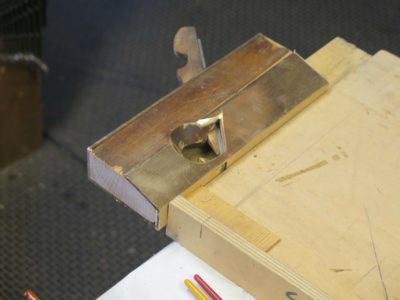
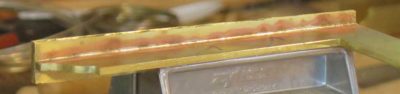
With the dovetail plane configured the way I wanted it was time to add the brass plate to the newly beveled sole. I grabbed a piece of brass from the scrap drawer and sawed it roughly to fit then drilled and countersunk screw holes for attaching it to the plane body. When I placed the screws the wooden body was too brittle (several cracks) for me to have confidence in that being the only method of affixing the plate.

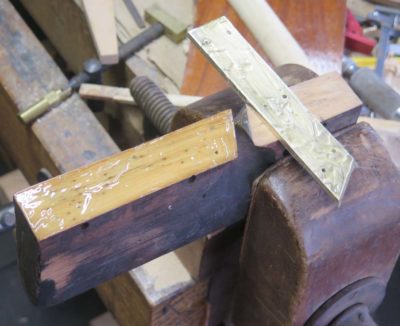
Instead I cleaned the contact surface of the brass plate with 60 grit sandpaper and slathered it and the wood contact surface with G-flex epoxy to bring it all together.
Since the gluing surface was beveled enough vis-a-vie the plane body that clamping was problematic I simply got the pieces in place and executed and old fashioned “rub joint,” making sure there was intimate contact and at least a partial vacuum between the adherends and the adhesive and then just let it sit to harden. I’ll know tomorrow if that worked out well.
Next Day
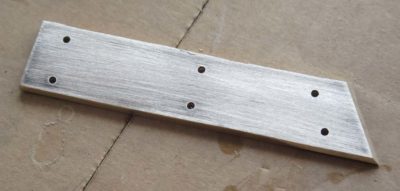
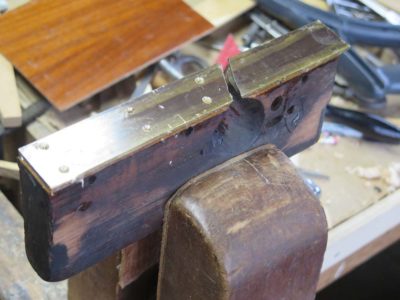
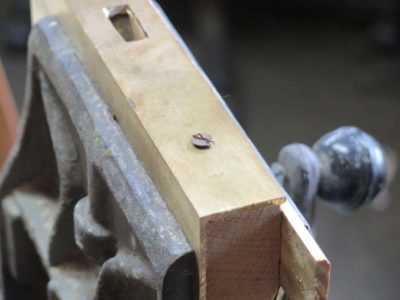
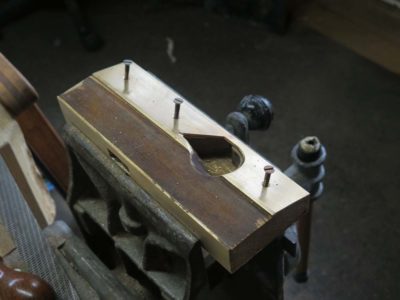
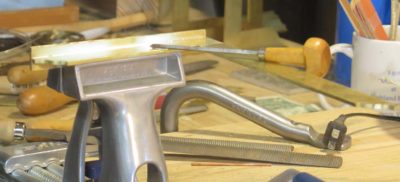
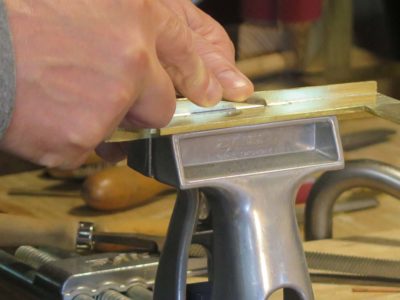
The “rub joint” with epoxy worked perfectly! I was able to trim and clean the new sole relative to the wooden body so that they configured nicely, first with a Vixen file followed by sanding.
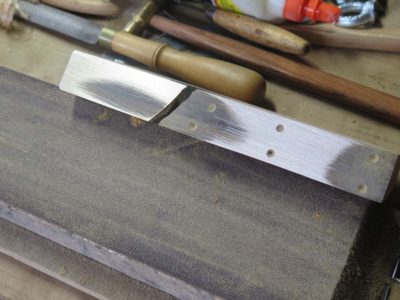
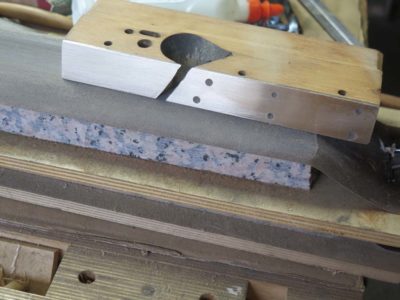
Using my granite block and sandpaper I got the sole pieces flat and coincidentally planar.
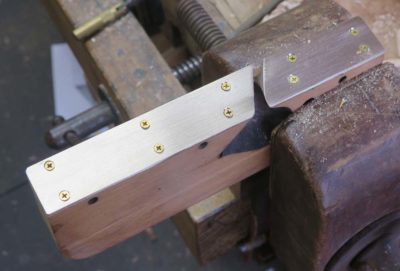
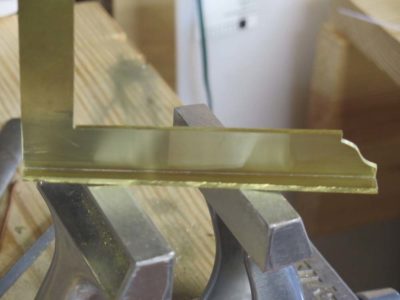
Re-drilling the previous screw holes, now filled with epoxy, and drilling new holes on the front half of the sole I got everything copacetic. I left the screw heads slightly proud and abraded them off smooth.
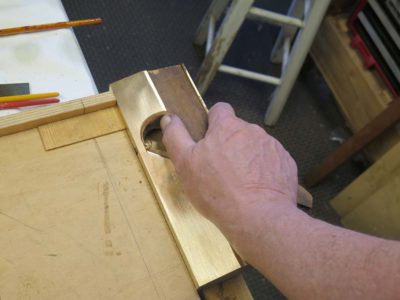
Now the tool is ready to assemble completely and give it a test drive.
Stay tuned.
Two of the students from the recent workshop have posted photos on their Instagram pages.
LenR posted an impressive glamour shot, and JohnH posted an image of his entire collection, although just short of the finishing line. It was indeed a great weekend, and I look forward to actually getting my two sets finished next month. At the moment I am just swamped with other priorities.
I’m thinking of diving in to the Instagram swamp; I am so old fashioned that I think of “social media” being conversing or corresponding with an actual human. Silly me.
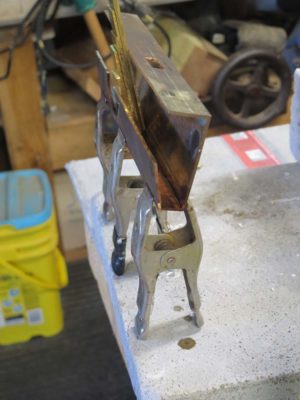
With the two halves of the mallet head shell soldered together I got to work making it into something resembling what I wanted (a la Studley’s mallet).

I began by trimming off the overhang from the soldering with the band saw. One of the great things about working in brass, bronze, copper, and aluminum is that they can be worked with a variety of woodworking hand tools and virtually all woodworking power tools and machines. Well, maybe not jointer and planer.

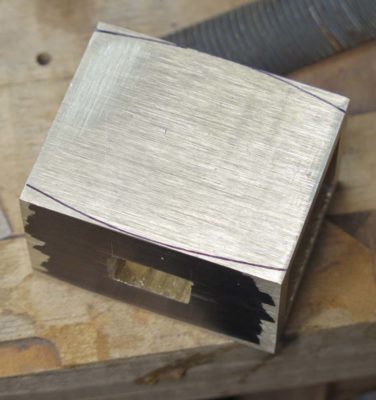
Once the trimming was done I cleaned and squared the head on the stationary belt sander.
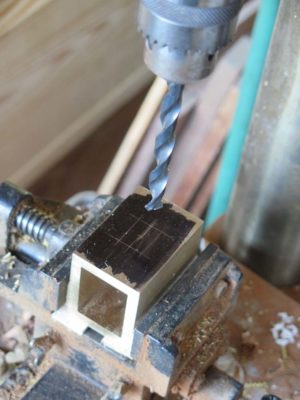

Then, while everything was still square I drilled then filed the holes in the center of the top and bottom faces. These holes allow for the handle to protrude all the way through the metal shell and the wood block infill. Doing all this before shaping the head was the only way to get it right.
Up next – on to shaping the head.

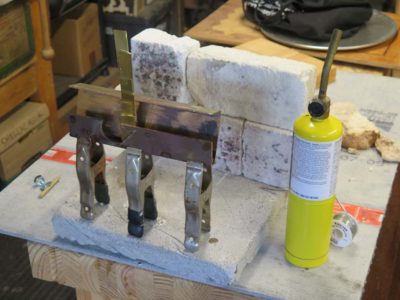
Of all the tools I’ve encountered that have seduced me Henry Studley’s infill mallet ranks at the top of the list. To continue the unenviable task of keeping my probably ADD self amused I decided to play with making something similar, a project I could work on intermittently while some glue or paint was drying, or when I needed a distraction while I cogitate. For the raw material I ordered 1/4″ wall thickness right-angle brass stock from McMaster Carr to serve as my starting point. Since this was more a “proof of concept” exercise, the concept being proven being the silver soldering of very heavy stock, it seemed like a sensible approach. Perhaps for a “proof of concept” exercise I should have started with aluminum rather than brass, but that’s where I started nevertheless.
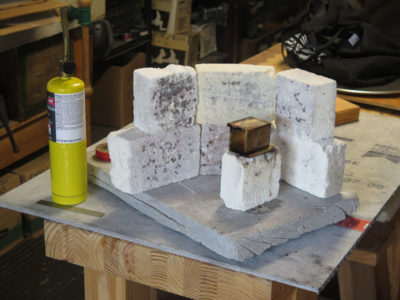
With the measurements in-hand I chopped the requisite segments and set up a soldering set-up on my heat-work station (I think I will probably write a series of posts about setting up such a work station yourself as I hope you will all follow me down this rabbit trail). My strategy was to simply overlap the two sections with each other as shown and fire up the torch. Even though I could/would only do one seam at a time I slathered generous dollops of paste flux on both interfacial surfaces.
After heating the entire mass I concentrated on the seam joint and introduced the silver solder on the inside corner of the seam and let the torch heat draw the solder through the joint.
It worked perfectly.
Stay tuned.
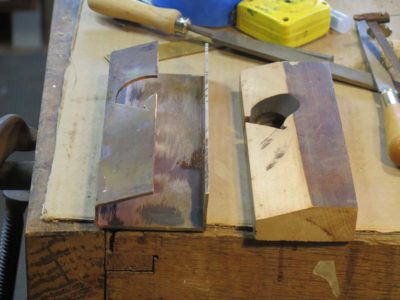
With the wooden core and outer bronze shell fabricated it was time to combine all the elements together to see if the concept was viable. Given the taper of the beveled side of the new plane shape and the resulting narrowing of the plane mouth I needed to cut one ear off the “T”-shaped iron to fit the smaller opening. With my Dremel tool and a cut-off abrasive disc it took all of thirty seconds to do that. Another minute on the diamond plate smoothed it all up and even the sharpening did not take long.
I decided to screw the bronze shell to the wooden body in such a manner that I was sorta working without a net in that if it did not work out correctly I was in for a lot of headache work. Much like Chris Schwarz uses on the corners of some of his campaign furniture, I drilled and countersunk the screw holes such that the vast majority of the bronze slotted flat head wood screws projected proud of the surface by an amount greater than the slot depth, then file the area smooth. I got my bronze screws from my favorite screw source, Blacksmith Bolt and Rivet Supply out in or near the Peoples’ Republic of Oregonistan.


Since the screw’s clamping force was so great the bronze shell deflected and I had to do a fair bit of abrasive flattening to make everything look good. The first ones left me very optimistic. A subsequent error resulted in less satisfactory results.

As I moved on to the other screws I mistakenly switched from using my brace and bit to cut the countersink to my battery drill and its countersink bit. Big mistake, as the angle of the new countersink was incorrect, an error I did not realize until it was too late. Clearly the bevel for the second countersink bit was shallower than the first bit in my brace, so the screws did not seat perfectly and there was a tiny line around the fastener when they were leveled off.
Drat.
That said, once I cleaned it all up as best I could the tool both performed magnificently but also fit my hand like it was designed for it. For that reason I did not make and install a handle like was on Patrick’s plane. I always have the ability to do that ex poste.
Some last minute clean-up and I declared it finished. Since the purpose of the tool is to shave the edges of veneers (I use hand-sawn veneers pretty much exclusively for parquetry) I gave it an extensive test drive and I have to say that it is more than glorious, more than sublime. It is gloriously sublime! Or is it sublimely glorious?

I’d guess that I have somewhere around 8-10 hours invested in it, and I think it was well worth the effort.
Once I had the beveled bronze cheek fitted and cut for the side opening it was time to silver solder the two major pieces together. Silver soldering pieces together at an angle can be tricky because if you get it wrong the pieces just stay together in the wrong conformation and you have to torch them REALLY hot to get them apart (usually warping at least one of the two pieces) or saw them apart.

I clamped the pieces together in place at the narrow dimension of the bevel but needed to shim the widest point to get the angle correct. After prepping the surface and slathering on the paste flux I lit ‘er up with the MAPP torch. It took a couple minutes to get the entire mass up to temperature but then the solder flowed like water into the crevices where it was supposed to go. I introduced the solder along the inside corner of the joint and let it heat-wick to the outside, the liquid solder being drawn to the torch. There was surprisingly little excess solder to be cleaned off afterwards.
I let the mass cool down slowly in the ambient temperatures and returned a hour later to a hard assemblage in the exact correct configuration.
That’s a day worth celebrating.
I use some version of the following techniques for cleaning the interior corners of a soldered/brazed joint such as that created at the shoe-and-beam joint for the Roubo squares. If my brazing technique is on its game this only takes a couple minutes from start to finish. If not, more minutes. Actually, were I a better metalsmith there would be no cleanup at all, but this is the kind of joint I usually have after the torch work.

My first step is to clean the excess solder with a half-round Vixen file, which is the metalworking version of a float. I lay the flat side of the file down flat on the workpiece and press the edge between the flat and half-round sides into the joint to remove any excess. Then I repeat it on the other flat face.
Once any excess solder is cleaned off I strike the joint with a diamond shaped burin, or engraver, to establish a nice clean corner. The spatial circumstance of the task does not allow for me to hold the burin properly, I just hold it sorta like a paring chisel.


Finally I find the halfway angle for a triangle fie and undercut the joint ever so slightly for an elegantly clean look.

After that I’ve got a nice surface ready for polishing with a light abrasive to make it finished. Once I get the edges finished this one will be ready to go.
One of the tools emerging from the recent Making Roubo Squares workshop was a diminutive 30-60-90 triangle. This tool is integral to much of my/our shop life for areas ranging from cubic/pinwheel parquetry to laying out the dovetailed tenons of a Roubo bench leg-and-slab double mortise-and-tenon construction.
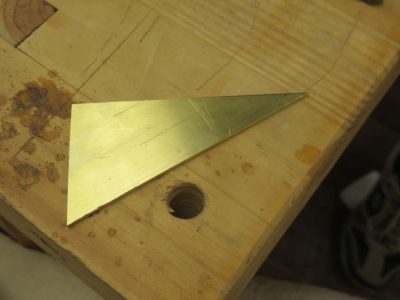
With the surplus rectangle of brass plate left over from the making of our nested set of cabinetmaker’s squares during the workshop there was plenty of brass plate left over for making other, smaller layout tools. Included in these were some small triangles that were roughly laid out with a plastic drafting triangle and rough cut on the bandsaw.
I took the opportunity to demonstrate the truing of the triangle to the workshop students, reminding them of the simple truths they learned decades ago in seventh grade Geometry class. Instead of using a micrometer or something similar to establish the tringle side lengths, a much easier, simpler, faster, and frankly more accurate method is only a compass or divider away.
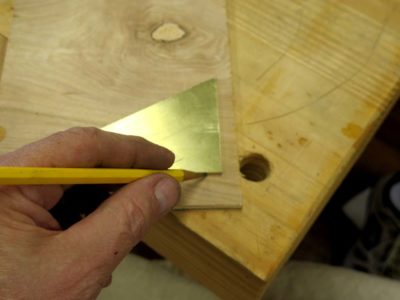
After establishing the perfect square corner between the two shorter legs of the triangle it was possible to achieve a perfect set of 30-60 degree angles by using just a scrap piece of plywood, a pencil, and a set of dividers. For work like this I almost always revert to a pair of dividers from an antique navigational drafting set that I bought for practically nothing many years ago. These German Silver (alloy of brass plus nickel) tools are simply lovely and a pleasure to the eye and the hand.
First I traced the rough triangle onto a piece of scrap plywood, and set my dividers to the exact length of the shorter side adjacent to the right angle.

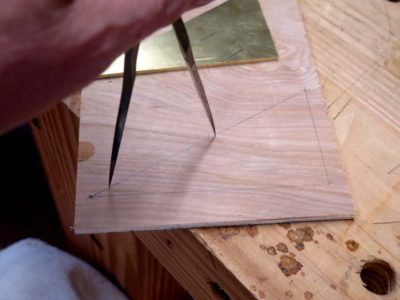
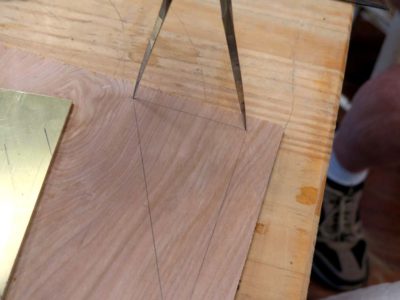
Then swinging the dividers to the hypotenuse I stepped off two of those lengths. If you will recall, for a perfect 30-60-90 triangle the hypotenuse is exactly two time longer than the shorter side of the right angle.


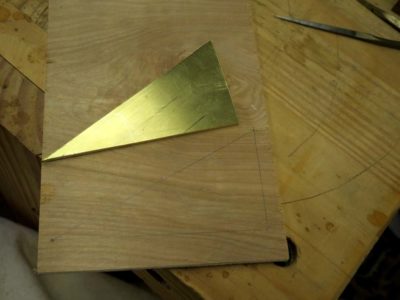
Once I determined that two-times-longer distance along the hypotenuse I re-set my dividers to this exact distance then transferred it to the longer side of the right angle, redrew the hypotenuse on the plywood, then transferred it to the brass.

Five minutes later I had cut and filed the new hypotenuse and had a perfect 30-60-90 triangle ready to braze on the foot and put to use in a multitude of applications.
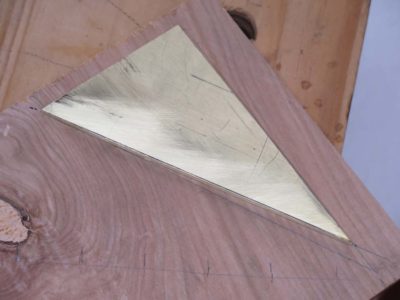
All with zero measuring, although to be honest I did grab my dial caliper afterwards to check. I wound up being off by almost 0.002″ which probably amounts to a couple seconds or so of angle degree (or, about 1/1800th of a degree). I can live with that.
To quote my mentor in the pattern shop, John Kuzma (cleaned up considerably for a family-friendly venue), “Measuring is the enemy. Layout and transfer are your friends.”
I cannot recall my 7th grade Geometry teacher’s name but I do remember Mr. Fiske, who taught me Trigonometry in 11th grade almost fifty years ago. Together these men impressed on me the importance of triangles in every-day life. Thank you, gentlemen.
Not too long ago I discovered something that perhaps many of you knew already (and if so, why didn’t you tell me?), and my response to the problem and solution imparted great satisfaction.

Being both a metalworker and a tightwad I am pretty fussy about my files, and in fact have a substantial number of them. One I could never talk myself into getting was a die-maker’s mill file with one shoulder devoid of cutting function. All the ones I had seen while shopping were simply more money than I wanted to spend. Since this is a utility I need on a fairly frequent basis I generally just put a strip of tape along one edge of the file so I could work into one side of an inside corner without boogering up the adjacent shoulder. Perhaps I had some bad tape but recently I was continually frustrated as it peeled off while I was working the inside corners of the Roubo squares.
I decided to deal with the problem once and for all.
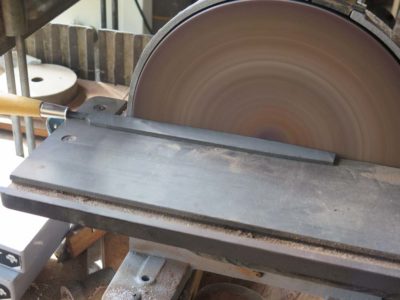
I took my new-ish mill file to the disc grinder and very gently just ground away the teeth/grooves on one edge. I say “gently” on purpose because I did not want to heat up the tool and have it lose its temper. So gently it was.

After that I took it to the vise and dressed the sanded edge to a fairly nice polish (1200 grit diamond stone). In almost no time (less than ten minutes) and for no money(!) I had a die-maker’s mill file that allowed me to work both more aggressively and more precisely on inside corners. And if I need to do any edge filing, I simply rotate the file 180 degrees and use the opposite edge.
I hope I don’t hurt my shoulder patting myself on the back…
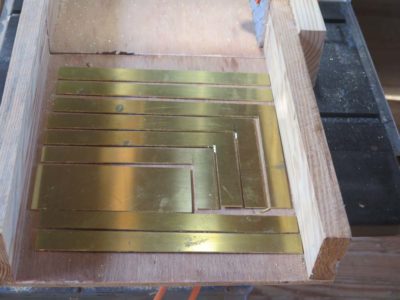
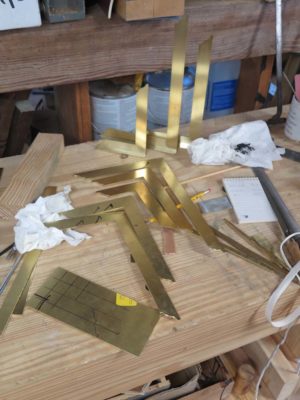
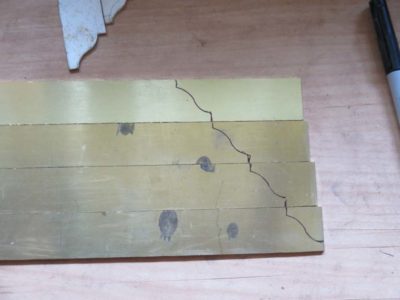
Every participant will begin with a slab of brass which we will cut on the table saw to yield the preferred number of graduated squares.
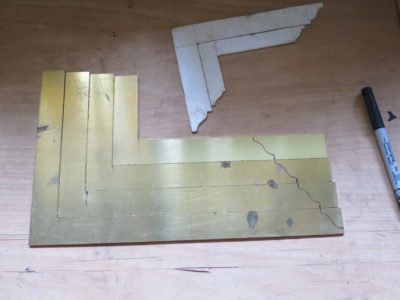
Once these have been cut and the corners cleaned up, they will be laid out for the graduated nesting sizes.
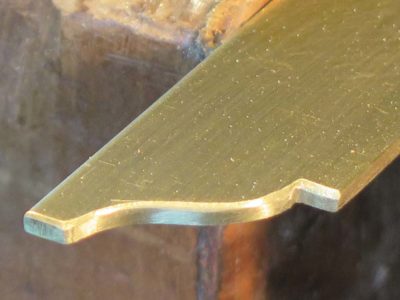
Ogees are cut and filed into the ends, and all the detailing is finished in preparation for the silver soldering of the shoe on the outside of the beam.

If this workshop interests you, drop me a line via the Comments or Contact functions of the site. It will be June 20-22, and the tuition + materials is $425. You will leave with a completed set of squares.
===================================
Other workshops at the Barn this summer are:
Historic Finishing
Make A Roubo Shoulder Knife
Make A Ripple Molding Machine

Recent Comments