
The conceptual foundation of this saw is the ability to rotate the saw blade within the saw frame. When noodling the design and fabricating this hardware element I considered many options before settling on something nearly identical to Roubo’s.

I ordered a variety of of sizes and configurations of eyebolts from McMaster-Carr to play with.
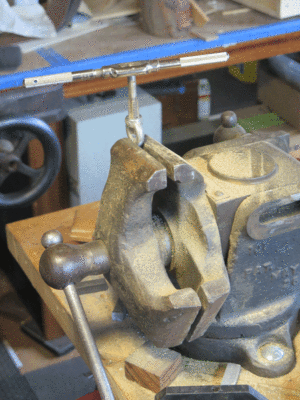

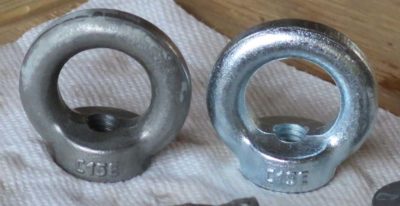
The eye large enough to accommodate or incorporate the 1/2″ cylindrical rod for affixing the blade was simply too huge for the proportion to work properly. The eye of the correct proportion was made for a threaded rod way too small for the 1/2″ wide blade. In the end I took that smaller eye and drilled and tapped it for the cylinder rod of the right size.


I split the eye bolt with my jeweler’s saw and a #10 blade. I then drilled the cross-holes through which the blade could be attached to this split rod.
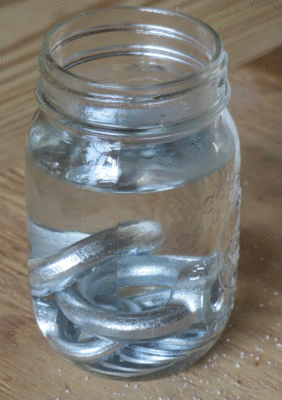
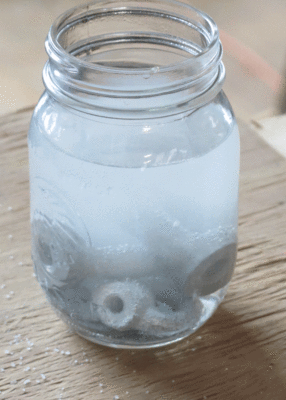
One of the last things I did before assembling the whole saw was to de-zinc the hardware parts by soaking them in a citric acid solution (about 2 tsp/pint of water). As soon as the mild acid began to work on the zinc the solution got cloudy. I had to monitor the progress and removed the hardware when I had gone far enough.

I assembled everything to make sure it fit but I did not give the saw a test drive since I did not have the saw blade that would be used for it.

I disassembled it and shipped it off to Wisconsin. I cannot wait to get a production prototype back to give it workout.
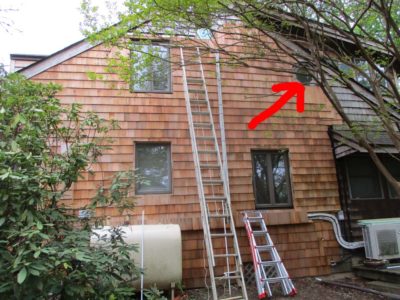

During my most recent foray into the battle of the cedar shingles I was finally at the location of the octagonal awning window in the master bathroom, indicating only another hour or two to completion of that side of the house. Alas, this is what I saw; the window was beyond repair even though I had painted it thoroughly when it was installed 33 year ago. Admittedly I had not monitored it for a very long time and the unit was made from white pine, not renowned as a durable exterior material. Both Barndottir and I searched the web diligently for a replacement unit, but a suitable one was not to be found. We could get one that opened, or or that was the right size. But not both.
Using a cat’s paw and small pry bar I got the window and casing out safely and more easily than I had originally feared, throwing away the exterior trim even though it was cedar. I made the opening weather-tight then hauled the carcass back to the barn to start on making a new one.
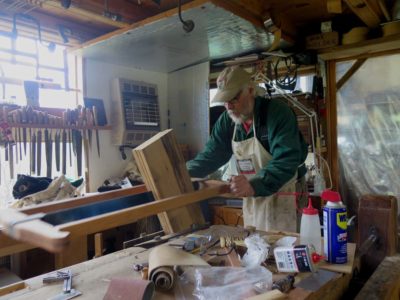

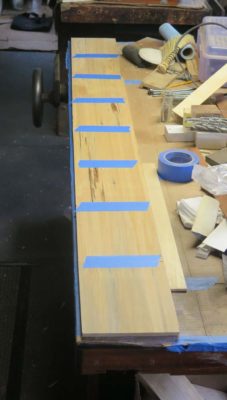
I decided to make the new window from my stash of prized old-growth cypress for longevity’s sake and set to work. I re-sawed the 11/4 cypress mostly by hand then dimensioned it with my lunchbox planer.
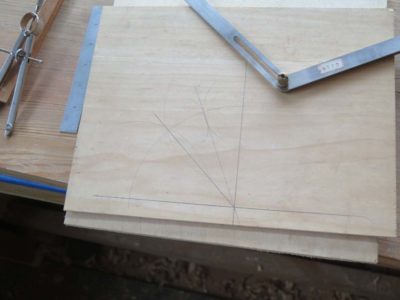
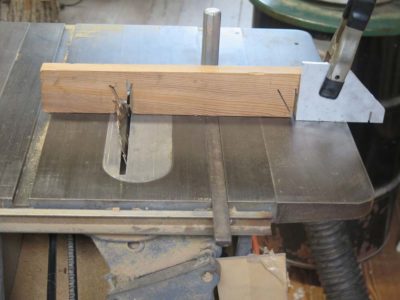
I spent the most time of the project getting the angle for cutting the miters perfect on the table saw so that all eight corners were tight when gluing it up.
I taped all the segments together, applied Titebond II to the insides of the miters and just rolled it up, holding everything in place with the tape after double checking the squareness. I toenailed each miter joint with brads from my pneumatic gun and set it to dry overnight
Thus the first session ended with the octagon box glued up, a very satisfying stopping point. Foolishly I did not take a picture of the octagon box at this stage but you can see it in the next installment.

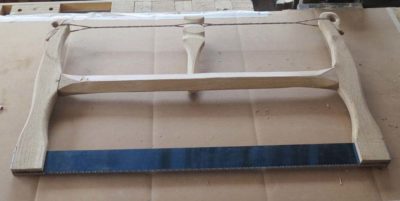
With the Roubo Joinery Saw prototype winging its way to Wisconsin I turned my attention to, well, Roubo’s “turning” saw from Plate 12, Figure 5. I used the identical design for the overall bow for the Joinery Saw, but there were more than enough twists and turns along the road to make it interesting.
The term “turning saw” has two particular meanings. First, the saw plate is narrow enough so that it could be turned as it worked its way through the workpiece. Second, the plate itself could be turned in the bow, enhancing the capabilities of the tool.
I began from the premise used in the Joinery Saw, namely that I would be trying to replicate Roubo as closely as possible based on his illustrations and verbal descriptions. As before I used white oak for the wooden elements. For the saw plate I just used a broken band saw blade since Bad Axe has not yet begun to develop theirs.
Thus the two crucial differences were the housing at the end of the bow arms through which the round spilt post passed, and the split post itself.


The bulbous end block was the simpler of the two problems to solve. I glued scrap blocks in place, laid out the bulb, and shaped it to the design. Drilling the hole for the post was simple enough.
Next time – the split post and related fittings.
There are times when I am working on the book manuscript when I just have to get up and do something physical for a change of pace. Because of the peculiar way I write, editing and massaging-together is often more fatiguing than the original creation of the first draft so I need a diversion and relaxation.

Last week I spent an hour or so at the lathe trying to see how thin I could turn a bowl. This concept interests me as I begin my re-immersion in replicating Japanese lacquerwork, a creative theme that will be prominent in the studio and on the blog for the foreseeable future.
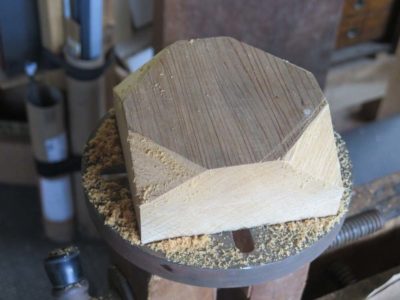
I had a block of c.1840 11/4 old growth cypress handy and gave that a try. I do not know why I had never turned the cypress before, it works like butter in the lathe. I left the face of the block square as I am trying to come up with a form that suits my fancy, and a square/turned bowl with a feather-thin edge is intriguing.
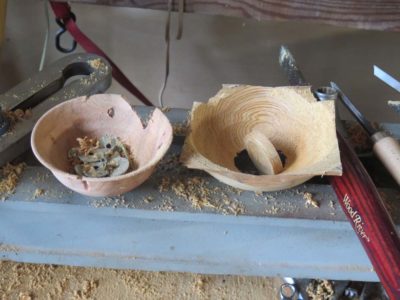
I found out that feathering the edge is not possible without reinforcing it somehow, probably by impregnating it with epoxy, or the edge will simply shatter as you work it. Ditto the base of the bowl where I did indeed find the edge of the envelope. I tried the a similar exercise with some figured plum stump I harvested 15 years ago. Same result.
Since failure is its own useful data point I now know I need to turn this form close to finished, then impregnate and finish up then. I will report back on those results.
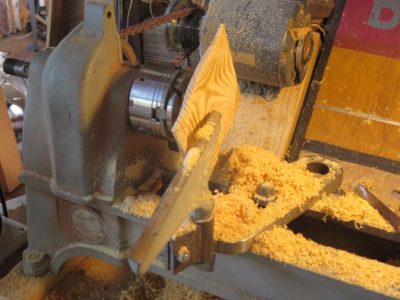
The next day I tried the exercise with a southern yellow pine scrap and also had encouraging results.

One of the peculiar and captivating phenomena of that attempt was the turning began to “sing” as the wall was thinned, sounding much like a crystal goblet when it is being played like a musical instrument.
Then, back to the Eames chair knockoff for more wordsmithing.

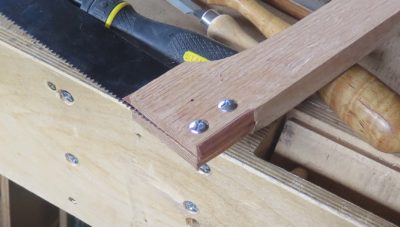
I think that when creating a production-worthy Plate 12, Figure 3 prototype at the request of Mark Harrell of Bad Axe Tools, I spent the most time and creative energy in working out the problem of retaining the saw plate in the bow saw arms.


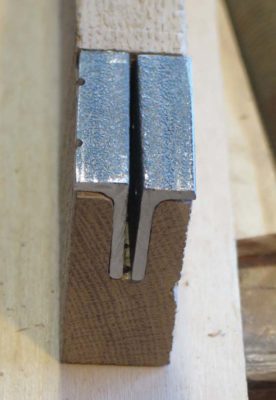
My first effort two years ago worked well enough for one guy making one saw, but it was IMHO insufficient for any kind of production run. The amount of work necessary to excavate the base of the wooden arm in order to receive this particular two-piece stirrup configuration made this option a non-starter.

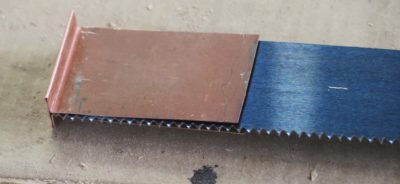
Plus, like the configuration of my original Art Nouveau-ish bow saw frame it bore little resemblance to Roubo’s illustration. His description and illustrations clearly represent a folded “T” shaped fitting-with-pin for holding the saw plate in a slot at the bottom end of the arm. So, that is the direction I headed towards. At this point my only fundamental deviation from Roubo was that Mark’s saw plate had two holes rather than Roubo’s one.

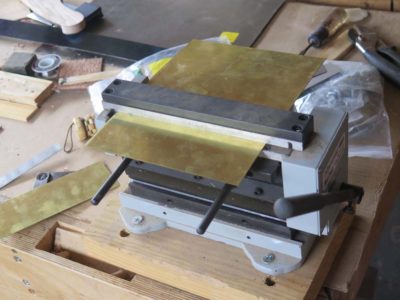
I ordered some 1/32″ steel sheet, unfortunately it did not come in narrow configurations so I wound up sawing it by hand until I had pieces that would fit into my little shear/brake. Once I had the strips in-hand I started the process of figuring out how to accomplish this tricky series of bends. Fortunately I had my sweet little shear/brake from Micro-Mark to help me. Sort of.
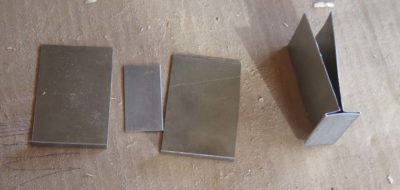
I found that the brake’s bending was so crisp that the steel snapped off at that point. Actually, what happened is that I could bend crisp 90-degree corners then had to spread them in order to bend the next set of corners, then bend the original corners back. That’s when they snapped. I eventually did figure out how to get it done (see below).

After the steel sheet gave me trouble, before I figured out the solution I tried some .030 copper flashing I had sitting under the stairs in my hardware store. It cut like butter with my engraver’s hook and folded in the brake without a hitch. (I swear I do not know why Photoshop and WordPress cannot play nice with each other!)
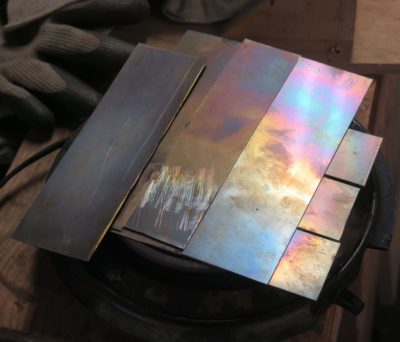
Since copper worked so nicely but was pretty soft I decided to try something halfway in between, .030 brass. Unlike the copper it was really stiff so I annealed it on my hotplate before trying to bend it.
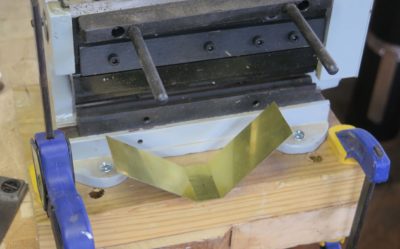
By this time I had hit on the solution to the earlier problem that caused the first steel stirrup to snap. Instead of making the first bends to 90 degrees then bending them open, I bent them only enough to establish the corner.
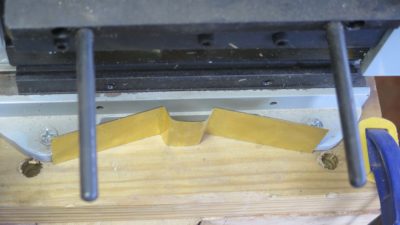
This allowed me to use the brake for the second bend. Then by hand I could fold the unit closed with a hammer and cold chisel until it was in the “T” configuration.
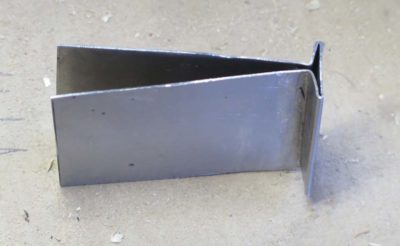
I worked this system in all three materials and found the solution to be darned near perfect.
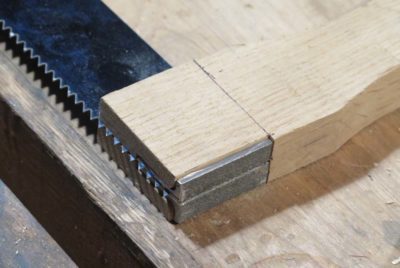
I drilled out the stirrup and arm to match the holes in the saw plate and held the entire unit together with binding posts. I apologize for not taking a picture of this assembly all by itself.
With the entire stirrup now passing through the bottom of the saw arm there was virtually no joinery involved; just make the slot for the stirrup and plate, widen it a bit, and slip it all together. Inserting the binding posts completed the assembly of the saw and all it needed for working was the windlass and cord. I used a much smaller windlass bar than my earlier one, about 1/3 of the weight of that one.
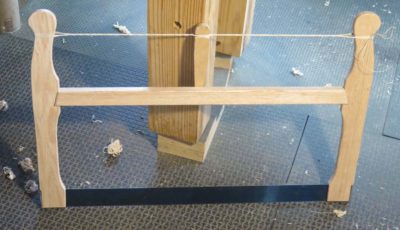
I took pictures, dismantled it and shipped it off to Wisconsin.
Now, on to Roubo’s Turning Saw.
Recently I was clearing out the Trash and Spam folders of my web site and came across a legitimate and thoughtful Comment at the top of the Trash list. I started looking a bit more, something I rarely do as I routinely get a almost a thousand bot Comments for every real one, but again in going through the folder found many legit Comments to the Blog, to which I have or will be replying as appropriate. I have no idea why these Comments wound up there, certainly it is not because of anything I did knowingly to the filters or some such.
If I have failed to notice or post your Comment I apologize, I do not know how long this dysfunction has been occurring.
Thanks for sticking in there.
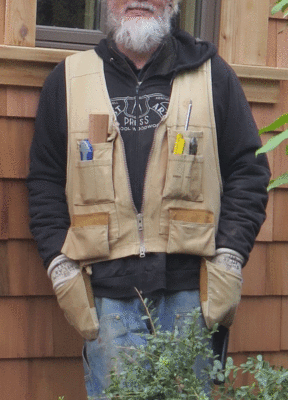
I am inclined to wear an apron while working in the shop, and my recent sessions working on the house while wearing my ancient Skiller’s vest (basically a wear-able tool box) have led me to reflect on shop aprons in general and the ones I had in particular. So, I took a couple hours to rectify my discontent with the aprons I had by making one to fit my own preferences.

Some of the shop aprons I have go back decades, and they look like it. Others are more recent, but all of them have shortcomings that led me to grouse about them silently almost every time I put one on. For starters, I like a shop apron that is really heavy weight. Second, I want the apron to have its hem well below my knees. Even more particular I want the apron to wrap all the way around the the back side of my leg. Admittedly it could be my physique that precludes this functionality (depending on your frame of mine I have either a “prosperous” or NFL linebacker- sized body).
These last two features, length and width, (or their absence) determine whether or not a shop apron is truly useful when I am working while sitting down.
The aprons I have encountered and own are so narrow that when I sit down to work at a low bench they creep up over the thigh and become little more than a wide loincloth, entirely insufficient for any apron-y task.

Recently I took an afternoon to begin making the apron I’ve always wanted but never found in the marketplace, at least not at a price I was willing to pay. I started with a large scrap of heavy linen canvas 20(?) years ago I had squirreled away “for just the right project,” and this apron was it. Using the apron I wore the most as a pattern, I laid out the new one to be of the same general ilk but almost a foot longer and more than a foot wider compared to the aprons I use normally .
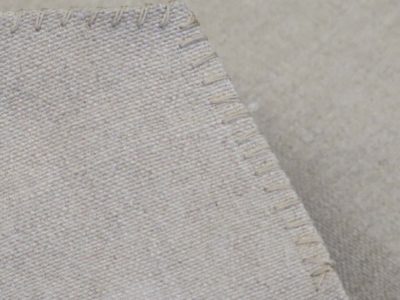
I cut it out and folded over the edges about 1/4″ then hand sewed the edges. This took about two hours using a hefty needle and upholstery thread. Fortunately for me the linen was so heavily sized that it stayed put when I folded the edges over, making the sewing a snap.
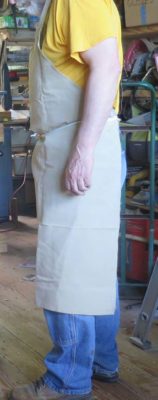
Since I like my apron bibs “high and tight” I made the neck loop from some of the linen canvas scraps and sewed it in place to just barely have room for my head to go through it. With some linen tape I sewed on waist cords such that the apron tied in the front, another feature I demand.
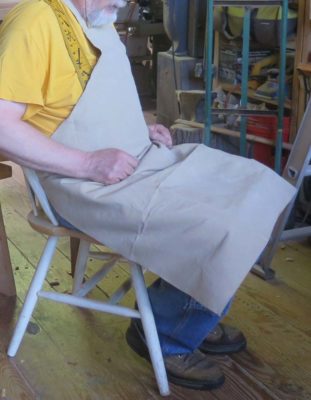
The added width was a particularly desirable feature as even when seated the apron covers my legs entirely.
Now I have an apron that meets my preferences, all I have to do is wear it for while to figure out exactly what pockets I need and where to put them. I’ll give this a month’s test drive then put on the pockets.
Stay tuned.
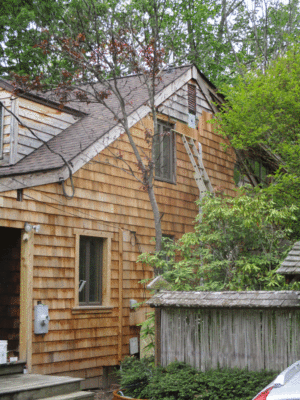
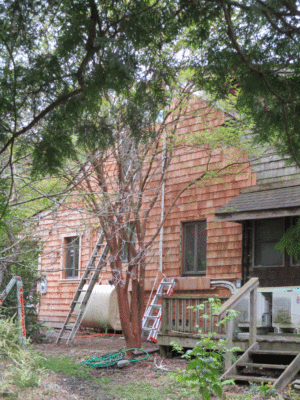
Progress on the house siding has been slow but steady. On our last trip I made it all the way to the peak of the wall, making sure to be careful and cautious the whole way up and down the ladder, The use of which made me think of my late friend and colleague Mel, who gave me the ladder with the comment, “I’m done going this high.” The ladder is a beast but there is no other way to get to where I needed to go.

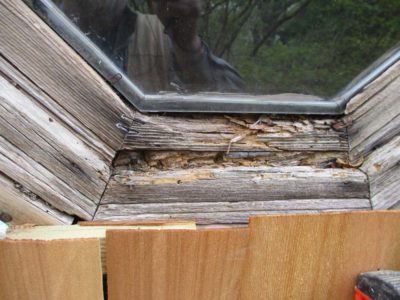
As I was zooming along thinking I would get the entire wall ready for trimming out I made it to the octagonal window in the master bathroom. Uh oh, this does not look good. The bad news is that the window is totally shot. I’d painted it when installing it 33 years ago but time has not been kind to it. So out it came, adding another thing to my “To Do” list. I will make a new one immediately on return to Shangri-La.
The great news is it is plain old weathering and rot, and the surrounding material was in perfect shape. No evidence of a cockroach’s cousin to be seen anywhere in the vicinity.
I have been sending pictures to old friends who know the house, and one replied, “This looks great and like it will last another forty years. By then you will have to be REALLY careful up on top of the ladder!”
I am on the home stretch, expecting to have Tim’s gunsmithing partner workbench ready for delivery by the end of next week, so now I am just wrapping up some of the details. Yesterday I laid it over to proceed with some of those tasks, and someone asked how I flip over a 10-foot almost 400 pound bench. Well, for starters in this instance I did not flip it all the way over, although I could have done so easily, I simply had to roll it 90 degrees so I could plane the apron and the edge of the top board to align perfectly with the apron. I’d already planed the legs before assembly.

This is how I lay over a Nicholson bench. I start with a pair of small horses/stools I made from a pile of scraps many years ago. I cannot remember the project now, but I had a whole stack of off-cuts and from them fabricated ten pairs of these unbelievably handy units. Placing them correctly I can just barely lean the the bench over such that the apron bottoms rest on the tops the two stools.

At that point the center of gravity is almost neutral, so flipping it the rest of the way is simply a matter of grabbing one of the feet and lifting easily. Once on its back I can kick the stools to support the apron and the leg at the same time.
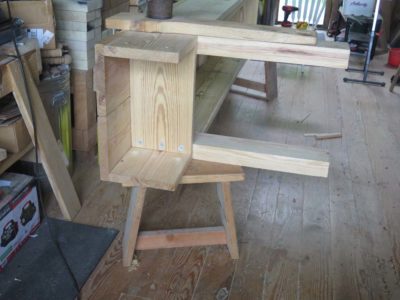
Now that the bench is on its back I’m ready to clean the apron with a foreplane, it is supposed to fit into rude frontier workshop after all, and chop the mortise for the parallel guide on the leg vise. Since I am re-using an extant leg vise all I need to do is put the jaw in the right place, mark with the chisel, and start wailing away. I have to mount the twin-screw face vise on the opposite leg, drill some holdfast holes, and it will be ready to go.
Some time ago I was asked by Mark Harrell of Bad Axe to build production-able prototype versions of the bow saws Roubo featured in L’Art du Menuisier, Plate 12, Figures 3&5. He was considering adding them to their product line and I was delighted to collaborate with him as I would be with any tool producer.
My first effort two years ago resulted in some success but some failure, so in recent weeks I have been trying to extract more of the former and expunge the latter. My first attempt yielded a prototype that was unsatisfactory in the important aspects of the tool; 1) it was way too heavy, 2) did not look anything like what Roubo described and illustrated, and 3) had plate fittings wholely unsuited for manufacturing (yes, I know I spell wholely different that the dictionary; the dictionary is wrong). So, I went back to the bench and started all over again.
In the coming days I’ll walk you through my successful attempt at Version 2 of the Joinery Saw..

Recent Comments