This week was a time of delightful camaraderie and productivity around the homestead as the firewood pile grew immensely, thanks to the ministrations of my Bible-study friend BobK and his mondo chainsaw (back in the ‘burbs my Stihl was the Beast of the East, but out here it is just a toy.) With Bob’s help we felled a number of locust trees on the perimeter of the front yard, and removed the sections of the raggedy old walnut overhanging the power system.
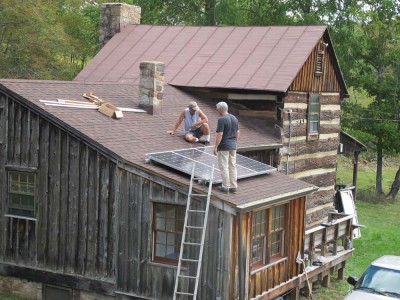
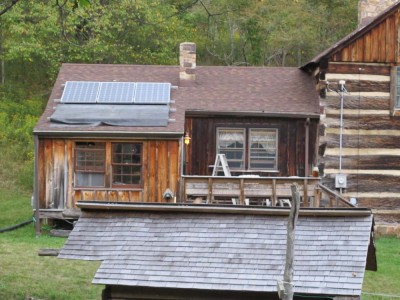
Following that came the arrival of my dear friends Bill Robillard and Dave Reeves for a few days of fellowship and power system upgrade as the new bank of solar panels was installed. Immediately on arrival Dave and I spent an hour at the wood splitter processing the two truckloads of firewood Bob and I had compiled. But as soon as Bill arrived the next morning the power work began in earnest. The current bank is almost perfectly oriented for summer power, but the new bank will be much more amenable for winter power production as it is inclined several degrees. if that is not adequate I will raise that angle to be more efficient with the low winter sun.

However, even prior to their coming I had to dig out and inventory all the parts and supplies I had purchased for this project last year. Fortunately I was able to put my hands on everything on the invoice.
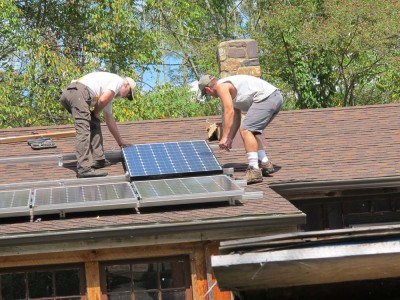
Installing the framework to hold the panels to roof was fairly straightforward measuring, drilling, caulking, and bolting. And of course, it was the hottest, sunniest day of the summer. Handling the panels and the tools was at times unpleasant due to their heat, but we got it done shortly after lunch.
We then draped the older bank of panels and shut the entire system down so there would be no risk of shock to Bill as he integrated the two sets of solar panels and upgraded the electronics connections in the power closet. His career as an electro/mechanical engineer has certainly been a tremendous resource for me and all his friends.

Combining this improvement with the new gargantuan 192-pound batteries I installed last spring should bring the system up to snuff. Perhaps over the winter I will get the second hydroturbine built downstream about 100 feet from the current one, gaining perhaps another 30% electricity from the hydro function.
When I first became interested in off-grid living more than four decades ago, efficient solar and microhydro electricity were pipe dreams, and I remember an article titled something like “Will Solar Panels Every Break the $10/Watt Barrier?” My panels are now six or seven year old technology, and they were in effect about 70 cents/watt, and the microhydro thurbine about a dollar a watt at maximum output. Newer ones are even better, of course. I can only imagine what the inventive American spirit will accomplish in the future out of necessity as the current knuckleheaded political establishment ramps up its obstruction to efficient industrial-scale energy. Come 2015 and 2016 as the War on Coal begins shutting down 3/4th’s of the nation’s electricity output… I decry the duplicity of political figures, but wouldn’t you know the one time a national politician keeps his promise, it is to fulfill a vow to send the energy costs skyrocketing.
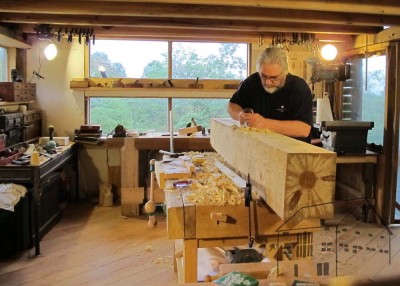
On Friday bill and Dave and I even had a bit of spare time to 1) solve the world’s problem, which we did with insightful alacrity, and 2) allow me to demonstrate to them my technique for sharpening edge tools. They seemed to appreciate it and went home with another skill set in their quiver.
I’ll know how much of an improvement this was to the system when the sun comes out later in the week. Until then I will just have to wait and anticipate.
Thanks guys, your accounts in the Bank of Don are full to the brim.
Somehow this blog post got lost in the shuffle, so it is a few weeks after the fact.
====================================================
On the day of convening the week-long gathering of several dozen members of the Professional Refinishers Group in August 2011, the months-long drought took its toll. The creek above the dam dried up for the first time in memory. Ironically the local hydrology left me clueless at the bottom of the mountain; because I have several springs between the hydro turbine and the dam, the water flow coming down the creek seemed unchanged.
I had been anticipating this problem as the water flow, and hence the power output, and been steadily declining through the year of 2011. To mitigate this problem I ordered three solar panels from my friend Rich at NoOutage.com. The day before the Group convening I took delivery of a bank of solar panels, and the attendant electronic hardware to control them and integrate them into my system. Unfortunately I did not have time to install them before the throng descended. That was exceedingly unfortunate.
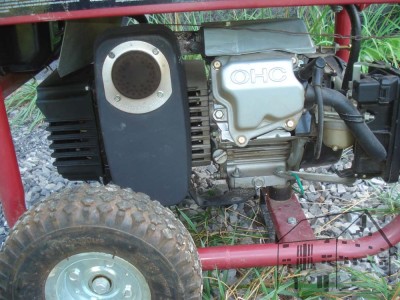
There was barely enough electricity for the event to proceed, fortunately we did not use much power as it was mostly low-tech demonstrations and lots of tale-swapping and tip-sharing. For those times when power was needed – a PowerPoint presentation, and some formulation requiring heated materials, for example, I just fired up a little generator. The event unfolded all right, but it was embarrassing, to say the least.
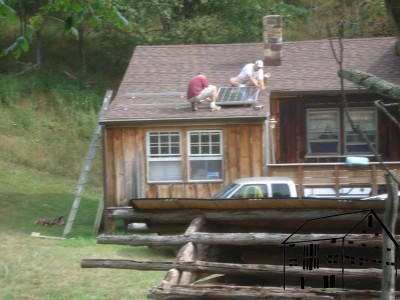
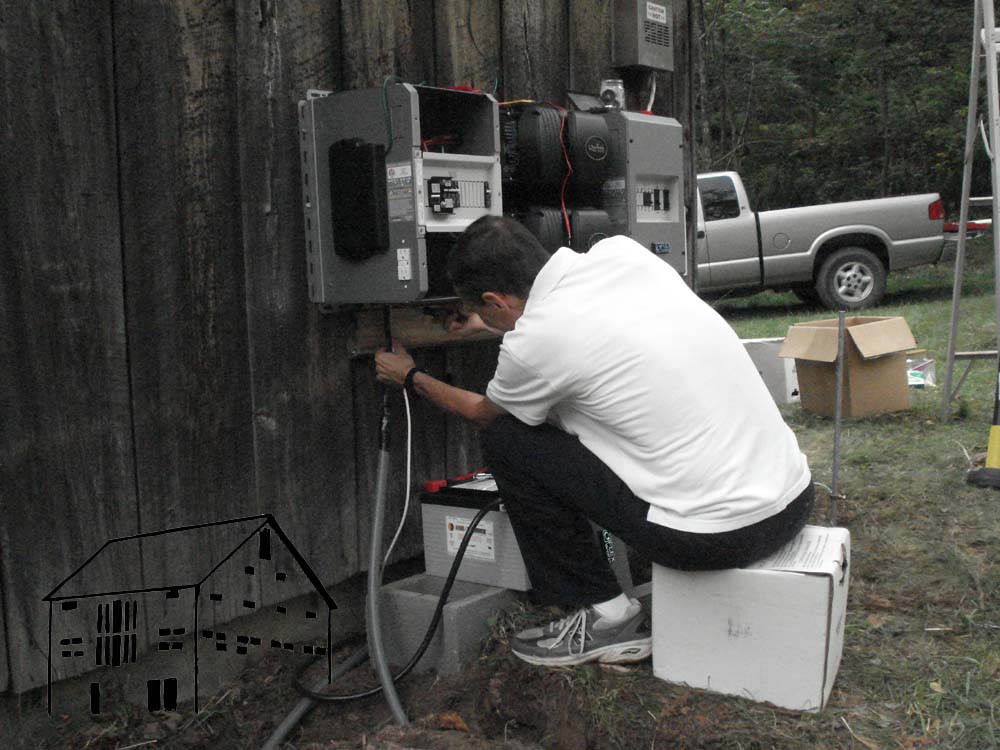
During that week some of the participants volunteered to stay afterwards and help me install the new solar panels and hardware, and I remain eternally thankful to SteveB, JeromeB, and BillR for pitching in to help.

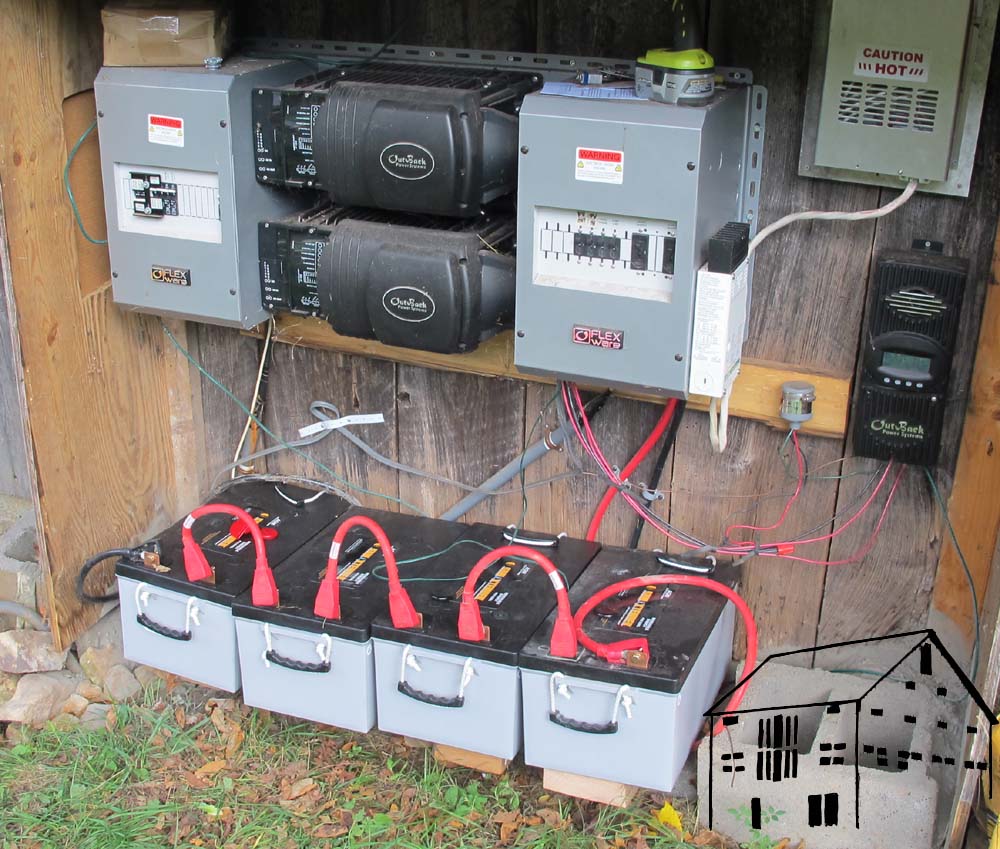
The new hardware consisted of three 235-watt solar panels, their roof mounting hardware, and the charge controller (the small black box on the right side of the power house) that would allow them to feed into the existing system. SteveB and JeromeB jumped up onto the roof for that portion of the project and proved themselves to be skillful practitioners of the problem solving arts. BillR is an electrical engineer, so he and I worked on the hooking up of the new panels to the old system. Once again, BillR’s knowledge and problem solving skills saved the day, and by the morning of the second day he had everything humming along.

The output of the solar panels was nothing short of astounding. At noon on a sunny August day they were each producing almost 290 watts of power! Bewildered I called Rich, who told me that the ratings for solar panels had to be estimated for the output at the halfway-point of the panel’s effective life. In other words, since these are thirty-year panels, the manufacturer expects them to produce 235 watts under direct full sun in fifteen years after their installation.
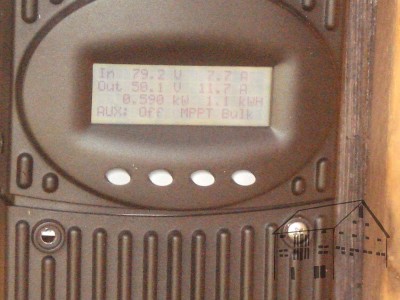
In the following picture, the solar component of the system is providing 79.2 volts of power at 7.7 amps, for a total input to the batteries of 609 watts.
Notwithstanding our location in the mountains, where the weather can change frequently (I have witnessed five rainstorm and bright sunshine cycles in a single day), these panels have been a boon to me. They pound out power during daylight, even when it is overcast. Not 290, or even 235 watts, but a couple of kilowatt hours each day even when it is raining. On a sunny day like today, they probably produce five or six kilowatt hours.

In addition, the natural cycle of the weather has provided us with a wet and cool summer, so the water is flowing more freely this September than any of the previous 13. Still, I felt the need to upgrade our system further, and am embarking on that journey now.
Up next – The Second Major System Upgrade
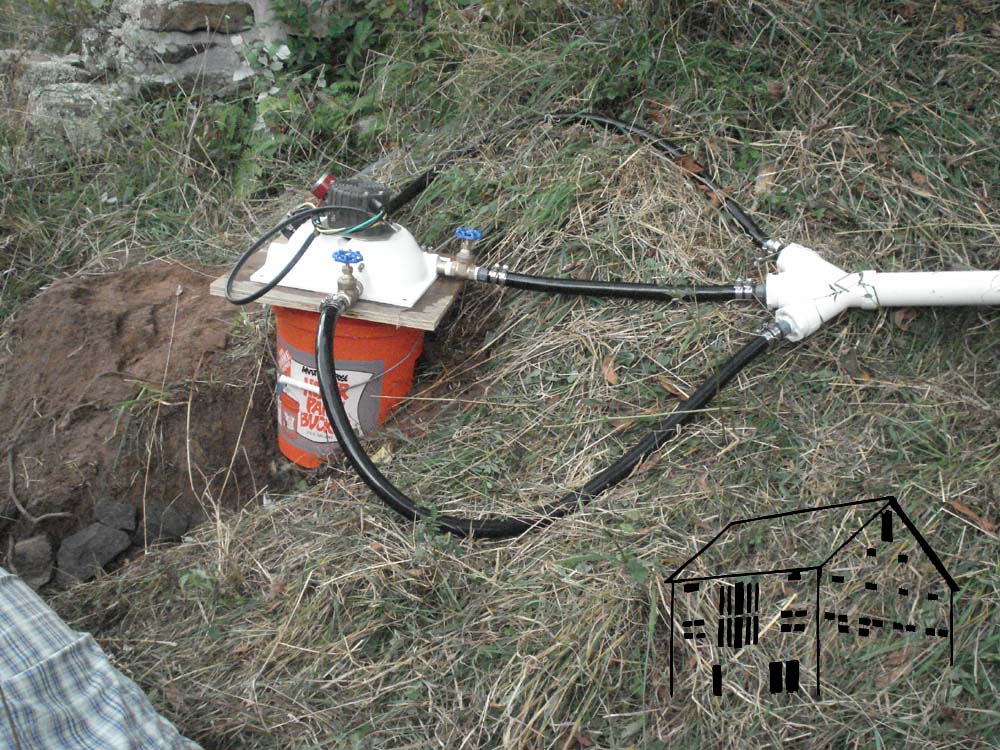
With much anticipation I waited for the weekend in September 2009 when Rich came to install all the guts of the system and I could then connect the water line to it.
The only real requirement for the location of everything is that 1) the turbine had to be at the lowest practical spot on the property, and 2) the high powered (and expen$ive) electronics had to be protected from the weather. I decided to locate all of it alongside a garden shed next to the creek.
Rich came with his family and did his magic. Truth be told I did not have all of my prep work done but amazing things were accomplished that weekend.

First, Rich attached all the electronic gizmos to the side of the shed, building the complexity of components piece by piece. As he was doing that I was installing the housing on which the turbine would set.

Since the “shroud” was a five gallon bucket, all I really had to do was dig out a pocket for it to sit in and cut a hole for the water to escape and rejoin the creek. (This procedure of extracting water from a creek on your property and returning it unchanged to the creek while still on your property is known as “non-consumptive use” and is, I believe, unregulated in all states. Check with your local officials to confirm this.)
Once Rich was done with the installation of the electronic hardware, including hooking up the turbine, the giant battery bank and connecting the 6/3 cable running up to the barn I built the cover for it, simply hanging a closet on the side of the shed. That structure still houses the electronics to this day.
I got done with the fussy plumbing fittings at the bottom and hooked up the water line to the turbine.
The water flow was very low, which is normal for the end of summer here, but still it was producing 4 amps at 48 volts, for just under 200 watts continuous, or about 4 to 5 kilowatt-hours per 24 hours. Not gobs of power, but you would be surprised what could be done with that much electricity.
I could hardly sleep that night. Several times in the night I went outside to sit on the front porch and simply listen to the soft whine of the turbine.
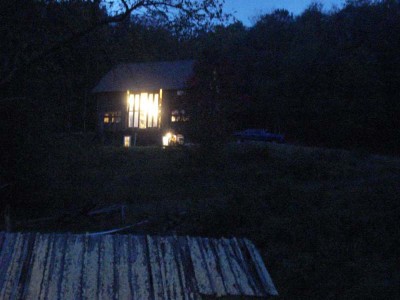
Within the fortnight following, the service box in the barn was installed and the wiring began. In those evenings i would saunter out onto the front porch, just to watch the lights in the barn gleaming in the night. Over the years the wiring network has expanded to the point where it now encompasses all four floors of the barn, and runs pretty much whatever I want to run. I cannot use unlimited electricity around the clock in perpetuity, but if you came to spend time with me working in the shop and did not know we were off-grid, you would not notice anything unusual.
Up next – The First Major System Upgrade in 2011
In 2006 I contacted Rich Buttner of Nooutage.com in Richmond to help me with the electrical engineering, which he did with experience, knowledge, skill, attentiveness, and excellent customer service. A retired power plant engineer who launched a business in the back-up energy world, Rich was excited about contributing to his first complete hydroelectric home-based system. I have been so pleased with Rich’s contribution that he remains my “go to” guy whenever I need advice or hardware about further improvements to my concept.
As he was spec-ing out the project and assembling the hardware, I went to work.

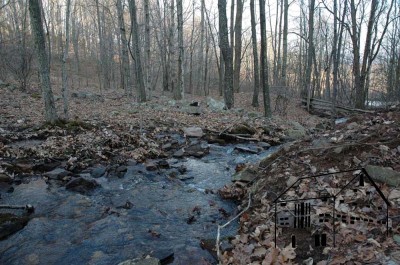
In late 2006 I got my hands dirty for the first time. I had already located the highest elevation on our property where the stream could be harnessed. About 100 feet from where the creek crossed the property line there was a narrowing to about 6-feet that was perfect for a small dam to serve as a capturing basin for the system.
Using sandbags filled with dry concrete I built a double coffer dam about 2 feet high and ten feet wide, about two feet thick. It did not have to be big, it just had to steer the water into the penstock (the pipe that carries the water down hill). I accomplished this task by embedding a 10” culvert into the dam, which in turn channeled the water into a capture basin, which itself was connected to the water line.
Somewhere around this time I ruptured a disc hauling piles of 16’ 1×12 siding up a ladder and nailing while I hooked a leg around the ladder, so I wound up delaying everything by almost two years for rest and physical therapy (with a healthy dose of “Don’t do that again!” scolding). Eventually I was back to full strength and ready to proceed with making a capturing/diversion basin and laying the pipeline.
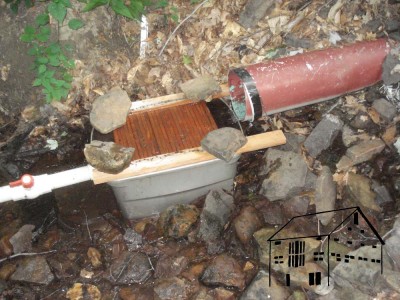
Since I was still working a the Smithsonian at the time, for a capturing basin I used a museum-quality plastic tub underneath the outflow of the culvert pipe, which I fitted with a museum quality shower drain, which I then attached to a 2” PVC fitting. I topped it off with a home-made Coanda screen filter on the top to keep the debris out of the tub but allow for full capture of the water.
It was then that my friend DickP enhanced his account in the Bank of Don by coming up for the weekend and helping me haul, arrange, fit and connect over a quarter-mile of 2” Schedule 40 PVC pipe. Seriously, I am in his debt more than I can fully articulate. At the end of the weekend we had a continuous line of 2’ PVC from the dam to the powerhouse where the turbine was going at the bottom. I opened the valve at the top and water flowed out the bottom. That was a joyous day!
At this point I will comment on the shortcomings of the workshop I first attended. They really gave short shrift to the construction and more importantly the “lay” of the penstock. Over the years I have been helped by friends and siblings to modify, disassemble and reassemble, and reroute the penstock four times to get it right. Perhaps I am simply stupid, certainly I am stubborn, but more understandng before beginning this stage would have saved me a boatload of trouble. Finally this past spring my friend TomS and I got it right, and I do not foresee any changes at this point other than repairs from falling trees or rolling boulders during a flood or some such.
Up next – Hooking It All Up
When I returned back home from the microhydro-electric workshop at SEI I had a fairly clear idea about the logistical and technical requirements for my system. There were several integrated elements.
1. A body of running water. Check. While the flow was variable, the creek on our property had never gone dry in recent memory, so I figured all was well. The hydrology is so unusual around here with all the porous limestone and aquifers you can hardly throw a rock without hitting some kind of running water. This county has between 400-600 creeks, some of which are seasonal.
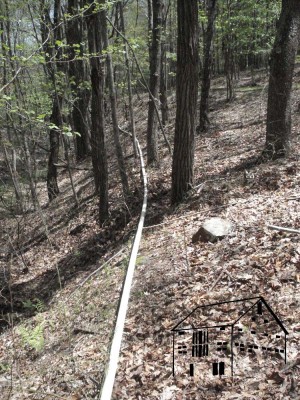
2. A way to get that water contained and downhill. As a practical matter this meant using a PVC pipeline to capture all the water I could as high as possible to exploit the inherent energy contained in running water. Given our hydrology and topography I figured I could get somewhere between 30-50 gallons per minute from an elevation about 100’ higher than the power plant.

3. A mechanical device at the bottom of the pipe to generate power from the force of the water jet coming out of the pipe. The evident answer based on the technical literature was a “Pelton wheel” turbine, which is basically a tiny(!) Ferris wheel which is turned by the water jet. The whole “machine” fits on top of a 5-gallon bucket! My turbine is 4” in diameter and the 48-volt heavy-duty truck alternator attached to it can produce more than a kilowatt of power if the water flow is enough. Mostly I get somewhere between 200-500 watts continuous output.
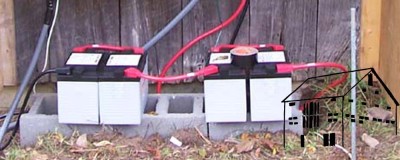
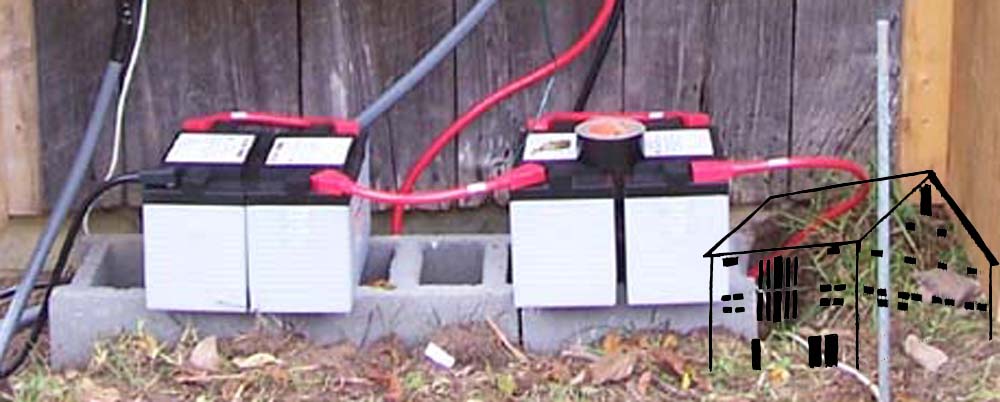
4. A method to store the power being created by the turbine. Giant truck batteries were the answer to the problem. I started out with four big deep-cycle batteries, the kind used for diesel truck engines.
5. A sophisticated system of electronic devices to control the electrical output from the turbine, to feed it into the batteries and dump the excess when they got full.
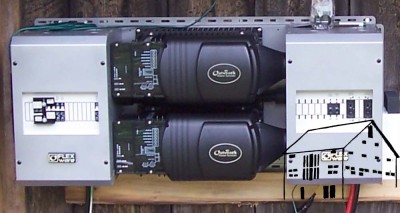
6. A high-power inverter system to transform the DC current from the turbine, and then feed the power to wherever I wanted it to go. The tail end of this system was standard wiring throughout The Barn. The “business end” was a matched pair of 48v input-to-110v output inverters in parallel, so I could have 220v in The Barn if I need it. In between was a 330’line of 6/3 cable fed through a shielded flex conduit.
At this point let me invoke the Schwarz Disclaimer — all of the products I cite in this series of articles are devices which I paid for in full, and get no benefit or consideration from their manufacturers nor distributors.
Up next — Building the System
In my opening entry to this blog I promised to present accounts of things other than historic woodworking or artifact preservation, with the emphasis on our evolving homesteading lifestyle. This is the first of those posts, as it begins a periodic recounting of the independent electric system we use for The Barn, and eventually for the cabin as well.
Being “off grid” is fundamental to the identity for The Barn on White Run. In part a lifestyle/political statement (I am fine with power companies but do not trust their political masters as far as I could throw a piano — virtually every gripe I have with public utilities stems from the regulatory bureaucracies governing them), in part a technological challenge (What? Just plug it into the wall? There has got to be a more complicated way to do this!), and part utilitarian practicality (out in the hinterboonies the power is interrupted a lot), the ability to work independently of the increasingly fragile power grid is a balm to the psyche. That has been especially true during periods of extended power outage, for example during the 2012 derecho storm when the power was out for more than a week. I continued work in the barn as though nothing had happened.

I am about to embark on several upgrades to my power system over the coming weeks and months, but I thought I would give you a glimpse of where I have been so you can better appreciate where I am trying to go.
Building the barn was accomplished with only a generator and power tools. My little Coleman with a Subaru Robin engine is apparently indestructible. After more than 1500 hours it still starts on the first pull and runs until I turn it off. (I could usually get about five or six hours per gallon of gas) A lot of time the generator was simply charging the 18v battery packs for the power tools, so rather than wasting an 8hp motor for that I got a teeny 1000 watt unit similar to this, that often gets about eight or ten hours per gallon of 2-cyle fuel.
I could have remained “generator only” for an indeterminate time, but making the barn fully wired required a more robust system.
Almost eight years ago I began to design our current system, its subsequent installation being the fulfillment of a lifelong dream. When originally searching for property in the late 90s, independent energy production potential was prominent on the “Wish List” menu. In the climes of the rural Alleghenies this meant hydroelectric power.
After we bought our place the wheels began to spin in hyper speed.

First, me being me, I read everything and bought every pertinent book I could find on the subject of micro-hydroelectric power. You want literature on producing your own power at home? Look on my shelf. It’s probably there.
Second, I searched far and wide for a practical workshop on microhydroelectric technology. Eventually I flew out to Colorado to attend a micro-hydropower workshop at the Solar Energy International. The course had a definite “Che was here” feel to it as most of the students appeared to be self-indulgent professional sandalista misfits pretending to follow their revolutionary catechism, while two or three of us were interested in actually building residential power systems rather than overthrowing political kleptocracies in the third world. The course was good as far as it went, but the holes in the content were large and did not become apparent to me until I built my own system.
Up next – the elements of my initial independent electrical system


Recent Comments