For the final session of the SAPFM Tidewater Chapter Spring Meeting I was asked to talk about “matching color” but I took the liberty of broadening the topic to “matching appearance” which I think is more useful. Though my demonstration component did indeed focus on understanding the perception of color and its modification, it occurred within the larger context of “appearance.” Normally this is a topic I like to spend a week covering, so in 90 minutes I barely got to the highlights. In fact, at this fairly late date I have decided to add a full chapter on the topic to my Period Finisher’s Manual book for Lost Art Press.
There are many aspects of appearance of interest to woodfinishing and I addressed each and their interrelation briefly. One point I made repeatedly is that if matching color is a critical component of any projects, that must be accomplished in the finishing layers (or between them), NOT in staining the wood.
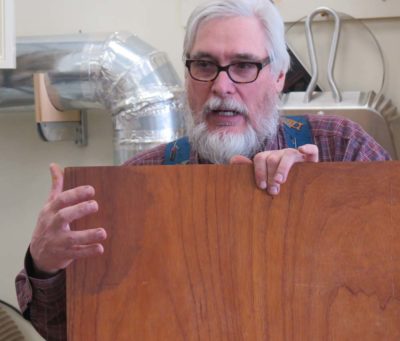
Trying to match any color via the manipulation of wood stain on the bare wood surface is a fool’s errand. To get to where you want to go, you must know where you are starting. And that means the wood surface must be sized with enough coating to establish the base appearance and color.
There are times where the selection of the coating itself is a critical component of achieving a specified color.
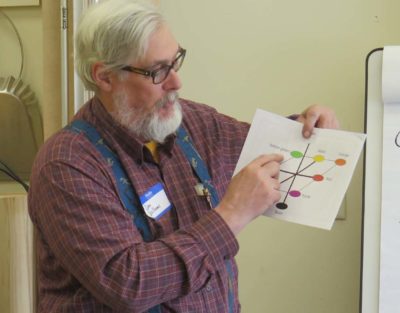
Once you get to the point of manipulating the coloration, I believe that the traditional color wheel is inadequate to the task. Instead I prefer a different conceptual model for color, and that model is known as the “L,a,b” color system. I will not go into detail here as to how I use this system in my own color work, suffice to say it is functionally a subtractive system i.e., if something is too red, I add green, if it is too yellow I add blue, to neutralize the excess color.
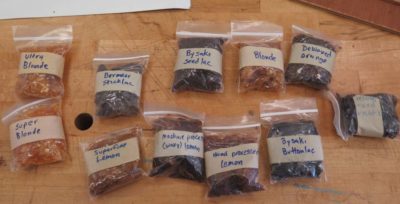
Adding tonality to the surface appearance can be achieved through tinting the coating itself with dyes or pigments. Here I am using some very intense organometallic synthetic dyes that were originally created for industrial and automotive paints, if I recall correctly. These are Orasol dyes and have a somewhat peculiar palette to select from, and are available to the finishing trade at Olde Mill.
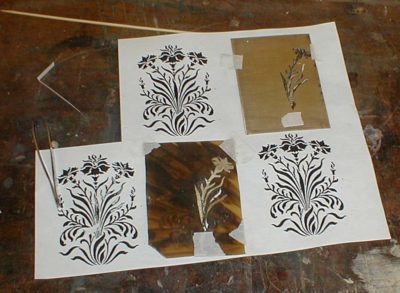
The means of imparting coloration are many, and once again I only use color in or in-between the finish. One of the simplest and most effective techniques — and historically accurate to boot — is a light glaze of asphaltum.
And speaking of glazing, I spoke for a few minutes about how to determine whether or not you have good glazing brushes.
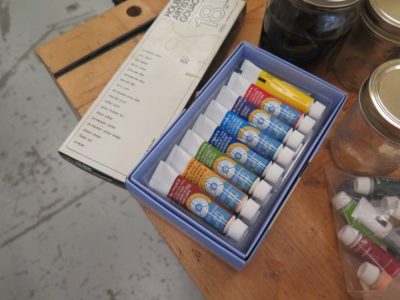
Another glazing technique I demonstrated was using artists’ watercolor paints known as goauche with a waterborne shellac binder that I made right there in the meeting. If you do not get the color or tonality correct, just wipe it off with a damp rag and start over again. You have perhaps a half hour to do this before the waterborne shellac sets, and it is very tenacious once dry.
Acknowledging three truths, namely that 1) folks have been generally resistant to coming to The Barn for workshops (I cancelled three workshops last summer due to lack of interest but am more optimistic for this year), 2) I think I have something to offer to an interested audience based on my 45 years of experience in woodworking and furniture preservation, and 3) I am comfortable and can work very efficiently when making presentations/demonstrations without a lot of wasted time. Given these three things I’ve decided to jump into the deep end of a pool already crowded with other swimmers.
I’ve made a great many videos before with Popular Woodworking, Lost Art Press, C-SPAN, cable networks, and dozens of live interviews and such for broadcast television. I am fairly familiar with the process and recently have begun what I hope is a long-term collaboration with Chris Swecker, a gifted young videographer who has returned to the Virginia Highlands after college and some time served as a commercial videographer out in Realville, to create a number of videos ranging from 30-45 minutes to several hours. Obviously the longer videos can and probably will be cut into episodes.
In concert with this endeavor has been the ongoing rebuilding of the web site architecture to handle the demands of streaming video (and finally get The Store functional). I believe webmeister Tim is in the home stretch to get that completed.
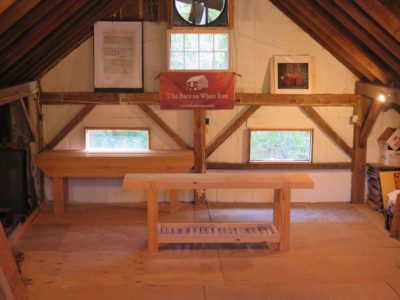
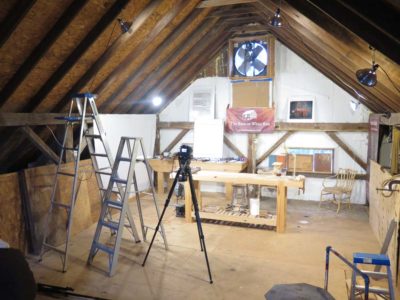
Beginning last autumn I turned the fourth floor of the barn into a big (mostly) empty room suitable for use as a filming studio. It is cleaned up, cleaned out, and painted with some new wiring to accommodate the needs but I have no desire to make it appear anything other than what it is, the attic of a late 19th century timber frame dairy barn. It is plenty big enough for almost anything I want to do.
The only shortcoming is that the space is completely unheated and generally un-heatable, limiting somewhat our access to it. This issue came into play very much in our initial effort as our competing and complex calendars pushed the sessions back from early November into early December and the weather turned very cold during the scheduled filming. We had been hoping for temperatures in the mid-40s, which would have been just fine especially if the sun was warming the roof above us and that heat could radiate down toward us. It turned out to be cloudy and almost twenty degrees colder once the day arrived and we set up and got to work. We had to do our best to disguise the fog coming out of my mouth with every breath and I had to warm my hands frequently on a kerosene heater just to make sure they worked well so we could make the video. Yup, this will be a three-season working space for sure.
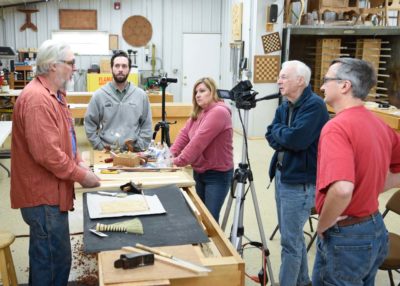
The first topic I am addressing via video is complex veneer repair. Based on my experience and observations this is a problem that flummoxes many, if not most, practitioners of the restoration arts. It was a challenge to demonstrate the techniques I use (many of which I developed or improved) in that this requires fairly exacting hand dexterity and use of hot hide glue, and the temperatures were in the 20s when were were shooting. It was brisk and oh so glamorous.
The electrons are all in the can and Chris is wrapping up the editing and post-production, so I am hoping to review the rough product in the next fortnight or so.
Paying for this undertaking remains a mystery and leap of faith. I will probably make this first video viewable for free with a “Donate” button nearby, but am still wrestling with the means to make this at least a break-even proposition. I do not necessarily need to derive substantial income from the undertaking (that would be great, however) but I cannot move forward at the pace I would like (5-10 videos a year) with it being a revenue-negative “hobby” either. I want to produce a first-class professional product, and that requires someone beside me to make it happen, and that someone has to be paid. As much as I am captivated by Maki Fushimori’s (probably) I-pad videos – I can and have watched them for hours at a time, learning immensely as I do – this is a different dynamic.
I continue to wrestle with the avenues for monetizing this just enough to pay for Chris’ time and expertise. I’ve thought about “subscriptions” to the video series but have set that aside as I have no interest in fielding daily emails from subscribers wanting to know where today’s video is. Based on my conversations with those in that particular lion’s den, subscription video is a beast that cannot be sated without working 80-100 hours a week. Maybe not even then.
Modestly priced pay-per-view downloads is another option that works for some viewers who are mature enough to comprehend the fact that nothing is free. For other viewers who have come to expect free stuff it does not work so well. I am ball-parking each complete “full-length”video at $10-ish, with individual segments within a completed video a $1. Just spitballing here, folks.
A third option is underwriting/advertising, but I find this unappealing as a consumer and thus unappealing as a provider. I have no quarrel with companies and providers who follow this path but it is not one I want for myself.
Finally there is always the direct sales of physical DVDs, which remains a viable consideration.
If none of these strategies work for me I will make videos only as often as I can scrape together enough money to pay for Chris.
At this point I have about 25 videos in mind, ranging from 30 minutes to several hours long. Our next one will require some “location” filming as I harvest some lumber up on the mountain.
Here is a potential list of topics for videos.
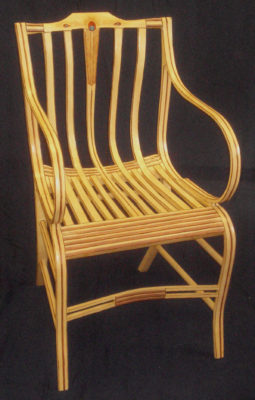
Making a Gragg Chair – this will no doubt be a series of several 30-45 minute episodes in the completed video as the project will take several months to complete, beginning with the harvesting of timber up on the mountain and ending with my dear friend Daniela demonstrating the creation of the gold and paint peacock feather on the center splat.
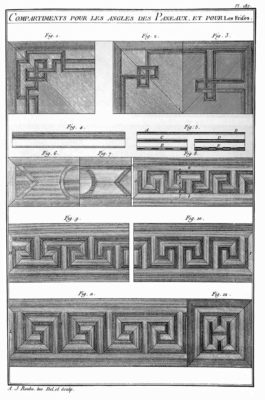
Roubo’s Workshop – L’art du Menuisier is in great part a treatise on guiding the craftsman toward creating beauty, beginning with the shop and accouterments to make it happen. I envision at least three or four threads to this undertaking, each of them with the potential of up to a dozen ~30(?) minute videos: the shop itself and its tools; individual parquetry treatments; running friezes, etc.
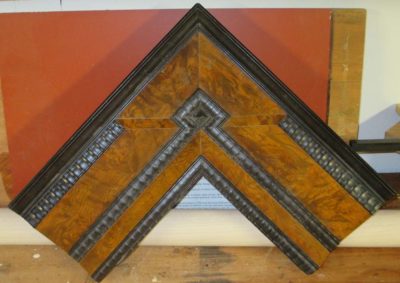
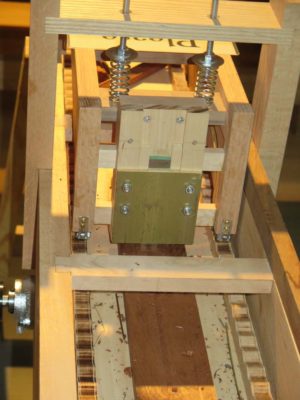
Making a Ripple Molding Cutter – A growing passion of mine is the creation of ripple moldings a la 17th century Netherlandish picture frames, and building the machine to make them. This topic is garnering a fair bit of interest everywhere I go and speak. I want this video (probably about two or three hours) to be compete and detailed enough in its content to allow you to literally follow along and build your own.
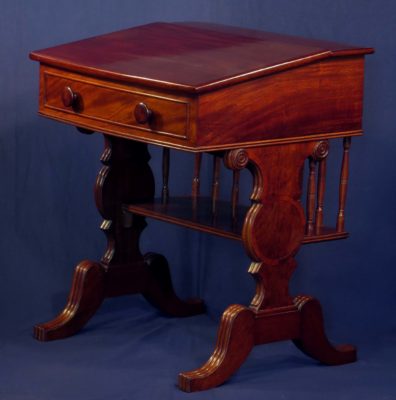
Building an Early 1800s Writing Desk – One of the most noteworthy pieces of public furniture is the last “original” c.1819 desk on the floor of the US Senate (home to a great many sanctimonious nitwits and unconvicted felons). All the remaining desks of this vintage have been extensively modified. This video will walk you through a step-by-step process of making one of these mahogany beauties using primarily period appropriate technology based on publicly available images and descriptions.
Oriental Lacquerwork (Without the Poison Sumac) – To me the absolute pinnacle of the finisher’s art is Oriental lacquerwork. It is created, unfortunately for me, from the refined polymer that makes poison ivy, poison oak, and poison sumac, well, poison. Driven by my love for the art form I am creating alternative materials employed in nearly identical work techniques. Tune in to see a step-by-step demonstration what can be done.
Boullework with Mastic Tordonshell – Very early in my career I loved to carve and gild, but that passion was re-directed more than thirty years ago to the techniques of Andre-Charles Boulle and his magnificent tarsia a encastro marquetry with tortoiseshell, brass, and pewter. Once I had invented a persuasive substitute for the now-forbidden tortoiseshell, a process demonstrated in exacting detail in the video, the sky was the limit.
Metalcasting/working for the Woodworker – This is the video topic I am most “iffy” about as many/most folks will be trepidatious of working with white-hot molten metal. But I just might give it a try to show creating furniture hardware and tool-making. It’s possible/probable I might make this a series of specific projects to make the topic more consumable.
Ten Exercises for Developing Skills in Traditional Furniture Making – Based on my banquet presentation at the 2017 Colonial Williamsburg Working Wood in the 18th Century conference this series of very approachable tasks for the shop will de-mystify a lot of historic furniture making for the novice in a very non-intimidating manner.
The Compleat Polissoir – starting at the point where Creating Historic Furniture Finishesleft off this would be an in-depth exploration of the ancient finisher’s tool kit and will be expanded over the Popular Woodworking video (about which I am still very pleased) with a boatload of information gleaned from my in-the-home-stretch Period Finisher’s Manual for Lost Art Press.
I’m sure there will be more ideas popping into my fertile brain, or maybe that’s fertilizer brain.
As always, you can contact me with ideas here and once we get the new web site architecture in place, through the “Comments” feature that was disabled a lifetime ago to deal with the thousands of Russian and Chinese web bots offering to enhance my body or my wardrobe.
The last session at WW18thC was my presentation of Historic Gilding and Finishing, including a briefsprint through the application of gold leaf. I described processes of gilding with a particular emphasis on building the surface (wood, gesso, bole) to make it amenable to the laying of gold leaf. It was only a few minutes, but gilding is a topic that can be introduced in either ten minutes or ten days, nothing in between makes much sense.
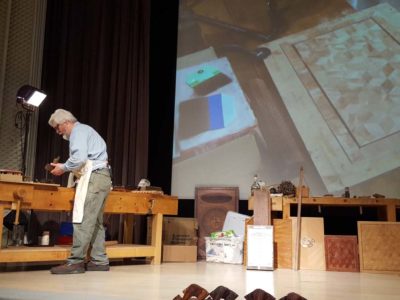
As quickly as I could I changed gears to get to transparent finishing, relying as always on my Six Steps To Perfect Finishing, a rubric that has served me flawlessly since I came up with it a couple dozen years ago. Not every one of the six points got the same emphasis here, that was not practicable given the time constraints, but the conceptual model was followed closely.
As always the starting point was surface preparation, including using toothing planes, scrapers, and pumice blocks that were integral to the finisher’s tool kit 250 years ago.
The final step in surface prep was to burnish the wood with polishing sticks or fiber bundle polissoirs.
I then moved into the no-man’s-land of filling the grain and building the foundation for the finish yet to come, employing the traditional method of using beeswax as the grain filler. In some circumstances this is the finished surface, in others it is the foundation.
In olden times they would have used a fire-heated iron to melt on the beeswax, I use a similar shaped tool that is electric. The molten wax is drizzled on to the surface then distributed with the heated iron unto there is excess. After cooling any excess is scraped off.
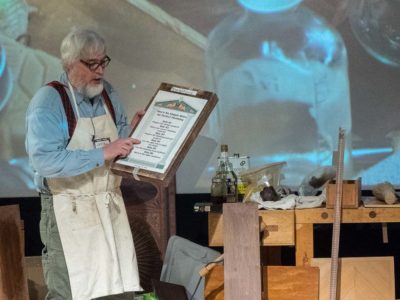
When choosing the finish itself, an 18th century palette would have been based on four major families of finishes. From left to right they are shellac, linseed oil, beeswax, and colophony (pine rosin).
In this demo I used padded spirit varnish (shellac) to show the application of the finish over the beeswax grain filling.
And then my time was up and everyone went home.
****************************************
I’ll be offering my annual Historic Finishing workshop at the barn in late April. Let me know if you would like to participate.
Since our first-ever convening of the International Ripple Molding Association last spring JohnH has been an enthusiastic fellow traveler along this road, and once he got home he started building his own following the instructions of Roubo as closely as practicable.
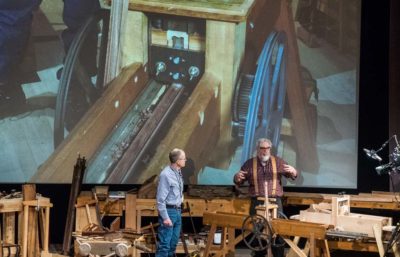
Inasmuch as he had it finished and working I asked him to bring it with us to Williamsburg, since I had already asked him to be with me on stage when we were demonstrating Winterthur Museum’s ripple cutter made by my longtime friend and colleague Cor van Horne.
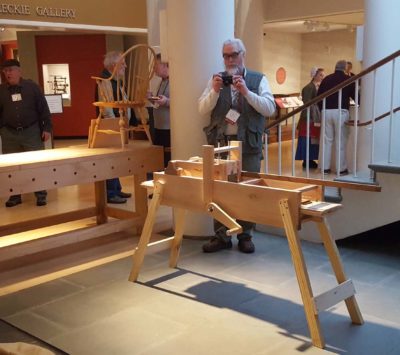
While demonstrating we were able only to get the Winterthur machine before we ran out of time, but we arranged for John’s machine to be on display out in the atrium of the museum.
There was a great deal of interest, including mine, and it would not surprise me to learn of several copies being made in the world of historic furniture making. I know that one will begin to take shape in The Barn in the not too distant future.
In addition, as John and I continue to develop our designs and facility in building these elegant little machines, we decided to offer a workshop on building your own ripple molding cutter at The Barn in late July 2019.
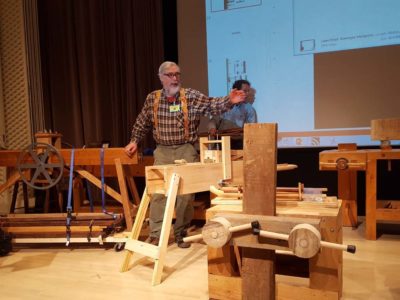
The first of my two WW18thC presentations was “Roubo Rediscovered – Merging 1760s Paris with the 21st Century” in which I recounted the nuggets gleaned from The Roubo Translation Project and how I have incorporated them into my current work practices. Not too surprisingly this is a topic on which I could speak and demonstrate literally for days, but I packed as much as I could in 90 minutes.
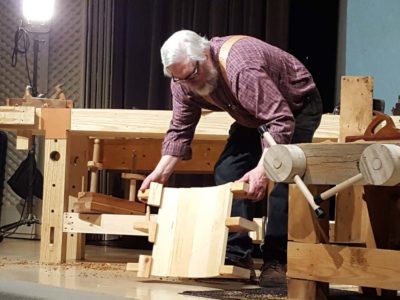
I began as almost always within this framework by giving my benches-and-holdfast sermon,
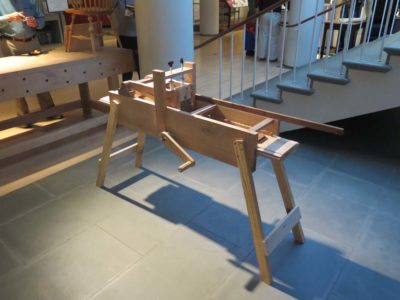
followed by demonstrations of Roubo’s veneer sawing bench with some audience participation,
winding-sticks-on-stilts,
the coopering cradle, a vital clamping component in the world of serpentine and bombe’ furniture,
panel clamping jigs,
mobile bench-top press, this one made by Oldwolf (can you say Moxon vise?),
and finally ripple molding cutter my friend and collaborator JohnH.
Each of these items will be addressed individually in coming blog posts. The overal; topic of Roubo’s Workshop is a huge one and I am outlining an extensive video series to explore it in depth (more about that later this week).
My thanks to JohnR for pictures of this presentation. I would have taken them myself but I was busy at the time.
I’ve been to several of Colonial Williamsburg’s annual confab Working Wood in the 18th Century (WW18thC), a gathering that always has a central theme of some sort. This year’s organizing topic was “Workmanship of Risk: Exploring Period Tools and Shops,” and it was my favorite of these conferences (although previous topics of “Surface Decoration” and “Oriental Influences” come in a close second tie). And not just because I was a speaker; that actually makes the experience less for me because of all the preparation work that consumes crazy amount of time and energy for me.
The presenters for this year included the crew from the Anthony Hay Shop, and their interpretation of a decorated tool chest; the Colonial Williamsburg joiners, demonstrating the consruction of monumental/architectural moldings; Jane Rees, the scholar behind the magnificent decorated lid of said tool chest; Peter Follansbee, recounting the processes of his work in carved 17th century oak furniture; Patrick Edwards, demonstrating classical marquetry techniques; and the inestimable Roy Underhill, with his keynote lecture and moderation of a panel discussion on historical primary sources; and me (more about that in subsequent posts).
There is no way to summarize the richness of the conference content without re-living it with verisimilitude, which could be accomplished only with a literal transcript and live video feed. But the next few posts will encompass my compressed take on the event.
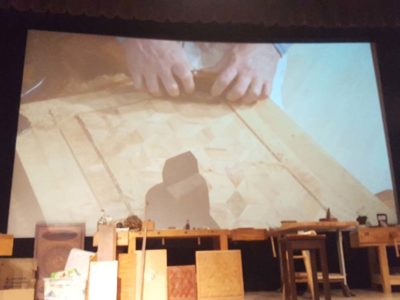
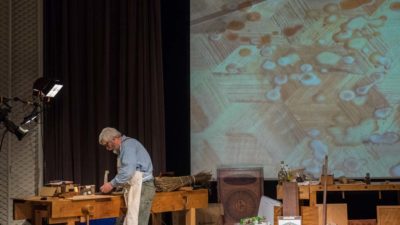
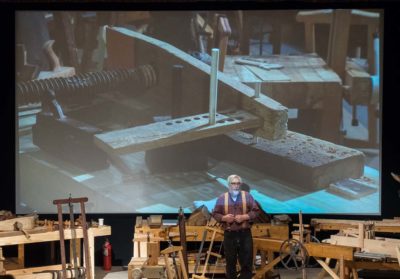
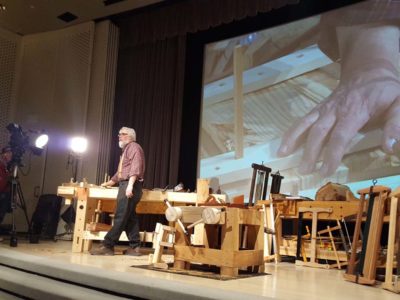
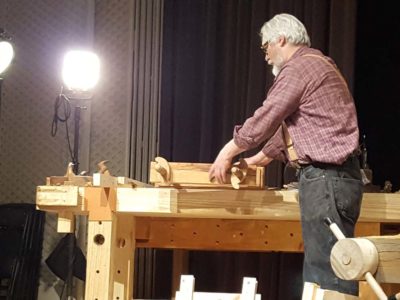
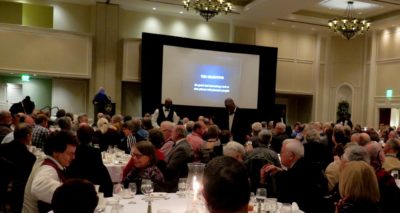
As is the norm for this event, which normally sells every seat within the first few hours of opening the registration, every seat in the house was filled plus perhaps a few more. I know that often the deciding factor of whether or not some guest may attend a particular presentation is the occupancy limit established by the Fire Marshall. All the presentations are in the front of the auditorium on a small theatrical stage, making it difficult if not impossible for anyone beyond the front few rows to see the details of the proceedings. To alleviate that hurdle and enhance the learning experience for the attendees the entire performance is projected onto a giant screen behind the stage. It sometimes sets up the weird dynamic of us performing for the cameras, turning away from the audience.
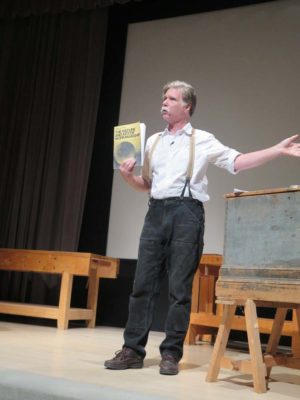
Our start on the first evening was RoyUnderhill, undertaking the unenviable task of decoding philosopher/craftsman David Pye’s influential book The Art and Nature of Workmanship, a book, which Roy avers, has been read by few if any artisans (I think he is correct in this; I ground my way through it some 40+ years ago and never felt the desire to return to it. It’s on my shelf if the impulse ever emerges).
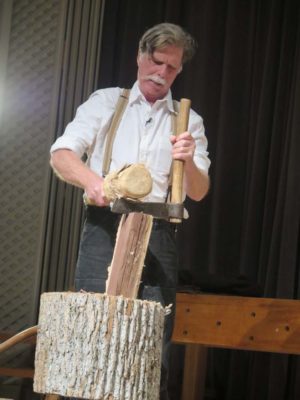
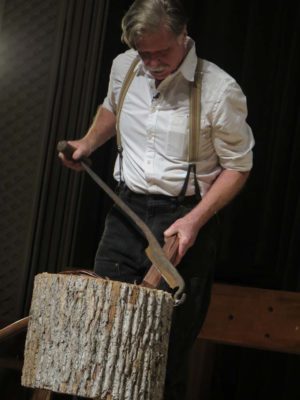
As always Roy was an engaging speaker even given the difficulty of the topic, and demonstrated some of the concepts contained within the risk vs. certainty discussion. Beginning with a mallet and froe to rive out some lumber workpieces, moving then to a hatchet, and finally to a sabot’s shave, he began the steps of workmanship that might not be “risky” in the hands of a skilled craftsman but certainly have a component of “uncertainty” to them, that uncertainly diminishing with each incremental step.
Roy ended up with an inventory of a complete tool box from ages past, using it and its contents as focal points for the soliloquy.
Recently I was invited to speak about the HO Studley project to the Frederickburg (VA) Woodworker’s Guild. My friend SteveD was my host and a grand time ensued.
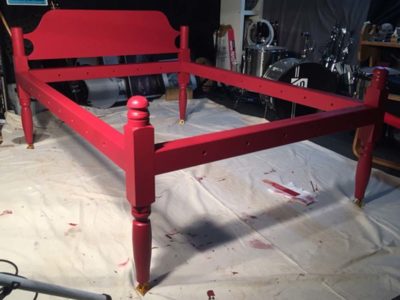
While at Steve’s I got to see a bed frame he had been working on in recent weeks, and about which we had corresponded regarding the finish being used. This bed was commissioned by the organization that is recreating George Washington’s childhood home near Fredericksburg. Much of the recreation is based on rigorous and ongoing archaeology. The Washington family domicile being readied for the public is all new construction, but there is solid evidence that it is a very faithful interpretation of the original.
Steve has been commissioned to create a number of beds (and perhaps other pieces?) for the site, and this bed is a stunning one.
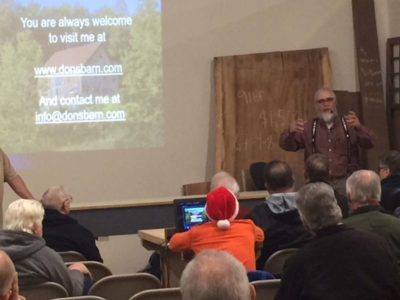
The audience at the Guild meeting was large and enthusiastic, Steve said it was about twice normal. And you gotta admit, the tale of Henry O. Studlew is a compelling one. The group meets in a semi-industrial space which suited me just fine.
The audience was very attentive and engaged, asking excellent questions throughout the presentation and staying after to discuss all manner of Studley and Roubo topics. They promised to invite me back, and I look forward to that event.
I recently spent a week at the Marc Adams School of Woodworking, teaching two three-day courses. I believe this was an experiment on Marc’s part, road testing some new scheduling concepts such as a three-day workshop during the week as opposed to only on weekends.
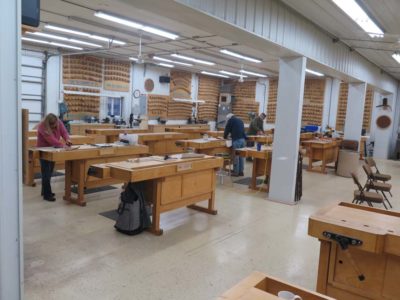
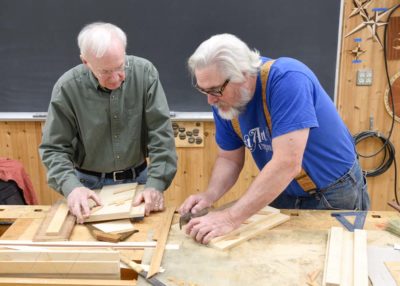
The Parquetry workshop had three enthusiastic attendees (plus a most excellent teaching assistant), a number the Marc told me precludes any repetition of the topic. This is an entirely fair conclusion on his part as he has a huge footprint to support. With several classrooms in simultaneous use I’m guessing he needs somewhere between 35-50 attendees every day for six months to make it work.
In fact our merry little band was in a huge, well equipped classroom with twenty (?) workbenches. The spaciousness was both unnerving and delightful as the students could spread their projects as widely as they wanted.
This workshop is somewhat unusual for me in that there was a finished project at the end, while I tend to prefer teaching a skill-set rather than a project.
But skills and processes were taught and practiced, including the making of sawing and planing jigs,
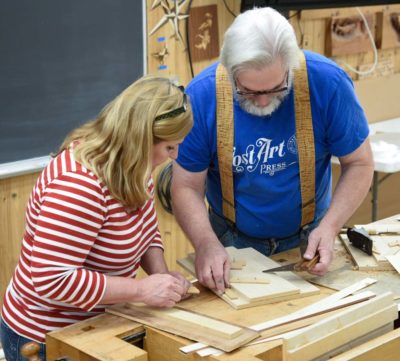
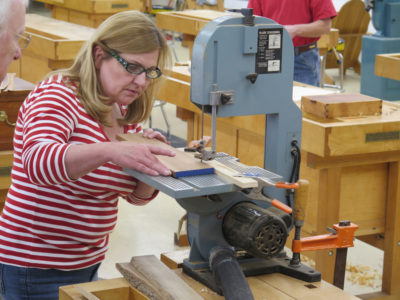
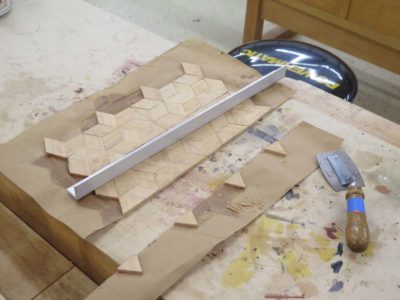
sawing veneer stock for making the patterns,
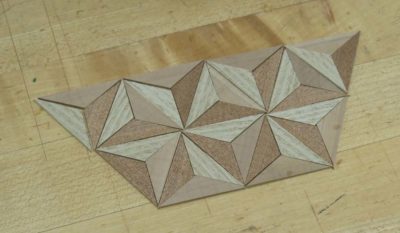
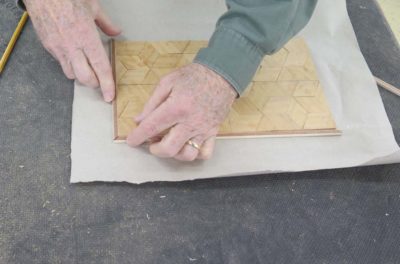
the assembly of the patterns,
fabricating and integrating simple bandings,
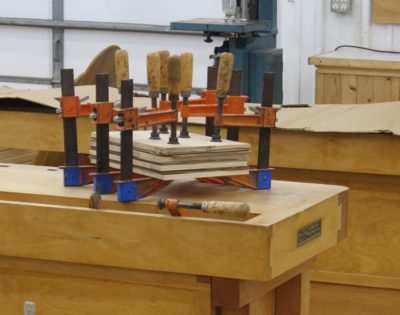
and gluing them down to a substrate.
In the end they were cleaned up with toothing planes, files, and scrapers making them ready for the finishing process.
Though I will not be teaching this workshop again at MASW, I will not completely set the general topic aside. I am hoping to have a workshop on knot-work banding perimeters there in 2019.
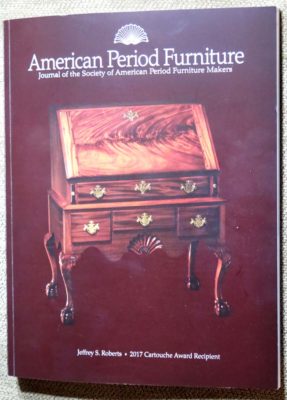
I rarely post about something that is current, but I found a package on the front porch when I came down for lunch yesterday. Inside was the new issue of American Period Furniture, the annual journal of the Society of American Period Furniture Makers. I have been a member of SAPFM for many years, and served a couple terms on the Society’s governing body.
Last year I was invited to be the banquet speaker for the annual Working Wood in the 18th Century conference at Colonial Williamsburg. Since the SAPFM always holds their annual business meeting and banquet at this conference there were plenty of members in the audience that evening.
They must have liked the banquet talk because I was immediately asked to turn it into an article for APF. I did, and it arrived this week. I forget whether this was my third or fourth APF article.
I will be blogging about each the 10 exercises in the talk and article at greater length in the near future.
After long and careful consideration, I have concluded that I simply cannot host any workshops at The Barn this coming summer. The combination of the Studley book and exhibit, brutal winter aftermath with a mountain of things to do on the homestead, projects that have languished in the studio, and the need to wrap-up Roubo on Furniture Making (almost twice as large as Roubo on Marquetry) leaves me with no time nor energy to dedicate to workshops at the barn. I had planned on a historic finishing workshop in late June, but that will have to wait until net year. In September I will host a week-long workbench build for my friends of the Professional Refinishers Group web forum.
This is not to say I will be entering my long anticipated hermit phase. My presence and teaching elsewhere over the summer will be evident. Check these out.
Henry O. Studley Tool Cabinet and Workbenchexhibit – May 15-17, Cedar Rapids IA
Making New Finishes Look Old – Society of American Period Furniture Makers Mid-Year Conference, June 11-15, Knoxville TN


Recent Comments