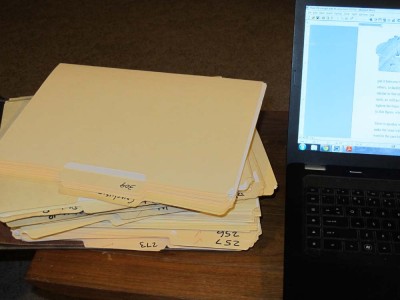
Now that Roubo 2 is winging its way to the desktops of the LAP magicians I wanted to take a minute to reprise our work thus far. That 5-inch thick stack of folders next to my laptop is the version Chris Schwarz will be working his way through in the coming days. Yes, it really is that big.
I hope to have a bound version of the submitted draft at the local chapter meetings of the Society of American Period Furniture Makers the next two Saturdays; the Virginia Chapter is meeting at the Leesburg, Virginia, the following Saturday is the Chesapeake Chapter at the Woodworker’s Club in Rockville, Maryland.
Even before Roubo on Marquetry was in the production pipeline in early 2013, we were hard at work on Roubo on Furniture Making. By May of 2011 we began assembling translated sections, with editing and rewriting as time allowed. Now we find ourselves on the cusp of the editorial phase, and for an abbreviated peek behind the curtain, here are the innings of labor for a project like this.
1st Inning – Michele creates a transliteration from the original text.
2nd Inning – Don chops up all the Plates into individual figures and plugs them into the transliteration; Don engages in in-depth review, editing, and rewriting of the transliteration to make it comprehensible to a contemporary world
3rd Inning – Philippe and Michele review Don’s edits and returns the sections to Don with copious edit tracking
4th Inning – Don reviews the edits and incorporates them into the manuscript, then forwards it on to external readers
5th Inning – Don and Michele sit together at the dining table and Don reads sections aloud while Michele follows along in the original French. These sessions, usually four hours because that is all the longer I can read out loud, have been astonishingly helpful in catching typesetting errors, syntax, word choice, and overall literary flow.
6th Inning – Don revises the manuscript sections based on the notes from our read-out-loud sessions combined with any comments from the outside readers, and sends them along to Lost Art Press
7th Inning – Lost Art Press edits the thing; Don reviews the edits
8th Inning – Wesley designs the books, Don reviews the galley proofs
9th Inning – the book gets manufatured and distributed
And that is where we are right now only thirty-six short months since beginning in earnest, in the bottom of the sixth.
Go ahead, write a book. I dare you.
It’s a big day around here as the first sections of the Roubo 2 manuscript were submitted for editorial review by the magicians at Lost Art Press. It is worth noting that after reading this material perhaps a dozen times, I still find it engages, educates, and interests me. This is a work about which we are very pleased. I think you will be pleased too.
Thanks to things we learned during the creation of the first volume, To Make As Perfectly As Possible: Roubo On Marquetry, our working pattern is fundamentally different from a document traffic flow plan. This manuscript, while almost twice as long as the first one, is taking less than half the time.
Now we treat each Plate and its accompanying text as a stand-alone document. So in the end I will not be submitting one big book manuscript; I will instead be submitting 99 documents. I’ll let Chris and Wesley melt them together into the whole. Some of these sections are brief – the shortest is two pages – while others are several dozen pages. On average they are about 10 pages long, so yes indeed, the working manuscript is more than 900 pages long.
I will sit down with Michele next week for our penultimate oral reading session, with the final one probably in a fortnight. I am also laboring on the essays and photographic enhancements for the book, but as of right now Chris has something to sink his teeth, er, red pen, into.
Watch out Henry O. Studley, I’m coming for you!
It was more than a week into Spring, and being this Spring the sun rose to reveal an inch of icy snow coating everything the morning we were to visit the incomparable Conner Prairie historic complex, one of the nation’s premier enterprises of historic reenacting and interpretation. Once the slop was scraped from my truck we were on our way; one advantage was that the bitter cold kept the crowd small and we had the place nearly to ourselves.
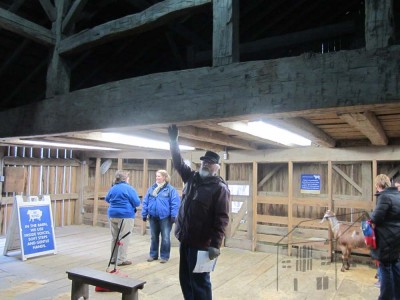
One of the highlights was the timber frame barn in the Conner homestead. The main cross-beam is a gargantuan oak timber more than 12” x 24” x 40 feet long (the historic carpenters there figure the tree trunk was more than eight feet in girth) and the longitudinal mid-rafter beam was an 8×8 perhaps 70 feet long.
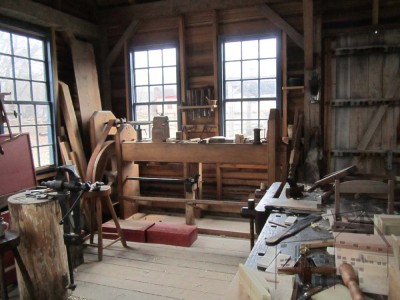
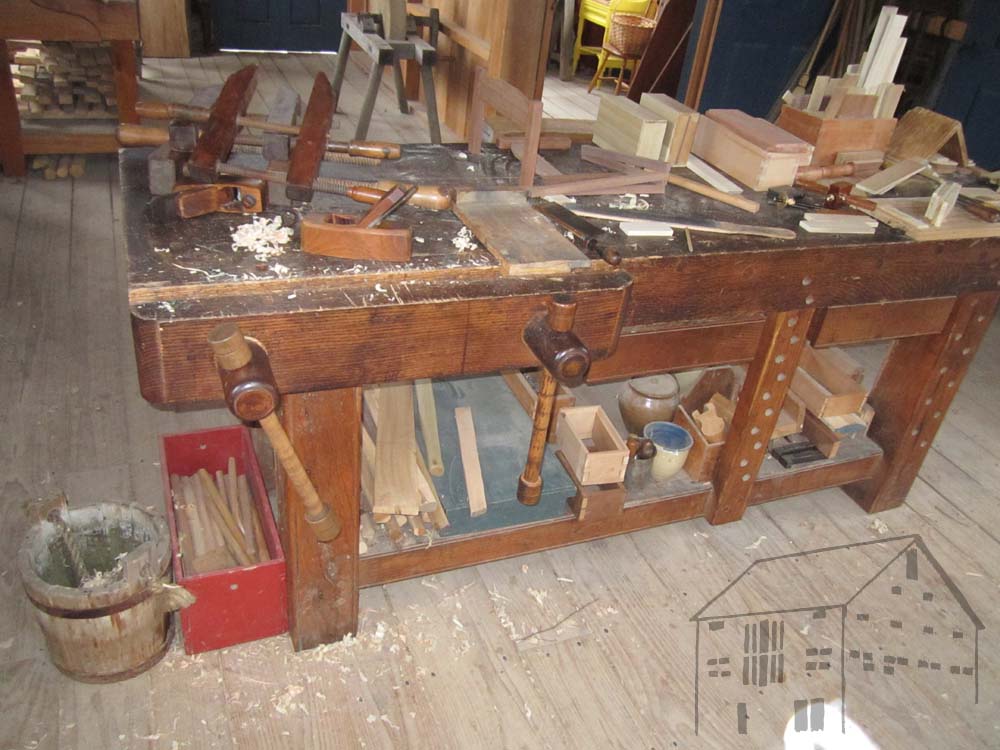
I especially enjoyed our time in the carpenter’s shop, where my wife and I were the only visitors. This allowed for a lengthy conversation with the proprietor about tools, wood, and their lathe. He showed it to me and allowed me a turn.
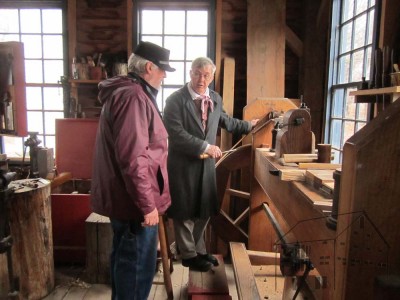
It is a magnificent shop-built machine with a 300-pound flywheel that can get away from you fast! Since I am a head taller than “Mr. McLure” it was very awkward for me, but I could see one of these fitting into the fabric of The Barn.
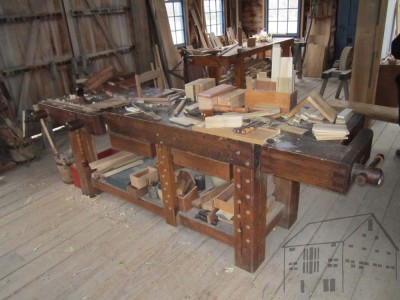

In the center of the one end was the impressive work bench, which had been built in the shop in years past. A copy of no specific documented model, it is instead a combination from a historically accurate vocabulary.
It seems to be about two parts Roubo with one part of Moxon and a dash of Nicholson. The six-inch-square oak legs are capped by a four-inch slab top, and the fixed deadman is stout as well. There is no real woodworker in America who would not be delighted to have this beast in their workspace. I know I would.
If you are going near the Indianapolis area, take a peek.
Lee Valley spent a lot of time and energy to create this April Fools treatment of Roubo on their web catalog. It is fabulous! Seriously.
They even got in a sly crack at Studley. Bravo!
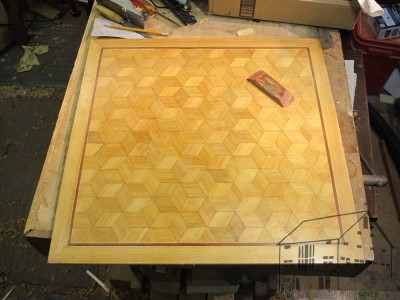
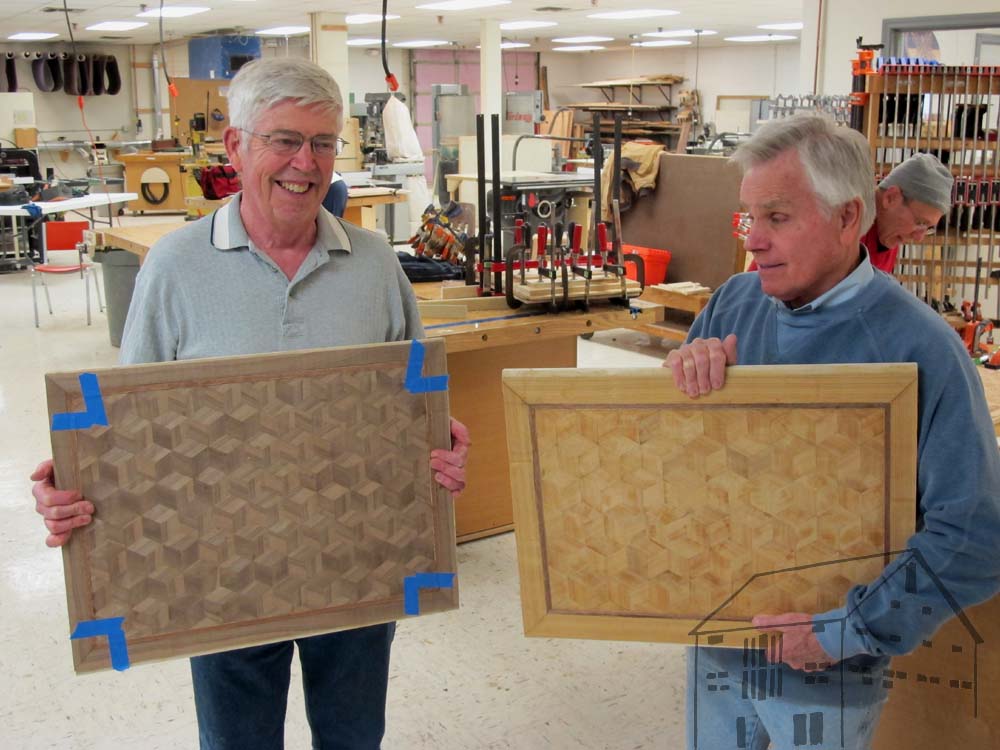
The goal for the weekend, thus the goal for the day itself as the final one, was to allow each student to leave with a fairly complete Roubo parquetry panel. The pace of the day was then almost by definition a peripatetic of not frenzied one.
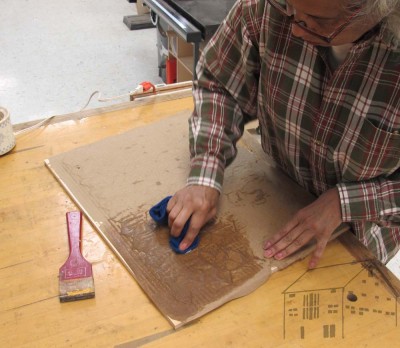
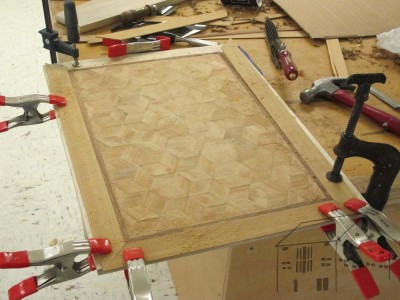
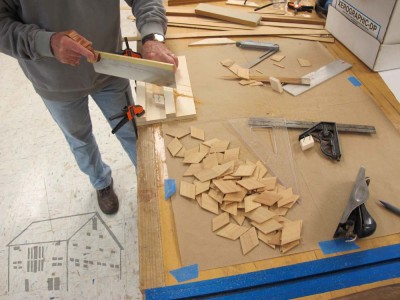
After opening the gluing set-ups each student was faced with a glued-down panel with a heavy layer of brown craft paper on the surface. Gentle work with a dampened sponge or rag combined with scraping with a scraper or knife resulted in a cleaned panel ready for trimming on the edges to allow for fitting of the banding. The trimming was accomplished with a straightedge and a utility knife or veneer saw.
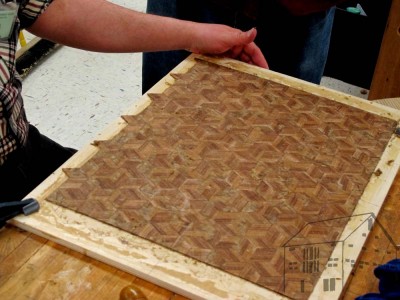
With strips of the banding glued up on day 2 each panel was fitted with the decorative detail.
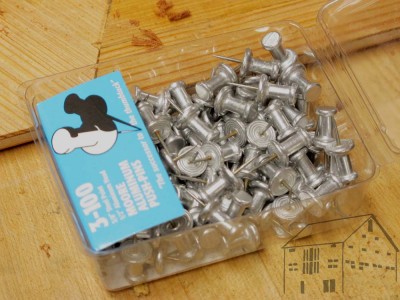
One of the delights of traveling and teaching is the opportunity to learn new things. In this instance, I learned that Utrecht art supplies carries an aluminum-head push pin, a necessary and useful tool for pinning the banding in place while the glue sets. I’ve been making-do with plastic headed pins, but until now had no success in finding the aluminum head ones. I left for home greatly pleased with the new information and source. My great thanks to Ms. S for finding them and bringing some to class, and for letting me buy her stash from her.

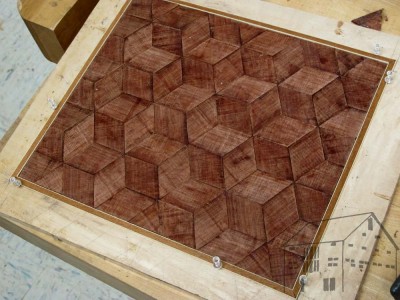
Once the students had their banding glued and pinned, while that was setting I took the opportunity to demonstrate flattening the surface of a parquetry panel with a toothing plane, smoothing it with a scraper, and finishing it with molten wax and water-wax. The students did not get to try all of these methods, but the techniques are simple and the students promised to finish them at home.
Once the banding was set, borders made from strips of the veneers used for making the original lozenges were fitted and glued as a longitudinal border around the perimeter of the panel.
By the end of the day, everyone had their panel in “take home” condition, now equipped with a new technique to apply to new projects. Several of the students indicated that those new projects are either underway or in the planning stage.

If this workshop interests you, you can sign up for the July 18-20 rendition of the identical project at The Barn, by dropping me a line here. I look forward to seeing you soon.
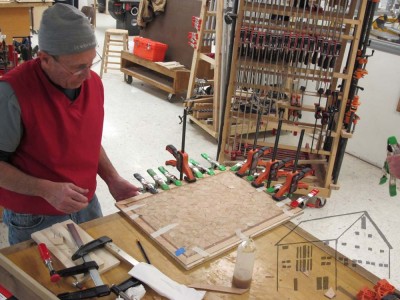
As is often the case for the second day of a three day workshop, the atmosphere was one of quiet work and little instruction or lecturing. Since the objective for the day was to get everyone’s parquetry assembled and ready to glue to the plywood base, there was lots,
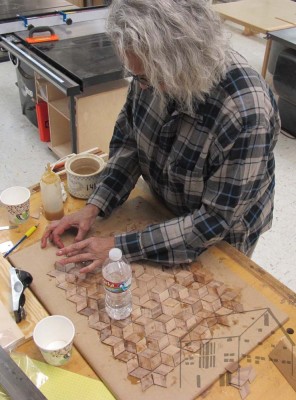
and lots,
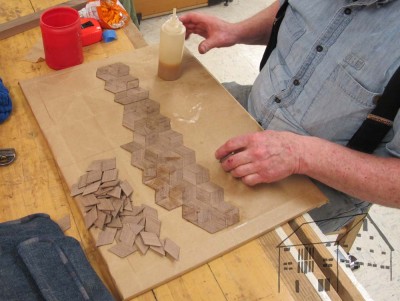
and lots of gluing parallelogram lozenges down to the kraft paper.
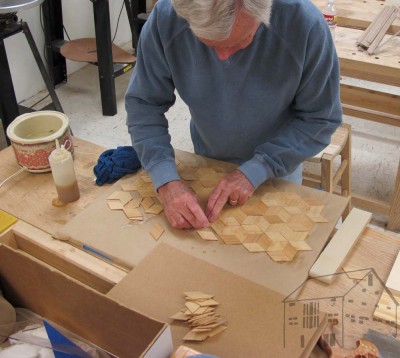
As usual, whenever somebody got theirs ready to go they jumped in to help the next person get theirs ready.
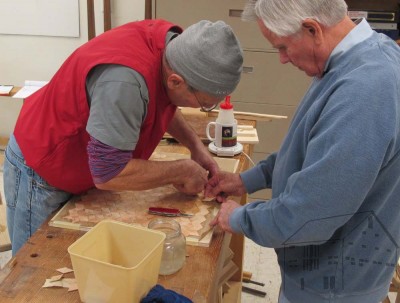
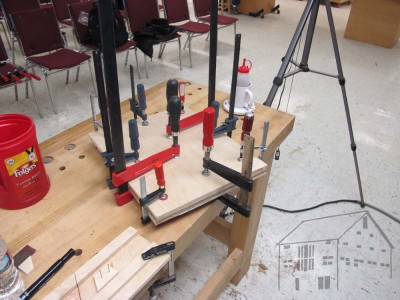
In addition, we needed to get the loaves of banding glued up to slice first thing in the morning of the third day.
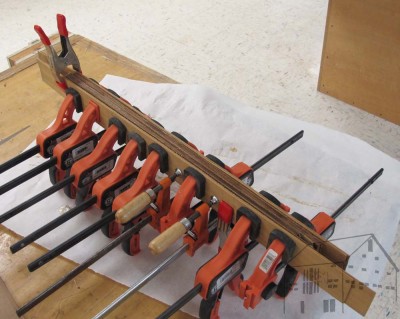
Finally everything was glued up and we called it a day.
Last weekend I taught a three-day workshop on creating this parquetry panel a la Roubo for the Kansas City Wood Worker’s Guild, a delightful host if ever there was one.
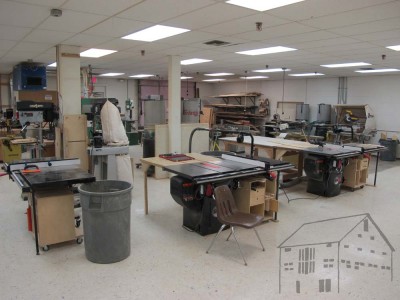
All you’ve heard about the Guild, its membership, and space is true and then some. they are positively at the top of the food chain studio-wise with a nice lecture space, and complete bench room, and a machine shop to die for.
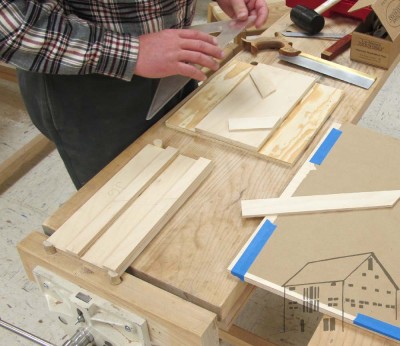
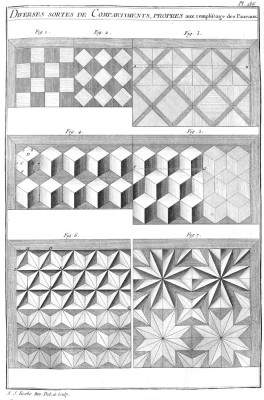
The first day began with a discussion of the project in general, but more importantly several specific tasks to get things started. First was the construction of two jigs necessary for the cutting of the 60-120-60-120 parallelogram lozenges that comprise the parquetry. One of the Guild members had prepared all the baltic birch plywood to make them, so all we had to do was cook some glue and assemble them.
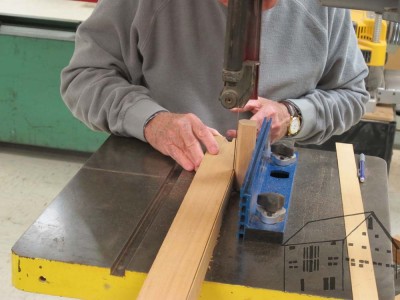
Next came the ripping of the lumber into the veneer strips from which the lozenges were cut.
Following that was the cutting of lozenges. By the hundreds.
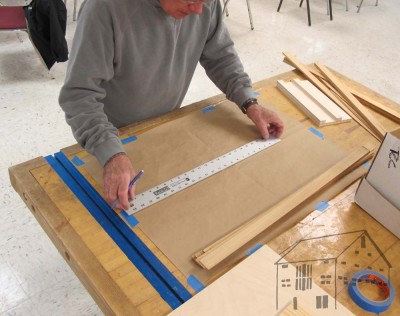
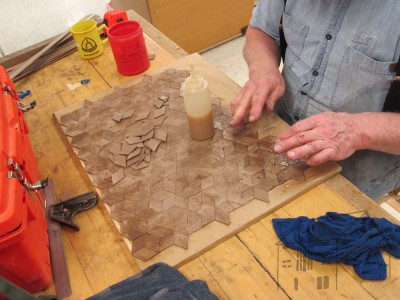
Since the pattern is first assembled and glued precisely onto heavy kraft paper, the needed to be divided exactly on both axes.
Finally came the assembling and gluing on the paper. this is actually more difficult than it seems and can be quite a challenge for newcomers until they get the knack of it, something I will be addressing in a blog in a week or so unless the spirit moves me to make it sooner.
More tomorrow.
While prepping for my upcoming visit to the Kansas City Woodworking Guild to teach a class based on Roubo’s Plate 286 I was casting about for my inventory of toothing planes. I can find three of them, but the other half-dozen are MIA. If you happen to know where I put them, please let me know.
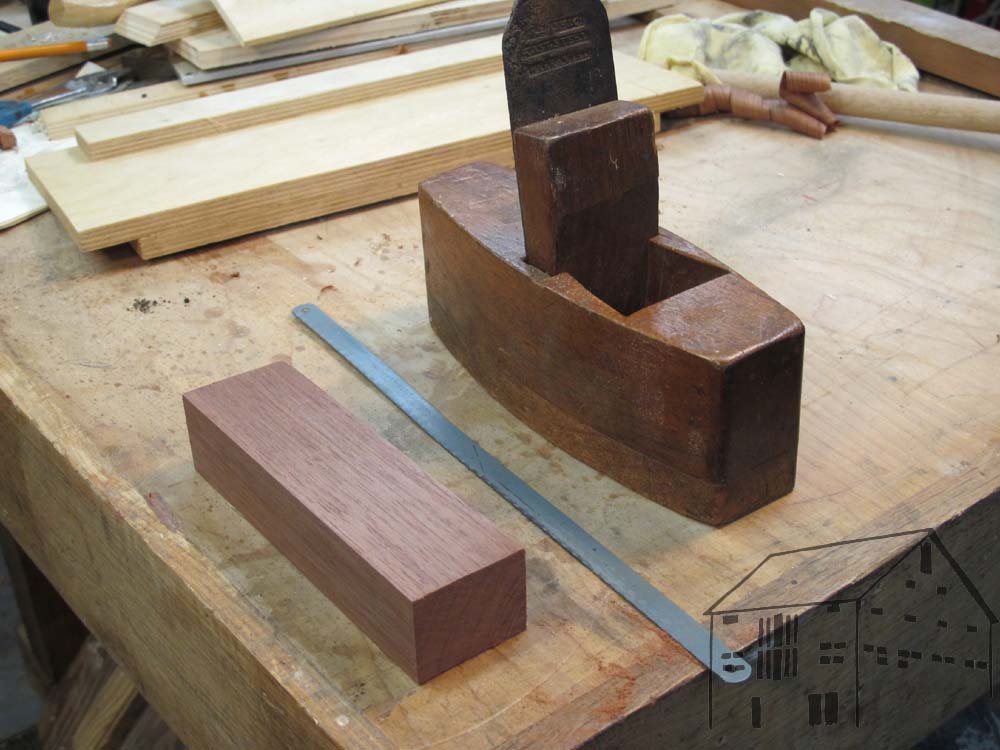
In lieu of finding my remaining stash of planes I revived an old homemade tool idea from the mists of the distant past. A word of caution: this will take almost five full minutes to make it with a cost of zero, so don’t say didn’t warn you. You will need 1) a block of scrap wood, 2) a hacksaw blade, and 3) a pair of metal shears.
Step 1 – Find a block of scrap wood. Cut it to about 6 inches long.
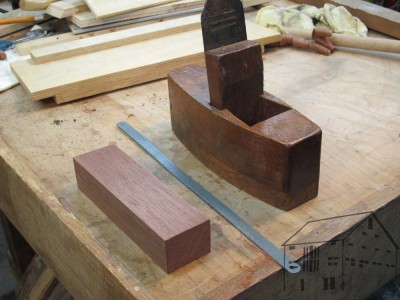
Step 2 – Find a hacksaw blade, and cut off a piece equal to the width of the block.
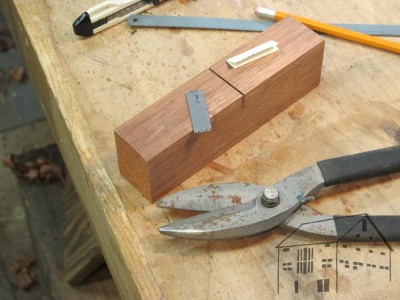
Step 3 – at abut the center of the block, on the side of the block mark the depth of the blade body to the base of the teeth.
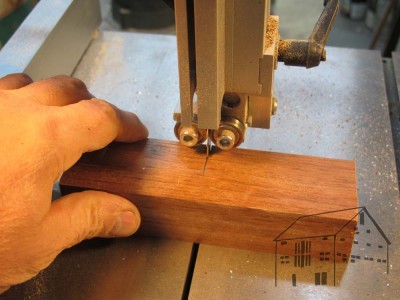
Step 4 – Using a saw (in my case I used my band saw) cut a kerf to the depth you marked in Step 3.
Step 5 – Ram it home. if necessary add a small shim of paper to the kerf to make sure the blade fits tightly. Adjust the blade so that the teeth tips are exposed about 1/16″.
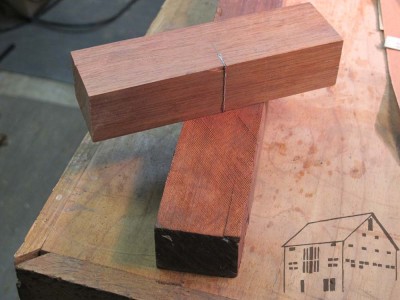
You now have an inelegant but functional toothing plane, a necessary tool for dealing with sawn veneer marquetry.
Step 6 – I will cover this in Part 2.
Last fall the good folks at Popular Woodworking very kindly asked to adapt and re-publish an essay I wrote for To Make As Perfectly As Possible: Roubo On Marquetry, which they titled Hammer Veneering. It came out a couple of issues ago but I got distracted and forgot to put it here also.
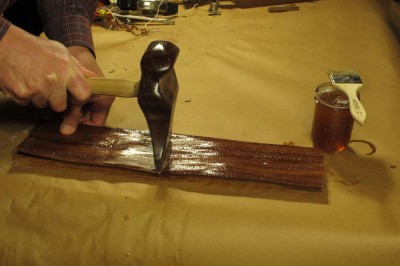
Here it is.
The recent convergence of editing the section of Roubo attendant to Plate 18 combined with assembling additional doors for the book cabinets of the library made me reflect on the nature of the humble pipe clamp, particularly in the ability to make pipe clamps any length necessary for the particular task at hand.
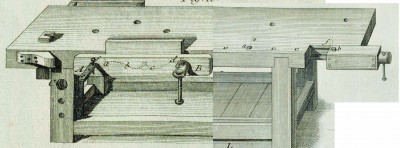
As part o the descriptive text for Plate 18 Roubo waxes enthusiastically about both bar clamps and the devices he calls “clamp extenders” to allow any particular clamp to have its capacity increased.
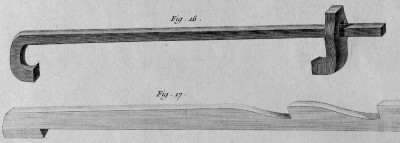
Here is the device Roubo illustrated for this purpose.
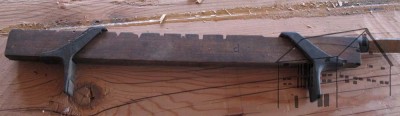
Such a concept is not unknown to modern woodworkers especially in the use or even the fabrication of bar clamps with wooden bars, which could be made to nearly any length.
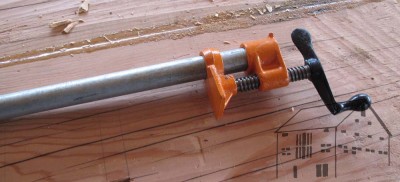
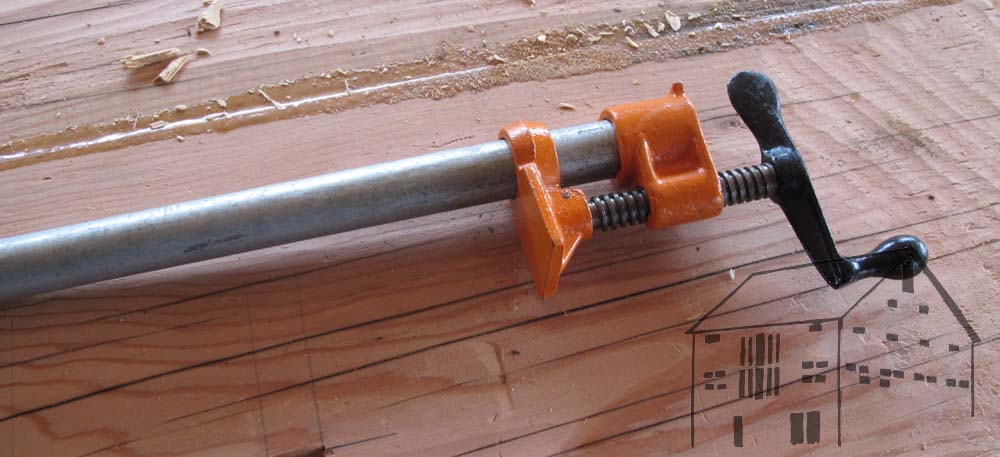
This brings me to the pipe clamp. Like almost every woodworker and handyman in the Western world I have pipe clamps, even several of them. Since my strategy for clamp acquisition revolves around the number “4” (the number of clamps needed for a pair in both x and y axes) I have in my collection of clamps 16 of the pipe variety. For interchangeability all of my clamps are for ½” n.p.t pipes, common enough from the local hardware store.
The down side is that for longer applications, ever longer pipes are needed. And, have you priced threaded pipe lately? Holy cow.
Being a cheapskate who really enjoys finding solutions to problems, while visiting my favorite hardware store and balking at the prospect of spending $50 for four 5-foot sections of threaded black pipe, I instead spent some time browsing the aisles of the hardware store, one of my all-time favorite activities. (every year I spend literally dozens of seconds shopping for clothes, but I can spend practically an entire day examining products at a good hardware store).

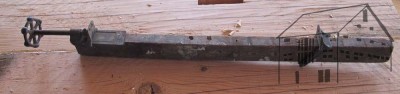
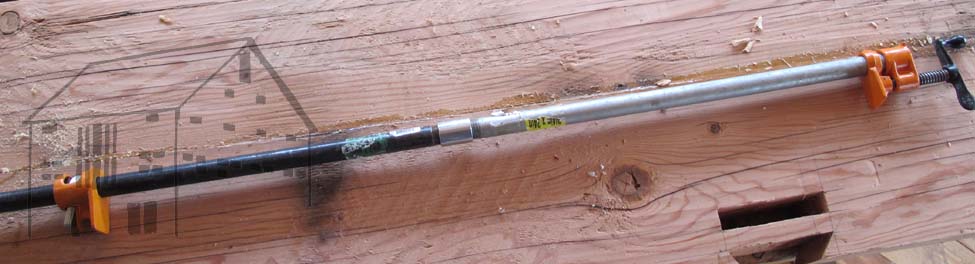
There in the shelf in the plumbing section was the 79-cent solution to the problem – a double female-thread pipe coupling. I grabbed a handful and headed home. Sure enough, they filled the bill. Perfectly. For less than a buck I could take two pieces of pipe, one 24″ and the other 36″, with a 5-foot clamp as the result.
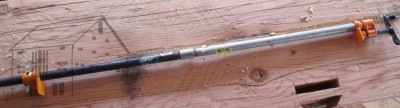
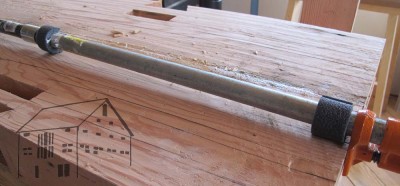
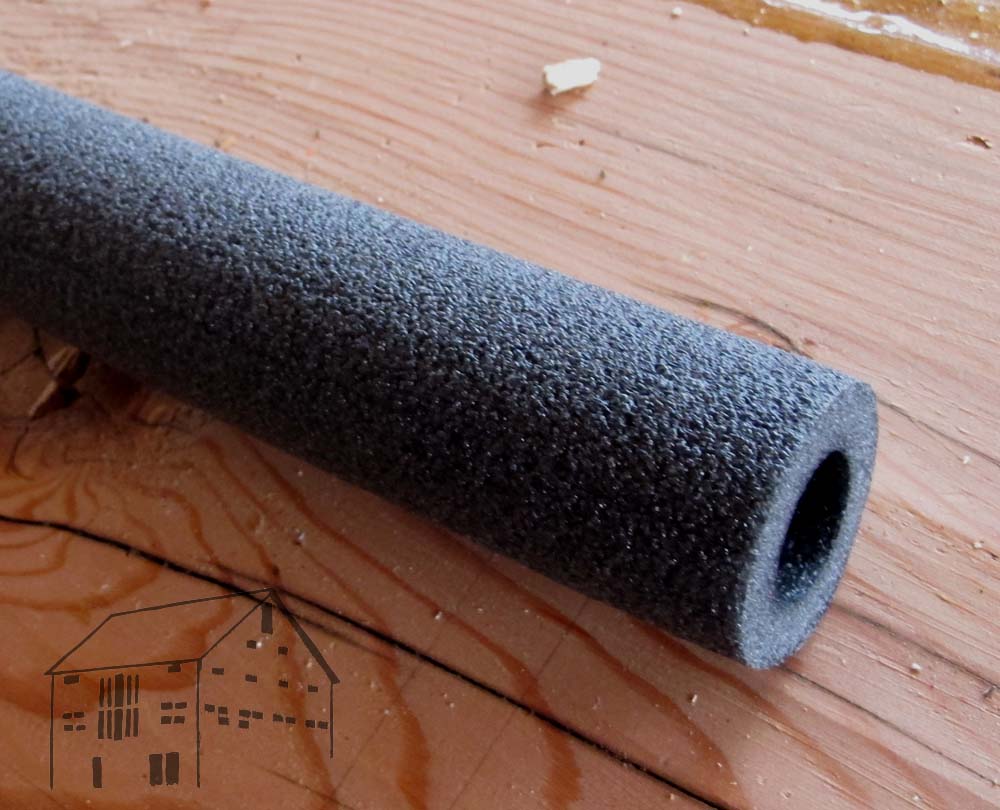
As an additional enhancement for the new, longer vise configuration, I grabbed a scrap of pipe insulation and cut rings to place on the pipe and provide protection to the wood surface from the abrasions of the coupling fitting.

I’d like to think that had they been widely available at the time, we would see elegant engravings of pipe clamps in L’Art du Menuisier.


Recent Comments