Making ripple moldings, and by extension perfecting my ripple molding cutting machine, is going to be part of my life for as long as it takes me to arrive at the horizon. I am comfortable with the concept of my ripple cutter and will extend the invitation to my fellow ripplistas to spend some more time in the barn this winter/spring as I follow this trail.
In my current episode of rearrangeritis (my favorite Stumpy Nubs term) I’ve moved my machine into the heated studio in proximity to my finishing bench so I do not have that excuse to prevent me from noodlin’ it at my leisure. Well, if I had any leisure.
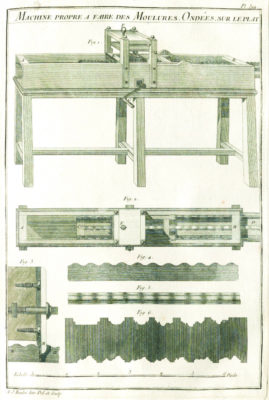
Thanks to some barbarian who chopped up (!) a First Edition L’Art du Menuisier, (!!) and should be condemned to copy the encyclopedia by hand a la The Adventure of the Red Headed League, I’ve got a lot of original Roubo prints to frame, mat and mount for a display gallery at the top of the cabin stairs, so I’d better get to it. This includes the plate of the ripple molding machine itself drawn and engraved by Roubo himself somewhat fancifully, given that he had never seen one in person and was simply imagining what it might be.
In a perfect world, 1) all the bents of the barn would be equally spaced, and 2) if #1 is not the case then the larger of the side bents, the one where my shop resides, would be on the south side of the building. Alas, such is not the case. When the barn was assembled and erected, what I got was what I got. My shop is on the north side of the barn, and in the winter vis-a-vie the sun nary the twain shall meet except for perhaps three hours after dawn (east-ish wall) and four hours before dusk (west-ish wall). As for the smaller space in the south side of the barn, the one ostensibly dedicated for a classroom, the solar/thermal gain is immense with full wall exposure to sunlight and a complete row of clerestory windows all the way around. Given enough motivation I could probably move my shop there, but it is a smaller space and the heating stove is underneath the current shop, the classroom is entirely uninsulated… I just had not experienced the alpine winters (near-zero lows are common) before setting up shop or things might be different. Sigh.
Between my propane wall furnace keeping the overnight shop temps in the upper 30s for about $2/night (no real desire to heat more aggressively with it through the day as delivered propane is topping $5/gallon!), my kerosene heater (frankly astonishingly effective; I am pretty certain I could heat my shop with it alone for about $5/day, but that open flame thing…) and my wood/coal stove in the basement under the shop I can keep the temps congenial 99% of the time. Nevertheless, my ongoing hunt for BTUs remains, well, ongoing. The other day when it was single digits with a stiff breeze outside it was a challenge despite 3″ XPS insulation in the walls and ceiling, new tighter doors, and a relentless hunt for crevices to caulk.
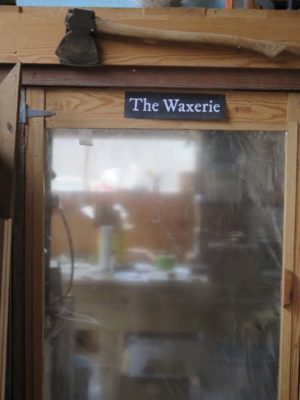
Many years ago my friend Tred told me of a set-up whereby direct solar heat could be harvested and introduced into the interior space via a ducted “greenhouse” panel. This video shows the concept. My plan is to modify that construction to build and install a couple of solar thermal collectors, one on the northeast corner of the barn (near the vise end of my Roubo bench) and the other on the wall nearest my Waxerie at the other end of the shop. For the former I expect I can harvest BTUs two or three hours each morning, and the latter perhaps four hours each mid-day and afternoon. Any BTUs I can garner without ongoing effort is a winner to me. A few years ago I made a solar oven to melt beeswax and it wound up melting the case for the digital thermometer (!), so I am optimistic that these units can be useful.
I think I just might start this project later today. I’ll check to see if I have all the materials on hand that I need.
My friend Tom standing in front of Walt’s tool cabinet when we were visiting him in Staunton. I very much like this style of standing tool storage.
For a variety of reasons – desire to consolidate my core tools into a compact-ish volume in preparation for the “some day” time when I do not have a 7,000 s.f. barn, organizational order (my friends are laughing out loud right about now); work flow; parquetarian/channeling-Studley indulgence; antipathy for floor level tool chests — I plan to spend a good part of the next two (?) years constructing, decorating and outfitting a large standing tool cabinet in my studio. It will reside in the space currently dedicated to my saw rack and whatever is on the floor underneath it. I was really impressed by my acquaintance Walt’s cabinet and plan to use his as an inspiration for mine.
Rather than making it out of solid lumber with dovetailed corners my plan is to construct the box/doors entirely from 3/4″ & 1/2″ Baltic-birch plywood and sheathed in a yet-undetermined parquetry pattern (a la Roentgen?) using veneers sawn from leftover FORP workbench scraps. This project has been gestating long enough that I scrounged scrap 18th century French oak from the original Roubo bench-building workshop in Georgia.
The cabinet box will be roughly 48″ high x 42″ wide x 16″ deep with an open space between the base structure large enough to fit my Japanese tool chest.
Leave it to me to attempt a masterpiece project that almost nobody will ever see.
This winter will be the one during which I begin to address the door issue in the barn.
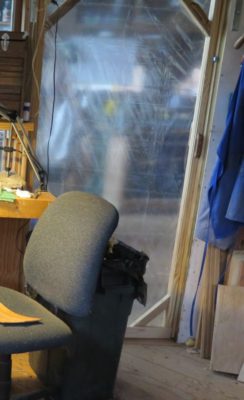
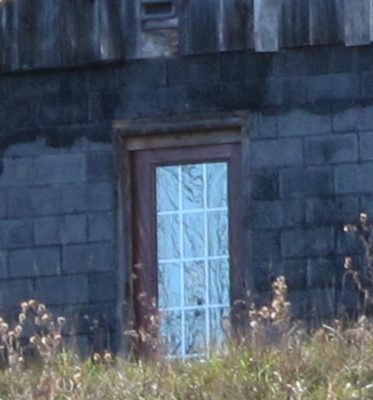
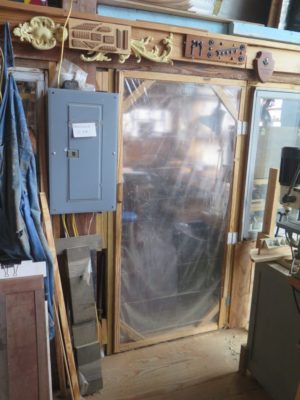
For the past 13 years the entrance into my studio space has been delineated by a pair of doors comprised of nice wooden frames with double plastic sheets, shower curtains actually, that have performed surprisingly well. But, the time has come to install proper insulated doors. Given the odd size of the doorways, determined by unalterable features of the original post-and-beam structure, the two doors into my studio space will need to be custom made.
The standard entry door to the first floor/basement was framed in about two hours if I recall correctly, needing to fit a compression fit jamb using only the things I had on hand one Sunday afternoon before heading back to Mordor. What I had on hand was some scrap white pine joist stock and a tube of construction adhesive, along with a salvaged insulated door. Years later this haphazard installation has become decrepit to the point where a good blast of wind or even a curious bear could take it down.
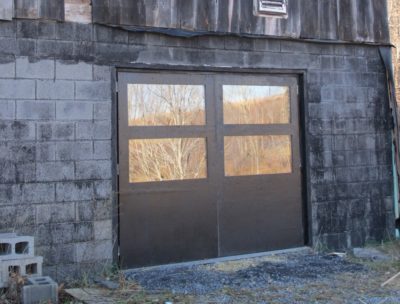
The garage-door opening of the first floor/basement was filled with a pair of four-foot-wide doors I made from 2x, plywood and with insulated glass inserts. Within a year of their installation (the photo was taken at the completion of the original installation) a howling windstorm caused irreparable damage to them (we get serious hurricane-strength (!) windstorms every year or so out in the holler) and ever since they have just been screwed shut with plastic sheeting covering the entire section from the inside. One thing has been made clear as a result, namely that I simply did not need a garage door-style access to the inside space as a matter of regular activity. I’m thinking of building a pair of panels, one screwed in place as an insulated wall and the other openable as a door to allow me to wheel my smelting furnace cart in and out as my foundry work progresses.
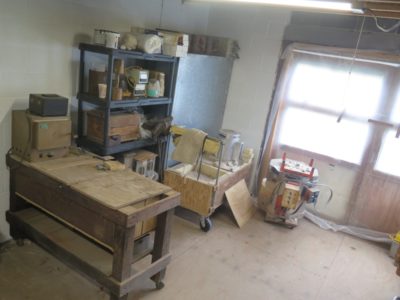
Since escaping Mordor and relocating to the holler at the end of the road, most of my metal casting set-up has been piled in the corner, patiently awaiting my ministrations to bring it all back on board. That status changed last week when I set aside a day to tidy up that section of the ground floor adjacent to the wood/coal stove, and unpacked all the foundry accoutrements and set it all up. It was really satisfying to get everything out and get reconnected with my brain, eyes, and hands. Now the only things left to do are drop a 220v line for the kiln (for firing the refratory molds used in lost wax casting) and to rebuild the doors to the first level adjacent to the foundry.
My plan is to roll my mobile foundry cart outside whenever I am casting; I’ve never had a foundry accident, but inadvertently spilling white-hot molten metal inside a 125-year-old wooden structure is a vignette that might not have a happy ending. The doors at the opening were badly damaged in a terrific storm a few years ago and making new ones will be easier than repairing the old ones.
On top of that, in recent months I’ve made the acquaintance of a gifted Amish blacksmith who recently moved to Shangri-la and am giving him one of my smelting furnaces so together we can set up a larger foundry in his shop. That endeavor will require its own set of postings, although I must admit that I have never asked him about photographing there and am not familiar with Amish custom in that regard.
Soon the Don’s Barn blog will regularly feature even more metal work, including detailed inventory of my foundry equipment, supplies, and processes.
Beginning probably next week I will relate the account of recreating some metal moldings and medallions for use in the conservation/restoration of a late 19th century cabinet that was missing its base along with the cast metal moldings and fittings. I do not think I have told that tale here before (I’m at almost 1500 postings but much of that is not easily searchable, much less rememberable) , but if I did you get to see it again.
Going back many years I was an enthusiastic supporter of the concept of a vertical marquetry saw as an alternative to a horizontal chevalet, a machine I never got the hang of. I’m not sure if I was the first person to raise the concept to Knew Concepts but certainly I was in there early with encouragement and specific concept and design ideas. The development of the tool took many years and trips down many rabbit trails, not the least of which was the passing of our beloved friend Lee Marshall from Knew and the transition to Brian’s sole leadership and all the logistical and legal details that entailed.
Then came the day several months ago when the very first unit rolled off the assembly line and shortly thereafter arrived on my doorstep. I assembled and used it just enough to get the sense of the tool, then put it away since I had so many other things in my pile of things to get done. Well, I am finally returning to the tool. The first thing was to find a permanent (?) home for it in the workshop. At the moment that location is the end of my oldest and dearest friend in the shop, my Emmert workbench.
Time will tell if this is the final resting place for this magnificent machine, but for now it is working just fine.
One of the foci for shop projects for this winter will be a series of projects addressing the “door” needs around the place.
This will begin with the completion of fashioning the doors for Mrs. Barn’s small clothes cabinet I built a couple years ago. I’ve had the vintage chestnut lumber picked out ever since the cabinet was made, but somehow that task never percolated to the top of the pile.
I’ve also got another eight doors to make for the book cases in the balcony library. Again, I’ve had all the stock prepared awaiting assembly, and now is the time for that to happen. I’ve not observed any mouse damage to the books yet, but given enough time it would occur.
Finally, I need to replace the double-plastic-sheet doors to the workshop. They do a surprisingly good job but the time has come for real doors with real insulated glass.
Once all of these jobs get done I will turn my attention to the door(s) into the machine shop/foundry. These doors were damaged long ago during a fierce wind and will be replaced by a configuration still to be determined. At the moment I am leaning toward a single door with a removable glazed wall alongside it.
I believe that in some (many?) craft cultures it is a New Year’s tradition to bring all of the components of the tool kit up to snuff. For the past several years, at least since relocating to Shangri-la, I have been dong some of the same thing and will spend this week so engaged. Throughout the year I toss everything that needs major rehab into a box on the shelf awaiting the beginning of the year for attention. Obviously this would not include anything truly critical to ongoing activities, that would be dealt with immediately by necessity.
This year there is an equal proportion of tools-to-be-made compared to tools needing a tune-up. This includes a batch of infill mallet heads I sourced recently, another plow plane iron re-purposing, a new (to me) iron to be fitted into my infill smoother and a new wedge made for it, a new tool holder for my patternmakers’ gouges, and some tools being transformed from one thing into another like some gouges I bought for the explicit intent of turning them from out-cannel into in-cannel, etc.
And of course, this is a week that gives freedom to my “re-arrangeritis” impulses, not that I have much restraint in that area to start with..
One of the aspects to living in a locale so isolated as Shangri-la is that it is populated by folks who are at the very least comfortable with isolation; for the “born here’s” it is simply the life they have always known, for many of the “come here’s” it is the life they actively sought. If you cannot tolerate isolation, you leave. I can speak truth to this, for about 99% of the time my only in-person contact is Mrs. Barn. Going to the Post Office or feed-and-seed-co-op hardware store a few minutes a week hardly describes a life of social interactions — “social distancing” describes every day ending in “Y” out here — and during this season of psychosis our only regular time of interaction beyond ourselves is at church. (I am increasingly convinced that functionally Covid-19, while deadly to a miniscule slice of the population pie, is more of a psychological experiment in repression than a public health crisis; I will believe it is a catastrophic pandemic when the elites act like it is one rather than jetting about for vacations in Cancun or group dinners at fancy restaurants and when politicians and gubmint employees rather than small businesses lose their incomes.)
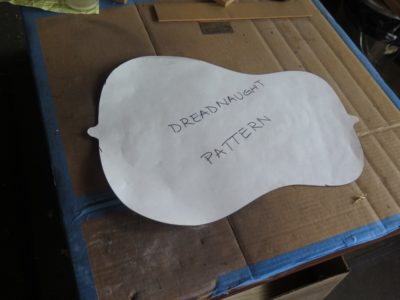
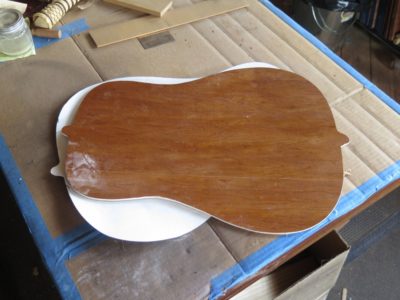
One of the things in which I have been long interested is finding other woodworkers here for fellowship and collaboration. They are around but like me they mostly stick to themselves. I’ve had some success in finding and interacting with gunsmiths, blacksmiths, metalsmiths, this smith and that smith, but thus far the woodsmiths have kept to themselves. In recent months this has begun to thaw as one retired “come here” with whom I am on a local Board revealed he is a luthier, and lo and behold there is suddenly a critical mass of luthiery-ish practitioners in the county. One is a newly arrived pastor/amateur musicologist, another is an actual full-time guitar maker who moved here recently and has a small studio in town. (When your region’s largest metropolis has fewer than 200 people…) Together we are in the gestational phase of starting a woodworking club with just the four of us working in my studio, the only space any of us has that would be amenable to the enterprise — plenty of workbenches in a heated work space. I think the plan is for us to gather weekly to work on individual projects as our schedules allow.
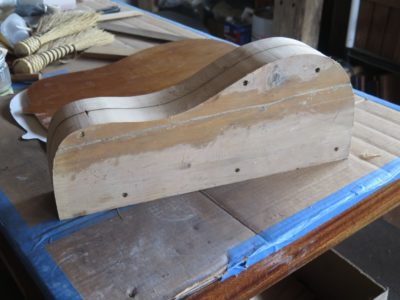
Since I am in fact the only one of us four who has never built a guitar from scratch I will be the main hindrance to the overall performance level. Still my enthusiasm for the effort is high, and not too surprisingly I expect to bring my own peculiar approaches to building a dreadnaught six-string guitar. Eventually I will build a hammered dulcimer for Mrs. Barn, who has expressed a strong desire for one ever since listening to the pastor/musicologist play his at a local music program. She never reads this blog so I will be able to maintain the secret surprise until it is finished.
… for my FORP Roubo bench to find its rightful home underneath the bank of northeast-facing windows.
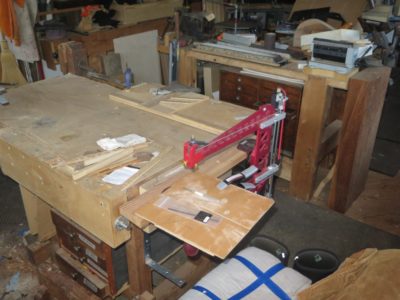
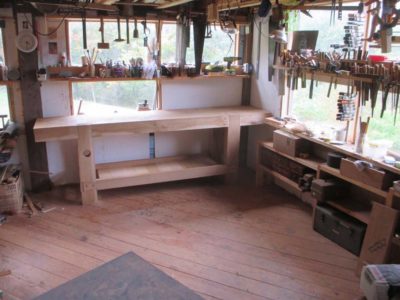
As I’ve mentioned previously the spatial arrangement in my studio has been undergoing reorganization, or as James “Stumpy Nubs” Hamilton calls it, “rearrangeritis.” In one sense I am living with the curse of too much space, thus I need not be particularly efficient with my shop layout nor unduly burdened by the necessity of tidiness. I am trying to improve on both counts.
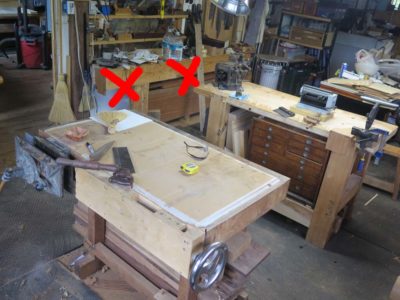
After completing the construction and assembly of my 2013 FORP workbench last year I planted it on the north wall of the shop, thinking that would be a good place.
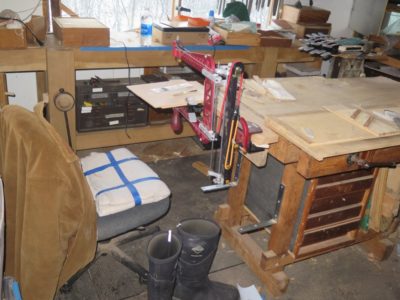
I was wrong. I back-filled the space around it with my favorite little two-sided workbench and some other stuff and before long the whole space was a chaotic mess.
Plus, that new space was so crowded it precluded me even installing the superb wooden screw leg vise that was part of the original design. In the original configuration the four inch round block plus the three inch moveable jaw would have made the whole thing stick out too far to even walk past easily. There simply was no room to use it even if it were installed so it remained on the sideline.
After much cogitation I decided to move it underneath the large bank of windows facing east. This was not done lightly — rasslin’ an 8-1/2-foot, almost 500 pound workbench by myself is not something to undertake on a whim. I set aside a day to move the bench and the other nine things that had to be moved first in order to accommodate the move around the corner, but it was absolutely worth it.
This should not have been a huge surprise to me as it was the location for my first Roubo workbench built from timbers left over from the barn re-erection. Truly, this was THE right location for the bench and I was an idiot for not recognizing this from the git-go.
I now have a sublime arrangement of my beloved first workbench sitting in the middle of the floor at that end of the shop with the Roubo a simple body-rotation away. The arrangement continues to make every day in the shop an unfettered joy.
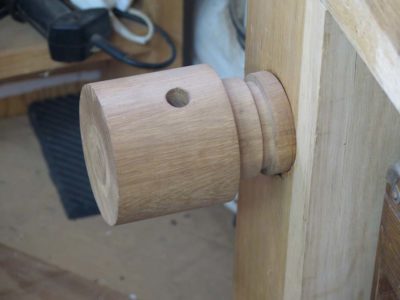
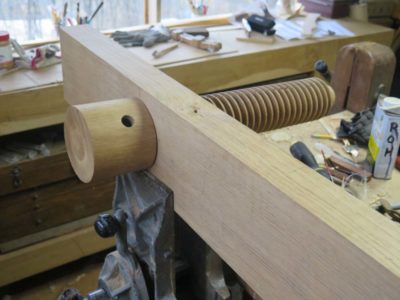
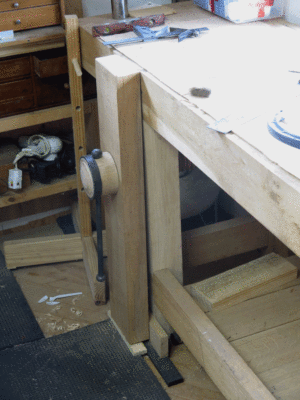
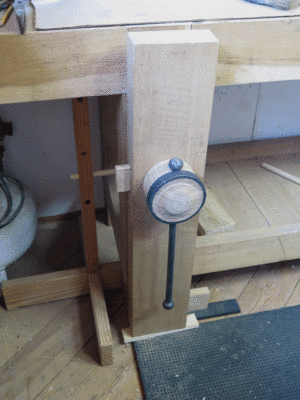
In addition to the move itself I finally finished the installation of the Roubo’s leg vise after first reducing the thickness of the jaw from three to two inches and reducing the size of the bulbous block that was exactly at knee height and stuck way out into the work space.
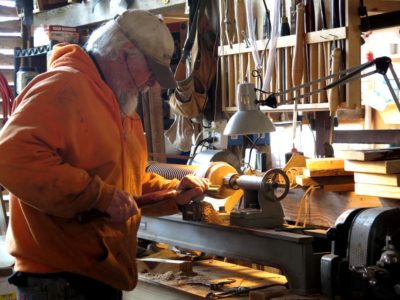
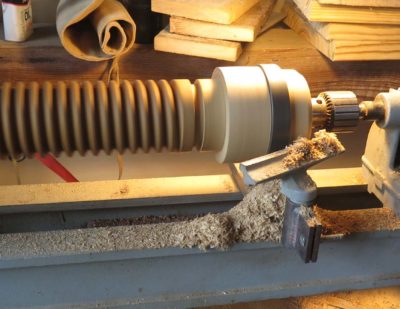
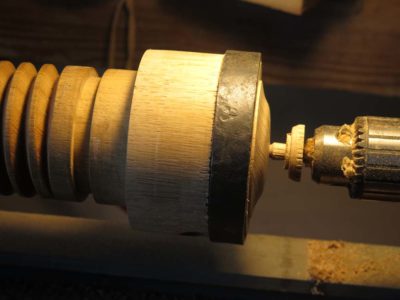
To reduce the number of times I whacked it with said knee I tossed the vise screw in the lathe and cut down the outer terminus block by an inch in length, moving the wrought iron collar right up against the handle holes and shaping the end, yielding a result much more to my liking than the knee-cruncher originally made. In fact completing this feature was one of the motivating reasons behind the move.
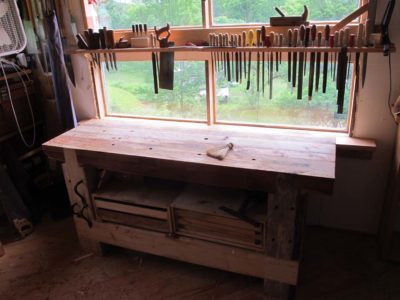
Using an outrigger stand temporarily until I get the sliding deadman built the bench works just like it is supposed to.
The integration of the massive Roubo into the workspace has other meaningful implications as well, almost like the ripples radiating from a stone being tossed into the pond. Not the least of these effects is the rendering of the planing beam as redundant, clearing up that particular space in the not-too-distant future. I may use part of that space as home to the full-service standing tool cabinet I have always wanted. If so I will have to find a new home for the exquisite vintage mahogany I have stored underneath the beam. Some of the other re-arrangeritis is more subtle as I will build a small, low Roubo bench for the space where the giant Roubo bench used to be. This lower bench will allow me to work for long stretches while sitting. As I get older I find the Eastern tradition of working while sitting down is all the more attractive; I actually do not mind working while standing, it’s the bending up-and-down that wears me out.
All things considered I am thinking that these changes will result in higher shop production-ableness while reducing the total footprint of the space.


Recent Comments