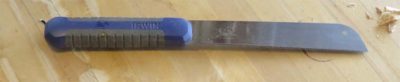
I recently posted about the wonderful little pull saw I bought at Lowes and how I use it constantly while working on the new cedar shingle siding. My only complaint about it is that it is just a smidge too big to fit neatly into any pocket of my old Skillers carpenter vest, a shortcoming I decided to address with other tools. So, I now have three more saws that do fit into one of the pockets, saws that are getting used with ongoing frequency.

The first of these is the little folding Japanese saw that I have had for ages. When fitting individual cedar shingles as one must, I find that there are many times when for several shingles in a row each and every shingle has to be custom cut and fitted, requiring lots of sawing. This is going to occur either on the ground or at the top of the ladder, and given the age and mileage on my knees I prefer it take place up on the ladder. When folded this little beauty fits perfectly in the breast pocket of the vest alongside at utility knife. Perfecto. It is so robust and inexpensive I will probably order another bunch of them so that I can keep one wherever I might need it.
Two other saws were shop made for beefier tasks like localized small scale demo work, which also needed to occur with some regularity as I was cutting away the old cedar siding paneling. Either of them allows me to work efficiently but under fairly delicate control as I was cutting away old materials from around electrical or coolant lines, places where I did not want to fire up the reciprocating saw.
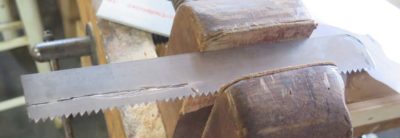
The first of these two saws use a leftover piece of bowsaw blade about 10 inches long. I rounded one end on the grinder and cut the other end of the blade with my rotary tool to remove the teeth and make a shaft for embedding into a handle.

I scuffed the surfaces of the blade handle then sandwiched it between two scraps of wood, using Gelfex epoxy to glue it all together.
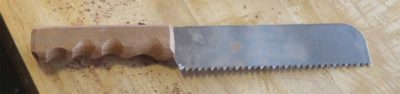
I trimmed and filed the handle to fit my hand and it was off to the races, working perfectly for its intended function.
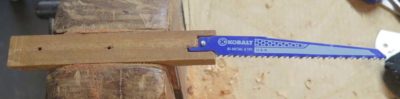
The second shop-made saw employed a blade from the reciprocal saw, the butt of which was inset into another two-piece scrap handle and embedded with epoxy as the handle halves were screwed together.
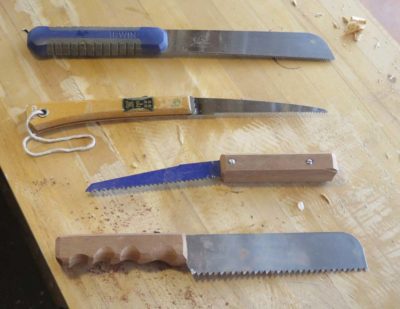
I now have an elegant sufficiency of little saws with large performance.
At many points in the distant past I picked up several pretty far gone saws with the expectation that some day I might get them rehabbed and put back to work. Well, for some of them that day has come and gone and several are now in service. Today I will start with the simplest one.
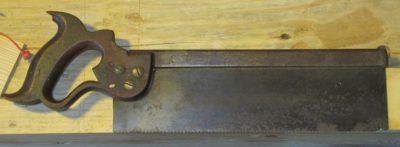
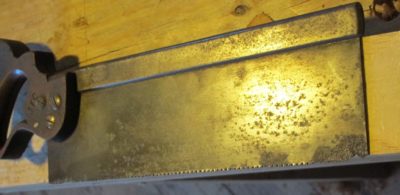
The first saw was a nicely proportioned back saw plagued with deep corrosion pitting on the plate extending up more than a half inch from the teeth at the toe. There was no way I could remove all the pitting from the plate, but I decided to cut the plate back to good metal for filing in some new teeth and at least salvaging the tool. My strategy was to achieve a tapered configuration, losing a good bit at the toe and almost nothing at the heel.
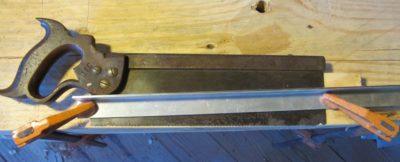
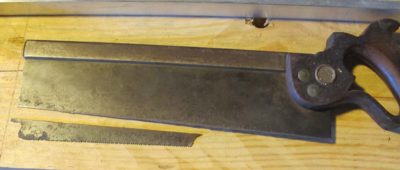
With a carbide scribe, hacksaw, and my trusty rotary tool and a one inch grinding disk (well, several actually) I made the cut, then cleaned it up by sanding the upright saw on my granite block I normally use for restoring edge blades, equipped with a 60 grit belt.
After that it was a very simple matter of re-toothing the saw, I vaguely recall making it into a 16-point ripsaw. Somehow I managed to forget where the pictures of the finished saw are, but you can use your imagination. After getting it to the point I was satisfied I included it in a shipment to Rob Hanson, my personal “Care” packages to a fellow craftsman who lost his home, shop, and business in the California wildfires almost two years ago. I hope he is giving it a good workout.
Which reminds me, I need to get another box of tools packaged and sent to him.
This post is not exactly a “Workbench Wednesday” episode, but since it was an issue and solution that cropped up while building Tim’s Mondo Partner Nicholson Workbench I thought I would put it here.

Normally when I am building a Nicholson bench I slam it together with decking or sheetrock screws and a portable drill. I can usually get one built on a day that way. But with Tim’s bench, because of the setting for the final location of the bench, a restored 18th century log barn outfitted to be an 18th century workshop appropriate to the long-rifle making that Tim does, he wanted the presentation of the bench to reflect the 1780 Virginia frontier. Hence, no decking screws.
Instead I fell back on my old reliable supplier, Blacksmith Bolt and Rivet, who still provides excellent steel screws of the slotted-head woodscrew variety. The quality of these screws versus the usually crappy modern plated screws from the hardware stores makes them worth the effort to obtain and use. For starters, I generally find that about 1 in 25 of the modern hardware store screws actually rings off when I lean on them too much, and the metal is so soft that the heads get boogered up even more often during installation.
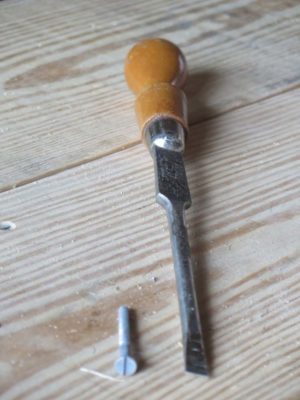
Using high quality slotted screws is not without drawbacks either. For starters the screwdriver tip has to fit the slot precisely in both width and length in order to get full efficiency in the driving. Plus, driving large screws by hand is a lot of work and in the case of Tim’s bench I was driving in over a hundred 2″ #14 screws.
The screwdriver tips I had to fit into my brace were not a perfect fit to the slots of the screws I was using so I took fifteen minutes to make a new one that fit the #14 heads precisely.
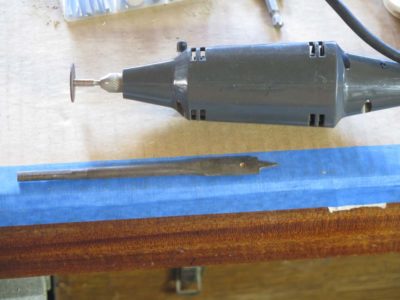
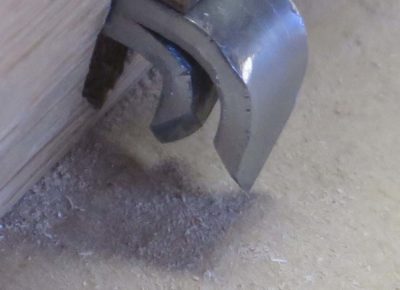
I started with the oldest, raggediest 1/2″ wood bit in my collection, 1/2″ being the width of the #14 head. With my handy dandy Dremel-type tool (Craftsman, circa 1975 and still going strong) I took off the central tip of the bit.
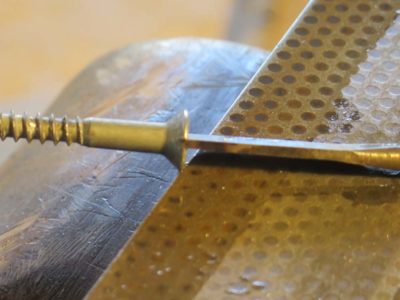
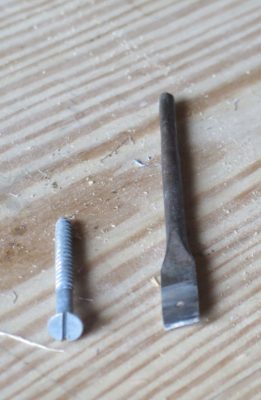
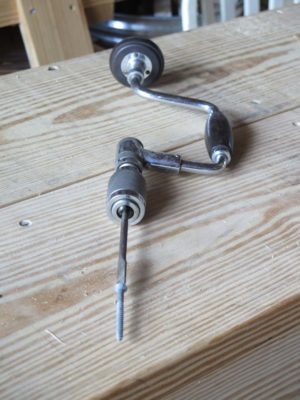
Using a grinding wheel followed by a coarse diamond plate I made the tip perfectly flat and the thickness of the bit to fit the slot exactly, so precise that it literally could be inserted into the slot by hand but still was snug enough to stay there.
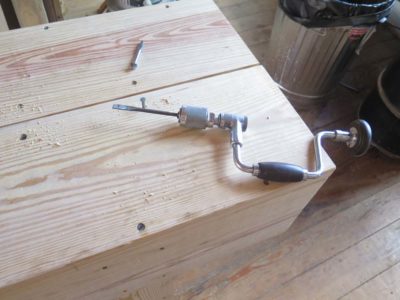
With this new precision wood screw bit I was able to drive the dozens of screws easily into the pre-drilled holes. All made possible by the fact that I did not throw away a decrepit drill bit.
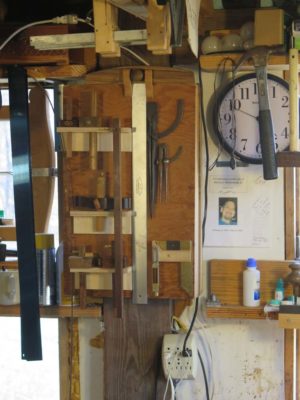
Once I finished the marking/mortise gauge for the Japanese tool box I noticed (of course) that the tool box contents did not include a panel gauge. Instantly my gaze swept over to the small cabinet hanging on one of the timber posts, holding several similar tools.
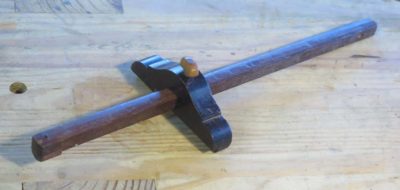
Included there was one set I created from one of my favorite tools, a panel gauge with a Cuban mahogany beam, a rosewood block, and a boxwood screw.


Still, I actually do not use a panel gauge all that much, even one as lovely as this one. But, I like this tool so much that I actually made an additional component for it just for the pleasure of using it more often than otherwise: I made a short cherry beam with a mortise for the cutter to make it a marking gauge as well.
I knew immediately that the scheme would work perfectly for the Japanese tool box with the spectacular advantage that it would consume almost no additional volume. Given the configuration of the irons and the block I could easily make a panel-length beam and simply slide it into place instead of the irons and the clamping pad.
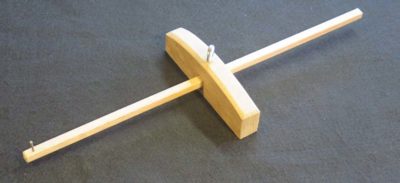
The complexity of the new component was extreme. I had to go to one of my scrap wood buckets and pick out a nice straight piece of white oak left over from making the Studley workbench top, and rip off a square slightly larger than the 1/2″ x 1/2″ hole in the block.
I planed it clean so that it fit snugly through the block and added a finishing nail marking tip which I filed into a sharp edge, and the tool modification was complete.
It fits the definition of a “two-fer” almost perfectly.

There are a variety of mechanisms for clamping a marking gauge’s iron(s) or beam into place but it generally comes down to one of two — a screw or a wedge. I toyed with both options and chose a screw as the simpler and quicker route. The only shortcoming of the system was that I did not have a “nice” screw to use when making it, an embarrassing inventory problem that can be resolved in the future.
In addition to the screw clamp I decided to add a pressure pad to the inside of the gauge block. I’ve always found this to be an elegant add-on as it looks nicer to my eye at least, and prevents the screw from disfiguring the iron/beam.
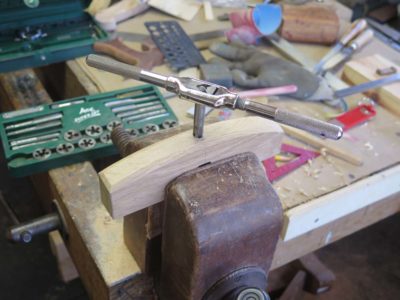
My first step was to drill and tap the access hole in concert with the screw I had on-hand. (As an aside, I once spoke to a woodworking group about tool making and asked how many had a tap-and-die set. Most hands in the room went up. When I asked how they used the set in their shops, there was a unanimous response of, “Never.” I use mine so much I hardly ever put it away.)
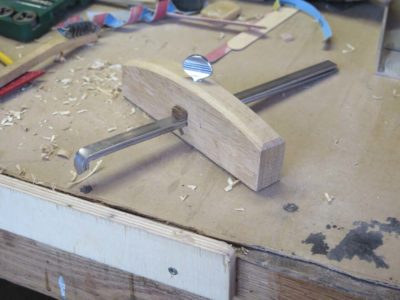
As I alluded all I had was a steel thumb screw, not even a brass one was to be found in the inventory, much less an ivory one. I’ll have to get or make a new one at some point to overcome my shame.


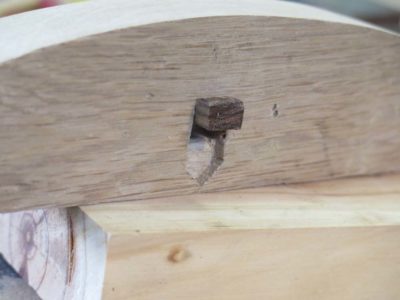
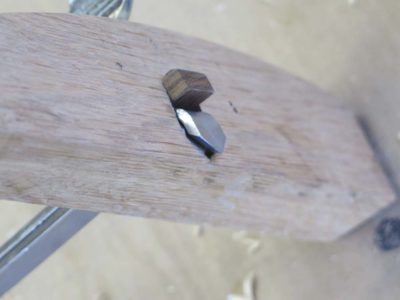
With the screw-hole drilled and tapped I went grazing in the scrap box and found a tiny piece of unidentified tropical hardwood (bocote?) from whence to fashion the pressure pad. This was a mostly filing exercise.
I honed the cutting bevels one last time with a fine diamond stone then cut the irons to length at about 6″, and before you knew it, the tool was finished.

I lied. Or had a brain belch. I said I would post next about the clamping system for the irons of my new double-iron marking gauge, but I am instead posting about the irons themselves before doing the clamping scheme on the next one.
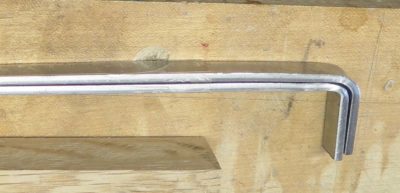
After bending the twin irons to be nestled as perfectly as possible (you just knew that I would somehow merge Roubo and Japanese woodworking!) I began to fashion their cutting tips.
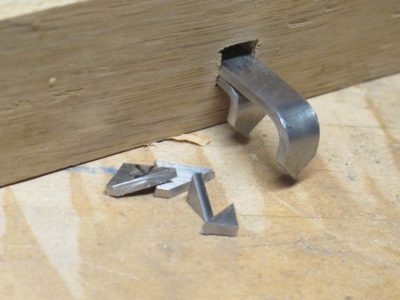
My first step was to saw both tips at the identical angle, a 90-degree point at 45-degrees from the axis.
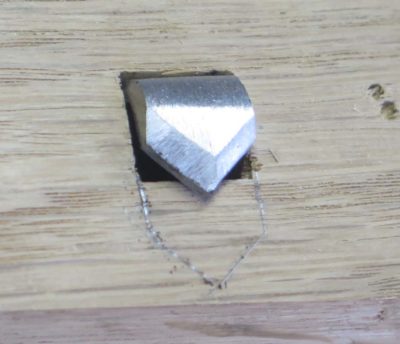
I made sure to have the cutting bevel orientations in opposition to each other, with the outer iron bevel-in, and the inner iron bevel-out.

Once the tips were cut and filed to have identical configuration and conformation I took advantage of the mild steel character of the metal to simply file the four bevels by hand, mostly with my treasured barrette files I got from Slav the last time our paths crossed. I tuned the edges further by hand honing them with a small diamond stone and they were sharp and ready to get to work.
At some point I might try hardening the cutting tips as mentioned by reader Joe, but for now these are just fine. The only “down side” is that I cannot lay out lines closer than 1/4″ apart. Time will tell if this is a problem.
Next time – the iron clamping scheme. I mean it. Really.
The block for the Japanese marking gauge was, well, just a left over oak block from making some finish samples many years ago.

Since the irons were 1/2″ wide and needed to penetrate the block with an opening that allowed for them to be clamped in place I simply punched a 1/2″ square hole through it with my mortising machine.

Once that was done and I was sure the irons fit through nicely I marked an arc across the top of the block, to cut later. The line of the arc just happened to coincide nicely with the perimeter of my trash can lid.

In order to make the tool the most useful as either a single cutter or a double cutter I surmised the need to have the first (inner) iron to be able to become invisible to the marking process. I accomplished this by cutting a recessed housing in the block for the first iron to reside.


Now the inner iron nestles away inside the block (upper picture), and even with the outer iron in place (lower picture) the tool profile is minimized.
Next time I’ll describe my iron clamping system, there are many to choose from but since I am incurably lazy I went the simplest way. It was the source of some embarrassment but worked out in the end.
Stay tuned.
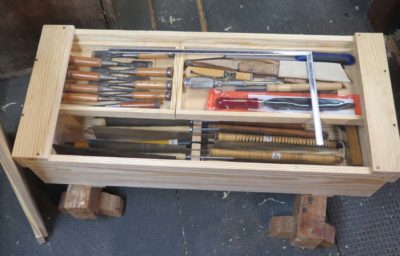
Among the tools I did not have in my set of Japanese woodworking tools were any marking gauges. Within the form are many different variations so ‘I was faced first with deciding what kind of marking gauges I wanted to make and keep in the tool box? In the set of hand tools in the shop I have several marking gauges ready to be put to work, but the Japanese tool box was already close to capacity so I needed to be very circumspect in the decision for this function.

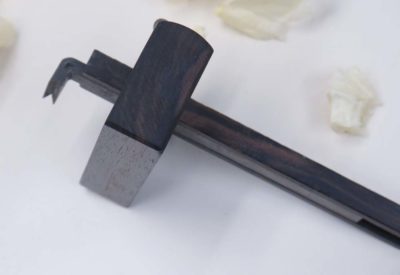
Fortunately at the recent Wilbur Pan Japanese tool demonstration, between Wilbur’s tools and the inventory brought by JayC to display and use by the woodworkers in attendance, there were several to view, handle, and use.
In the end I came up with my own version of the two-bladed gauge, with some slight modifications so that it could function well as a single blade or a double blade tool.
My starting point was a pair of mild steel bars, each 1/8″ x 1/2″ in cross section. Mild steel rather than tool steel because the mild steel would bend easily and the sharpened cutting edge would be marking wood, so the mild steel was plenty robust enough for that. I got the steel bars down from my overhead inventory; I probably bought it at the hardware store at some point in the past when I was just stocking up on raw tool-making materials.
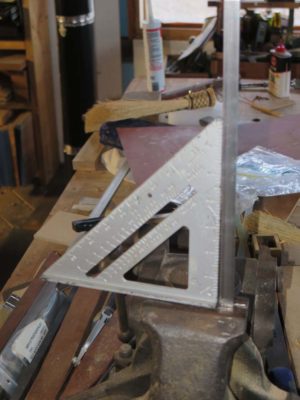
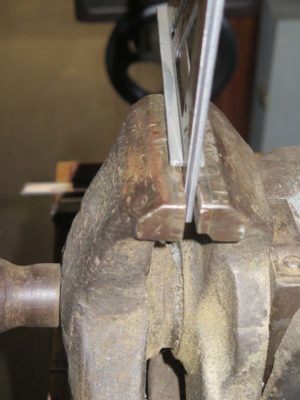
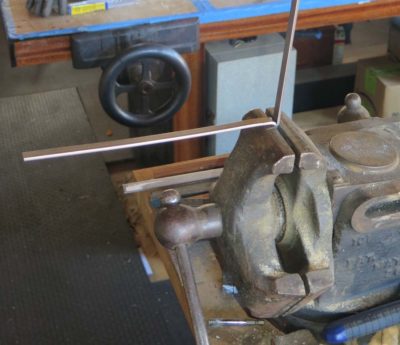
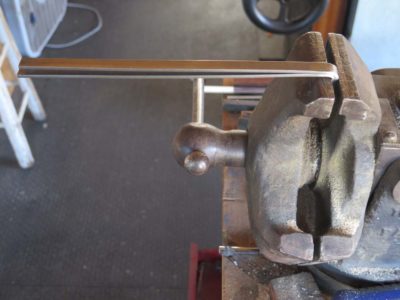
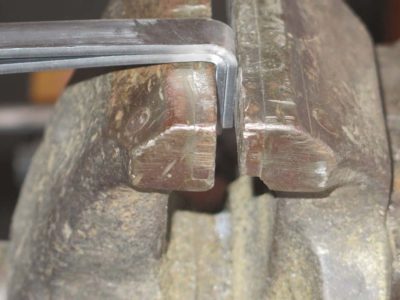
Placing the bars vertically in the Emmert tool-makers vice, making sure to square them to the jaws, I simply bent one and then the other of the bars so that they nestled against each other nicely. The hammer work was minimal to persuade them to conform.
Now, on to the block.


Part of my process of refining the raw “slum gum” unfiltered beeswax from the honey factory delivered in a case of roughly 6-inch thick slabs from the bottom of a five gallon bucket, involves a step wherein the coarsely filtered molten beeswax/hot water slurry (removing the bee bodies and gross debris) is poured through fine pasta strainer into a cake pan and allowed to cool undisturbed.
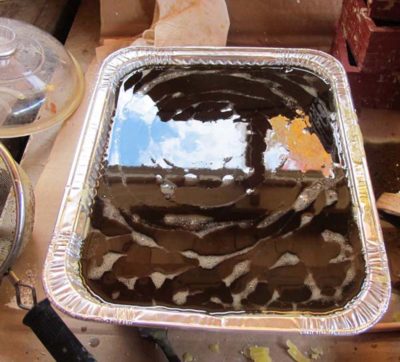

After cooling and decanting the water with any remaining water soluble adulterant, I am left with a big block of beeswax with a fairly uniform layer of sediment on the bottom face of the block. This needs to be removed before moving on to the next step of filtering.
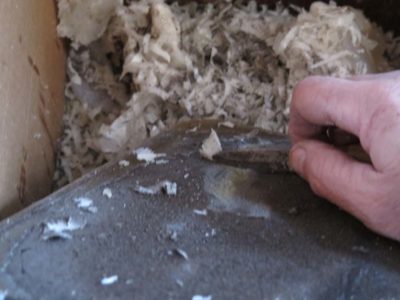
Normally I try to time the scraping off step for when the block of wax has cooled enough to be fairly solid, but still warm enough to be scraped easily with a large knife. There are times, however, when I do not get to this step soon enough and the block of wax with its accretions hardens fully. And with enough cold, it can get pretty hard. Scraping this is not impossible but it is some hard work when I am doing several of them at once.
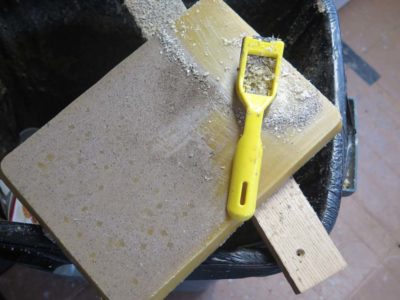
Recently I had a great idea while rummaging through my “Giant Files” drawer and pulled out this little curved Surform tool. I found that for a fully hardened block, even one that is chilled and rock hard, it removes the precipitant easily and quickly.
That smack is the sound of my pam striking my forehead. Usually in just a minute or less the block is ready to be put aside for the next melt during which time it will be getting its final filtering from me before moving into Mrs. Barn’s domain and one final filtering before casting into blocks.
I love it when caprice like this happens.

I am delighted to report that after a few weeks of being out of stock, as of ten minutes ago I am now replenished with Model 296 polissoirs and they will begin shipping again immediately.

Ditto the whisk brooms.


Recent Comments