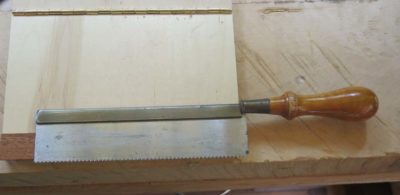
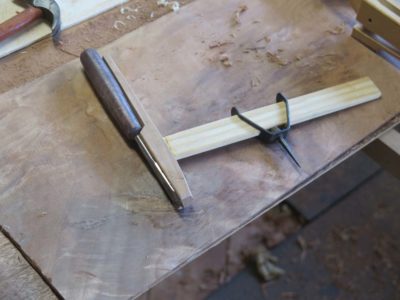
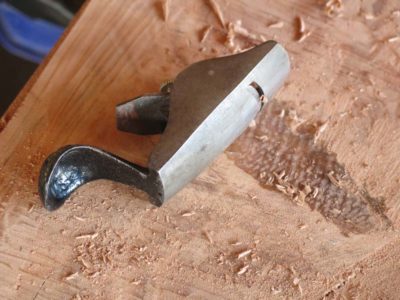
While noodling around the shop getting the classroom and supplies ready for the upcoming (actually, just-completed) “Make A Petite Dovetail Saw” workshop I devised and built several of perhaps the easiest and simplest saw filing vise ever. Like me you can make one in minutes using materials from the scrap box.
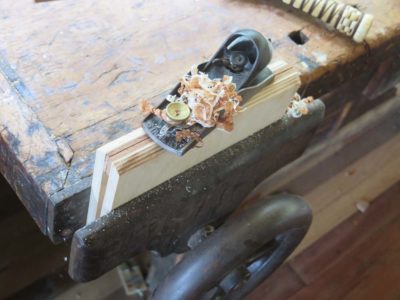
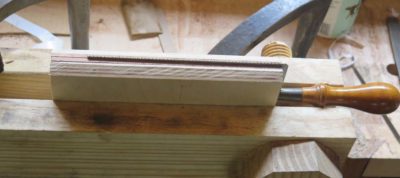
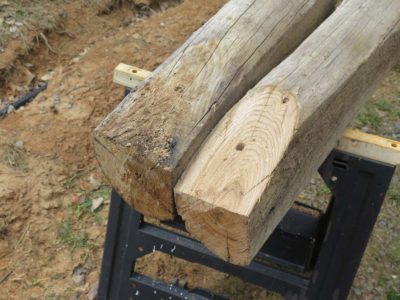
I started with some 1/2″ baltic birch cut into a pair of 6″ x 8″ panels. These were connected together along one of the long edges with a piece of piano hinge, with about 1/8″ space between the panels when the hinges were screwed on. Following this a pair of scrap strips approx. 1/8″ thick were glued to the inside edge at the tops (the hinge was on the bottom). Once the glue was dry I trimmed the top edges with a block plane until they were clean.
The result was a wooden book facsimile that was narrower at the bottom than at the top. This would be important later on.

With these top strips in place along the inside edge and the glue hard I planed a chamfer along the bottom of each of them to create bevels that touched at the top of the vise, thus bringing it into intimate contact with the saw plate being sharpened. At this point the vise is finished. Really.
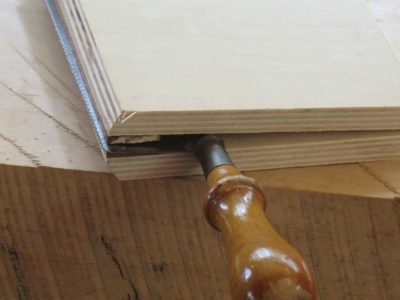
In operation the vise is pretty much idiot proof. Place the saw in the “book” so that the teeth are exposed by the amount you want. I generally shoot for a tad more than the distance between the teeth, but you can use what ever is convenient and comfortable.
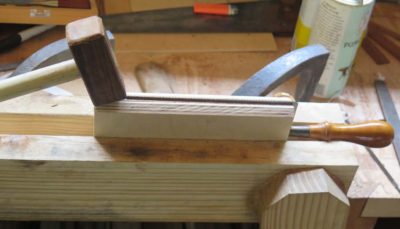
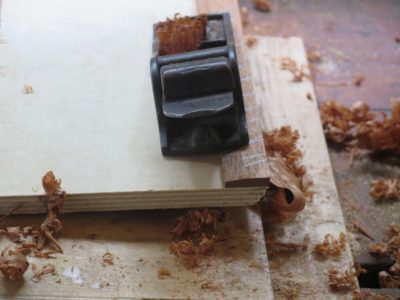
The vise with the saw inside are gently pinched together and placed in a bench vise, a Moxon in this case but any vise that fits is an option. By adjusting the Moxon vise such that the thinner bottom of the saw vise slips into it easily yet the saw vise engages with the Moxon jaws a little more than halfway in, this seems to work perfectly. Press down on the saw vise until it is snug in the Moxon and fully engaged with the saw plate. A gentle tap on the top of the saw vise drives it deeper into the Moxon and causes the saw vise to pinch the saw plate so that it can be filed.
When you are finished with a filing run a 3/4 turn of the screws loosens the Moxon enough to allow the saw vise to be easily lifted out of the Moxon.
Many, many years ago a dear friend gifted me a pair of “Shinto” rasps, and for some time they sat in the drawer. Slowly I began to incorporate them into my work, and recently I have integrated them fully into my projects as needed. The tool really does hog off material unlike anything else in the shop.

Sometimes the bulkiness of the rear handle and the outboard front handle were not a problem, there were times they even provided the perfect place for my hands to grab them and really bear down on the work.
Other times the handles simply got in the way and I tried removing them. The cutting surfaces then come into direct contact with your, which hand is about a -5 on the pleasantness meter. I tried wrapping the ends with electrician’s tape but found that to be an unsatisfactory long-term solution. However, by adding appropriate-sized rubber chair leg tips over friction tape I now do have a setup that pleases me very much. I suspect I will be using this tool even more in the future.
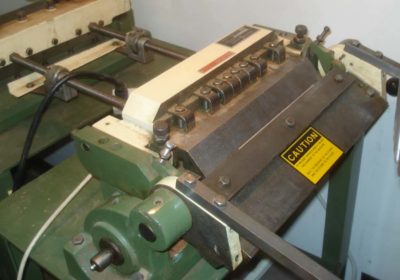
Six years ago when I wrote my article in American Period Furniture on making my own dovetail saw I had the advantage of access to an ultra-sweet 12-inch Houdaille precision shear and a matching 12-inch brake. I loved those tools and have been looking for the pair ever since I left Mordor, preferably for a modest outlay. Alas, even used these run about $2k for the pair, with the new showroom price north of $6k. If I ever find them for next to nothing I will still pick them up, but that is an unlikely occurrence. I believe Houdialle is now re-branded as Di-Acro but I cannot be certain.

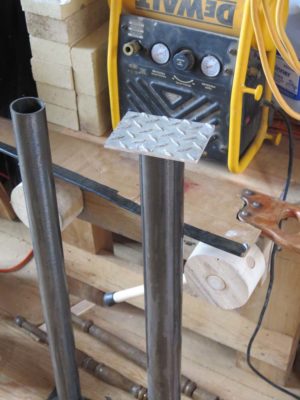
Many moons ago I got a notice from Micro-Mark that they were discontinuing the very tool I wanted, and it was on sale at a very deep discount. The tool in question was a mini-shear/brake for sheet metal, precisely the kind of tool I could use when making, or teaching the making of, petite dovetail saws. The width capacity of the tool is 8 inches, which pretty much defines “petite” when it comes to saws.
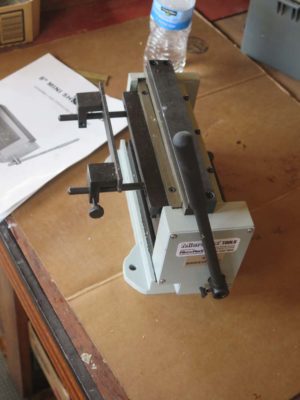
I recently unpacked it and gave it a try. Very, very nice. I am fairly certain that this unit was manufactured by Baileigh, as theirs seems identical in every way.
The uses of this tool are many, from cleanly cutting spring steel coils to length and width for the saw plates, to bending brass backs for the saw structure. I make saws with a folded 1/16″ back, which is a bit stout for this little tool, but if I anneal it first there seems to be no problem.
I’ll be using the tool in the near future as I build another saw in practice for the upcoming workshop Making A Petite Dovetail Saw, June 8-10. I’ve got one opening for that class, so if it interests you drop me a note.

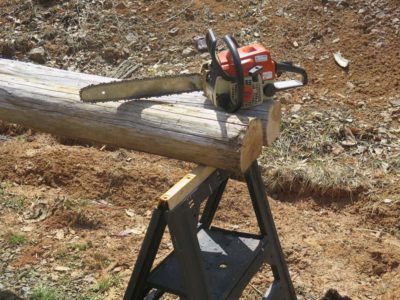
With the commencement of production for the video “Making A Gragg Chair” steaming down the rails I thought it would be good to get back in practice splitting logs I had culled from last year’s harvest up on the mountain. As soon as the mud dried out I drove up there and started wailing away at one in particular. As I already recounted the initial results were not heartening. The last time I split some giant logs was a couple years ago and that went perfectly. Had I forgotten how to split a log?
A second log went much better but I had left my camera in the barn so you’ll have to take my word for it.
I also had long desired to build a riving brake, a tool I had never before possessed. Now was the time to spend part of an afternoon doing so.
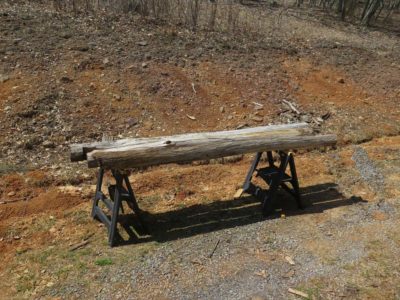
When my brother and I rebuilt the lean-to on the lower log barn lat year I was left with a half-dozen ancient chestnut poles. They seemed to be perfect candidates for the project.

Using precision woodworking processes I trimmed the ends of the logs to allow for whisper-fit angled joinery.


That joinery was accomplished with a low-speed high-torque drill and a length of 1/2″ threaded rod and nuts. With some judicious use of leveraging I got the tripod up on its feet.
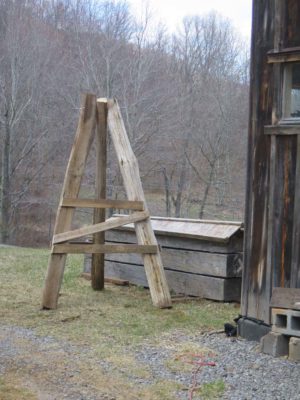
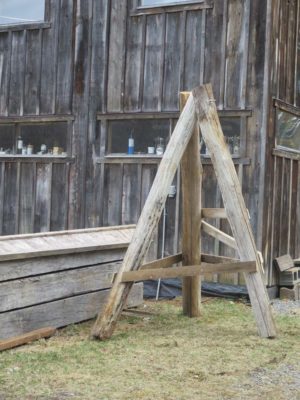
I added the cross bracing and it was ready to put to work.
I’ll see if it is as easy to use as Follansbee makes it look.
Recently I was organizing/reorganizing my Japanese tools.


Apparently I am almost out of room for any more. But somehow I will find the space if I every get a Japanese marking gauge or a spear plane.
Recently while en route to the SAPFM Tidewater Chapter meeting I stopped into a Michael’s store in search of one ingredient I wanted for my demonstration. They did not have what I wanted but as is my habit I took a stroll through the art supplies to see what might be on sale. My mouth probably fell open as I saw a deep discount on all their inventory of Robert Simmons Sapphire brushes, the sable/nylon blend bristles that for me are the standard by which all others were measured.

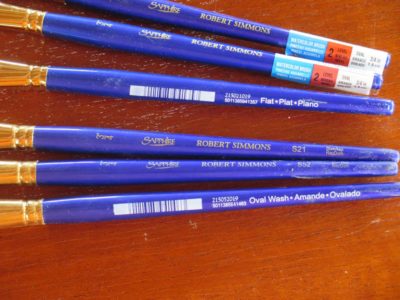
They did not have any 1″ brushes, but I bought all the 3/4″ flat wash and filbert mops they had. In doing so I added another half-dozen to my inventory (since I do so much teaching of finishing, I can never have enough good brushes), saving myself a ton of money. If I recall correctly these brushes are listed at about $70 apiece at retail, and I got these for about $10-12 each.
I do not know if this is a discount at Michael’s nationwide or if this was restricted to the one store I was at, but it would be worth your checking it out.
UPDATE: I’ve been to several Michael’s stores and found each of them to have the same discounted offer. They didn’t all have any inventory, but they all had the same discount.
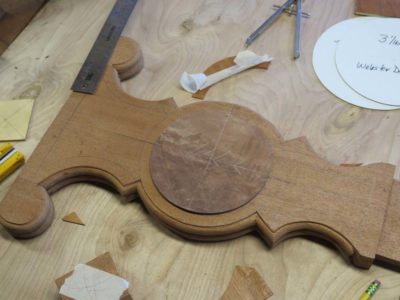
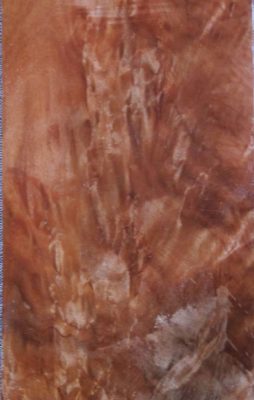
With the writing box and drawer addressed and set aside it was time to move on to the fanciest work awaiting me. The veneering of the “legs” of the desk provided the showiest detailing for the entire project, and frankly consumed the most time and energy. Since I hope to continue building copies of this desk into the future it was worth spending the time to really get the process nailed. I got pretty close with this one after a considerable amount of prototyping.

As a recap, all of the materials for this project, including the veneers, were hand sawn and prepped. The highly figured veneers for the faces of the legs came from several crotch mahogany slabs I had obtained several years ago. In the meantime they had warped enough to make sawing them a challenge, and the exuberance of the grain made planing and prepping them a hassle. In the end I decided to leave the veneers ultra-thick and thin them once they were attached to the substrate.
As with all decorative pattern veneerwork the layout was the crucial thing. And, since the patterning for this project was almost exclusively circles and arcs my tool of choice would be based on a compass/divider, or in this particular case, a trammel set. Given the thickness of the veneers being cut for the pattern a stout cutting edge of the end of the trammel was called for. I first tried a utility/scalpel blade but it was not beefy enough. Ditto my LNT Latta cutter. After a fair bit of trial-and-error I settled on one of my striking knives and concocted a way to mount it to a trammel bar. This tool served to provide 99% of the work moving forward.

I mortised the trammel beam through the vertical block that would hold the striking knife/dovetail chisel and excavated the block such that the knife fit snugly, and attached it with hose clamps. Worked like a charm.

My first task was to true the outlines of the arcs on the legs. With my layout lines firmly established I taped a 1/8″ plywood square over the center point a struck the arc. This was a technique I used throughout the process.


I then cut the individual veneer elements themselves (sorry for the dearth on pictures, I was too busy working to take more). These were glued in place with hot animal hide glue.

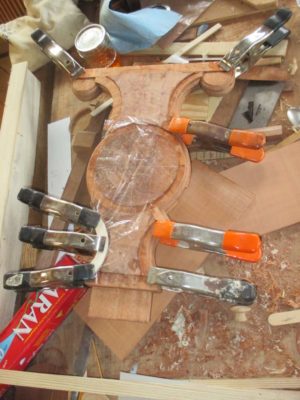
Starting first with the central crotch veneer elements then wrapping up with the outer straight grain pieces cut to fit, the composition was completed. I have no idea why I left this camera in the center of the image.

This post does not fully convey the time consumed in this aspect for both the testing and execution, but it was many days worth of work (almost two months if the camera codes are to be believed) to get it to where I was not unhappy with the end result. After the veneers were all cut, applied, and trimmed, the full surface was toothed and scraped to a uniform thickness of approx. 1/16″. .
PS I have no idea why the final picture is rotated. It stubbornly resisted my efforts to present it otherwise.
One of the exercises I incorporate into the syllabus for the Historic Finishing workshop is finishing a baluster spindle or two, to get the feel for brushing finish onto an undulating surface. Rather than spend a lot of time finding new ones for student use I just got a trash can full of them and recycle them as necessary. I found a very efficient way to strip them in preparing for the next round of use, a solution that I think would work for anyone who has a similar task.
I had our local welding shop to fabricate two vertical stripping tanks (for about $80), comprised of a piece of steel pipe welded to a steel plate base. One of my standing tanks uses a 2″ pipe, the other 2-1/2″. This allows me to use (and lose) a minimal amount of whatever solvent I am using, whether paint remover for the initial treatment of painted spindles or denatured alcohol for recycling the shellacked ones.
The system works like a charm, I just put the spindle in the pipe and fill it with solvent, then place a piece of metal plate on top to hold the spindle down and cap the cylinder, and in a few minutes I extract the stripped spindle, allow excess solvent to drip off, and wipe it down with paper towels It literally takes only 15-30 seconds of my time to get one done. Over a few days’ of doing this I lose only about a half-pint of solvent to evaporation, and whatever additional solvent is absorbed into the film.
Both the writing box and the legs for the desk are fully veneered on their faces, and in a most prominent manner. In keeping with the client’s request to make the complete piece from technology appropriate to the 18-teens I sawed and prepared all the veneers by hand.
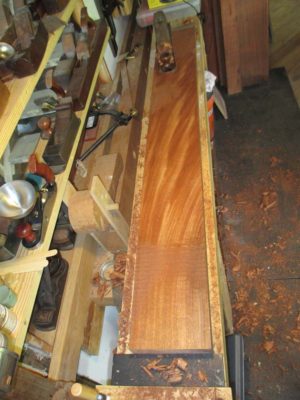
For the writing box I used a superb piece of Cuban mahogany I had been saving for nearly 40 years. I did not know back then what I was saving it for, but I knew it would be something special. The board was just the right length and width to allow me to wrap the entire box’s full sides and back en toto and continuously, I made the back and the drawer front match which turned out nicely.
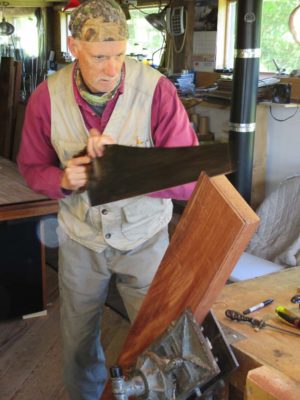
Using a variety of saws, my pal Tom and I sliced off two full leaves of veneer, about a shy 1/8″ thickness. We were not excessively experienced at the task and chose to err on the side of safely rather than efficiency. The density of the mahogany made it a real workout, but the results were definitely worth it. Sawn veneer is such a delight to work with; I have a sizable stash of sliced veneer and to tell you the truth I use it more in gluing up small pieces of plywood than anything else. Well, that and making sample boards for students to use in finishing classes.
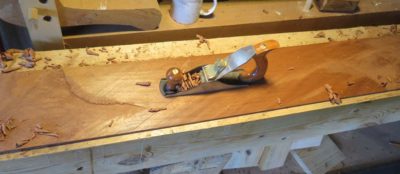


With the thick sawn veneer I can actually plane it by hand to prepare it for use. I usually concentrated on the underside, that is the side that would be glued to the substrate, hitting it quickly with a succession of the scrub plane, a fore plane, and the toothing plane.

For the veneer on the legs, the central decorative fields were comprised of flame crotch mahogany. I had purchased some big 3/4″ slabs of that but they had warped so severely that dealing with it was a challenge. Even cutting them down considerably they were still a squirrely mess of end grain. I wound up sawing these almost 1/4″ then planing them flat. Now that was an exasperating adventure.

To work the pieces I made a special planing jig with thin stops on two edges, I’d put the veneer on a piece of rubber matting, push it into the corner and set to work.
The scrub plane was too aggressive, so most of the work in flattening and thinning the stock was done with a vintage Stanley spoon bottom palm plane and some luthier’s planes, followed again by the toothing plane.
The results were pleasing albeit aggravating.
During my recent foray to the annual PATINA tool tailgate flea market, dealer sale and auction, I garnered a fair bit of treasure. Some inexpensive, some not so much. Here’s the inventory of the harvest.
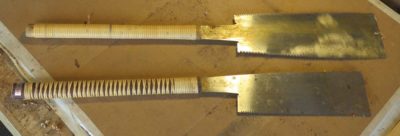
My first purchase was completely off-shopping-list, but this fellow had two timber-sized Japanese saws for $10 apiece. There was no moral argument for passing them up. I will clean and tune them up, and hang them with the rest of my Japanese tools.

Next came this stash of 6-inch Starrett satin chrome machinists scales for $4/per. I keep these both in the tool cabinet and my work apron, and scattered around the shop.

Having several work stations – barn, gardening shed, utility room in the cabin – it seems I can never have enough miscellaneous tools. Tools like these wrenches and channel lock pliers abound at flea markets, and I got these for $4/per.

The best thing about tool flea market is that you can pick up derelict tools for very little, and can either rehab them or adapt them for another purpose without spending a fortune. This pair of bow saw arms for a petite saw was $3, and I can fiddle with it when I have the need.

This trio of 1″ dado planes was had for less than $10 apiece. Now, I have no particular need for 1″ dado planes, but I know of a tool that can be made from them.

And here is that tool, the small shooting plane that Patrick Edwards had at WW18thC. It is especially suited for trimming parquetry pieces, and since that is an art form to which I am committed, the tool was a perfect compliment to my own set. I was immediately enamored of the plane, and asking other tool aficionados led me to think this was a one-off user made tool, with the foundation being a radically modified 1″ dado plane. Soon enough I will do the same thing.

One of the fellows from whom I bought one of the dado planes also had tubs of molding planes, and I bought a mismatched pair of #8 hollow-and-round planes to complete my set. I think these were $15 for the pair. They need a little attention, but I should have them ready to roar in an hour or so.
By the time I bought these planes the inside dealer sales were open a raring to take my money.
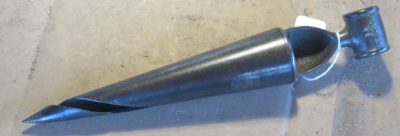
I think my first purchase was this spiral taper cutter for beer keg spigots, although I will use it for reaming the drilled mortises for staked benches and the like. I have a small shaving horse with the legs broken off in the half log base, so this will come in handy very soon. I think this was $22.
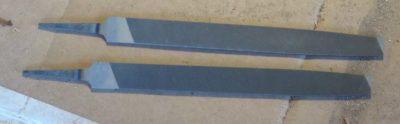

Next I found someone who had some new-old-stock files, and I bought a pair of 12″ Nicholson Black Diamond mill files, I think the pair was $10. They do not go bad.

My final dealer purchase was this knurling cutter with two sets of wheels, so that I can make my own knurled thumb screws. I am recalling this near-pristine set was $25.

I hung around for the afternoon auction as there was a power tool I wanted. This box lot was full of miniature woodworking machines used by model train makers, and the tiny table saw caught my eye. I will fit it with a 1/32″ slotting saw for cutting the grooves in the brass spine of back saws.
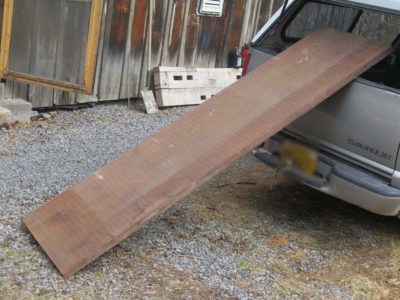
Certainly the most substantial purchase of the weekend was this slab of vintage mahogany, 8/4 x 24″ x 8-feet. My friend JohnD brokered the deal for me to buy this at a fair price from a famous toolmeister’s widow, and if I cut it carefully it will provide the tops for eight more Webster Desk replicas. Now all I need are the clients to pay for the desks.
Seriously, if you have any interest on tools you should connect up with fellow galoots and galootesses at places like EAIA, MWTA, PATINA, RATS, MJD, or the multitude of strictly local tool flea markets.

Recent Comments