Forty years ago, being younger and foolisher, I believed that buying “Name Band” pricey hands tools was necessary for good craftsmanship. Turns out that might be true sometimes, but not always. In fact some “name” brands are capable of producing dreadful products, poorly designed, poorly executed, and actually moving you backwards as a craftsman. Or, sometimes it is just that your way of working is not reflected in the way the tool works. Such is the case with my first “professional” dovetail saw.
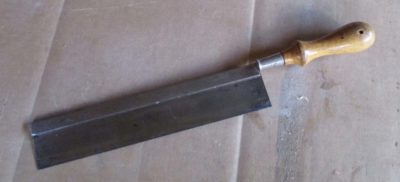
Prior to that moment I had been “making do” with this un-branded “gent’s saw,” progressing in my skill to the point where I was making real dovetail-ish constructs. Given my circumstances at the time I am nearly 100% certain that I bought this saw at Sears in the mid- to late ’70s, back when they were a purveyor of quality merchandise rather than a real estate management/liquidation enterprise. But as I fell under the thrall of the Fine Woodworking ethos it became (falsely) apparent that I needed better, brand name, tools to make better progress.
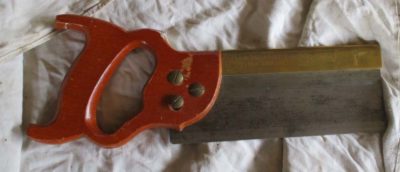
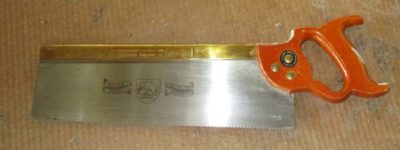
Then came a third try at college with the three years of a highly restricted purchasing and time regimen attendant to that. In 1984 I started employment at the Smithsonian Institution’s Conservation Analytical Laboratory, allowing for a modest tool budget. This was in the days prior to our current Golden Age of Tools and tool making so the options available to anyone outside the vintage tool network were limited to one or two mail-order catalogs. So I went to the best hardware and tool store in the DC area and bought the best, most “Name Brand-y” pair of back saws they had. How was I to know in advance that the “dovetail” saw was dreadful? It only took me one or two sessions at the bench to realize that this was the case.
Everything about this saw’s ergonomics was wrong. The handle did not fit my hand as nicely under fire as it did when being admired at the store (was Angus MacAskill their hand model?). And though the cutting length was nice, in fact the teeth were excellent, the height of the saw plate combined with the absurd weight of the overly stout brass back made the thing so unwieldy for me that my facility at cutting joinery actually regressed when using it. It might have been a fine tool, in a purely theoretical sense, but it was not suited to me.
The odd(?) thing is that the companion tenon saw I bought, same time, same maker, suits me almost perfectly for its purpose.
So I tossed the dovetail saw aside for more than two decades, no, make that three decades. With my little gent’s saw I made steady progress in my workmanship. I even augmented that with a Bad Axe standard issue dovetail saw early in that company’s existence. Though these were excellent saws I found that when working in thin stock making petite joinery they were too aggressive.
Me being me, I decided to try to make my own little saw and that outcome was excellent, resulting in not only a perfectly suited saw but even better, some Ivory Tower Coin of the Realm — a publication! I continued making more saws, becoming more confident in them, giving most of them away as I finished. I even commissioned Bad Axe to make me a custom saw based on what I learned in making them myself, and that saw remains an integral part of the inventory.
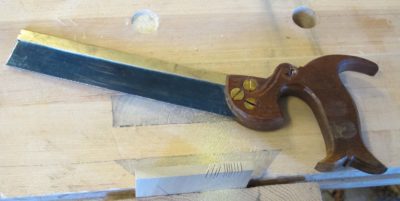
But let’s return to the saw whose shortcomings led me down this path; could it possibly be rehabilitated? After all, the cutting edge was excellent, it was just everything else that was not.
When making traditional-ish workbenches one of the considerations is making the holes for the holdfasts. I might have said “To holdfast or not, that is the question,” but in my experience a woodworking traditionalist either decides to incorporate holdfasts from the start or comes around to using them eventually.
As a general rule the hole for the holdfast is a smidge bigger than the shaft of the tool so that when the top is pounded to induce flexing tension the holdfast grabs the bench top firmly. As a practical matter virtually all of the holdfasts I know are available now use either a 3/4″ or 1″ hole. Getting the holes perpendicular to the bench top on two axes can be a nuisance some times, and in the past I have made a couple of drilling jigs on the drill press. However, over time both of these versions became wallowed out and somewhat less than fully helpful.
After returning from Arkansas where my older jigs got a serious workout I set to making another more robust and precision jig for fitting the Gramercy Tools holdfasts that I am so fond of. My main modifications for this were to lift its base up off the workpiece with plywood feet to provide exit for the chips, and bronze bushing sleeves fitted to the 3/4″ drill bit.
I drilled the hole for the O.D. of the bushings, then epoxied them in place. Finito.
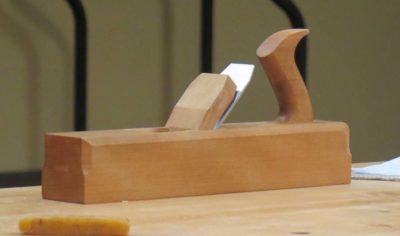
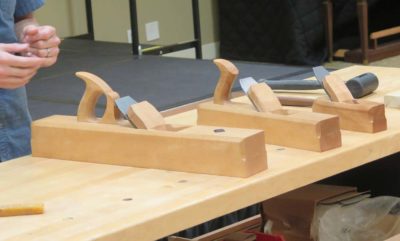
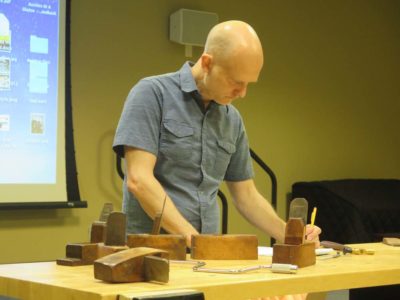
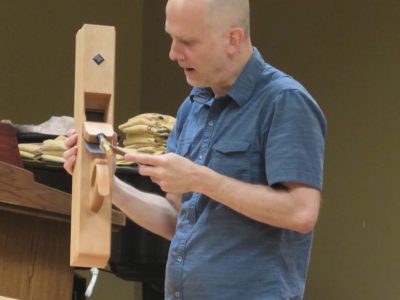
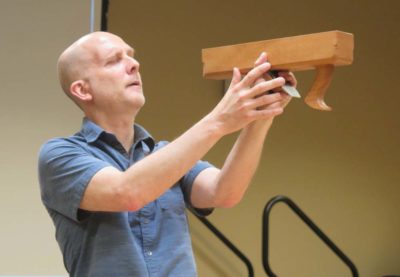
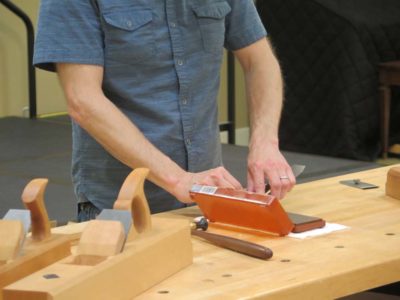
A recent foray to Mordor coincided with the monthly gathering of the venerable Washington Woodworkers Guild, whose fellowship I have enjoyed for more than three decades and at which I have presented numerous times. The meeting included a terrific recitation on and demonstration by music-professor-slash-toolmaker Steve Voigt of the double-iron English-style wooden planes he makes, and he brought his line of planes to show and use.
Steve has been cultivating interest in possibly making toothing planes and had asked me to bring a selection from my collection once he learned I was coming. I was delighted to oblige. Prior to the meeting, after he had set up his stuff, he spent a fair bit of time examining, studying, and measuring my planes, occasionally asking me about my preferences for this plane or that feature.
With the soft-spoken straightforwardness that he is known for Steve walked though the process he uses to design and construct his planes, which he has been making professionally now for closing in on a decade. In setting them up to work he prefers the cap iron to be as close to the cutting edge as possible, and he does most of the adjusting by eye (oh, to have eyes that can do that. It must be wonderful!)
His jack plane was set up as a heavy cutting fore plane and soon enough he had a good pile of stout shavings on the floor. One of the things he shows is the effect of a perfectly set-up double iron in the smoothing plane, wherein the gossamer shavings shoot straight up the throat and actually up his arm with very little curling or puckering. It is mighty impressive, and unfortunately I was so engrossed I forgot to take pictures.
Steve concluded with a demonstration in answer to a question he probably gets every time he is talking to a woodworker; how do you sharpen? He is a hollow-ground, oil stone and free-handed micro-bevel guy, and the results speak for themselves.
I find Voigt planes to be elegant and high-performance, and own one myself (so far).
My long-held interest in replicating Japanese urushi lacquerwork with synthetic materials (to avoid using the refined poison sumac sap that comprises urushiol) led me to lurking at Maki Fushimi’s youtube channel. His narration-free tutorials are spellbinding to me and I am an enthusiastic cheerleader for them. I recall visiting my pal Dave and telling him about the videos so he pulled them up and sent them from his iPad to the television. Two hours later the ladies had to drag us away to dinner.
As I began my own work to mimic urushi lacquer, I found that Maestro Fushimi demonstrated the tool set employed by a lacquer worker, including the use and making of brushes and spatulas to apply the molasses-like varnish. I must have watched this pair of videos on making spatulas a half-dozen times, and was drawn to the knife he was using for the task. I determined to get one. Then I checked the price. Nyet.
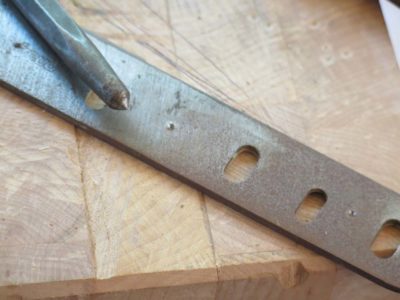
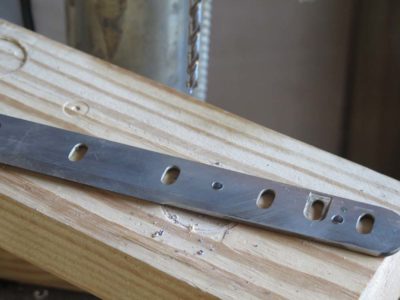
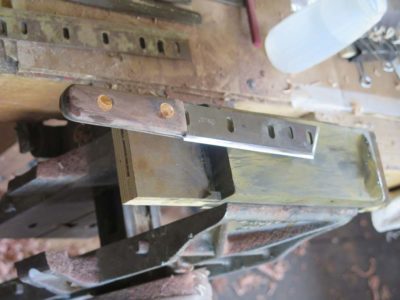
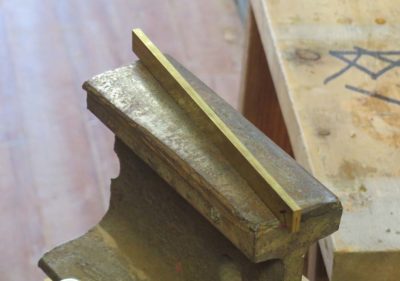
Instead I turned to my collection of spare parts to see if there was any readily available tool steel for such a project. There was, old planer knives to be more specific. I ground the tip of one end to resemble the shape of the knife in the videos, then set about to make it as much like Maki’s as possible, at least functionally, with just what I hand on hand. With the planer knife already having an established bevel edge sharpening it would be a piece of cake.
I marked and drilled the holes for the rivets and the handle cheeks.
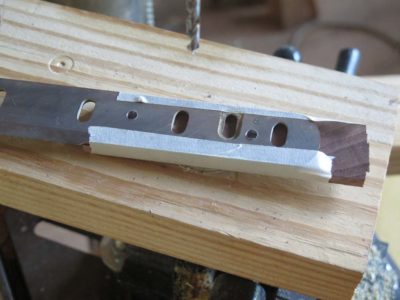
I grabbed some walnut for the scrap box and quickly made some cheek blanks suitable for the handle. By taping the cheek blanks to the drilled blade I located all the holes in exactly the right place.
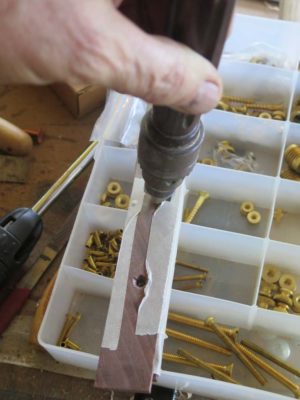
Using a hand-held countersink I worked the rivet holes just enough for the rivets to fit (the longest ones I had in my rivet box were a bit too short). I was so eager to test the concept I did not take the time to fabricate custom rivets, a topic I will blog about soon.
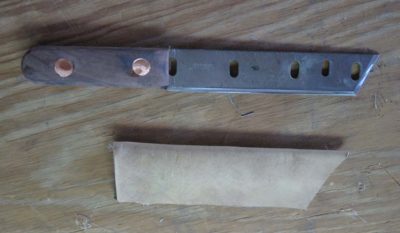
And then I hammered the rivets into their holes.
I worked the shape of the handle, sharpened the two edges and made a sheath, and it was done. I was using it just this afternoon and love it. At some point in the not too distant future I might make another one, only nicer.
In order to assist the students in saw sharpening I stumbled across another application of Clothespin Magic.
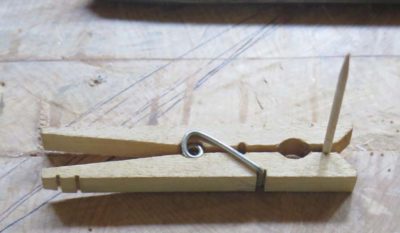
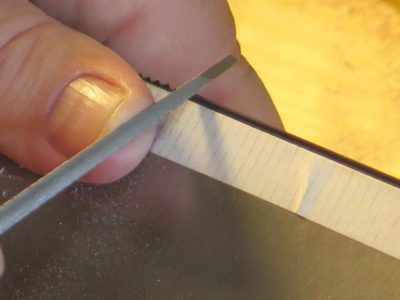
One of the key components of saw sharpening is to keep the orientation of the file consistent for each tooth. When you are using a comparatively tiny file, as we were on the dovetail saws, it can be a bit tricky to keep the rake angle the same for every tooth. A method that I find very helpful, short of using one of the specialized handles made for this purpose by Lee Valley or Blackburn, is to use a clothespin to hold a toothpick as a guide stick.
Sometimes I want a guide affixed to the tip of a file, and sometimes to the base. Making the accessory is the same either way, but setting them up is different.
For either version first file a groove across one of the clothespin jaws and on the second jaw file a groove running front-to-back, 90-degrees to the other one. For the tip guide this second groove is the one that is clipped to the end of the tiny file. You now have a set-up to hold a toothpick and the file tip in perfect conformation. Glue the toothpick to the cross groove. The tool is ready to put to work.
For the base version of the guide you simply revere the orientation of the toothpick; rather than gluing it perpendicular to the clothespin you glue it to continue the long axis.
This configuration is particularly helpful for new saw sharpeners, or those new to this scale of sharpening and teeth-cutting. By keeping the toothpick at the correct angle for each filing stroke, you end up with teeth that have an identical rake.
Doggone, is there nothing that clothespins cannot do?
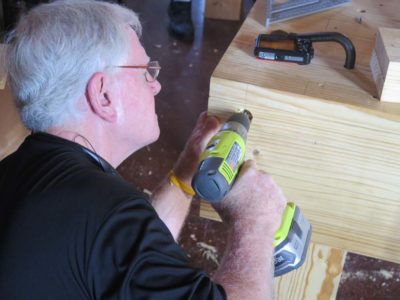
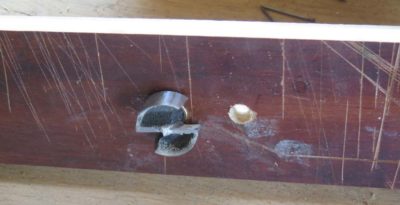
During the Hand Tool Woodworking workshop one of the things that gave some folks trouble was drilling the 1-3/8″ holes in the aprons for the twin 1-1/2″ screws that would be installed once the holes were tapped. At issue was getting the holes not only in the correct place, which was not much of a problem, but drilling them parallel to each other and exactly perpendicular to the apron. There is an art, or a least a practiced technique, to drilling clean holes with a large Forstner bit and a hand drill.
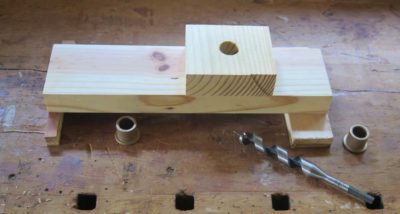
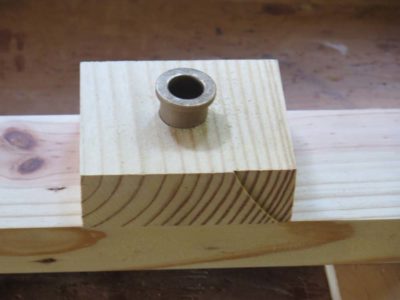
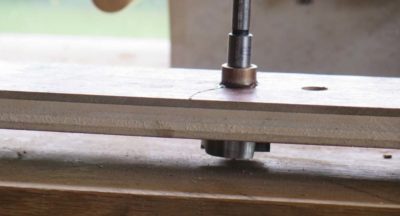
I decided to try building a jig that could suffice for the problem. The challenge was that the 1-3/8″ cutting head was affixed to a 5/8″ shaft. My jig design reflected that reality. I set a piece of scrap 3/4″ plywood on a pair of feet to make sure there was room for the drill bit cutting head to fit and also a place for any chips to go. The first thought was to drill a 5/8″ hole and just feed the bit shaft through it from beneath, but on second thought I drilled and 7/8″ hole to hold a 5/8″ I.D. bronze sleeve bushing. The bushing was roughed up on the outside and tapped into the hole slathered with Devcon epoxy.
The limitation of the system is that the hole can only be as deep as the shaft protrudes above the jig plate. Given that most of the time I’m hand drilling through two layers of 2x stock on the front apron the depth of the hole from using the drilling jig is deep enough (and straight) that completing it free-hand is adequate to accomplish parallel holes fully through the apron.
We hit the ground running on Day 3, hammering closed the slot cut for the saw plate.
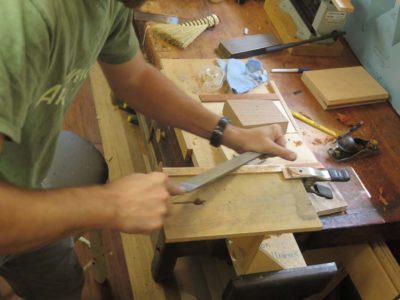
Once that was checked the stroll through sharpening-land got underway. When we cut the teeth on the first saw at 16 t.p,i, I promised the students that they would get immeasurably better on the second one, and I was right. Though the teeth on the first saw worked just fine, the teeth on the second were really, really good. It is not just because of the wider spacing at 12 t.p.i., but more it was the confidence and muscle memory/rhythm from making some teeth from scratch that worked well.
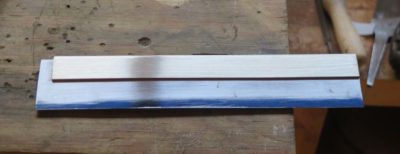
The facets from hammering the backs were more aesthetically displeasing for this crisp rectilinear back as opposed to the more rounded backs earlier so some time was spent cleaning these up. A sharp file, especially a float configuration, actually yields shavings and a nearly polished surface. Finished off with some sandpaper and pumice the appearance was quite nice. (This was a saw I was making when not coaching and encouraging the students; you can see the effect of thinning the bade at the top of the blued plate. I call this “the Blue Tooth look.”)
Absolutely everything went 2x faster on the second saw. If you will recall this saw had a saw plate that was 12″ x 2″ x .015″, while the first one was 8″ x 1-1/2″ x .020″.
By lunchtime the saws were going together. And they were cutting suweeeet.
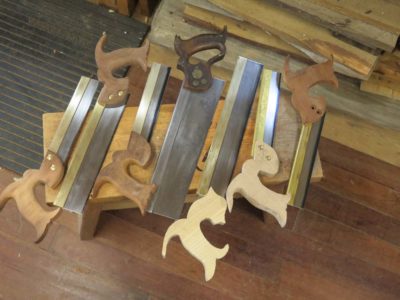
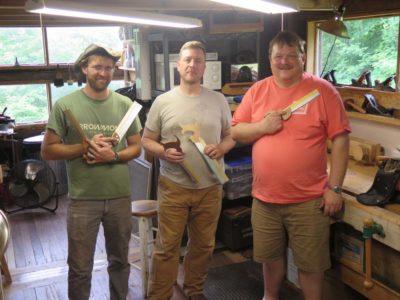
Just before the company of sawyeristas disbanded I took portraits of the weekend’s productivity (somehow one saw got left out). The finishing work on the handles was something they preferred to accomplish at home so they could build the second saw, and I admired them for making that choice to stick with and move forward on the more difficult work while we were together.
This weekend workshop was a whole lotta fun, and I look forward to replicating it sometime.
Note: The darker D-handled saw in the middle of the chorus line was a vintage Disston that I was completely re-working in lieu of building another one. I’ll blog about that project soon.
I have long incorporated Japanese knives into my work routine, beginning with my first one, a Christmas gift from my older daughter. When it comes to shaving and marking, cutting a line for precise sawing, nothing else comes close to them. I’ve purchased a few of these tools over the years, in various sizes and configurations.
One thing about them that I do not like is the feel of a new one with no handle. I am not sure these are even supposed to have handle cheeks, but I like them anyway. I generally wrap the handles with a double layer of leather boot strings, gluing them at the end with hide glue.
And, these critters are so sharp and pointy the need a sheath. I made three-layer sheaths for all of mine from a large scrap of heavyweight sharkskin. Starting with the first layer large enough to serve the function, I follow that with a second layer that is cut out to fit the knife tip perfectly. A third layer mimicking the first is the final part of the assembly, all of it glued up. The sheaths are snug so they stay put while the knife is awaiting use.
With my leather sewing kit I stitched a perimeter line around the edge of the sheath and it is finished.
Here is a captivating series of videos on using a Japanese knife to prepare a new lacquer brush for duty.
One of the tool groups whose importance has grown on me immensely over the years js that of the file family. Like most discriminating pursuits (addiction is way too strong of a word) it begins with the first strong hit of the good stuff, and before you know it there is an entire tool rack dedicated to them. A vintage mill file leads to a nice machine made rasp, and then a hand knitted rasp. Or six. And once you get your hands on a Vixen curved tooth the path to a selection of floats is pretty much inevitable. Then comes diemaker’s rifflers and sinkers, sculpting rasps, Swiss needle files, and barrettes. And eventually you seek out pushers like Slav in Chicago,, whose trench coat pockets are always full of files I suddenly discover a consuming need for. Every tool scrounging tailgating session becomes a new chase.
Which is where I got this new-old-stock premium Vixen file last year (a tool flea market, not Slav). I love the finish left by a perfect curved tooth file. I was using it recently and for the thousandth time I tapped it on the bench to knock out the shavings. Much to my literal astonishment this low mileage tool snapped! For many seconds my frame of mind was some combination of shock, anger, and dismay. Seriously, this was a premium tool that broke under very gentle stress within a very few hours of service. Exasperated I set it aside to compose myself in order to conduct the memorial service. Or not. In the meantime it would sit on the shelf of my file rack.
Then, suddenly the recipe for lemonade from a broken lemon leaped to the for. I was working on a saw handle during the Dovetail Saw class, using one of my Iwasaki floats to work the wood, At one point I needed something a bit larger but still with a fine, crisp cut, and no tang or handle. I walked over to the file rack and grabbed the broken Vixen to give it a try. The result was sublime. It still cut perfectly but without the obstruction of the handle end that had broken off. The fracture margin was a bit ragged so I touched that up with a coarse diamond sharpening stone.
It was the sweetest glass of lemonade ever.
Now I just have to ask Slav to find me some more handle-less curved teeth files.
The saws began to take final shape early on Day 2. My strategy for toothing the plate long before anything else is fully completed became clear, as that finished toothed edge with no set was used to cut the slot in the handle for the saw plate itself. It worked perfectly.
Once the saw plate was fitted to the handle it was time to begin the final assembly process. This meant that the saw plate had to be inserted into the back, and the open mortise for the back had to be laid out and cut into the handle.
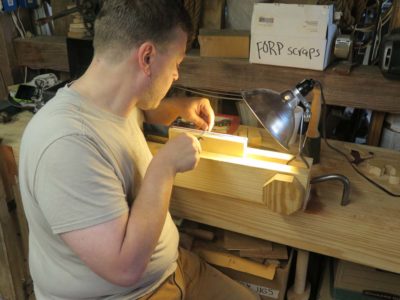
Once the pieces were all fitted together temporarily, it was time for pulling it all back apart and undertaking the final finishing of the plate. As I said, I do not set the teeth of these tiny saws. Instead I taper the plates from the top to within about 1/6″ of the teeth gullets with coarse sandpaper or a pumice block, then increasingly finer abrasives until the “look” was the way they wanted. Using blued spring steel for the plates is exceedingly helpful for this process. I’ve measured the effect of abrading the plate such that the bluing is fully removed and the plate polished to a “brushed steel” appearance, and it is something around one-half of a ten-thousandth of an inch.
The final step in the assembly is to drill the holes through the handle and the plate to fasten everything together with brass binding posts. I must give a shout out to Chris Cianci for his technique of breaking the initial lay-out hole through the spring steel plate by striking with a center punch, then flipping the plate and repeating. After a couple back-and-forths with this the spring steel shatters in the designated location. This makes drilling a breeze. A slight counter-sink at each hole for the screw heads, and assembly was soon finished.
By mid-afternoon completed saws were emerging from the efforts.
Rather than having the participants take the handles to final completion we decided to embark on a second saw with a 10″ x 2″ x .015 plate, employing a sawn slotted brass back, compared to an 8″ x 1-1/2″ x .020 with a bent spine for the first one. After the first saw, the second went so much faster. Once again there was fitting and pounding to make sure the back and the plate went together well.
Then on to more teeth cutting, this time 12 t.p.i. rather than the 16 t.p.i. for the first one. Much to their delight and in keeping with my promises, the leap in skill of the second sharpening versus the first was notable in both quality and speed.






















Recent Comments