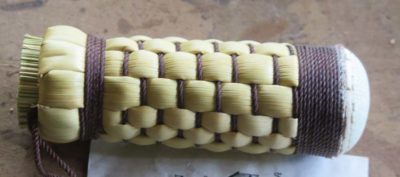
I took a test drive with my recent practice piece when customizing the turner’s polissoir for a couple of spoonmakers to see how it worked. I was going to carve a spoon bowl but time got away from me so I just used a hardware store wooden spoon to try it out.
I first immersed the crowned tip of the modified polissoir into a molten bath of 50/50 beeswax and shellac wax to harden it and align any wayward fibers. The waxed tip is really dramatic.


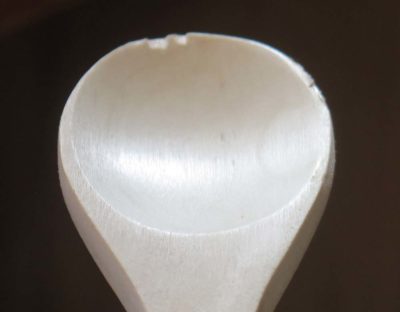
Then I burnished the bowl of the aspen (?) wood spoon (it was fine grained and essentially character-less). The surface became soother’n cat spit even though I did no preparation to it, it came straight out of the package. Clearly I could have used the polissoir on a much smaller, steeper spoon bowl (sorry about the blurry picture, auto-focus did a wonderful job of capturing the texture of my jeans).
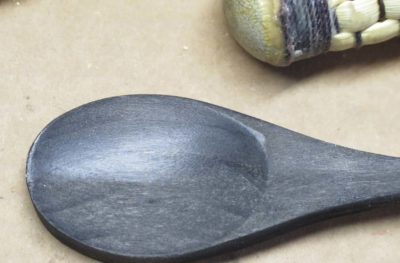
I did it to another spoon after ebonizing it with India ink to emphasize the effect. You can compare the polished half with the unpolished half and see the difference.
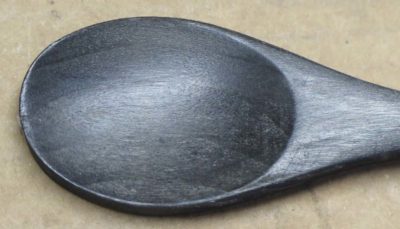
All finished it’s pretty good with about 15 seconds of burnishing.
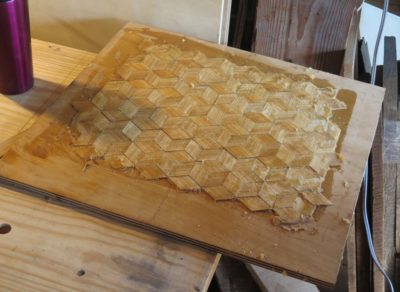
The day began with the unveiling of the parquetry backgrounds glued up just before stopping yesterday. A bit of water on a sponge allowed the paper backing to be removed easily and quickly. The hot hide glue had congealed nicely but was still pretty green so we placed them in front of a fan to help dry faster.
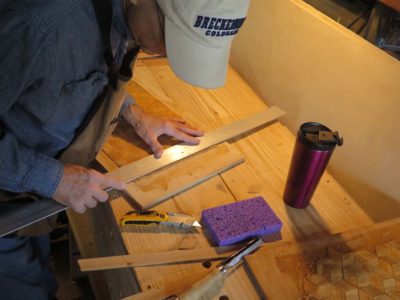
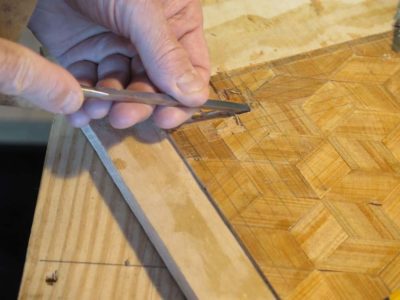

Then it was on to trimming edges, laying out the knotwork inlay and excavating the channels for the banding.

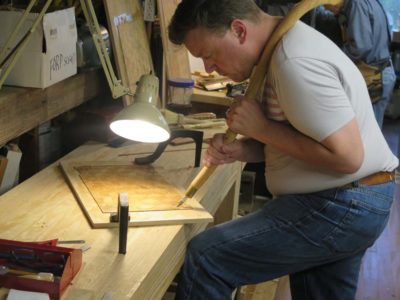
Much of the incising as done with utility knives, but Brint in particular took a liking to my shoulder knives. He gave both of them a long test drive and had definite preferences for them. So much so that he encouraged me to have a workshop next summer to allow the participants to make one (or two). We will get together over the winter to work out any bugs for that workshop.
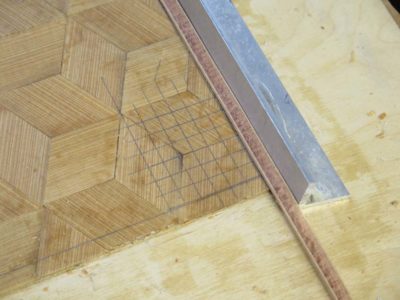
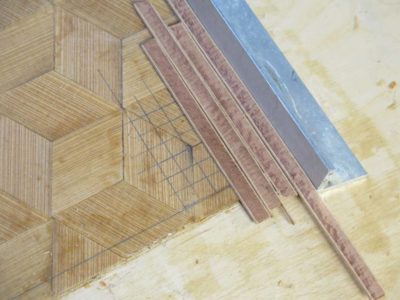
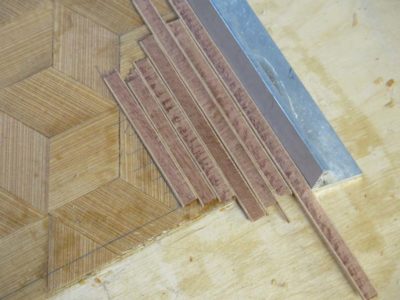
Meanwhile I was noodling around and found a donkey-dumb simple way to lay out the knotwork pattern with pieces of the banding itself as the measuring devices. Palm meet forehead.
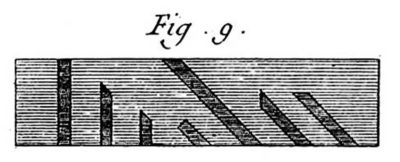

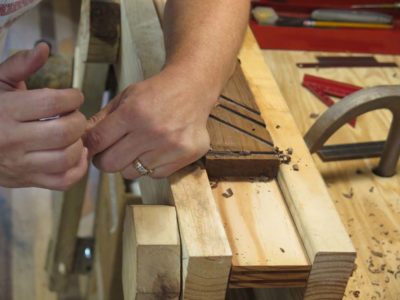
For Brint and John, once the excavations were far enough along it was time to create the template block for the individual pieces of the composition.

Following the guide of Roubo they took blocks of walnut and created right-angle and 45-degree channels for the banding to be sawn and planed, then placed pieces of the banding as stop blocks in the channels. This allows for limitless production of identical elements and very fast work in creating the knotwork pattern.
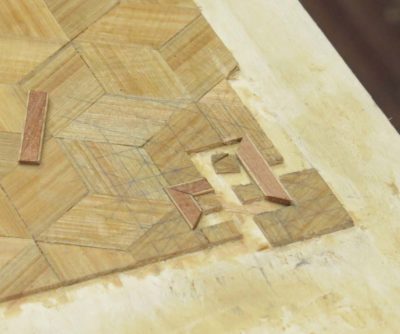


And knotwork corners became manifest on the boards.
Thus endeth Day 2.

The second annual gathering of Rippleistas convenes a week from today, and I am readying the barn classroom and main room. I’ve heard back from all three of last year’s participants and they hope to be here, along with one other person who will drop by if he can. I’ve had no other confirmation of attendees wanting to join us even though the event is open-invitation and tuition-free so perhaps the charm of ripple moldings is less than I thought.
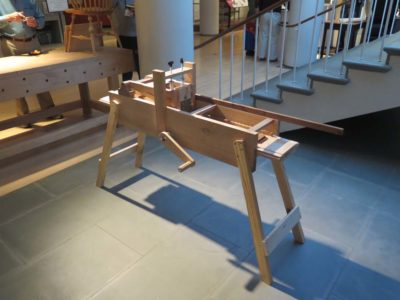
Although I no longer have the Winterthur Museum ripple molding cutter here, it having been made functional and returned, I know that one of our posse wants to experiment with a bench-top version of a ripple molding cutter, another will be perfecting his own machine built since last year, and two of us will no doubt be working on a new machine and revisiting my own machine design from last year.
I’ve ordered a pile of the nece$$ary hardware from McMa$ter-Carr so we should have everything we need to have a week of productive fellowship and undulating creativity.
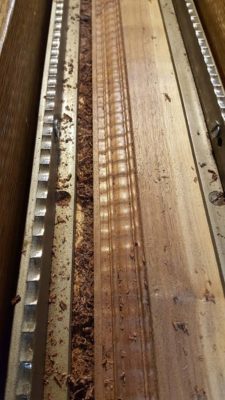
Stay tuned.
Early last week I was contacted by two separate spoon carvers asking about customizing Roubo’s polissoirs for their needs. I do not know if this is a point of discussion among spoonsters or both of these creative folks arrived a the same point at the same time. I gave it a try, and both orders have been sent off.
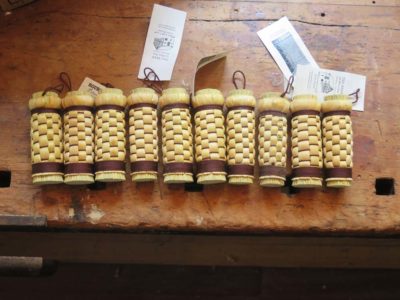
Given their descriptions of their needs I started by looking through all of the turner’s polissoirs I had on-hand, selecting the three with the longest bristles. Ostensibly these are designed to have 1/4″ bristles that can be gently domed for polishing the concave contours of bowl turnings, but in this case the crown needed to be dramatically more pronounced to fit into the bowl of the spoon. Since all of the polissoirs are hand-made there were minute variations in them, I wanted the ones that were a smidge longer (its a technical term you might not recognize) to accentuate the curve that could be imposed on them. Longer bristles allowed for a higher crown, so that is where I started.
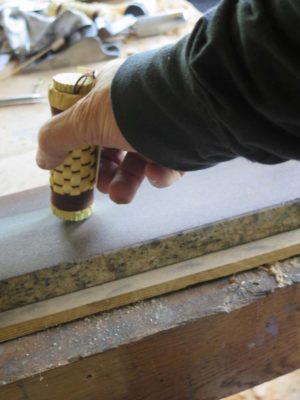
With the first test I discovered that a very dramatic crown was possible. I worked cautiously to impart the contour I though they needed and arrived at a point that made sense to me.
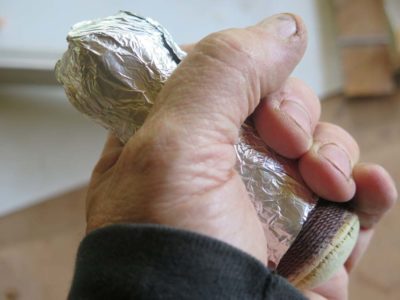
The test subject got pretty dirty and the label beat up so on the subsequent two I first wrapped them with aluminum foil to provide a bit of protection.
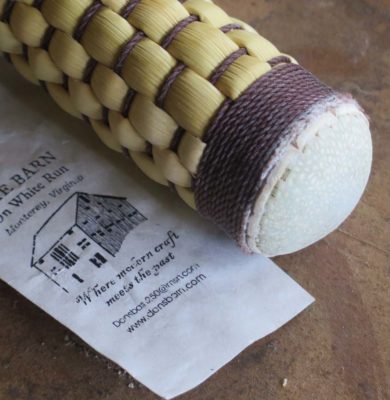
I hope these work for the spoon makers, if not I guess I will hear back from them. Of course the unmodified end can serve to burnish the flat and convex surfaces of their spoons.
My practice polissoir remains on my workbench and I will carve a spoon-sized shape to see how well it works.
Stay tuned.
For many years I have been on the hunt for a most rare quarry, the Emmert Metalworker’s Vise. As a life-long aficionado of Emmert K1 Patternmaker’s Vises, well, maybe not my whole life but certainly since I joined the Maddox Foundry pattern shop in 1978, I have found the K1 to be something close to a perfect woodworking vise. By that time Emmert Company was long gone but Kindt-Collins, the foundryman’s supply house, was manufacturing them. I was so taken by the vises in the pattern shop that I checked into buying the K-C version. The price of almost $2k in 1980 scared me off but I was indeed hooked.

Fortunately in 1982 I was able to buy a pair of vintage K1s at a price a married college student could afford. They sat unused for three years until I finished school, got a job, a house with a basement shop, and a workbench to put one on. This has been my constant woodworking companion ever since. (My second one waits forlornly for a bench of its own.) As I have often said to my well-established woodworking friends, “If you have never used an Emmert K1 don’t start now because you will be black-and-blue from kicking yourself for waiting so long.”
I am ashamed to admit that I never learned of the Emmert “Tool Maker’s and Metal Worker’s Vises” a/k/a “The Metal Hand” until a decade or so ago. If Emmert’s woodworking vise was this good, how fantastic must be their metal working vise? I was now on the hunt for this great beast.
Occasionally they would come up at auctions or on-line, but the prices, like that of the Kindt-Collins K1, were enough to retard but not diminish my ardor. It seemed as though every time the prices would eventually zoom into the stratosphere and I would have to drop out. A few years ago at Donnelly’s I hung in on the bidding long past my point of reason and still the hammer price was twice as much as when I dropped out.

As a profound gesture of friendship and condolence in the aftermath of my dashed hopes, my friend Jersey Jon presented me with a consolation prize, an equally rare but far less expensive (I hope) product brochure for the vise. It remains a treasure in the Archive of Don.

With high hopes I noticed one in this year’s MJD Summer Auction catalog and the chase was on. I knew from the listings that this item would be on the block at lunch time on Saturday. I located and examined the vise almost immediately on arriving on Thursday, and from that point on all the auction activity pointed to lot 26XX (at the moment I cannot recall the number).
When the moment was approaching our little band of tool mavens quieted down in anticipation of the lot number. Once it began it was soon clear that only one other bidder was fervently interested. As fate would have it he and I both had the same secret limit and fortunately I got there first! The auctioneer sang out the next increment several times then said “Sold to number 78.” With whoops and back slaps I was the winner, and unlike Captain Ahab I was going to live with my conquest.

Afterwards we loaded it into the CRV with some effort. At home I wrestled it to the ground, not much of a contest as it weighs more than a hundred pounds. The trick was avoiding smashing my toes or aggravating my back. Once on the hand truck it was a piece o’ cake to wheel it into the shop, and with caution I hoisted it onto my bench to remove the grease and grime.

And there it sits to this moment, awaiting a plan to mount it, perhaps on a new bench.
In hindsight I wonder if landing this beast after such a long quest will diminish my enthusiasm for attending tool gatherings like the one where I obtained it.
Nah, that’s just crazy talk.
But like Jameel Abraham once quipped to me, “Why couldn’t we collect thimble boxes instead of cast iron anchors?”
There were two individual tools on my “gotta bid on these” radar at the MJD summer auction. The “pretty one” was a small brass shooting plane.

Patrick’s plane
After seeing Patrick Edwards’ petite shooting plane he used for parquetry at the Williamsburg conference this year I have been itching to get one. (I will almost certainly make one myself, but that is a topic for another set of blog posts). Here was a sweet little one that was pretty clearly custom-made, perhaps even user made.

The auction estimate seemed pretty low, so I was interested on checking it out. Very, very nice, great lines, pleasant heft, a nice Sorby iron. I was hooked. Since it was being sold very late on Saturday, and Mrs. Barn and I were going to visit friends in Rochester NY for dinner and the evening I would not be around for the bidding festivities. Hyperkitten volunteered to bid for me and I told him my limit.
Late that afternoon he sent me a message on my newfangled smart phone thingy that I had indeed won that particular prize! A week later it arrived at the PO box and I had a chance to look it over really well.
It was pretty clear that the plane had never been made operable. There were no wear marks on the body that would suggest any real use, but the kicker was that the Sorby iron had never been sharpened. Its back had been “ground” on a flat waterwheel but had never been taken any further in the process. I took about a half hour and got it singing like Caruso. It is darned near perfect for my needs in cranking out French parquetry or other small-scale work.


The handle of figured walnut had been broken and repaired, albeit poorly. The repair seems to be holding firm so I may wind up just re-sculpting it a tad and leaving well-enough alone. Oh, and I think a nice knurled pressure screw is called for.

I noticed with some amusement that the maker had stamped his name on two places of the handle; A. Williams. we are probably only distantly related.
At the annual MJD summer tool extravaganza the action of acquiring tools at the auction itself is only one of the many attractions. The tool-dealers flea market gets larger every year and I always manage to get a few treats.


This year it was a pair of screwdriver tips for a brace, always a useful thing to have more of, and a vintage Panavise.

Even better is the extravaganza and fellowship if the cluster of friends I sit with, often kibitzing about the tools being sold and reviewing each others’ purchases. Here is my pal JohnH and a pile of wooden body planes he got for a buck or two apiece.


I am particularly fortunate in both the tool acquisition and fellowship aspects to sit alongside tool merchant extraordinaire Josh Clark of Hyperkitten.com. He comes with a detailed “Buy” spreadsheet and generally has great success as he is buying good quality “user” tools for his customers to purchase from him at a very modest price. Any while he is aggressively obtaining his winter inventory we get to scour his purchases and make side deals with him. It is especially superb when he gets a large lot of boxes with stuff he doesn’t want. The the horse trading begins in earnest.

Here’s my haul from Hyperkitten this year.

I’ve always liked “take down” framing squares since they can fit into a low-rider tool tote. I bought one many years ago and Josh was happy to pass this one along to me.


One of the lots that Josh was watching carefully was a small box chock full of Yankee drill bit sets. I find Yankee drills to be an integral element in almost every work setting and have them scattered about in numerous locations. The problem is that the littlest bits you use the most are the ones that also break the most. Once the box was in his hand I bought three complete bit sets from Josh.

One of the tools that is often in abundance is the venerable wood screw, something Josh has no interest in due to the fact that they are so bulky and the demand is too low to commit space to them. Here is a pile that he just gave to me since I use them quite a bit.


In separate lots were a very nice Ulmia horned toothing plane and an unmarked so-so scrub plane. SOLD!

This lovely little wire and sheet metal gauge was identical to one in Henry Studley’s tool cabinet, and I did not already have one exactly like it, so…


Josh brought this one to my attention and it was so beautifully detailed I snapped it up. The French wrest for setting saw teeth is simply a spectacular thing.

Finally, Josh found a fairly good number of plow plane irons amongst his treasure that were too boogered up to be reclaimed without extraordinary effort, and since I can use them in re-purposed applications he handed them over to me.


The final off-book delights were fellowship dinners with friends old and new. One night the lovely toolaholic Christine reserved the upper floor of an excellent local restaurant for our crew, and the next night was the annual pig roast at the auction. A grand time was had by all.
Except for two specific items that deserve their own posts, my acquisitions at this year’s MJD auction were sparse. I bid on the occasional items but only if it seemed a particularly good and opportune acquisition for a deep discount price, and dropped out of the bidding early once the prices approached fair. I did get a very few things that were cheap and intriguing.


My first purchase was a lot of ebony pieces including a smoothing plane and several navigation parallels. The plane is complete and in pretty good shape, I will brink it up to snuff soon. The parallels will be re-purposed for applications yet to be determined.


A second plane was this odd and huge solid rosewood Japanese plane. Admittedly this was simply a whim, the price was so low I could not pass it up. It weighs a ton, it will be like using a concrete block with a sharp iron. The current iron is pretty much no-account so I will cast around for another.

The final small auction purchase was this unusual pair of a sash and cope pair. Unspectacular, but again cheap.
Recently Mrs. Barn and I headed to central New York for the annual overdose of antique tools at Martin Donnelly’s compound in Avoca. It is a phenomenal experience that I can commend heartily to anyone interested in pawing through nearly 100,000 tools, all for sale. The really great thing about this auction is it is the “cleaning out the warehouse” sale of items left over from MJD’s other auction the preceding year. The earlier auctions have a much higher portion of “collectible” tools, this one is mostly “user” tools with little collectible value. Not all, but mostly.
Previewing the auction lots is a nearly impossible task unless you take the full week beforehand; we arrived there the morning of the auction that was beginning at 2PM. I was able to get about five hours of looking prior to the opening gavel.
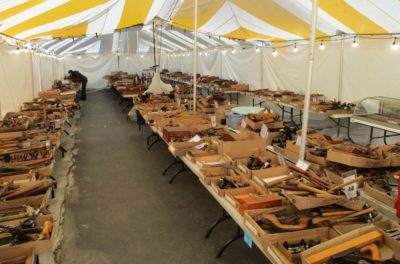
I began with the first 600 lots, which were the opening day’s salvo. Most of these are located in the first of the dozen or so tents on the grounds (there is logic to this arrangement, and the 2nd evening barbecue is in this space so it gets cleaned out first. Most of the box lots for the sale include groupings of tools, sometimes up to a couple hundred small tools. It is a fairly rare lot that inlcudes only one tool, I would estimate that at about 5%.

In the first-day tent I found a few things that interested me, including this solid ebony smoothing plane. It was part of a small lot with several ebony navigating tools included.
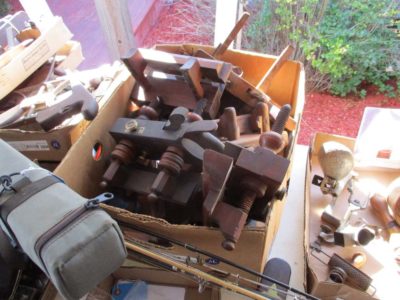
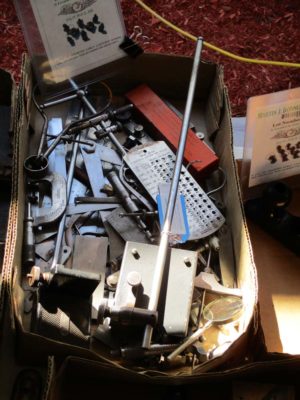
More common were lots like these which included anywhere from a couple dozen items to a couple hundred.
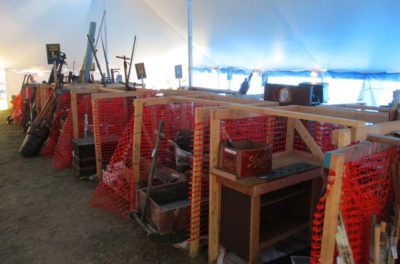
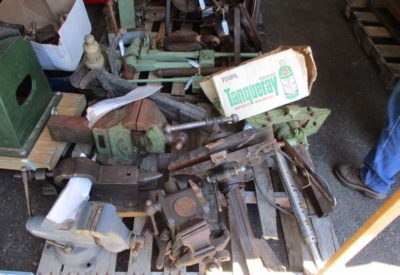
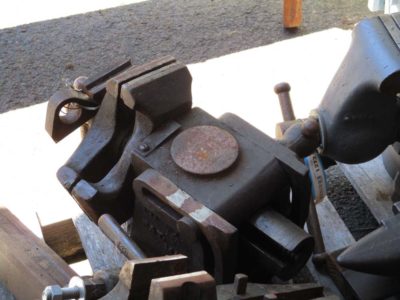
About 1-in-25 lots is oversized and thus in one of the several tents full of bins or palates. After browsing through the box lots in tent #1 for a couple hours I wandered through these tents and found some real treasures to be sold later, especially on Day #2. One palate of heavy iron included THE tool I went to bid on, an Emmert Universal Metalworking Vise. I’d been on the hunt for one of these behemoths for many years, always losing out when the bidding entered the stratosphere. Maybe this was the year.
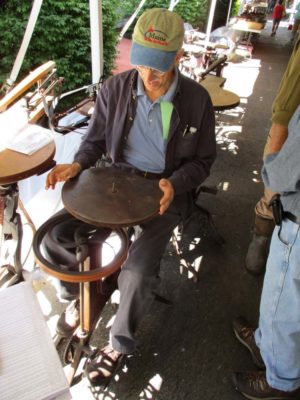
There was stuff everywhere, including the largest selection of foot-powered machinery I had ever seen in one place. There must have been about 50 of these machines, including the pedal-powered shaper my pal MikeM is trying out.
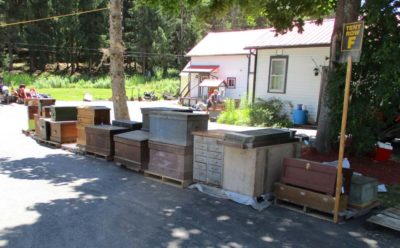
There was even an avenue of tool chests out along the driveway.
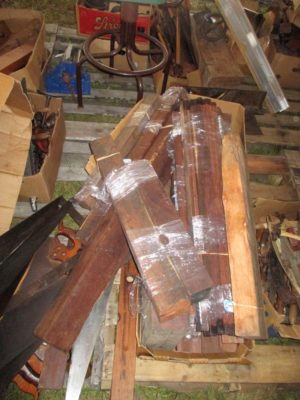
Another tent for oversized lots included this pile of several hundred pounds of Brazilian rosewood, cocobolo, Gaboon ebony, and even more. It came from an old closed yacht manufacturer in Long Island.
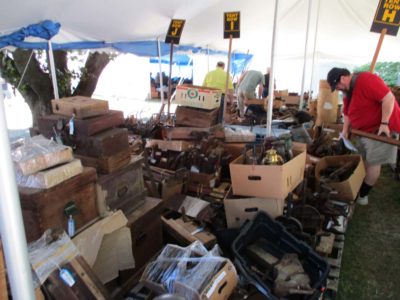
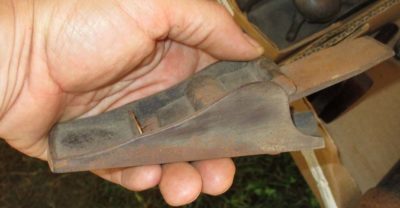
Still more giant tents stuffed to the gills with tools, baskets, boxes, you name it. This included a fair number of boxes I was interested, at the right price of course.
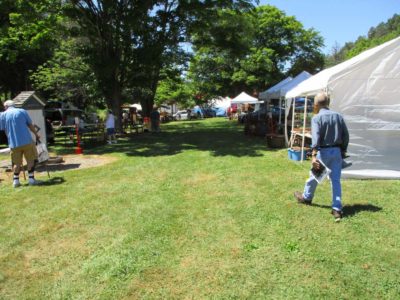
And this does not include the two-dozen small tents and tailgates of tool swapping out near one of the parking areas. I have learned to have a lot of fun with the wheeling and dealing here and can often learn a lot of tool lore with the dealers.
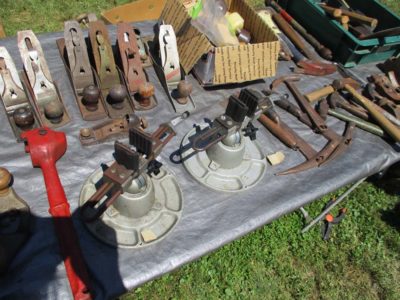

This fellow had two older Panavises that my pal JohnH and I were interested in. His wallet was the size of a hoagie roll. One friend of mine who was selling here confessed that she used to make fun of old guys with big wads of cash in their pockets, the had to confess further that she had become one of them.
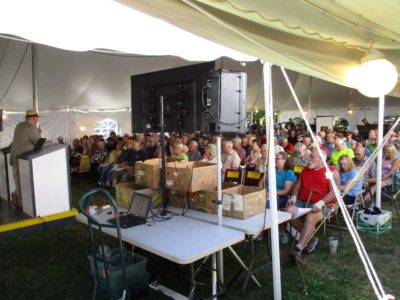
Soon the time raced to the point where folks filled the bidding tent, and the contest was ready to begin. Martin Donnelly greeted the crowd then turned the show over to the auctioneers, whose goal is to gavel four or five lots per minute until all 3000+ are gone. You snooze, you lose.
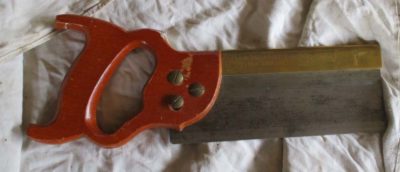

The rehabilitation of my first “brand name” dovetail saw began with dismantling all the components and re-thinking the proportional issues that rendered it an ill-fitted tool for me. As I said before, the cutting edge (teeth) of the saw was about the only thing I liked about it, so that would be left alone but everything else was on the table. Removing the handle was of course no more complicated than removing the saw nuts holding it on. (I’d already mucked around with the handle before I took this picture. Also, note the shallow bedding of the saw plate in the brass back).
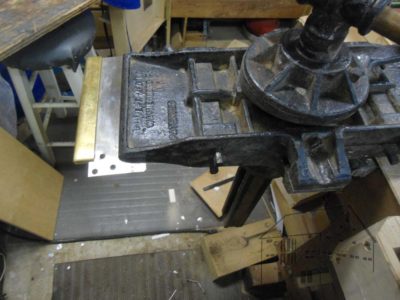

Separating the back and the plate was not much more involved. I set my Emmert vise to the horizontal position and tightened the saw plate in it. With a mallet and a stick I gently drove the back off the plate.
I addressed the easiest part first, the handle. I’ve been working wood for five decades but have not yet figure how to make holes smaller. Given that limitation I was stymied in making the handle and its way oversized hand-opening the right size for my hand, but at least I could make it more comfortable. I accomplished that by transforming it from a closed tote to an open tote, albeit a pretty ugly one. This did allow for and encourage a more comfortable grip on it and is an immense improvement. Still, I will make a whole new handle once I get a little ahead on the multitude of other projects occupying my days.
Next came the re-dimensioning of the saw plate which was just wa-a-ay to tall for my taste. Previously the distance from the teeth to the top of the spine was almost 3-1/2 inches, a pretty excessive proportion for an 8-inch saw. Some of this was due to how the plate was bedded in the back and some on the depth of the plate. The plate was a very hard piece of tool steel, probably cold-rolled sheet that was effectively forged and thus too hard to saw through. It was also too hard for my little sheet metal shear to cut through so I had to use a different approach.
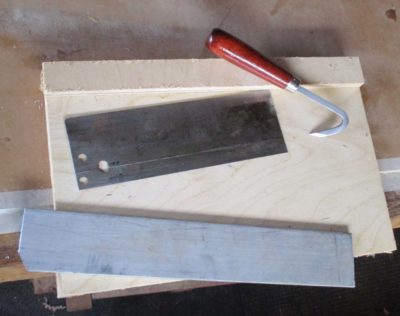
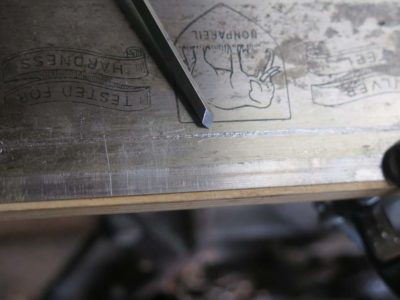
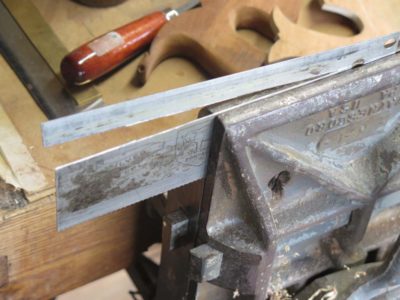
Instead I scored the plate with a scribe along the line I wanted to cut. I then used an engraving burin and took several passes along the scribed line to create a furrow, weakening the plate to the point where I could break off the excess. It worked like a charm.
I finished this slightly jagged edge with a diamond stone and it was ready to go back in action.

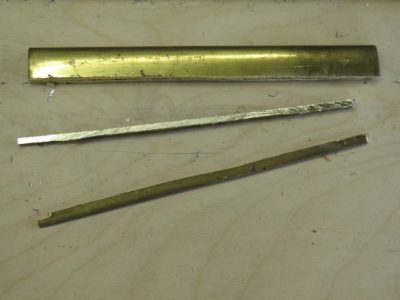
My final major modification was to narrow the brass spine. The saw was originally fitted with a bent back made from 1/8″ brass with a 1-1/8″ depth making it a stout, really heavy component. On a saw this small it threw the balance way off, another feature I did not like. I did not necessarily mind the depth of the back but it was just too massive as it was. Using a hacksaw I ripped a proud quarter inch from its depth, then finished the edge with a file resulting in a brass spine that is almost 1/3 lighter and narrower than it was before.
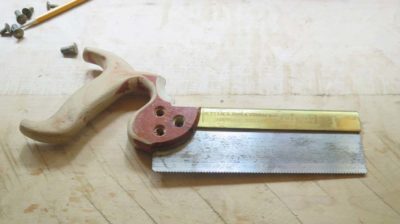
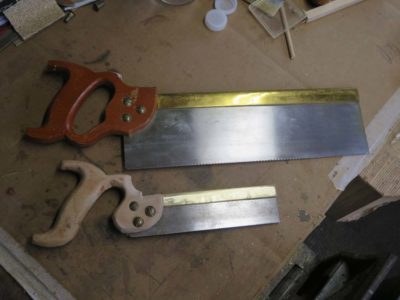
One final modification was to re-set the plate fully bedded into the bent back, as opposed to the original bedding that was only about 1/4″ at the tip of the back. The result of this combined with the cutting-down of the plate resulted in an 8-inch saw that was only about 2-1/4″ in overall depth versus the original 3-1/2″. This improvement alone was worth the effort as it makes the saw feel like more of an extension of my hand rather than some barnacle stuck there.

With all the old pieces made new, the reassembled saw more closely resembles a tool I might use regularly. The relatively heavy set for the teeth, at least when compared to my no-set tapered saw plate model, feels a little “wallow-y” in the kerf but performs well. I can definitely see this old/new saw becoming part of my regular repertoire of options.


Recent Comments