
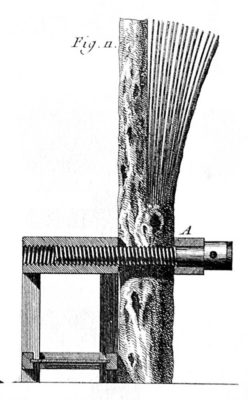
In great part due to the rapidly forming manuscript for To Make As Perfectly As Possible – Roubo On Marquetry and the number of my essays describing the seemingly arcane practices of 18th Parisian workshops, in 2011 I built a slightly diminutive (2/3 scale) version of Roubo’s sawing bench as illustrated in Plate 278, Figures 10 and 11. The dimensions for my version were determined by the space in my basement workshop; I now wish I had made it full sized. Doing so would have doubled the mass of the bench, and in this instance mass is really the only important thing. The construction was real meatball woodworking, I simply fit and fastened together 4×6 tulip poplar stock then drilled holes for the vise screws all the way through the top horizontally. For the female threads I simply used the wooden vise nuts that came with the threaded screws.
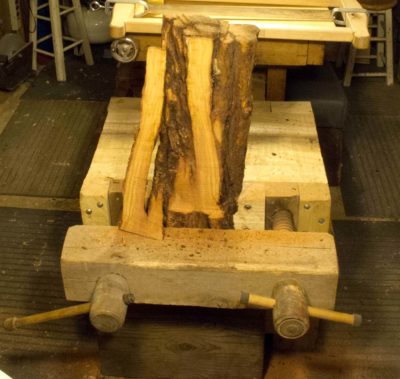
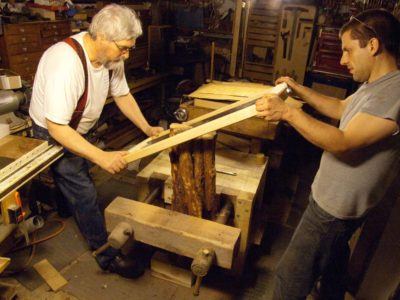
This workbench has only one purpose and function, to hold a work piece firmly while it is being resawn. What we found immediately in battle was that the bench vise did a fine job of holding the work piece in its jaws tightly. Unfortunately the bench was simply too light to perform well in action as the whole thing danced around the shop with every saw stroke. The only way we could get it to work was placing anti-skid pads underneath each leg and then loading it up with as much weight as was handy. Currently this sawing bench is the storage home for several hundred pounds of fire bricks I keep handy.
Roubo alludes to this problem himself, extolling the virtues of massive weights being stored on or under the bench to hold it steady, or even more likely bolting the entire unit to floor. In my old basement shop this made no sense on the concrete floor in a tiny space, it makes more sense now that I have wooden floors and lots of them.

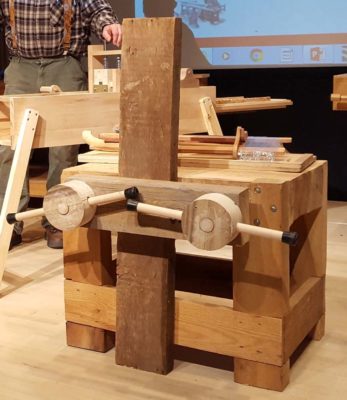

Most recently I used the saw bench during my demo at Working Wood in the 18th Century at Colonial Williamsburg, employing an attendee as my stabilizing weight. In preparation for that demo, and in response to my having cannibalized the unit to use the original vise screws on other benches, I made new screws and screw nuts with my Bealle threading unit.
I cannot say I have used this bench enough to become facile at resawing veneer, the best I can do is about eight leaves per inch. Only time will tell if I ever get to the point where I can saw a dozen leaves to the inch like the old timers, but if I do this bench or one like it will be part of the equation.

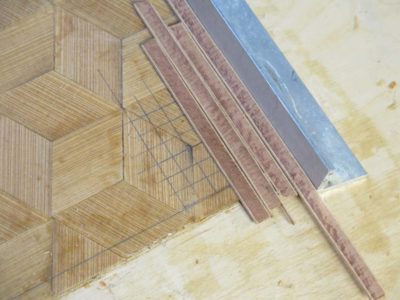
The day began with the unveiling of the parquetry backgrounds glued up just before stopping yesterday. A bit of water on a sponge allowed the paper backing to be removed easily and quickly. The hot hide glue had congealed nicely but was still pretty green so we placed them in front of a fan to help dry faster.
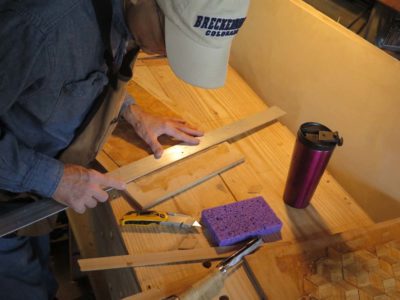

Then it was on to trimming edges, laying out the knotwork inlay and excavating the channels for the banding.

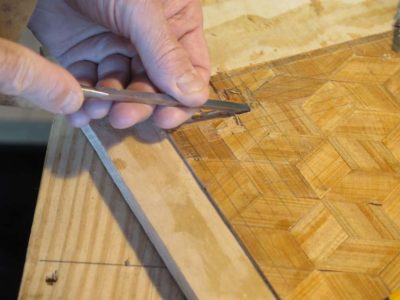
Much of the incising as done with utility knives, but Brint in particular took a liking to my shoulder knives. He gave both of them a long test drive and had definite preferences for them. So much so that he encouraged me to have a workshop next summer to allow the participants to make one (or two). We will get together over the winter to work out any bugs for that workshop.
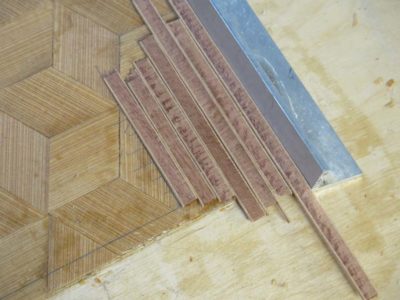
Meanwhile I was noodling around and found a donkey-dumb simple way to lay out the knotwork pattern with pieces of the banding itself as the measuring devices. Palm meet forehead.
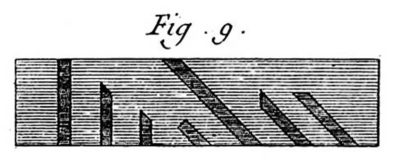

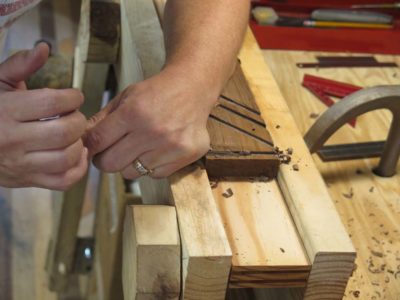
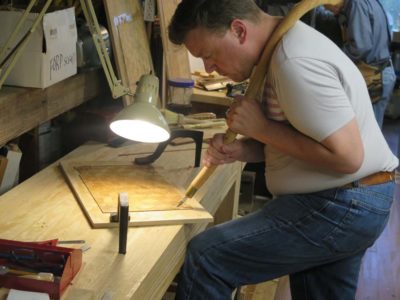
For Brint and John, once the excavations were far enough along it was time to create the template block for the individual pieces of the composition.

Following the guide of Roubo they took blocks of walnut and created right-angle and 45-degree channels for the banding to be sawn and planed, then placed pieces of the banding as stop blocks in the channels. This allows for limitless production of identical elements and very fast work in creating the knotwork pattern.
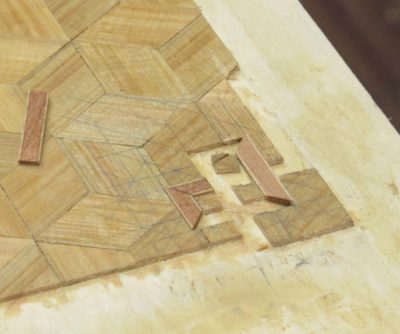


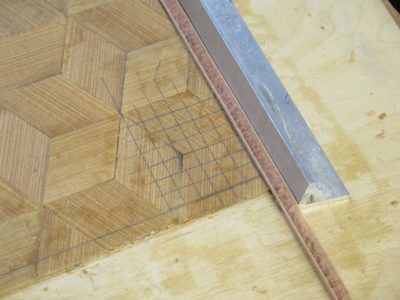
And knotwork corners became manifest on the boards.
Thus endeth Day 2.

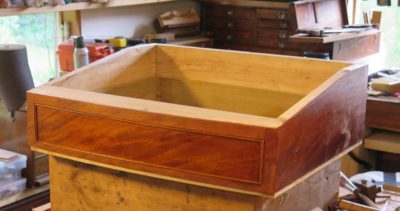
During the time I was working on the fancy veneerwork for the legs, the drawer had been sitting minding its own business at the other end of the bench. Unfortunately and unbeknownst to me in those intervening weeks the finished drawer, complete with matching veneer and bead edge, decided to act like an elected official and go crooked on me. When I picked up the drawer to put it back into the writing box I saw that it had racked and twisted almost 1/2″ from corner to corner and would only go into the runners part way. I could have dealt with 1/16″ with a little bit of shaving and a little bit of shimming. But this require pretty drastic intervention.
The problem was both vexing and perplexing. I had specifically selected a piece of very old tulip poplar for the structure of the drawer, yet here it was, gone all potato-chip-ie on me. At the very least I would have to trim the dovetails and hope I could get it all back together, flat. The edge beading that trimmed the edges of the drawer face was completely sacrificial and I knocked that off with a mallet and chisel in short order. An hour in a water-filled trough released the rear dovetails and the back slat of the drawer, but the front was a trickier issue.
My first and foremost consideration was NOT damaging the veneer on the front of the drawer as that was carefully matched to the surround on the desk. If I screwed that up I would have to saw a whole new piece of veneer from the prized figured plank, and I had zero interest in that. Since the veneer had been applied to the curved front of the drawer with hot hide glue all it took was immersing it in hot water and letting the glue line relax to remove the veneer and get to work solving the problem. No problem, right? We’ve all heard this was the Achilles Heel of hide glue, that it was not robust and prone to failure in high-moisture environments. I placed the drawer face down in a plant trough and poured in the hot water. I checked back in a few minutes and nothing had happened. Well, the finish had bloomed but that was irrelevant. The veneer was holding firm.
I did it again.
No change.
And again.
No change.
I left it in the water trough overnight and checked it again in the morning.
Still firm.
In aggravation I dried off the drawer front and removed all the shellac finish. Using my tacking iron and spatulas I rubbed the heated iron (over a wet rag) on the face of the veneer and gently worked the spatulas underneath the veneer to separate the glue line. It worked, but took over an hour of nerve-wracking time.
I set the veneer aside, undamaged but a little warped as you might expect. But certainly salvageable. I put the drawer front back into the water trough overnight and was able to disassemble the dovetails to see where I could trim the joinery to get it to fit snug and flat.

But for whatever reason this piece of clear, vintage wood had twisted and there was nothing I could do to un-do that. I won’t describe the whole process of trying to re-use and re-fit the original components — I think I have exasperation induced amnesia on this chapter of the tale of woe — but in the end decided to build a whole new drawer front. The drawer sides and back were just fine, but that bowed drawer front was, as my beloved Mom might say, a stinker. (My mother is among the most gentle, even tempered people I have ever met, and I never heard an uncouth word cross her lips. She once, however, described a troublesome co-worker as, “A real stinker,” and I knew he must be The Spawn of Satan.)

So I fabricated new new drawer front from a different piece of lumber, also vintage tulip poplar, cut new half-blind pins, and reassembled the whole. New edge beading, relaid the veneer, and newly finished.
It was perfect, and held true until the desk was finished and delivered. Whew.

Recent Comments