When it comes to sawing lumber there are three distinct processes. Crosscutting is the most common to most woodworkers, wherein a longer board is made into a shorter board. Ripping is when a wider board is cut into two or more narrower boards (one of which may be purely waste material) and is the function for which the table saw was primarily created. Resawing, by which a thicker board is cut into two thinner boards, is generally the least employed of the three sawing methods. And if it is done, it is mostly reserved for table saw or bandsaw work.
Because of my own peculiar interests and projects, I find resawing to be a regular function in my studio as I routinely saw my own veneers, both by hand and by bandsaw. Recently in my preparations for my presentation at the upcoming SAPFM Annual Mid-Year, as I was working on some luan plywood panels to create the set of sample boards reflecting my presentation content, namely the options available to rural colonial craftsmen, I was dissatisfied with the aesthetics of the outcomes. I decided to make some honest-to-goodness furniture lumber sample boards. The most readily available material I had was true mahogany of 8-9 inches in width and 1 to 1-1/4″ thick. In other words just a smidge wider than I could resaw with my upstairs bandsaw. My downstairs bandsaw with the riser block and beefier motor was out of commission for some maintenance. So, I decided to resaw the mahogany boards by hand. [N.B. I would have preferred to use walnut as that would reflect 18th C rural life in the mid-Atlantic region better than imported mahogany, but the lumber for that was at the bottom of a very big pile of lumber. Nuts to that.]
I used my 3/8″ kerfing saw on all four sides of the boards and got to work (the saw cuts a 1/16″ kerf 3/8″ from the edge of the board, not a 3/8″ kerf).
Back in the day when the Woodworking in America shindigs were a thing one of my favorite presenters was Ron Herman of Antiquity Builders of Columbus, Ohio, who would show up with a half-dozen boxes of carpenter’s saws of almost every iteration known to man, and talk about all things saws and sawing. I learned tremendous amount from Ron as he waxed eloquently of things he had been taught and subsequently learned from his many years of restoring and preserving historic buildings. One thing he said which remains embedded in my brain was, “Make sure the saw fits the job.” He would then walk the audience through the process of selecting from among the scores of saws he had for a specific task at hand.
Ron’s words were ringing through my ears as I undertook the slicing of my mahogany boards. The mahogany was dense, and some boards were denser than others. This required fine-tuning my tool selection to make sure the saw I was using was the best fit for the board itself, and given that the three boards I resawed were different densities, I wound up using three different saws (and tried several others) to get the job done. Such a conundrum is not present when I am resawing, for example, cypress when the grain is so uniform and the density so creamy I can go at it with my most aggressive saw. Or, when I am resawing hard cherry or maple. But when, as in this case, the boards are not uniform in density or even when different sections of the same board differ in character I was switching back and forth between saws.

At this point in my studio trajectory my default starting point for resawing is the Bad Axe one man Roubo saw, which works wonderfully well and did so in this case. For the densest of the mahogany boards this saw and its 4 t.p.i. configuration was the tool of choice for much of the work.

This time, inspired by this Salko Safic video I decided to try one of my c.1800 frame saws. With its 2 t.p.i. configuration it cut like a beast on fire but I had a bit of wander on the outfeed side. Perhaps with a bit more practice… Or, I could give Mark Harrell a call to ask for some advice on getting the saw to cut dead true. I had not tried using a four-foot saw by myself much before this, so perhaps all I need is more time in the saddle. It could also be that Salko is simply a better man than I.
I have two brand new saw plates for four-foot frame saws so maybe a new tool project is coming over the horizon.

The most Ron Herman-ish episode of the excursion was tuning my saw selection to the individual piece of wood. For the denser board my usual re-saw tool, the vintage 3-1/2 t.p.i. Disston “skated” over the wood a bit much, even after I gave it a quick tune-up with a file (about five minutes’ worth of work; it took longer to set up my saw sharpening rig than to actually do the touch up). Switching to the equally vintage 4-1/2 t.p.i. Disston, set up with the exact same specs did the trick. Both saws were what I call “skin prick sharp” (the teeth are so sharp they grab my skin when I gently press my finger against them) so really the only difference was the tooth spacing. The 3-1/2 t.p.i. saw worked like a charm on the less dense board.
I might not need Ron’s eight dozen saws in my inventory, but maybe a few more than my dozen-and-a-half could be called for. I’m always scouting for good vintage saws cheap at flea markets. All I want is an original depth plate and no kinks.

One final note: I make a point of keeping my saw plates well waxed, stopping to apply a thin swipe of paste wax whenever I feel things “grabbing.” It makes all the difference. Normally I use a paste wax made from my 31 Blend but that would have required walking to the other end of the studio to retrieve it. This tin was right there.
I find resawing to be an immensely rewarding exercise, and I do mean exercise. It takes a good while and a fair number of calories but the result is exhilarating when done well. To paraphrase Toshio Odate, “If I find a task pleasurable, why would I want it to be over quickly?”
He is a wise man.
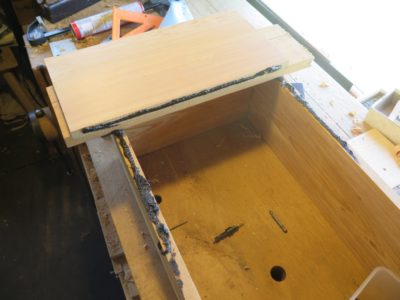
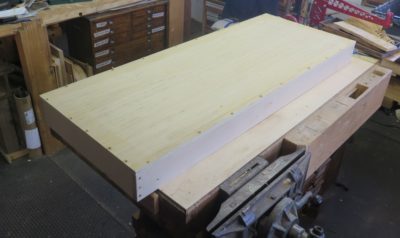
With the dovetailed box sides assembled I moved on to attaching the board bottom. The orientation of the wood there was such that it will cause the maximum swelling and thus compression sealing that panel.

My strategery was to lay down a bead of asphalt and screw thing down tight for each board. I left each board over-length by about an inch to reduce the risk of splitting from the screws. I left the end board even longer to allow for a more stable outrigger effect when sitting in the stream after installation.
The successive board was tarred to both the sides and the preceding board. Tidiness was not the objective, sturdy durability and performance was. My only real objective was squeeze-out.
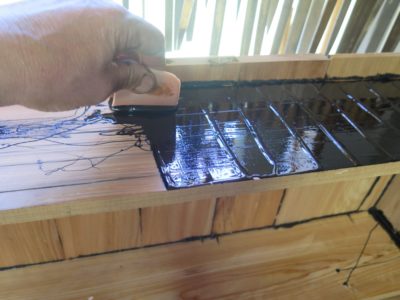
When the bottom was in place I turned my attention to one of the side boards that had a bit of surface cracking. I trowelled on some tar on that whole surface just to make sure it would remain intact. Probably overkill.


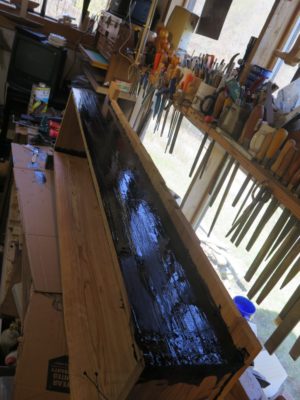
A line of tar on the inside and outside of each corner completed the assembly. Using a hole drill I installed the shower drain fixture that served as the connector for the penstock water line.
Now all I had to do was make the screen lid and haul the monster up the hill.
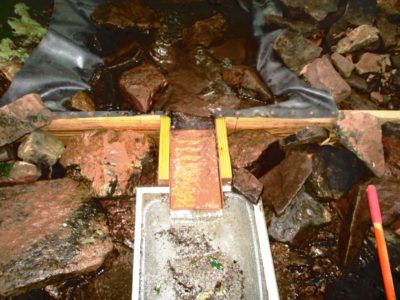
Not only was the severity of the winter weather manifest in the damage to the pipeline and master valve, the existing intake setup (pictured above) at the top of the system was thrashed. The Rubbermaid tub was several yards downstream from the weir (dam) and the copper chute was missing altogether. I cobbled the system back together to give myself a few days to make a new capturing basin. The time had come to construct the collector box I have vowed to make ever since installing the system.
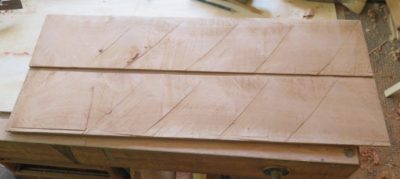
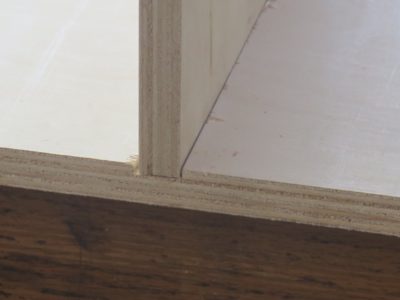
Using some of my prized c.1840 11/4 bald cypress lumber I made the box I have always wanted. The first step was resawing the 11/4 stock into three equal boards roughly 4-feet long and eight inches wide for the long sides and a foot long for the ends, and the requisite number of cross-boards for the bottom. I started the process by cutting the initial kerfs on the table saw, then finishing the task by hand (the lumber was too wide for my upstairs band saw. I could’ve used the resaw bandsaw in the basement but would have had to move a whole lot of stuff to excavate it.) Sorry, no pics for this process.
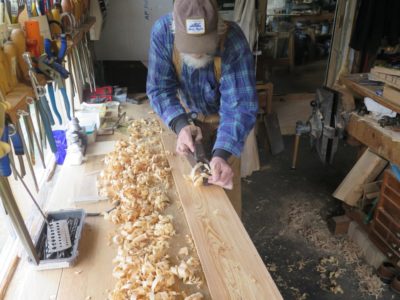


The boards were foreplaned as the finished surface. Incidentally, even though the wood is 180+ years old it is still tacky on the inside when re-sawn and planed, and cypress’ typical smell of patchouli oil fills the air! BTW I hate square-post-through-the-bench-top planing stops a la Roubo and always have. I much prefer the right-angle stop in the leg vise as shown here. It’s just how I roll, or rile, or whatever.

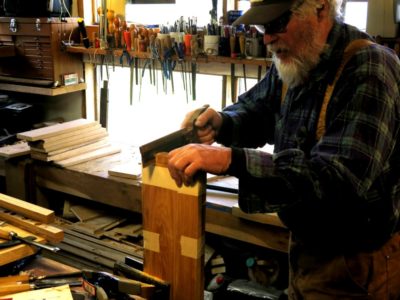
With the lumber prepped I set to cutting the dovetails in the corners. As is my custom I cut the tails on both pieces at the same time. Normally I nail the two boards together but this time I decided to tape them.


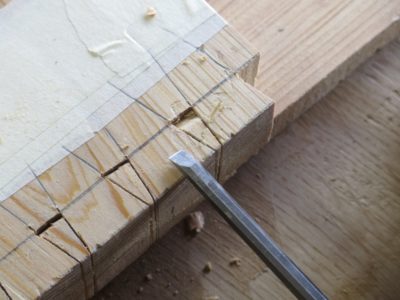

Another of my multitude of peculiarities is a dislike of sawing out the dovetail waste. I just incise the shoulder, pare out a bit, then go back and wail on the waste. In a minute or two they are done. I cut the pins basically the same way.
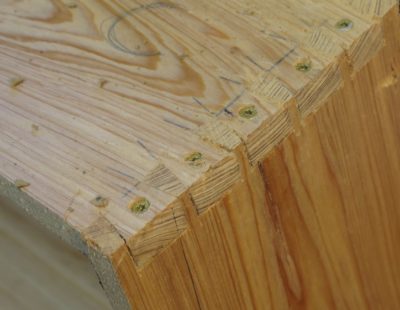
The dovetailed corners were screwed together with decking crews (pre-drilled and countersunk) since adhesive was not likely to perform permanently under water. With the screws and the swelling from the moisture I expect these joints to remain tight until forever. Even so, before installation I slathered the corners inside and out with tar, just to make sure.
Stay tuned
The tool cabinet is really three big boxes, one being the main box of 48″x42″x14″, and the two outer hinged boxes are each 48″x20-1/2″ x 4″. I built the big box first and outsmarted myself some, a lesson I learned in time to change the way I built the two door boxes.
Beginning with four pieces of 48″x24″x3/4″ Baltic birch-ish plywood panels from the big box store, I ripped them all to 14″ wide and sawed rebates on the back edges to accept the 1/2″ back panel. I ripped a fifth 3/4″ panel to be 1/2″ narrower than the outer box elements in order to allow for the 1/2″ back panel since it serves as the center stile.

It was at this point when I outsmarted myself and wasted a lot of time to no great purpose when I decided to miter the corners. This was simply unnecessary and a step I avoided when building the matched door boxes. Given the set-up of my shop the only way I could cut miters on the ends of the box panels was to use my battery-powered circular saw, which is an excellent tool that works just fine. The time sink was in getting the 45-degree cut just right in order to accomplish the 90-degree corner. After some test cuts I got it right and had the four outer panels ready for assembly.
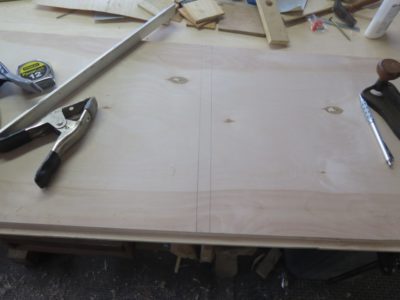
Once that was done I cut the dadoes in the top and bottom panels to receive the interior center vertical panel, cutting the shoulders with a Japanese saw, excavating with a router plane then finishing it off with a small dado plane.


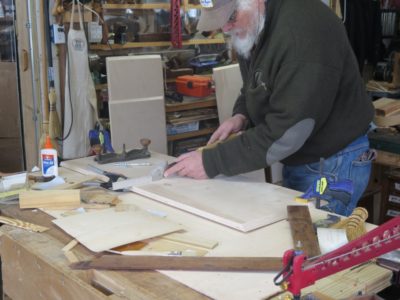
I assembled the back panel from two pieces of 48″x24″x1/2″ plywood, using PVA adhesive and pinch dogs to hold the together while the adhesive sets. Pinch dogs are one of the treasures I discovered in the pattern shop, along with using nails and screws for clamping stacked elements together for painted curvilinear structures. In this case it’s not painted stack laminations, but the surfaces will be obscured entirely by veneerwork.


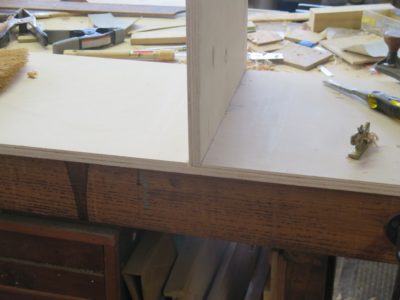
With all that complete the entire structure was assembled using PVA adhesive (I cannot assure that the tool cabinet will always be in the best atmospheric environment) and deck screws. I chuckle with the gasping and pearl clutching I am sensing out in the fruited plain. I augmented the corners with full-length mitered glue bocks using nails and PVA.
I learned my lesson with the bog box so I assembled the doors with butt joints and glued-and-screwed.
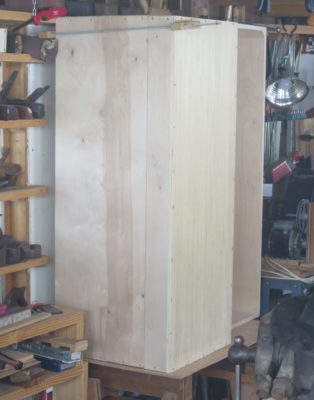
Whew, all the pieces fit together. The thing is so big I shoulda called it “the tool closet.”
Within view of the barn parking pad, where I process all my firewood, are two nice trees with mature burls. Those trees will likely suffer fatal injuries soon. Whether I make them into turnings or veneers waits to be seen. I’ve got lots of ideas for both options. One of my favorite pieces of furniture is Ruhlmann’s burl veneer cabinet with inlaid ivory bubbles. Hmmm. I’ve got a bunch of ivory, real and artificial, so…


This tree trunk is roughly a foot in diameter. The odd shape has me wondering how to saw up this one once I get it on the ground and in the shop.


This burl is almost a three-foot ball, so my creative glands are pumping out juices big time.
In addition to these two beauties, I’ve culled some very large forks from cutting up the big walnut tree we felled last year. Gotta be some outrageous crotch/flame grain inside them. I’m hoping to get up the mountain and harvest the firewood for winter 2023-2024 within the next month or two, and it would be a good time to process all of this stock.
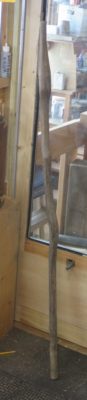
My pal Long Tom generally prefers woodworking in a stylistically primitive form, even though his craftsmanship is sophisticated and exacting. He just loves “woodland” woodworking, making rakes, walking sticks, stools, etc. He generally keeps a nice inventory of walking sticks in the corner of his shop, and around the time we moved to Shangri-la he gave me a shoulder-height stick he had been saving “for something special.” I am pretty sure it is some gnarly white oak he picked up during one of his walks through his woods.
For the first couple of years, it resided next to the cabin front door and received only occasional use as I traipsed through the woods or up the creek. Later as I recovered from my broken hip it became a constant companion on my treks up and down the hill to the barn. After I recovered fully from that injury the staff was used mostly during inclement weather, helping me to keep steady and upright on the steep driveway.
Then last summer after my knee surgery it became a constant companion once again, to the point where the tip was getting pretty beat up. I love that stick and refused to let go of it. So, I decided to make some modifications that will allow it to serve me until they scatter my ashes up on the mountain.
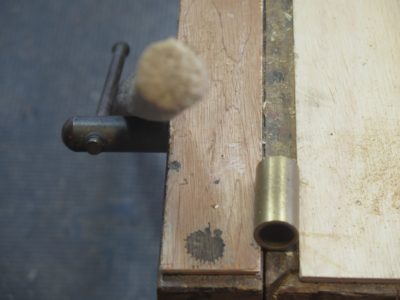
My initial thought was to fit the tip with a ferrule of brass or copper, but when scrounging through my scrap inventory I noticed some bronze bushings including sleeve bushings. I found one of the perfect size and set to work.
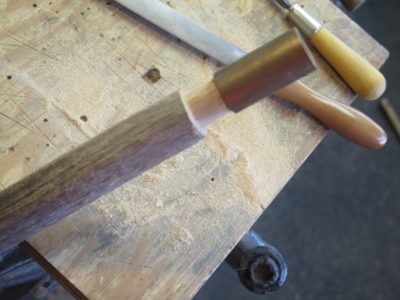
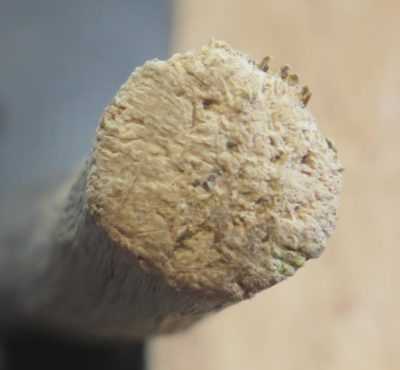
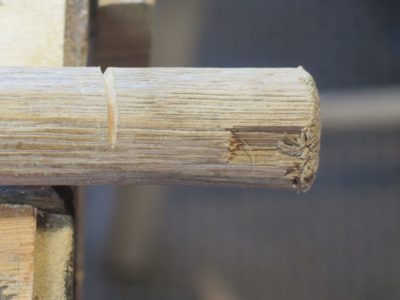
I filed the tip of the stick to fit the inside of the sleeve bushing using an Ariou rasp, working my way slowly around the circumference until it got to the point where I could drive the new bronze ferrule onto it.
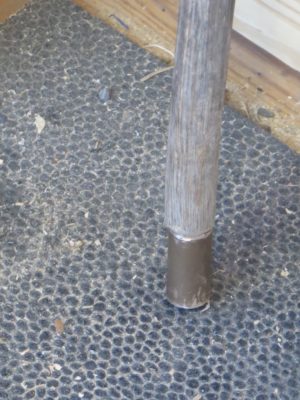
Once that was done I chamfered the adjacent wood to make the fit a bit more elegant, and now I do indeed have a faithful walking companion to last me the rest of my days.

All thanks to Long Tom’s friendship and passion for “found wood” woodcraft.
Some woodworking projects are hidden from others, some are fancy or extravagant, but this one was a simple task to guarantee this friend will remain a treasured gift and companion working for me for many more decades.
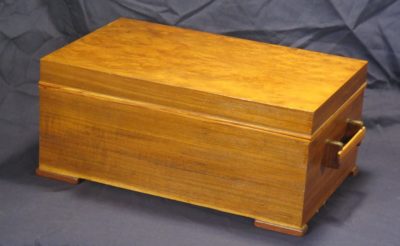
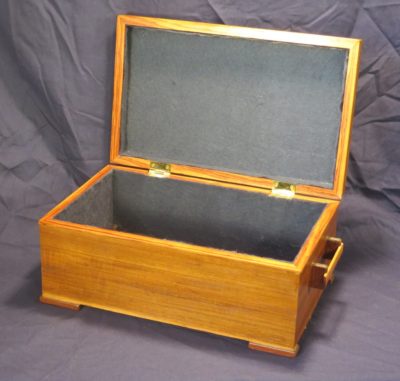
Recently my brother visited and dropped off a box I made for all the cards our parents received on their 50th wedding anniversary in 1993 (my older brother and his wife celebrated their 50th a couple weeks go and Mrs. Barn and I celebrated our 40th anniversary recently).
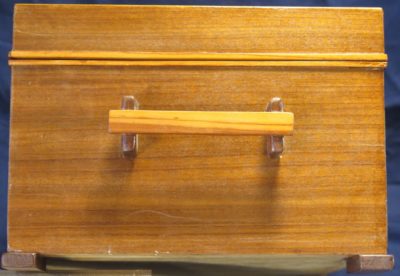
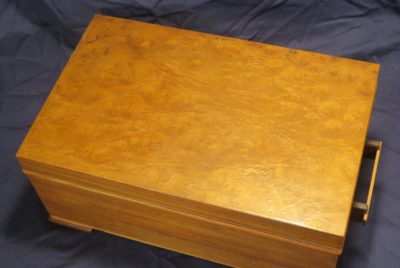
My memories of the project are a bit hazy, but I am pretty sure the core substrate is 1/2″ baltic birch plywood with walnut veneer for the sides and an unidentified figured veneer for the top.
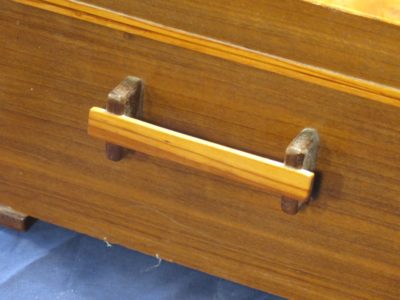
The trim woods were tulipwood (dalbergia) and macassar ebony. It’s had a few bumps and bruises over the years but my mom had it displayed prominently in her bedroom during her final years. In retrospect I still find it a beautiful reflection of a loving marriage that ended with my dad’s death only a month before their 60th anniversary. Every time I cast my eyes on it I will celebrate their years together, and ours as well.
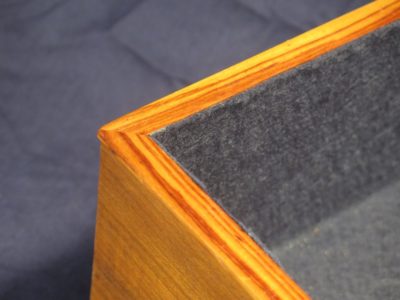
Given the nature of the smaller Kindle case I was making for Mrs. Barn’s 5×7 Kindle, as opposed to my earlier book style case for my own 8×10 Kindle, the assembly and finishing took a different path. Her smaller Kindle led me to create a “calling card case” style container into which the Kindle would be inserted, rather than the bookcase for my larger Kindle, into which the Kindle would be closed within folding panels.

This meant that the process for completing the assembly was entirely different as the interior had to be finished before the case was assembled, rather than after assembly with my case. Making sure the two halves of the case fit precisely I then glued the interior felt lining in place, leaving the case gluing margins clear. However, before I glued in the felt I glued a piece of thin polypropylene foam to the wood panels to assure a gentle pressure on the Kindle once it was slid in to prevent it from falling out due to too loose a fit. Dry fitting the pieces together with the Kindle in place to make sure I had the spacing correct, I then was able to glue the two halves together with PVA making sure to not have excess glue squeezing out into the interior space.
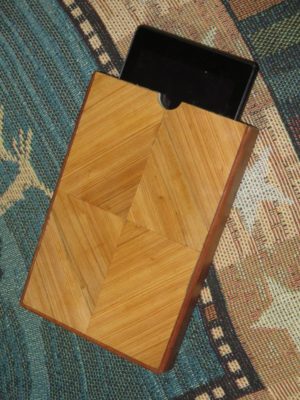
A little trimming and sanding followed by shellac and wax, the case was ready for Christmas and use as she travelled back and forth to the West Coast. Given the unfolding circumstances ex poste, namely the death of her dad in mid-January and our own family Christmas taking place in late February, the case may never be used for its intended purpose of frequent coast-to-coast travel. Nevertheless it was a pleasant and instructive exercise.
After much consideration of building a Benchcrafted Carver’s Vise to affix to my Romastionian Low Bench, in the end I decided to go a different direction. The BC vise was just too complex and robust (read: complicated/time consuming and heavy) and went simpler and lighter.
Yesterday was my first day back in the shop, where I went after packaging and sending a bunch of polissoir and wax orders. Mrs. Barn gave me a warning in the sternest possible terms about not injuring myself and treating my knee with care, probably a well-founded warning. Besides, she has more than forty years invested in us/me and she wants to protect her investment. I was cane-free and pain-free by Saturday afternoon, walking more than a mile at a leisurely pace, so I was sure that a low intensity day in the shop was appropriate. So late yesterday morning, able to see my breath in the chilly morning, I headed up the hill to continue work on the Low Bench vise.
The tapered open socket on the side of the bench was a perfect place to fit a small-ish vise for use while sitting on the end of the bench.
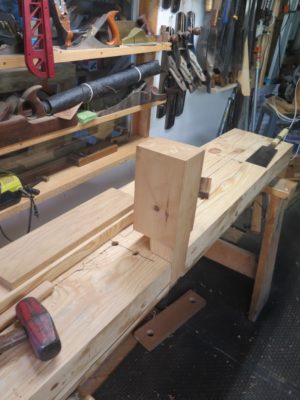
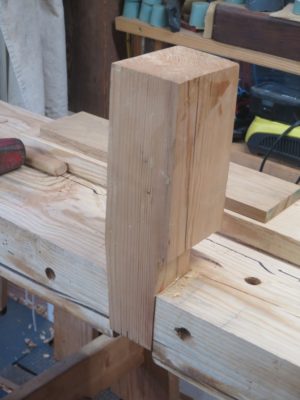
Beginning with a chunk of pine 4×6 from the scrap pile I cut and planed a tapered edge to fit perfectly into the side notch. To make this undertaking quicker I cut a shoulder on the inside of the blank so that the vise en toto would project to the inside of the notch. I decided this was a mistake ex poste, but there you have it. I spent the time necessary to get the nesting just right so that the vise block was set firmly in place with one whack on top, and released easily with a whack on the bottom.


Once I had the housing and tapered block fit just right I marked out the jaw to be cut from the solid block. To make the end result the most precise I chopped the mortise for the parallel guide through the whole mass, then drilled the holes for the screw holes. I drilled a larger hole through the moving jaw face, then the smaller hole for threading by clamping the block in place for the larger hole halfway through, then swapping out the larger bit with one 1/8″ smaller.
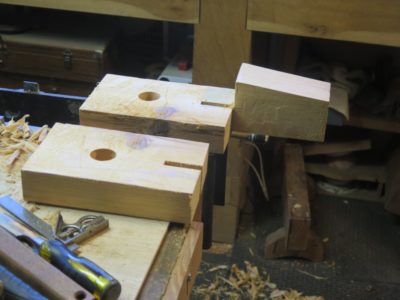
Sawing out the movable jaw was just a matter of careful sawing. Now everything was ready for final work and assembly.
I often tell first-time homeowners that, “From this point on, one of your ‘hobbies’ better be working on the house.” It has always been that way for me, although I am finding the scope of the projects are getting smaller as my bones get creakier. Small things, okay. Large things like re-chinking the cabin and the upcoming new standing seam metal roof? Better leave those to younger and more nimble folks. The problem is exacerbated by the dearth of a labor pool in the hinterlands. To get skilled tradesmen to attend to a specific need you might have to wait up to a year or so once you “get on the list.” Any man available for hire as an hourly wage laborer is available for a reason. I’ve got leads for a couple of younguns to help out on the homestead on occasion but I have to wait for school to get out to firm up those connections. We’ve got Amish moving into the community which I hope will alleviate some of this shortage.

Recently I had a nice little project that was pretty important. Ironically it was on one of the newest pieces of wood on the cabin, on the rear side of the mud room built around 2008 or so. The beveled sill at the bottom of the board-and-batten siding had decayed to the point that it was literally falling off. unfortunately it was originally made from soft white pine so its life span was bound to be short.
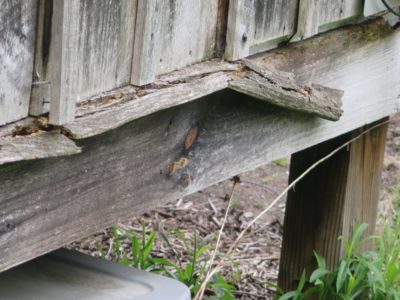
With very little effort I was able to excavate the detritus and make the necessary measurements for a new one. My first inclination was to make the new sill out of PTSYP, but given the current price of lumber (~$14 locally for an eight foot PT 2×4) and my depleted stock of PTSYP I went in another direction, one that was actually more appropriate; I recycled some of the chestnut framing lumber from the old shack up on the hill.

I re-sawed a full 2″ x 4″ stud to the size and configuration of the piece being replaced. Given the “run of the mill” character of the chestnut I had to hand plane it a but to get it less curv-ey so that it would just slide into place. It did, and a handful on mondo finishing nails later it is in place looking like it was always there. Well, it will look that way after a few weeks of weathering.
This whole side of the cabin gets the brunt of the weather so I will certainly have to re-visit it at some point.

Recent Comments