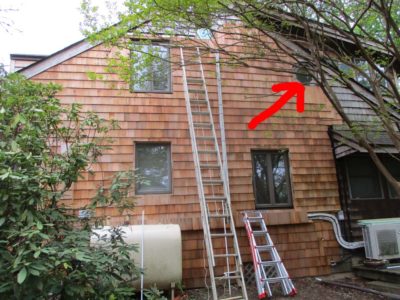
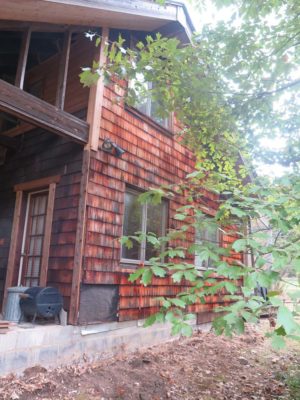
During my most recent foray into the battle of the cedar shingles I was finally at the location of the octagonal awning window in the master bathroom, indicating only another hour or two to completion of that side of the house. Alas, this is what I saw; the window was beyond repair even though I had painted it thoroughly when it was installed 33 year ago. Admittedly I had not monitored it for a very long time and the unit was made from white pine, not renowned as a durable exterior material. Both Barndottir and I searched the web diligently for a replacement unit, but a suitable one was not to be found. We could get one that opened, or or that was the right size. But not both.
Using a cat’s paw and small pry bar I got the window and casing out safely and more easily than I had originally feared, throwing away the exterior trim even though it was cedar. I made the opening weather-tight then hauled the carcass back to the barn to start on making a new one.
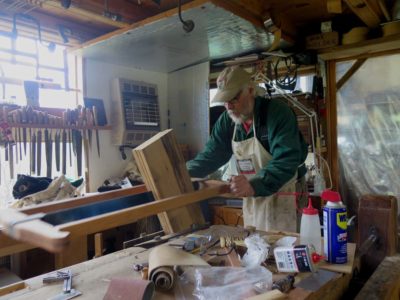
I decided to make the new window from my stash of prized old-growth cypress for longevity’s sake and set to work. I re-sawed the 11/4 cypress mostly by hand then dimensioned it with my lunchbox planer.
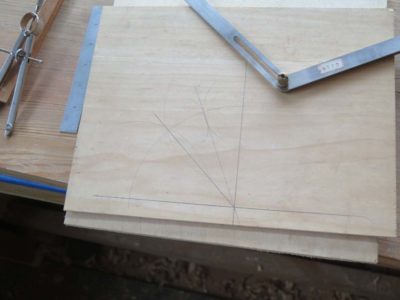
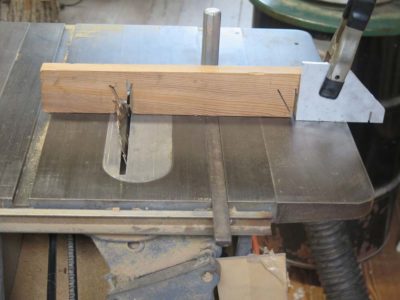
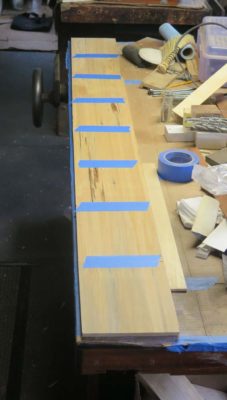
I spent the most time of the project getting the angle for cutting the miters perfect on the table saw so that all eight corners were tight when gluing it up.
I taped all the segments together, applied Titebond II to the insides of the miters and just rolled it up, holding everything in place with the tape after double checking the squareness. I toenailed each miter joint with brads from my pneumatic gun and set it to dry overnight
Thus the first session ended with the octagon box glued up, a very satisfying stopping point. Foolishly I did not take a picture of the octagon box at this stage but you can see it in the next installment.
There are times when I am working on the book manuscript when I just have to get up and do something physical for a change of pace. Because of the peculiar way I write, editing and massaging-together is often more fatiguing than the original creation of the first draft so I need a diversion and relaxation.
Last week I spent an hour or so at the lathe trying to see how thin I could turn a bowl. This concept interests me as I begin my re-immersion in replicating Japanese lacquerwork, a creative theme that will be prominent in the studio and on the blog for the foreseeable future.
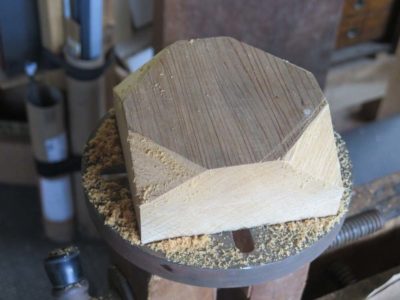
I had a block of c.1840 11/4 old growth cypress handy and gave that a try. I do not know why I had never turned the cypress before, it works like butter in the lathe. I left the face of the block square as I am trying to come up with a form that suits my fancy, and a square/turned bowl with a feather-thin edge is intriguing.
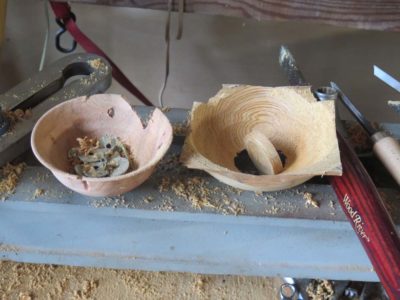
I found out that feathering the edge is not possible without reinforcing it somehow, probably by impregnating it with epoxy, or the edge will simply shatter as you work it. Ditto the base of the bowl where I did indeed find the edge of the envelope. I tried the a similar exercise with some figured plum stump I harvested 15 years ago. Same result.
Since failure is its own useful data point I now know I need to turn this form close to finished, then impregnate and finish up then. I will report back on those results.
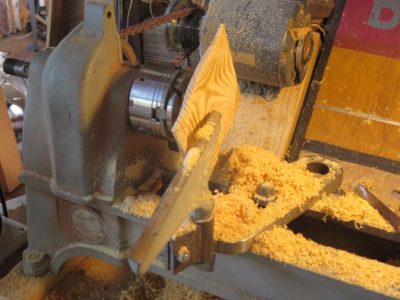
The next day I tried the exercise with a southern yellow pine scrap and also had encouraging results.
One of the peculiar and captivating phenomena of that attempt was the turning began to “sing” as the wall was thinned, sounding much like a crystal goblet when it is being played like a musical instrument.
Then, back to the Eames chair knockoff for more wordsmithing.
A couple weeks ago while clearing out some stuff from my basement workshop at my daughter’s house, I came across an experiment that is almost forty years old.
In the world of historical fine art one of the premier positions is held by “panel paintings,” or fine paintings composed on a solid wooden panel. Given the age and prominence of these artworks, and the fact that they are unbalanced construction on an inherently unstable base given the presence of a precisely constructed laminar gesso and paint layer on the front side of the solid wood panel, caring for these artworks takes a high place in the preservation hierarchy. Very early in my museum career I found this problem to be a fascinating one, and the data points of my career projects (when I was able to choose the projects to work on, which was most of the time) revealed that it was the quality of the problem that motivated me much of the time, not necessarily the notoriety of the artwork/furniture. That explains my final project, which was the stabilization of a pair of wooden flag poles that encompassed a peculiar approach to addressing the problem of split timbers.
Back to panel paintings.
(Photo by H.L. Stokes via Wikipedia)
To counteract the unbalanced construction on a dynamic foundation, many, perhaps even most, ancient panel paintings have been augmented with a framework applied to the back side to both balance out the construction somewhat, but also to mitigate the tendency of the wood panel to warp. Sometimes these added features, called “cradles,” are elegantly sophisticated. Others are sophisticated and deleterious to the panel as the “floating” spines bind in the “pass through” blocks that are glued to the back side of the panel, inflicting new fractures to the panel along with the distortions as the panel attempts to expand and contract while the bound spines hold it in fixed dimensions, essentially a fixed cross-grain construction. This problematic outcome caused the entire concept to be reexamined beginning about the time I was coming into the museum world and many panel paintings have been de-cradled.
Shortly after hearing a seminar presentation on the topic in 1982 I decided to construct a prototype integrating my understanding of what wood is and how it behaves with some out-of-the-box thinking. Given that many of the old cradles were actually damaging the panel paintings, clearly a different approach was needed. Believe me, the number of alternatives to traditional cradling were legion, and even the last panel paintings conference I attended included several novel and unrelated options.
So I made a full scale model to test some ideas I had rattling around my brain pan. For starters I selected a less than premier piece of wood, it was literally a 2 x 12 resawn, planed, and glued together with hot hide glue into a “panel” approximately 20″ x 30″.
I then fabricated a series of “pass through” blocks with rounded contact points for the floating spines, which were themselves fairly lightweight, with the entire system glued to the back side of the panel.
You can see the construction of the blocks from this one that had been broken somewhere along the line. I applied spray dry Teflon to both the rounded faces of the blocks and the floating spines, hoping that the shape and permanent dry lubrication would prevent the blocks and spines from binding together (Teflon being the slipperiest substance on earth).
After assembling the entire model and showing it to the paintings conservators at the museum (I was working at Winterthur Museum at the time) I set it aside and literally forgot about it for almost four decades. Presumably it has been just sitting in the basement for all those years, responding to changes in the unregulated environment of the space. Over the life of the panel there have been swings in humidity from 100% to maybe 25%, more than enough to impart hysteresis cycles a’plenty.
Much to my delight the assemblage has suffered no ill effects over the decades, so at least the concept proved sound. The original construction is still perfectly flat and there are no instances of long-grain fracture to the wood. Admittedly the panel is balanced in that both faces are raw wood open to the microclimate so there was very little impetus for severe warpage. Still, I would have expected some loss in planarity if there was a flaw in the concept. Nope, still dead flat.
Now that I have reclaimed the experiment I will create a simple paint scheme on the face to mimic the structure of a typical Renaissance panel painting and see how the experimental cradled panel responds over the years. I will leave it sitting out of the way in the barn essentially exposed to the elements except for rain. I’ll check back with it in, say, another 38 years to see how it did. I’ll be 103 then, but I just got back from celebrating my Mom’s 103rd so that might not be too crazy.
If it still looks good then I’ll let someone in the museum world know about it.
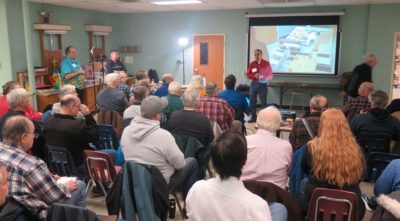
A week ago Saturday I had the great good peasure to spend the day with two DC area woodworking groups, the Manassas Woodworkers and the Washington Woodworking Guild, as they co-hosted a day of Japanese toolification with my friend Wilbur Pan of Giant Cypress fame. The event was at the Manassas group’s space which turned out to be almost perfect for it. I did not take an exact head count but the room was crowded with an estimated 75-100 folks, some of whom came from surrounding areas as distant as Fredericksburg or even the Virginia frontier. Since I have been in that circle of woodworkers for a long time I knew many of the folks in attendance.
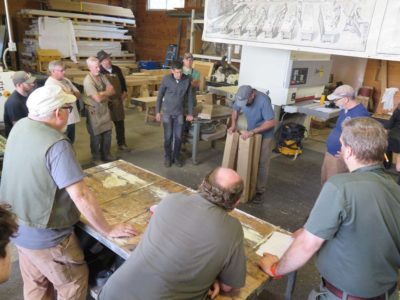
Beginning at noon and winding up at supper time, Wilbur walked the audience through the many facets of using Japanese tools in his woodworking, taking pains to refer to those areas where Japanese tools are different from European traditions and where they are similar and complimentary.
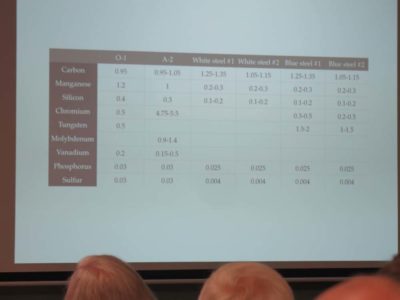
Systematically he reviewed the major tool categories — planes, saws, and chisels — including a full menu of reference information ranging from metallurgy and manufacturing technology to edge geometry to ergonomics and kinesthesiology. My impression was that this was unfamiliar to many in the audience, but there is no way anyone could depart at the end of the day without a deeper understanding of woodworking in general and Japanese woodworking in particular.
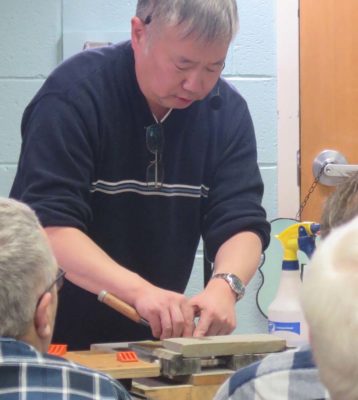
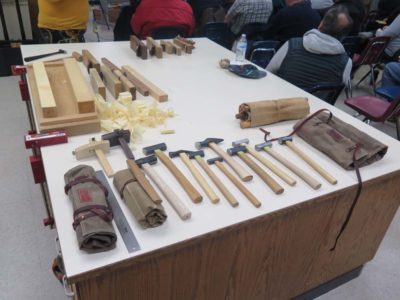
In addition to Wilbur’s tools for the demonstrations, WWG member JayC brought his sizable inventory of tools for show and use. This was one of three or four tables Jay had set up for his tool collection. As we were cleaning up and clearing out afterwards I noticed Jay giving instruction to some of the attendees who wanted to try things out.
I finally got back to my daughter’s home around 9.30, just in time to Skype with other daughter and SIL. It was a darned near perfect day; breakfast with a friend who is a political mechanic, strategerizing about disrupting the malevolent Virginia political establishment, woodworking toolism with friends old and new all day, a delightful dinner with same, and ending with Mrs. Barn and me chatting with the ones we love most dearly.
One of my favorite jokes of all time is the old one about the heroic three-legged pig, with the punch line being, “A pig that good, you just don’t eat him all at once.”
This past week I was able to spend the evening visiting with my long time woodworking pal Tom in his shop. If you recall, Tom and spent Wednesday evenings for many years working in his shop and it was such a delight to reprise those evenings. Anyhow, to tie the joke to this post I tell you that Tom was clearing some space in his shop. Translation: he was making me take a bunch of my stuff with me so he could get some more space.
One of the treats he threw into the mix as I was loading up the car was this exquisite slab of birds-eye(!) walnut, measuring 36″ x 16″ x 4-1/2″. Now that is a spectacular pig and I do not want to eat it all at once.
I have some ideas about what to do with this treasure and the current front runner is this lovely accessory for the bench top.
Before It do that, however, I want to make a prototype from my stash of old growth, premium cypress staves from a c. 1840 water tank I bought during the mezozoic era. Once I get that done I can turn my attention to the walnut one.
In fact, the walnut slab is so thick I can re-saw it and make two of them.
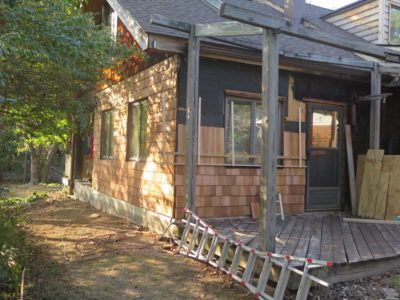
With the repairs completed on the south side of our daughter’s house it was time to start the re-siding. It was the beginning of a process that included singing the praises of the Hughes Flying Boat. It was on that project where the first pneumatic nail gun was invented, which in turn was the grandfather of the shingle stapler I used for attaching several hundred cedar shingles to the house. (A project that will continue through the winter no doubt, making it about six months’ of work intermittently. The crazy thing is I can still work as hard and as long as I used to, but I just don’t get as much done. Huh.)
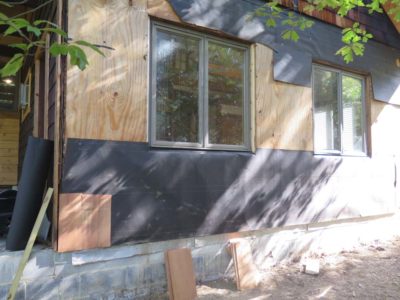
I finished the new shingles up to the top of the first floor, dealing with the area I had excavated to repair and replace the window framing before re-inserting the window.
Compared to the stating point I was not displeased. I will be even less displeased once the entire wall is completed.
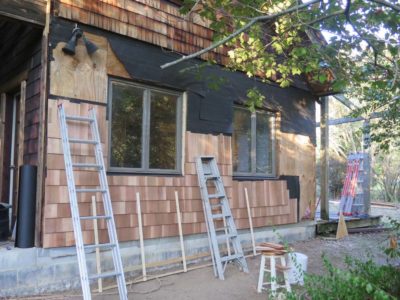
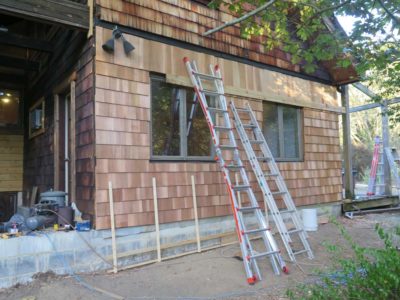
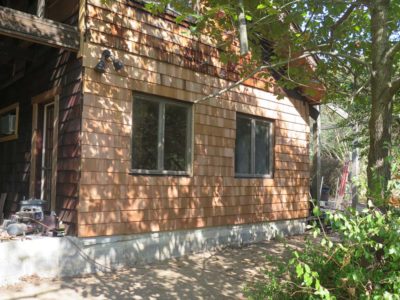
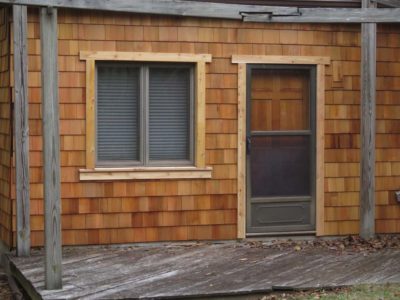
Once that milestone was reached I wrapped around to the east side of the house, peeling off the cedar shingle panels that had served us for the past thirty-plus years, and nailing on the new shingles over new tarpaper. NB – the shingling “mistake” on the right side of the door is simply a “cover up” for a box to the defunct lighting that will be replace. Some day.
I thought I had been told to arrive at 9 the first morning, so I did, only to find out that the first students arrived before 7AM to stake out their work stations and set up, so the bee hive was buzzing long before I got there.
As I came to learn throughout the week the students body was an amazing mix of folks; a chemical engineering professor, a video production entrepreneur, a lawyer/lobbyist, three professional woodworkers/furniture makers, a cybersecurity geek, a geophysicist, a playwright, a CPA, a custom floor maker and his furniture design student son, a fireman, a mechanic, an energy engineer, an electrician, a high-end custom home builder, a rancher, two surgeons, a military helicopter pilot, and maybe another couple of folks I cannot remember at the moment. There was no shortage of interesting things to talk about during meals and breaks.
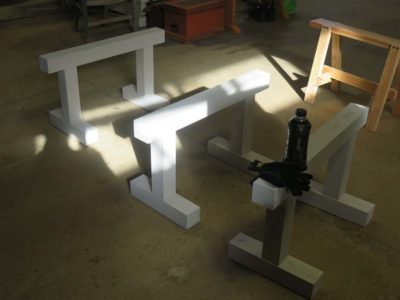
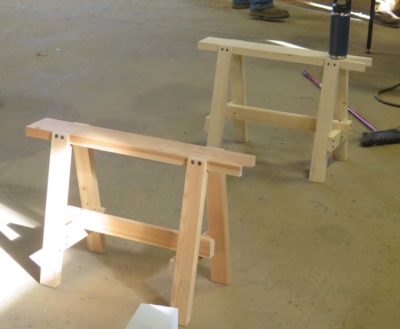
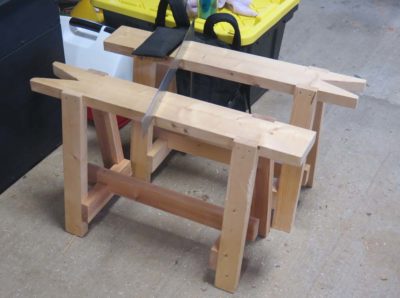
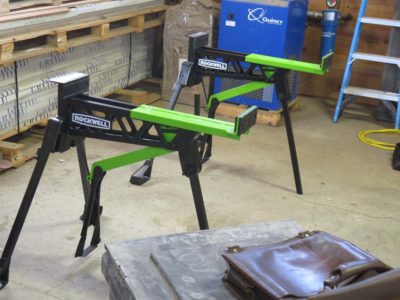
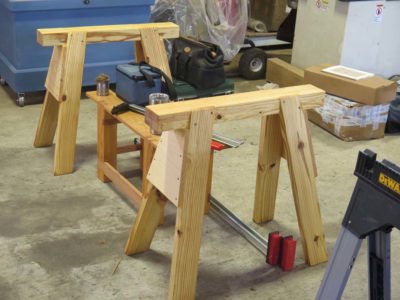
Frankly put, the gallery of student set-ups was a dizzying cornucopia of horses and tool inventories, with the former ranging from old-school carpenter’s horses to sooper high tech devices the likes of which I had never seen.
Take a look.
As for tool inventories and their containers they ranged from several ATCs and Dutch cabinets to plastic tubs to simple canvas bags. I’ll take a look at them in another post.
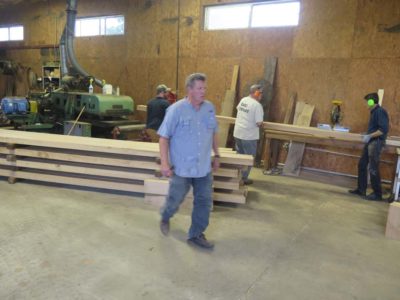
As I arrived the last of the bench tops were being fed through the Stratoplaner, the prehistoric minivan-sized machine that planed all four surface of the 300-pound slabs simultaneously. One by one these took their places in the appropriate work stations.
In short order the preparations for the 80 legs commenced.
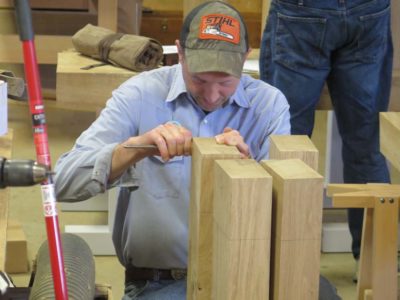
A quick tutorial on laying out the double tenons on the tops of the legs (and keeping track of them!) was followed by the soundlessness of eighty sets of tenons being laid out.
While that was underway Will Myers and Father John Abraham prepped the stretcher stock, and once again Jeff Miller and I tag-teamed to make jigs for cutting the tenon shoulders. Which we did. A lot.
As the day closed the air was filled with the sounds of wailing away on the valleys between the double tenons and the scriiitch of planing the edges of the tops square and true so the double mortise layout could be executed.
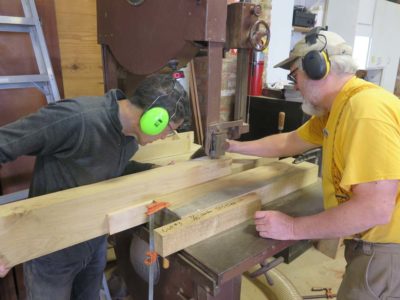
Recently my friend Neal came to the barn to work on building a few shelving units, and his pastor Rick came by for a visit while we were working. Rick brought two maple boards he needed resawn for the new hammer dulcimer he is making and I volunteered to do it for him. Using my Tom Fidgen inspired kerfing plane and the Bad Axe frame saw I got to work.
It really was a pleasant experience and a very good workout!
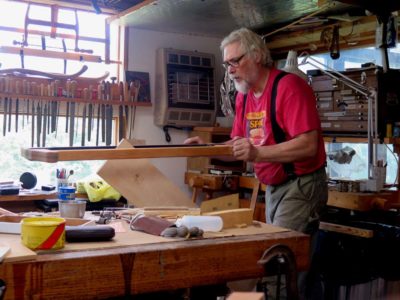
After the resawing I touched up the kerfed surfaces with my Dutch-style scrub plane and returned them.
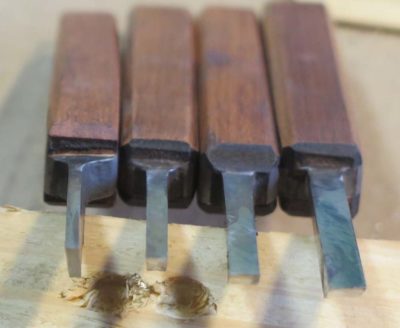
With the big push to get the Gragg chairs assembled I was inspired to finish the first of the plow plane iron mortise chisels. I got the four smallest ones to the finish line, or at least finished enough to actually use them on the delicate mortises of the chair.
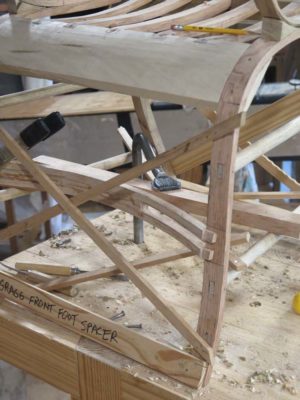
The back splat elements are mortised into the crest rail with 3/16″ tenons.
The front bowed rung is inserted into the front legs with a pair of 1/8″ mortises. These need to be accomplished fairly late in the assembly timetable so there is limited space to work. These new petite chisels (roughly 6-7″) work like a charm.
One of the important things I learned was that the striking end of the chisel is comprised of two laminae of the wood cheeks and the fairly soft steel(?)from the plow plane iron that runs the full length of the tool. I resolved this for the moment by using a brass mallet for pounding on them rather than a steel one. I will add rivets near both the top and bottom of the handle to make them more robust, and may even add a metal striking cap at the top of the handle.
But they do indeed work exactly as I had hope they would
This has been The Summer of Gragg, and I am on the home stretch for the two chairs I am building. One of the big hitches to the project is that I was committed to getting it all on video, and sometimes getting my calendar to mesh with the videographer’s calendar was a big challenge. Fortunately (?) I made sure to have the two chairs at different points of the process, making sure the have one of them at the concluding point of the previous video session and the other somewhat ahead. So, when our calendars did coincide we could make hay.
Recently the first one made it to the finish line construction-wise. I was pleased. I can now concentrate on trimming and sculpting each of the individual elements to make the chair much more sinuous. This process must be done once the chair is fully assembled so the lines, edges, and proportions can be tuned as a whole.
I’m envision a completion date of early to mid- October.
I’m guessing that we will have 20+ hours of good video when all is said and done, and for simple logistics it will have to be diced into roughly hour-long segments to get it upload-able.


Recent Comments