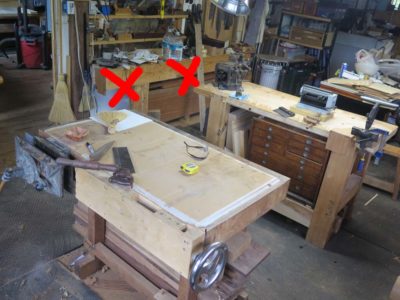
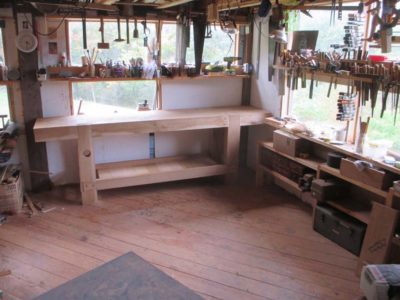
… for my FORP Roubo bench to find its rightful home underneath the bank of northeast-facing windows.
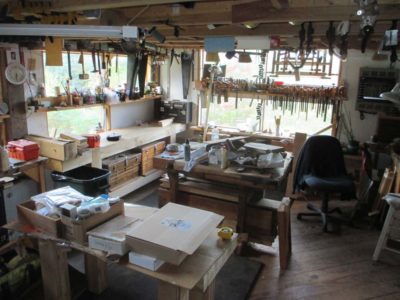
As I’ve mentioned previously the spatial arrangement in my studio has been undergoing reorganization, or as James “Stumpy Nubs” Hamilton calls it, “rearrangeritis.” In one sense I am living with the curse of too much space, thus I need not be particularly efficient with my shop layout nor unduly burdened by the necessity of tidiness. I am trying to improve on both counts.


After completing the construction and assembly of my 2013 FORP workbench last year I planted it on the north wall of the shop, thinking that would be a good place.
I was wrong. I back-filled the space around it with my favorite little two-sided workbench and some other stuff and before long the whole space was a chaotic mess.
Plus, that new space was so crowded it precluded me even installing the superb wooden screw leg vise that was part of the original design. In the original configuration the four inch round block plus the three inch moveable jaw would have made the whole thing stick out too far to even walk past easily. There simply was no room to use it even if it were installed so it remained on the sideline.
After much cogitation I decided to move it underneath the large bank of windows facing east. This was not done lightly — rasslin’ an 8-1/2-foot, almost 500 pound workbench by myself is not something to undertake on a whim. I set aside a day to move the bench and the other nine things that had to be moved first in order to accommodate the move around the corner, but it was absolutely worth it.
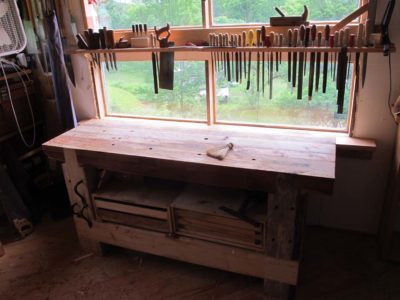
This should not have been a huge surprise to me as it was the location for my first Roubo workbench built from timbers left over from the barn re-erection. Truly, this was THE right location for the bench and I was an idiot for not recognizing this from the git-go.
I now have a sublime arrangement of my beloved first workbench sitting in the middle of the floor at that end of the shop with the Roubo a simple body-rotation away. The arrangement continues to make every day in the shop an unfettered joy.
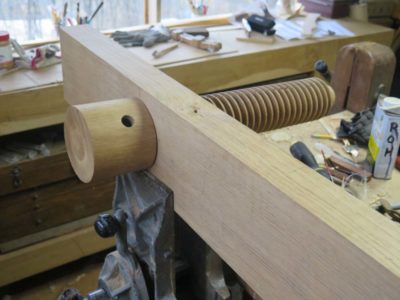
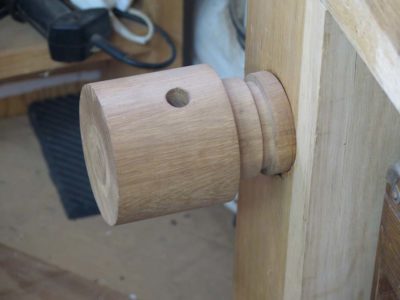
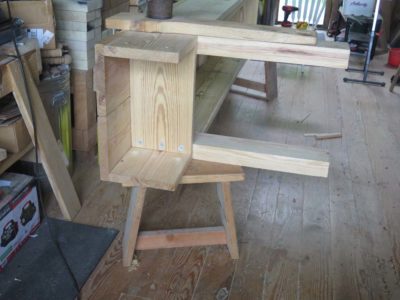
In addition to the move itself I finally finished the installation of the Roubo’s leg vise after first reducing the thickness of the jaw from three to two inches and reducing the size of the bulbous block that was exactly at knee height and stuck way out into the work space.
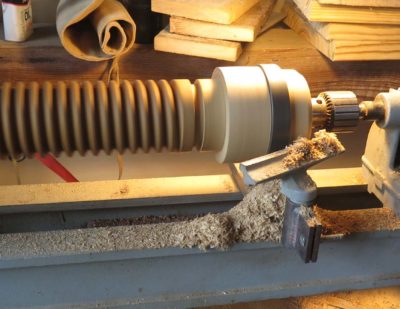
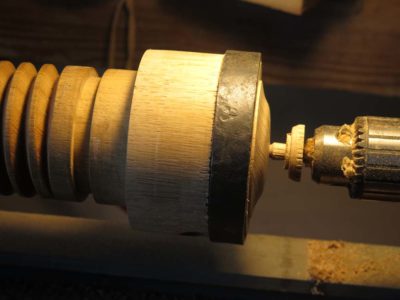
To reduce the number of times I whacked it with said knee I tossed the vise screw in the lathe and cut down the outer terminus block by an inch in length, moving the wrought iron collar right up against the handle holes and shaping the end, yielding a result much more to my liking than the knee-cruncher originally made. In fact completing this feature was one of the motivating reasons behind the move.

Using an outrigger stand temporarily until I get the sliding deadman built the bench works just like it is supposed to.
The integration of the massive Roubo into the workspace has other meaningful implications as well, almost like the ripples radiating from a stone being tossed into the pond. Not the least of these effects is the rendering of the planing beam as redundant, clearing up that particular space in the not-too-distant future. I may use part of that space as home to the full-service standing tool cabinet I have always wanted. If so I will have to find a new home for the exquisite vintage mahogany I have stored underneath the beam. Some of the other re-arrangeritis is more subtle as I will build a small, low Roubo bench for the space where the giant Roubo bench used to be. This lower bench will allow me to work for long stretches while sitting. As I get older I find the Eastern tradition of working while sitting down is all the more attractive; I actually do not mind working while standing, it’s the bending up-and-down that wears me out.
All things considered I am thinking that these changes will result in higher shop production-ableness while reducing the total footprint of the space.
Stay tuned.

With a crew of stout-hearted folk we got the 10-foot bench onto a friend’s pickup just before the coming rain. I did not make the trip with it just then but went on Saturday to see it in its new habitat.
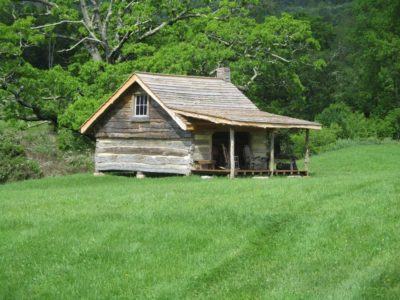
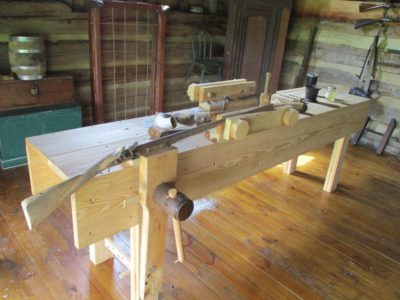
The gunsmithing shop is a newly re-erected late 18th century log cabin from the Lynchburg area, IIRC. The new old-style doors with locally fabricated blacksmith hardware get installed this weekend.
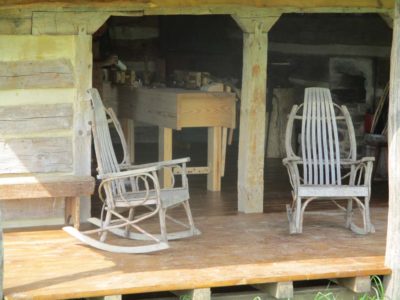
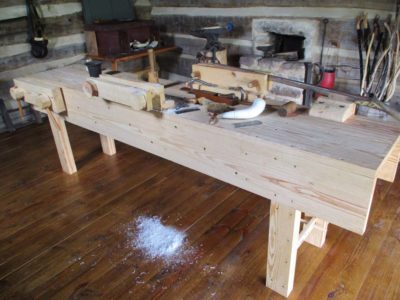
As I approached the shop I could see it already being put to work. The new owner was hard at work on a powder horn with the pile of shavings from the longhorn on the floor underneath one of the Moxon vises. He declared that the bench was exactly what he had always hoped for, and that its addition to the shop, “… Made my year!”
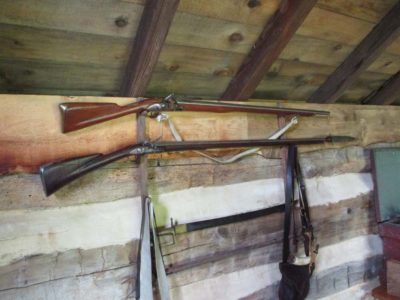
Here are a couple of the historic replica long rifles akin to what the new bench will be part of making.
(ascending soap box) The final tasks for the completion of the gunsmith’s partner bench have now been accomplished and the beast is awaiting delivery this weekend, provided the client can make it back from riot-duty in Richmond. I am hoping for his safe return and for the rioters to spend the rest of their lives in prison. Peaceful protests and redress of grievances are grand and glorious freedoms, rioting is barbarous nihilism, arson, and theft. Words have meanings, and “peaceful assembly” is not what we have been seeing these past several days. We have been witnessing the sowing of seeds of the wind, only time will tell if we reap the whirlwind. (descending from soap box)

My first task in this home stretch work was to replace any of the modern decking screws I had left visible in the bench when first putting it together months ago. These screws were removed and replaced with counter-sunk 3-inch #14 slotted flat head wood screws from Blacksmith Bolt. If I recall correctly this task involved only twelve screws I had used to fasten the end aprons to the legs, but the logistics were a challenge in the tight quarters.

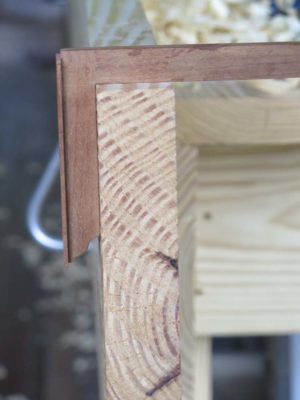
I added additional screws at the edge of the top, tying those boards into the apron more securely. With that corner secured I could complete the planing of the edges of the top boards to be flush with the apron face. I almost always construct Nicholson benches with the top boards projecting over the apron by at least 1/16″ after initial assembly to allow me to plane the edges flush as with this one. I also hand planed the entire apron as there were some excessive chatter marks from the mill.

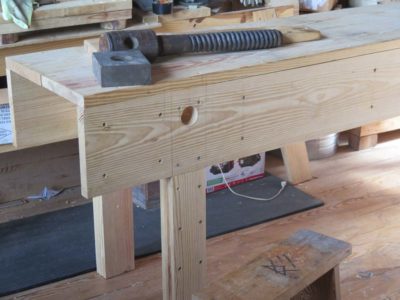
Having established the crisp corner of the top and apron, the leg vise was finally finished with the rear block installed with vintage square-head lag bolts, protruding above the bench top thus turning it into something kin to a carver’s vise. Which in fact it will be as the primary activity will be the shaping and fabricating of replica frontier long-rifles. I had already chopped the through-mortise for the parallel guide through the leg based on the mortise already present in the re-used vise jaw. It is unlikely that the jaw will ever be opened more than 4″ but it is ready if the need for a full opening presents itself. I suspect the faces of the vise will be leather lined at some point, but that is for the user to decide.


Diagonal to the leg vise I installed the twin screw face vise. Given the “partner’s bench” design of the workbench this will allow two gunsmiths to work at the same time.

A few holes for holdfasts, especially for the clamping of the portable Moxon vises, and the bench was finished.


It will be grand to have that space freed up, as this was the largest thing I have built there since making the giant arched window frame many years ago.
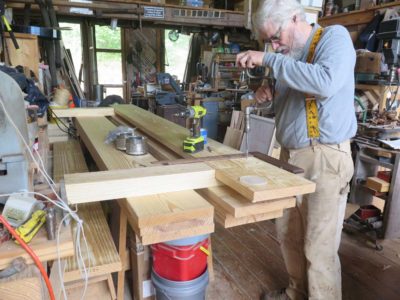
I am on the home stretch, expecting to have Tim’s gunsmithing partner workbench ready for delivery by the end of next week, so now I am just wrapping up some of the details. Yesterday I laid it over to proceed with some of those tasks, and someone asked how I flip over a 10-foot almost 400 pound bench. Well, for starters in this instance I did not flip it all the way over, although I could have done so easily, I simply had to roll it 90 degrees so I could plane the apron and the edge of the top board to align perfectly with the apron. I’d already planed the legs before assembly.
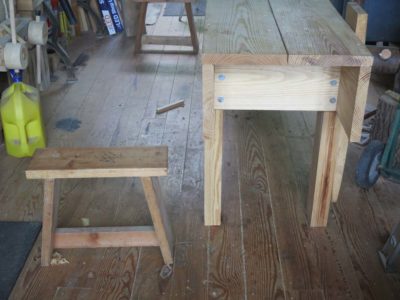

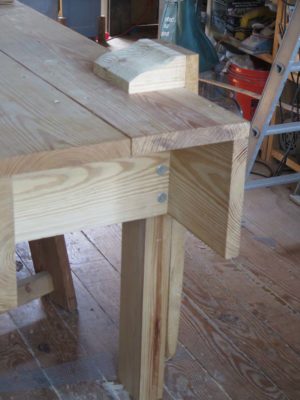
This is how I lay over a Nicholson bench. I start with a pair of small horses/stools I made from a pile of scraps many years ago. I cannot remember the project now, but I had a whole stack of off-cuts and from them fabricated ten pairs of these unbelievably handy units. Placing them correctly I can just barely lean the the bench over such that the apron bottoms rest on the tops the two stools.

At that point the center of gravity is almost neutral, so flipping it the rest of the way is simply a matter of grabbing one of the feet and lifting easily. Once on its back I can kick the stools to support the apron and the leg at the same time.
Now that the bench is on its back I’m ready to clean the apron with a foreplane, it is supposed to fit into rude frontier workshop after all, and chop the mortise for the parallel guide on the leg vise. Since I am re-using an extant leg vise all I need to do is put the jaw in the right place, mark with the chisel, and start wailing away. I have to mount the twin-screw face vise on the opposite leg, drill some holdfast holes, and it will be ready to go.
When Tim came over a while back to check the progress of his bench he asked for a special arrangement for the leg vise — could it be configured to rise above the bench top several inches to better accommodate carving his gun stocks and similar gunsmithing tasks? I had already given him a vintage vise screw and nut, so I had to check out what was possible with them. I also had a jaw from some other project that could be integrated with whatever I could arrange for the vise.

My first task was to see if/how the nut could fit into the underside of the Nicholson bench. I took a little trimming of one edge of the nut block but it fit darned near perfect. I would love to claim credit for this design feature genius-ness, but it was just a lucky happenstance.
Fitting the jaw to the screw took a minute or two on the spindle sander, but the screw hole through the apron was another matter. I wanted a snug fit and the closest hole saw I had was 1/16″ underside, so I would up pending two hours rasping the hole by hand.

The arrangement of the jaw to the nut/hole allowed the jaw to protrude about five inches above the bench top, to serve in essence as an integral carving vise a la one of the bench top accessories from Benchcrafted.
A rear jaw sculpted to fit, to be bolted to the top with some vintage square head bolts, and that particular feature was finished.
PS sometimes Photoshop and WordPress do not play well together, sorry about the photo orientation but I cannot seem to solve it this time. If I get it figured out I will repost with the pictures corrected.
This post is not exactly a “Workbench Wednesday” episode, but since it was an issue and solution that cropped up while building Tim’s Mondo Partner Nicholson Workbench I thought I would put it here.

Normally when I am building a Nicholson bench I slam it together with decking or sheetrock screws and a portable drill. I can usually get one built on a day that way. But with Tim’s bench, because of the setting for the final location of the bench, a restored 18th century log barn outfitted to be an 18th century workshop appropriate to the long-rifle making that Tim does, he wanted the presentation of the bench to reflect the 1780 Virginia frontier. Hence, no decking screws.
Instead I fell back on my old reliable supplier, Blacksmith Bolt and Rivet, who still provides excellent steel screws of the slotted-head woodscrew variety. The quality of these screws versus the usually crappy modern plated screws from the hardware stores makes them worth the effort to obtain and use. For starters, I generally find that about 1 in 25 of the modern hardware store screws actually rings off when I lean on them too much, and the metal is so soft that the heads get boogered up even more often during installation.
Using high quality slotted screws is not without drawbacks either. For starters the screwdriver tip has to fit the slot precisely in both width and length in order to get full efficiency in the driving. Plus, driving large screws by hand is a lot of work and in the case of Tim’s bench I was driving in over a hundred 2″ #14 screws.
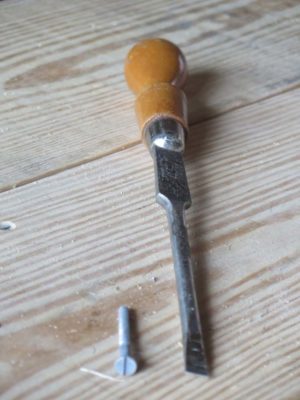
The screwdriver tips I had to fit into my brace were not a perfect fit to the slots of the screws I was using so I took fifteen minutes to make a new one that fit the #14 heads precisely.

I started with the oldest, raggediest 1/2″ wood bit in my collection, 1/2″ being the width of the #14 head. With my handy dandy Dremel-type tool (Craftsman, circa 1975 and still going strong) I took off the central tip of the bit.
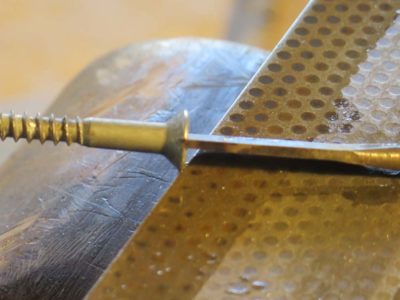
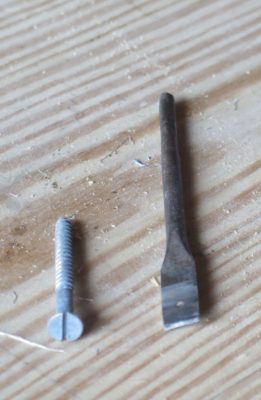
Using a grinding wheel followed by a coarse diamond plate I made the tip perfectly flat and the thickness of the bit to fit the slot exactly, so precise that it literally could be inserted into the slot by hand but still was snug enough to stay there.
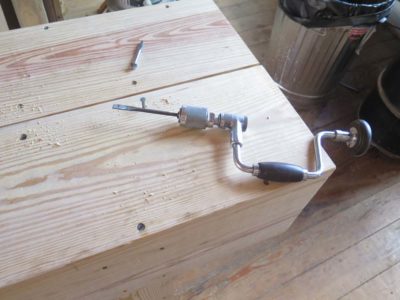
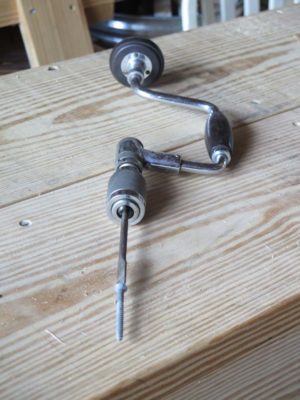
With this new precision wood screw bit I was able to drive the dozens of screws easily into the pre-drilled holes. All made possible by the fact that I did not throw away a decrepit drill bit.
The actual assembly of Tim’s gunsmithing partner bench was pretty meat-and-potatoes, differing from other Nicholson benches I’ve built only in the size (10-feet long), the mandated use of countersunk slotted head wood screws (from Blacksmith Bolt and Rivet) and the fact that both aprons needed doubling up for holdfasts due to this being a bench used by two people at the same time, one on each side.

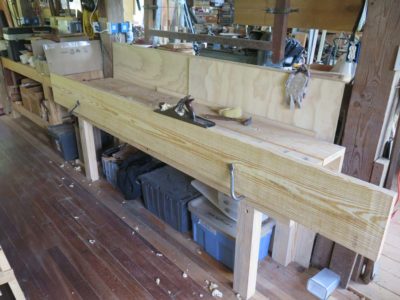
Soon enough the beast began to take shape in short order; it will weigh almost a quarter-ton when finished. Once the bench was on its feet Tim came by to take a look and made requests for some additional features I will talk about next time.
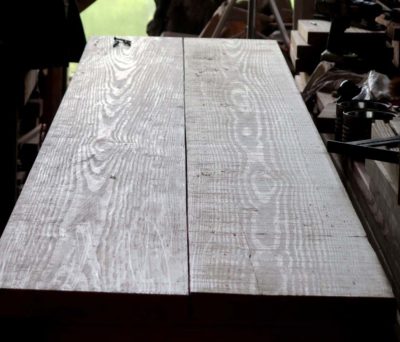
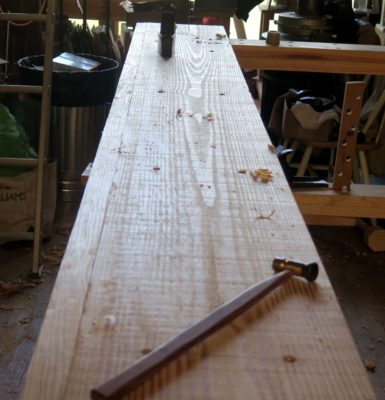
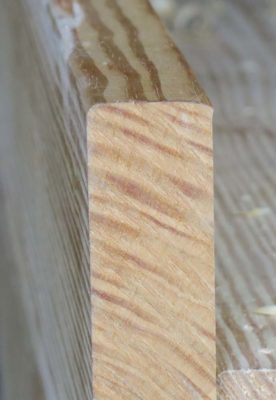
One of the issues I needed to address, and began doing so almost immediately, was the fact that these magnificent SYP boards came through the mill on a very bad planing day and were beset with the worst planing chatter I hade ever seen. I needed to gently plane them out in order to leave a good base for the final surface treatment with a toothing plane. I’ve begun the hand planing on the left board, you can really see the difference.

Up next – the peculiar configuration for the leg vise.
As Tim and were discussing his new bench he expressed a strong interest in a bench that was both oversized (10-feet long) and would serve as a “partner’s bench, in other words both faces would be front faces set up fully for use. Since the bench was two-faced I needed to make sure that both aprons were double thickness to accommodate holdfasts. Normally I only double one face for a Nicholson bench.
In addition, since the bench is going into a shop modeled on a late 18th C working space my usual method of tossing one together with decking screws was not an option. Instead I ordered several lengths of #14 flat head slotted wood screws from my reliable supplier, Blacksmith Bolt.
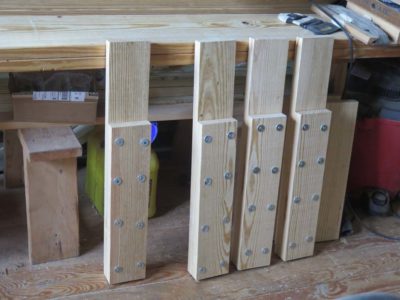 I still used decking screws when assembling the pieces, but only to tack things together until I was ready to drive home the #14s. I almost always start with the legs and did so again here. I will admit to using PVA glue since the environment for the bench might be a bit dicey at times. I slathered on the glue and clamped the two pieces together with decking screws and fender washers It is a system that is fat and works perfectly, allowing me to maneuver the clamping pieces easily.
I wanted the edges of the boards to be nice and clean so I planed them once the glue was dry and the decking screws were removed.
I also planed the faces to get rid of the planer chatter from the original mill. If the pre-hand-planed surface is any indication it must’ve been a rough day for the machine.
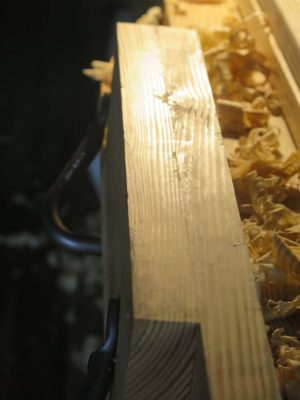
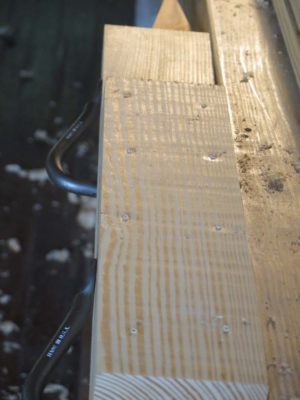
The apron bottoms needed to have crisp corners too. The corners were really rounded, so I tossed them onto the apron of an eight-foot Nicholson and got them cleaned up.
Before long I was assembling the front and back sides of the bench in preparation for attaching the inner aprons, the end aprons, and the ribs. I predrilled and countersunk all the holes then sank in the flat head screws.
Stay tuned.
In the years since escaping Mordor for the idyllic solitude of Shangri-La (heck, “social isolation” is the normal practice for every day ending in “Y” out here) one of the valued local friendships is that of Tim, an all around cool dude and a primitive skills enthusiast. One of those “primitive skills” is Appalachian long rifle-making and connoisseurship and he has been an invaluable aid in my work on the David Cooley rifle.

In recent months Tim has been engaged in salvaging a couple of mid-18th century log buildings from south central Virginia, re-erecting them on his place a few miles from here to serve as his workshop for making rifles and other tasks relative to 18thC frontier living. Once I learned of this project I proposed building the tool to fulfill his need for a proper period-appropriate gunsmithing work bench. Tim’s rifle-smithing is in the later-18th century English style, so his bench will be a Nicholson.

We picked up the superb southern yellow pine from Virginia Frame and Lumber in Fishersville and over the next few Wednesdays I will be chronicling the project to outfit him in the manner he and his new shop deserve.
Stay tuned. I think you will find this an interesting trip.
Usually I find that hindsight is somewhere in the range of 20/20. When I moved my FORP bench into the studio I though I had the perfect location for it. It sure looked great there, at least until the space got put back together.
After almost two years of using it there I have become less enamored with the situation.

For starters I rely more on my original small torsion box bench more than anything else, in great part because of the vises already up and running on it. The spatial relationship between my favorite bench and the FORP bench has precluded my finishing and installing the leg vise on the FORP, knowing that if I did install the leg vise the tight quarters would result in me cracking my knee on a regular occasion, resulting in improper verbal outbursts.

After cogitating on the issue for several months I recalled how much I enjoyed having my first Roubo bench in front of the eastern windows before I moved it to the finishing station twenty feet away.
Now I think I know what to do.

Recent Comments