A few days ago the weather was grey but unfortunately not raining. (We have not had a decent rain in about six months and my hydro-turbine has become almost a trickle charger rather than a robust electron producer.)
Nevertheless, even on this grey day when I stepped out of the barn to head down the hill for lunch, this explosion of autumn color greeted me and imparted an intense visual delight that brightened my psyche for the rest of the day.
Our plan from the beginning of Tim’s bench-building visit was to fabricate what was essentially a kit, since everything had to fit as individual pieces into his compact station wagon for the trip home.
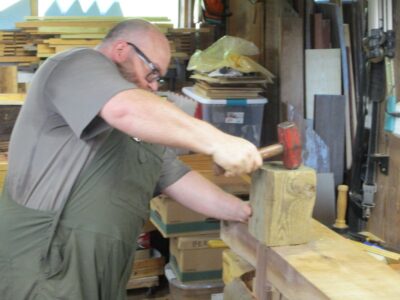
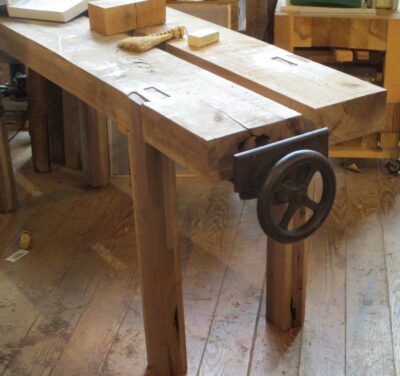
Our final day together was spent sorta assembling the bench to make sure it fit together the way we wanted. Since it was a split-top Roubo, we could each work on one half of it at different work stations. This was Tim’s first big woodworking project so I let him do much of the work.
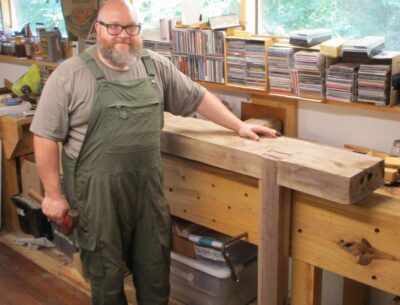
In the end we screwed some temporary cleats to the underside of the slabs in order to get it up on its feet, and mounted Tim’s piano maker’s vise for the obligatory pictures.
The rest of the work, installing the stretchers and cross battens and trimming the legs to length, will be accomplished by Tim once he gets back home.
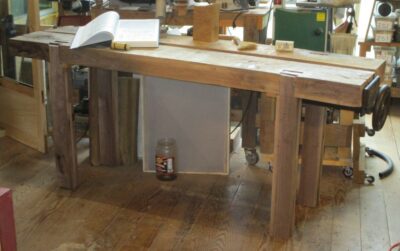
We made exact measurements prior to beginning the construction so it all fit into his little station wagon, just barely clearing the rear hatch and dashboard.
And with that he was on the road back home to work on completing the bench as time allows.
NB – Tim has been making steady progress but the terminus has not yet arrived.
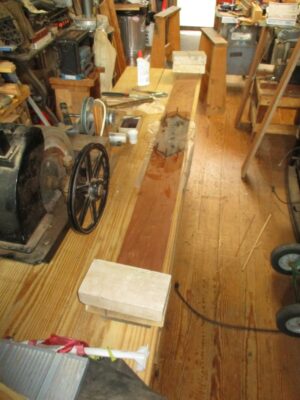
Looking through my lumber inventory for vintage cherry boards from which to make the trim for the new bay window, I found some beauties. Unfortunately, all the boards I had on the top of the pile were about 4″ shorter than I needed for the lintel and base trim. The deeper into the pile I looked, the more frustrated I got as these were too short also. Aaaargh!
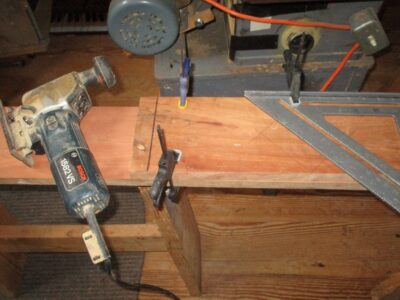
After many days of ruminating on the problem, including contemplating a trip to a sawmill to get some new lumber, I settled on a plan to stretch my boards by grafting in some diamond “dutchmen” as decorative elements into the center of the boards I had. I rough cut the boards with my circular saw and a fence, then fed them through the lunchbox planer.
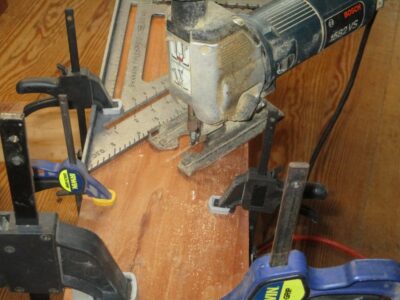
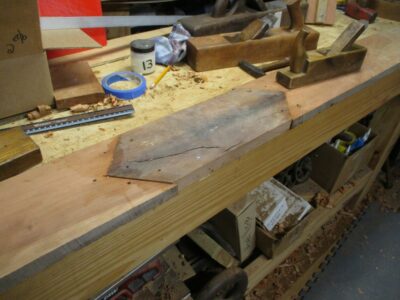
I laid out the dutchman on the inlet, clamped the inlet board and the longer board together, and cut the angles with my reciprocal saw and a speed-square fence. The kerfs were smoothed with my Iwasaki float to fit them together well.
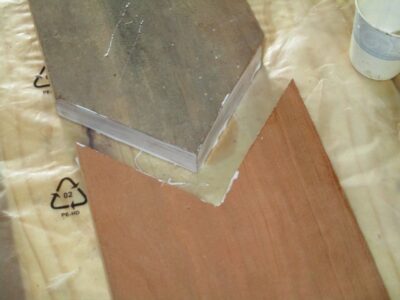
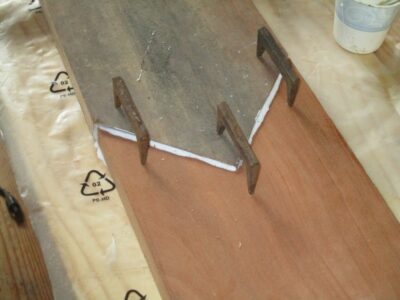
Using pinch dogs on the verso as the clamps (indispensable accessories I first used in the foundry patternmaking shop when I worked there 45 years ago), the glue margins drew together very tight with nice squeeze-out of the PVA I was using as the adhesive.
To counteract the slight curling induced by the pinch dogs being only on one side of the assemblage, 10-pound bricks were placed on each end of the gluing-together element to press them flat on the bench top.
The next morning they were ready for me to work by hand.
After last week’s web site hack, as Webmeister Tim was noodling around he noticed that a lot of the site platform elements were very old and is undertaking a top-to-bottom update this weekend. One important consequence is that the “Comments” function should be working perfectly.
The past three years have seen the dramatic improving of the envelope of our domicile, part of which is a c.1890 chestnut log cabin and the other a c.1985 modern kitchen, dining room, and bathroom. Three years ago we had the stone/block walls of the crawlspace underneath the whole insulated and the ground underneath sealed with heavyweight plastic sheet (depending on your physics literacy the system was either wicking cold in or wicking heat out like a champ, the only thing that was for certain was that before the insulating and sealing the floor was icy all winter long); two years ago we had the cabin completely re-chinked with all the old chinking stripped out and new chinking skillfully installed. The combination of the two improvements made the floor much warmer, room temperature as opposed to refrigerator temperature, and reduced the air flow ~90% or so. Not a small thing when you live in a windy, wintery place.
Last year we intended to continue the trajectory by having all the windows in the home replaced. The extant units were all of modest quality from the 80s, with the sash windows augmented by aluminum triple-track storm windows. One feature of the latter is that they provide excellent ventilation, open or closed, year-round. Ever since we moved there in 2013 I have been taping plastic over the windows every winter just to keep the interior somewhat congenial.
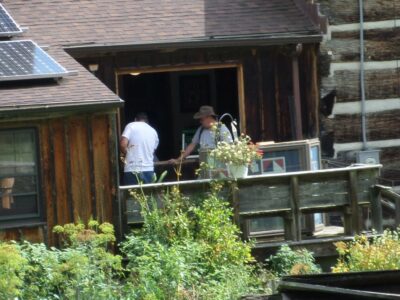
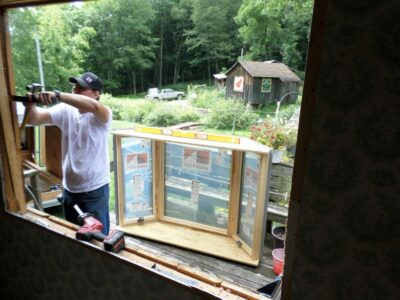
We ordered the new, high-performance windows about eighteen months ago, but given the disruptions to the manufacturing and supply chain the windows did not arrive for more than a year. When they finally did arrive, a local contractor installed them lickety-split, replacing more than a dozen old windows in two days, all finished.
Except for Mrs. Barn’s prized new bay window in the dining room.
That one took four days of work, reframing the opening and installing the new custom unit. It transforms the whole house.
Extending the schedule of the bay window project was the need for me to fabricate all new trim for the unit. We decided to go with some of my vintage cherry lumber to be harmonious with the built-in cherry china cabinet already in the room. The only hitch was that none of my cherry boards were long enough for the upper and lower trim boards, missing the mark by just a few inches.
Next time you will learn about my board-stretching technique.
During Handworks 2023 I was able to chat with Youtoobers Rex Krueger and James Wright about their channels (I am a subscriber to both and you should too). They were very encouraging about my ideas for producing less formal at-the-workbench videos.
Yesterday James’ video featured polissoirs prominently and was an enjoyable romp through the various techniques underneath the umbrella of French Polishing. My only correction to the content would be that my wax blends are beeswax and shellac wax, not beeswax and shellac. But certainly the effort was earnest and almost entirely on the mark. Well done and thank you, James.
Coincidentally(?) while James was steering people toward this web site, the web site itself was partially hacked. Not the content, but rather the search and redirect from the Dark Star, a/k/a Google. Late yesterday afternoon I began getting emails and texts telling me that trying to get to this site from Google resulted in the searchers being deposited in a gaming/gambling site. I contacted Webmeister Tim who got right on it and had the situation resolved as soon as he got home to his computer. Still, it made for a restless night as I wondered how deep the intrusion was.
Is it any wonder that I have long considered compewder hacking to be a capital offense. I am not kidding. And yes, I know what “capital offense” means and implies.
My fundamental operating preference is for almost all of my hand plane irons to have camber, or some degree of curve along the cutting bevel. About the only plane irons that are not cambered are 1) block planes, of which I have many and use nearly every day, 2) smoothing planes, 3) “miter” planes for use on shooting boards, and 4) rabbet/dado planes for crisp shoulder/joinery work. Otherwise, pretty much everything is cambered.
And, since it such a routine part of my work, I have developed a simple, easy, and straightforward process to deal with inducing camber and sharpening cambered edges. It has to be simple and easy or I would not go there.
Exactly how much camber depends on the use of the tool. For general-use bench planes like jointers it’s a teensy bit (the precise technical description) and for scrub planes it is a gob of camber (again, the precise technical description), and jack planes and foreplanes somewhere in the middle. How much camber, and when to induce it, are almost whimsical at this stage of my life after decades of creating and maintaining them. That said, the basic process is the same in that it depends on how my hand bone is connected to my arm bone, and my arm bone connected to the shoulder bone.
The most basic truth is that the hand/arm/shoulder joints function as pendulums (pendula?) and their pivot points. As a result, while I use a sharpening jig to establish the bevel on a new or really trashed old iron, virtually all of my sharpening at the stone is designed to overcome or counteract this pendulum imperative. I will not go into depth here on my theory and practice of sharpening (ask three woodworkers about sharpening and you are likely to get 74 opinions), in routine sharpening I am a freehand sidewinder, and in the world of cambers this is an added benefit.
Here is how it works for me.
Holding the iron so tha the bevel is flat on the stone surface, when pushing the iron away from my body I press down hard with my thumb. On the return trip, pulling the iron back towards my body, I press down hard with my index finger. With this simple process camber is induce. Exactly how much camber depends on how many strokes you move fore and back, and how coarse the stone is.
With the iron bevel-down on the sharpening stone, I establish (or discover) the bevel angle moving the blade fore and back. Here’s the sublime part, camber-wise — all I have to do to induce the camber is press more on the trailing edge on the push stroke and on the pull stoke to begin a rocking action and remove more material in a near perfect curve on one side for the push stroke and the other side on the pull stroke.
Simple as that.
Again, exactly how much camber and when to induce it depends on the purpose of the iron. For bench planes I induce it at the 600-grit stage of the sharpening process. NB – my progression for a new or derelict iron edges is to work up through very coarse silicone paper or diamond stones to 220 diamond to 600 diamond to 1200 diamond/1000 water stone to 8000 water stone, followed by stropping with micro-abrasive impregnated into a wooden board.
=================================
BTW I am playing with creating short shop-based videos, and if there is enough interest I could easily feed this topic into the pipeline.
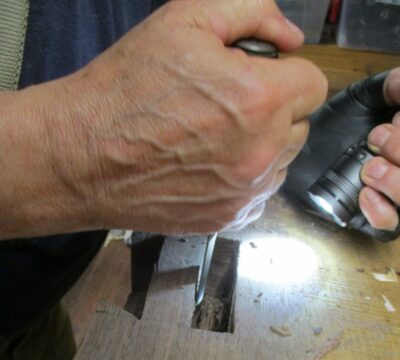
When restoring a plane iron my starting point is always flattening the back, a frequently arduous task as a surprisingly few irons have undergone such a corrective action. As a result, the time and energy for this step is an outsized proposition. Even with coarse stones, diamond plates, or abrasive paper, flattening the back of a derelict iron can be a real workout. Generally, I’ve found that it is practically impossible to work the iron too hard on the abrasive, whatever it is. And, although I have pretty big, strong hands, it can be wearying session. To make it less of a nuisance I need a force multiplier.
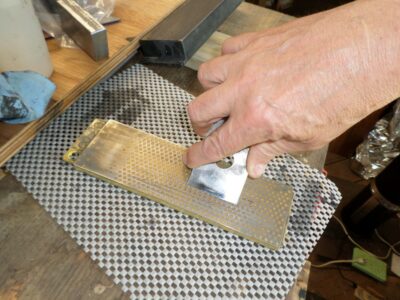
This is where The Magic Stick comes in handy. This fundamental tool was introduced to me by my late, lamented and much-missed work pal Mel Wachowiak (his obituary is still tacked up in my shop), who in turn learned it from somebody working on a Japanese plane iron. The tool is beyond basic but required for a new Japanese blade as the “grabbable” real estate for handling the blade is roughly half that of a Western blade.
With the Magic stick you can really, really bear down on the blade when working it on the stone or sandpaper or diamond or whatever.
By gluing a piece of very coarse sandpaper on the bottom of the stick with epoxy, and pressing that coarse surface against the upper side of the iron, you are no longer limited by hand strength and endurance for flattening the back. You can basically impose the downward force of your entire upper body on the workpieces with surprisingly little effort. This approach cuts my work time for the initial set-up of the back by at least 75% and at times 90%.
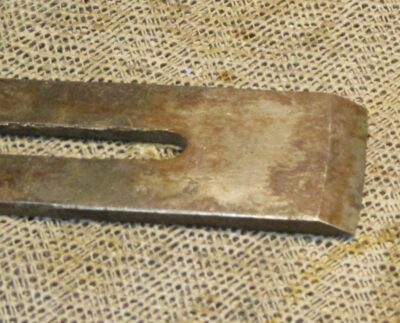
Recently I brought up to snuff a narrow coffin plane that had been originally used as a semi-scrub plane, and it had been worked mighty hard if the mushrooming of the iron heel was any indication.
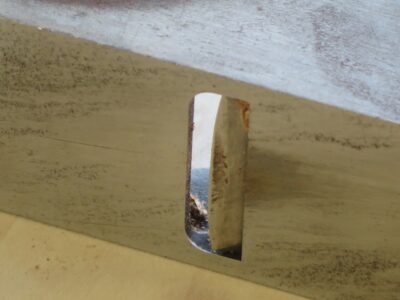
Looking closely at the iron I saw that the bevel had been established on a bench grinding wheel or something similar. But the edge had never been honed and the back never flattened. The iron was essentially straight-from-the-factory forge. I knew this because the fire scale had never even been touched! (I’m still kicking myself for not getting better pictures of this.)
Fire scale is the deposit that forms on the surface of metals when they are worked at high temperatures, it is the stuff that sloughs off when a blacksmith is working a piece of wrought iron or steel. Not being a metallurgist I am not 100% clear on the composition of ferrous fire scale. All I can tell you that it behaves carbide-ish, hard and tough. Very hard. Very tough.
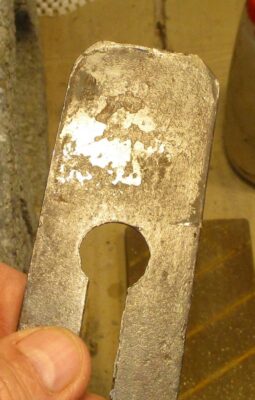
So, on this blade I had a lot of fire scale that needed to be ground off to accomplish the preparation of the vintage iron blade. Just abrading it on a diamond stone was brutal work by hand, but with the Magic Stick it was doable in about 10 minutes. BTW, the carbide-ish ferrous fire scale was so tough that it trashed my 120 grit diamond stone. Absolutely trashed it. I wound up doing most of the work on a piece of folded silicone carbide paper.
Working my way up through the grits on diamond and water stones, a dozen seconds at a time, was a piece of cake thanks to the Magic Stick. This blade is not the previous one with extreme camber, but an example of a blade back that was prepped in just a few minutes.
I am not a tool collector per se. I am a tool acquisitor, but that is a whole different mindset. I own fewer than a dozen collectible tools – my Robert Towell and Raney Nelson planes, a Chris Laarmans finger plane, a Laarmans router plane, a set of Otner-Botner luthier’s planes, perhaps a couple others — but my inventory of acquired tools is always in flux. I am always on the lookout at flea markets and tailgating events to find tools that I can rehabilitate and find them a new home to someone who needs one of them. Sometimes the refurbished tools go to family, some go into the wooden box marked “tools for Lil’T”, and some go to friends or even friends I’ve never met. Such was the case a couple years ago when I was able to send several boxes of tools to Rob Hanson in the aftermath of his shop and all its contents turning to ashes in the Paradise Fire in California. I counted it as joy to send them even though we had never met, because it was the right thing to do.
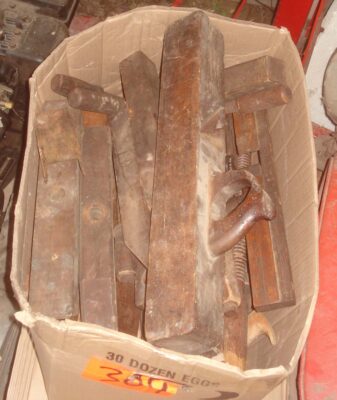
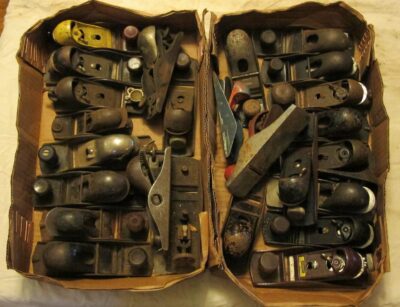
One of my very favorite things is to buy boxes of old block planes to tune up and give away to new woodworkers. One sharp tool can make a difference in charting someone’s passion for woodworking.
I often purchase wooden body planes even if they have no iron, and often purchase irons even if they have no plane. As long as they are basically in good shape I can eventually make something of them, combining an iron from my drawer full of irons with a body who needs one. Then I can find some body who needs the finished tool.
NB — for guidance on restoring all manner of iron planes and other woodworking tools, Ralph Baumenot’s Accidental Woodworker is the reference, a must read for me on a near daily basis.
I am currently rehabbing a series of wooden body plane irons, good projects in that they can be worked on a few minutes here, a few minutes there.
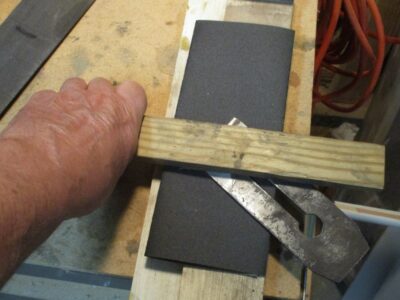
When working on an iron that is in really rough shape, or even sometimes brand new, I find my most valuable tool to be “The Magic Stick,” two versions of which are illustrated above.
You’ll find out the Why and How next time, along with a cut list.
I am fairly confident that had Roubo’s contemporaries owned Shinto rasps, they would’ve used them That’s my story and I am sticking to it.
That is all we did, all day. That, and listen to music.
Then, with the gentlest taps possible we put the pieces together for the rear half.
Since the whole thing had to be disassembled for the trip home we made little effort to get it, well, all together. We did just enough to know that it could go together once it got there.


Recent Comments