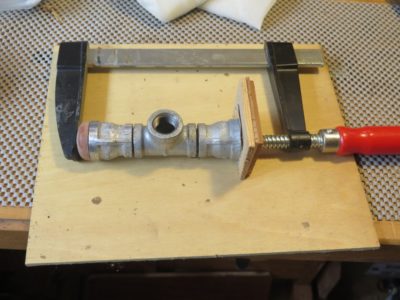
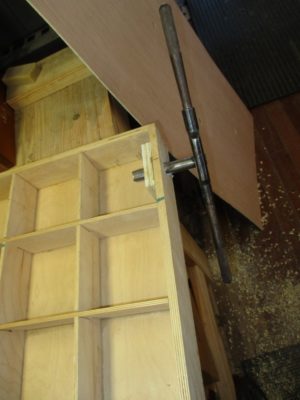
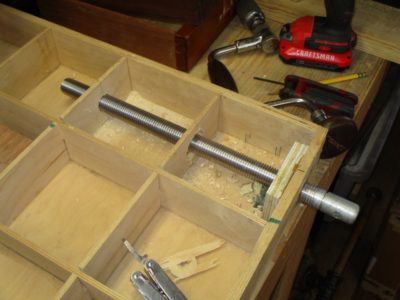
With one end of the head now embedded with the turned padauk plug I fired up the lead smelting cup. To make sure the opposite end of the head was plugged I clamped a scrap of plywood over the end with several layers of aluminum foil as a gasket, and poured in the molten lead.
Since the lead shrank on cooling I had to dribble on a bit more of the molten material to fill the void to a slight excess.
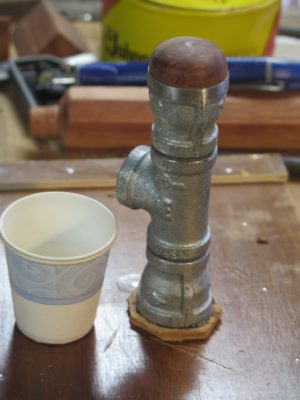
I filed the face of the mallet flush with the margins of the plumbing fitting, then epoxied on some 3/16″ cowhide.
Trimming that flush with the edges of the face let me move on to the final assembly of all the plumbing parts.
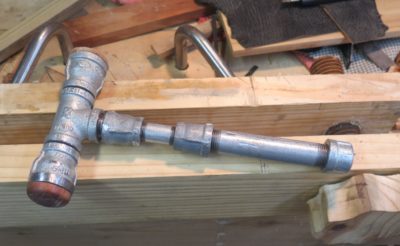
After saturating the padauk plug with dilute epoxy, the final step was to apply a couple layers of sharkskin to the handle. Just because.
In the end, it was a fun project but I am not persuaded of its efficacy due to the ungainliness of the head; it seems too long to me. I’ll probably make another one with a fatter and shorter head.
Stay tuned.
the had now filled with cast lead it was time to finish the assembly and wrap it up.
Once I got the water flowing through the repaired penstock I trudged down to the turbine to check the result. As I approached the turbine I was gratified to hear the soft whine of the mechanism, and exasperated by the sound of spraying water. Once I got close enough to see, I noticed an absolute geyser of water spouting from the master valve that allows me to shut down the system to allow for maintenance (read: extracting fogs or crawdads from the nozzles).
So I hiked back up to the first soft joint — there are a half-dozen joints that are actually radiator hose from a bulldozer, held in place by four hose clamps (this method is designed to allow the penstock to blow itself apart without damage if there is an obstruction downstream) and disconnected it. Yup, the master gate valve housing was split, big time. There was no way to do anything except replace and re-plumb the business end of the system. A hairline fracture I could possible deal with. An eighth of an inch? Not so much.
I decided it was time to make some substantial changes to the water routing at the bottom. as it happens I was in town, i.e. “over the mountain” on other business so I dropped into the farm supply store there to upgrade my valve system to a 2″ solid brass spigot valve rather than the low-tech, low cost, and low strength PVC sliding gate valve.
I also decided to take advantage of the opportunity of the completely disassembled plumbing to enact a longstanding goal of upgrading the system and complete the second line into the turbine housing, something I had been hesitant to do while the overall system was working well. This upgrade 1) balances the forces on the impellor shaft by directing the water jet to strike the impeller from both sides, and 2) allows for a near-doubling of the wattage output as well.
For the connections between the new brass valve and the turbine housing I used new 1-1/8″ heater hose from the auto parts store. The water pressure at the bottom of the system is 40-45 p.s.i so these flexible hoses should work just fine.
Finally, the new setup has me contemplating changing my strategy of mothballing the system over the winter. Given the increased robustness of the new valve and the elasticity of the hose connections, why not just let the system run all winter long? Water can flow well below freezing temperatures, particularly water within a pressurized construct (pipeline). This feature is enhanced by particulates suspended in the water itself (the water coming though the pipe is very hard, essentially mineral water) so that fact alone would suppress the freezing point. Thank you Mr. Auletta, my 9th grade Physical Science instructor, for 53 years ago relating the anecdote of the coal fields’ slurry pipelines that can keep on flowing until 15 degrees below zero Fahrenheit, or 47 degrees below freeing! And, if I wrapped the bottom plumbing with heat tape to keep the smaller lines and the nozzles above freezing, couldn’t it keep running all winter long when our coldest temps are just barely below zero, and only for a few hours at a time?
Hmmm.
Time to turn my attentions to the intake end of the system.
One of the key features of The Ultimate Portable Workbench is its weight, or more precisely, its lack of weight and its rigid stability. That is to be expected for a portable bench, designed for on-site furniture restoration projects. This concept has been unfolding in my brain and shop for three decades.
My estimate for Version 4.0 is a fighting weight of 50-60 pounds, not featherweight but manageable especially since it folds flat-ish. Even though I no longer have any plans for on-site work (there could always be a project that temps me, but it has been a very long time since I did any on-site work) I am going to finish this version as a gift to my son-in-law, given his nomadic status (military) for another ten years.
One of the critical improvements in this version is the increase of work-holding capacity to the point where the bench could suffice for almost any woodworking venture. In addition to the two twin-screw Moxon-style vises I figured out a way to incorporate holdfasts into the design and function. The critical thing was, as I alluded before, thinking beyond the realm of steel/iron holdfasts. They work perfectly in this or any other application but they add unnecessary weight. But, what about holdfasts made from lighter material? At one point I thought about trying to cast some aluminum holdfasts myself, but I have had such success with wooden holdfasts I have decided to pursue that avenue enthusiastically.
Following Mike Siemsen’s perhaps tongue-in-cheek reference in his brilliant video I made a first proof-of-concept model. Imperfect to be sure, but successful enough to propel my further development.
One of the main faults for the initial prototype was that I had not oriented the grain direction of the clamping arm properly. So after a short time in service the arm broke exactly where you would expect. Solving that problem was simple and straightforward, my favorite kind of solution.
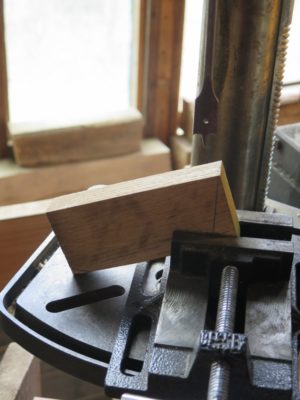
First, rather than making the arm from a scrap piece of pine in the kindling box I used one of the dozens of white oak sample blocks I had boxed under one of the benches. I created these for a corporate presentation many years ago that I would thought was going to lead to a consulting gig, but it never did. I provided a complete set of samples for each attendee in my presentation so I had a lot of these blocks awaiting a new purpose.
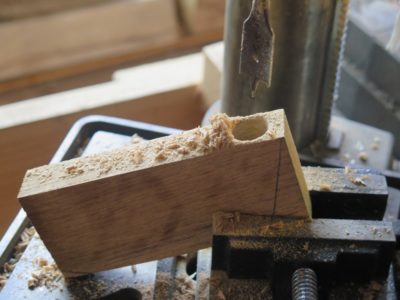
Once I determined the general nature and shape of the holdfast overall I placed the block in the drill press at the inclination I desired and drilled a 3/4″ hole to accommodate the 3/4″ oak vertical post.
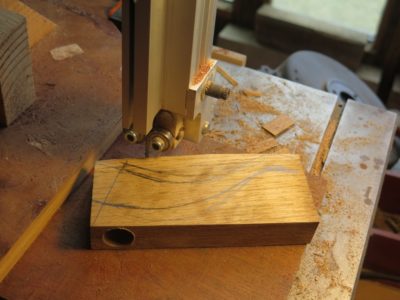
I rough-shaped the block with the bandsaw and glued a length of 3/4″ oak dowel into the arm.
Once the glue was set — I used T3 since I have a lot of it on hand at the moment — I finished shaping the head/arm with rasps.
And with that it was done and ready to get to work. I’d guess my total time of fabrication for the holdfast was about 10-15 minutes.
It works exceedingly well, holding whatever piece might be reasonably worked on The Ultimate Portable Workbench.
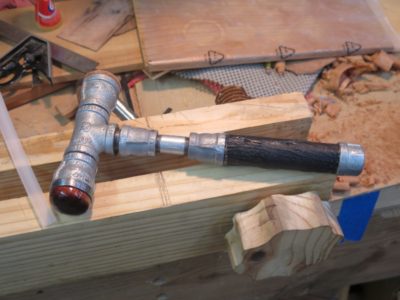
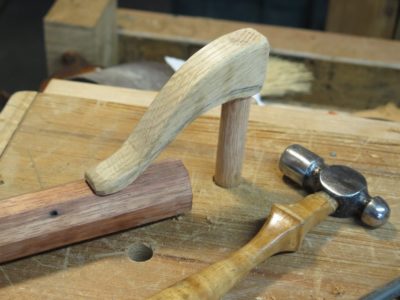
A while ago I commented on the mallet that Bob Rozieski was using in chopping some joinery (later identified by several readers as a Lee Valley tool), I mused about making something similar myself. I tend to enjoy making tools myself, sometimes even more than using said tools, so making a steampunk mallet could be a blast. In addition, my location in the hinterlands, where the local feed/seed coop/hardware store has both limited inventory and limited hours (and our one local auto parts store is closed on Saturday!), as a result I keep a solid inventory of hardware on hand. Thus the odds were pretty good that I had everything I need on-hand to construct the tool.
Could I turn a pile of pipe fittings and scrap wood into a usable mallet?
Let’s see.
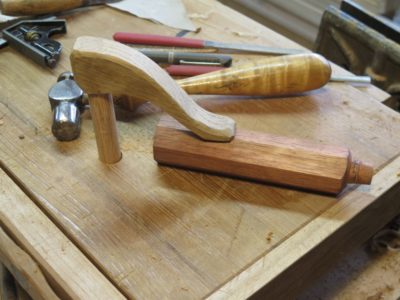
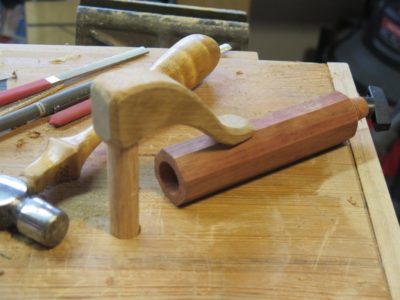
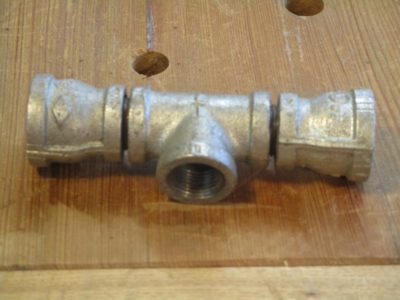
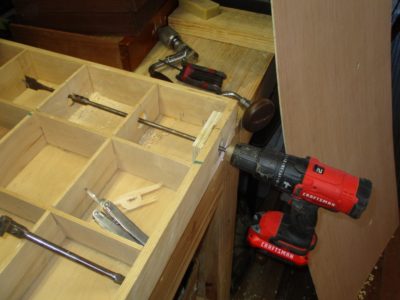
In browsing through my inventory it was clear that I had most of the parts in-hand and needed only to buy a couple of double-nipple 1/2″ NTP fittings and one reducer. I assembled the head fittings together as tightly as possible using my big pipe wrench and a piece of long pipe to act as the handle extension.
So far, so good. Now I just had to figure out how to add some heft. How could I do that? Oh wait, I have several hundred pounds of lead under the gunsmithing bench. And a lead melter; I could fill the head with molten lead. But first I had to plug the ends.
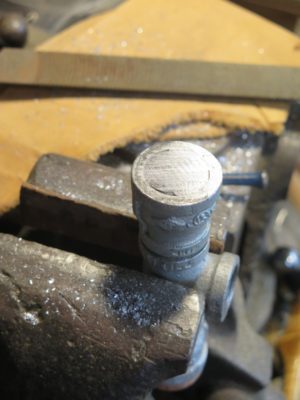
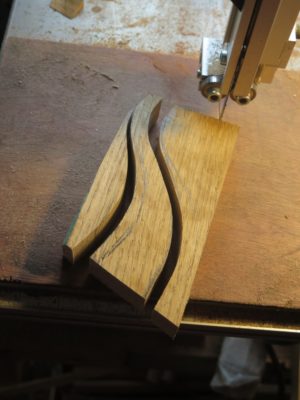
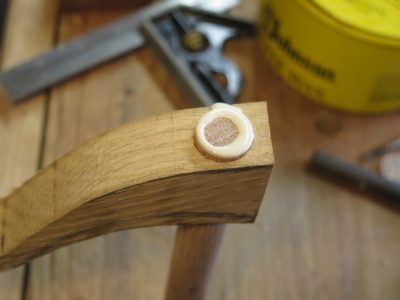
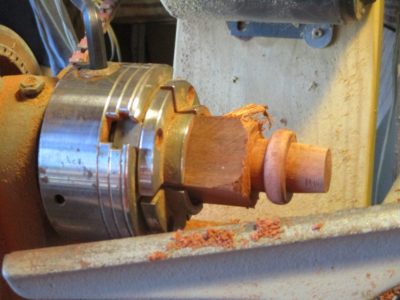
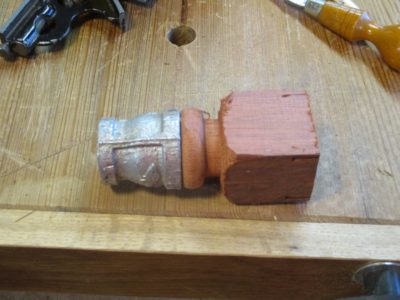
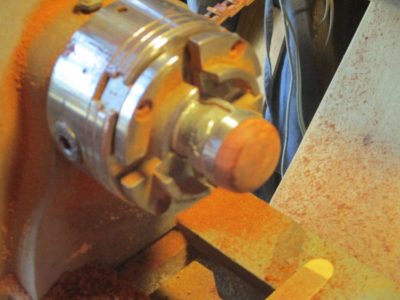
I had already decided to make the mallet to have one end-grain wood face and one leather faced surface. I might as well go ahead and make the wooden face now to use it as the plug for one of the ends. I found a square scrap of padauk in the scrap box and tossed it onto the lathe to turn one end to the taper needed to screw it into one end.
Once that was accomplished i could turn the actual face of the block and drive (screw) it in.
I recently came across this video and found it to be inspiring on so many different levels. I am a big Greene & Greene fan, and once (1984/5?) had a private tour of the Gamble House. It was spectacular.
The end of winter here in the Shangri-la highlands is accompanied by a number of traditions, not the least of which is the status assessment and repair/maintenance of the power system. Sometimes this occurs as early as mid-March, but with travels back and forth to visit Li’l T and his parents and the deposition of several inches of snow as recently as last week, this year “spring” and its requisite duties is/are late in coming.
It is an undeniable truth that when you are “off grid,” a prominent blessing is that you are your own power company. It is also an undeniable truth that when you are “off grid,” a prominent bane is that you are, well, your own power company. Last week I split my time going over the mountains to get some service on my truck (I am old; I remember buying a complete set of new tires for my first car, a 1961 Ford Galaxy 500 with a trunk big enough to hold six feet of a 4×8 sheet of plywood, for $50 in 1970. Now, two tires for my F150 are $500! Sigh.) and working on the water line.
I walked the quarter-mile of water line last Sunday to gauge the level of repair needed. Even though the winter seemed fairly ordinary judging by memory and the consumption of firewood, the condition of the hydro system penstock suggested a different history.
In six places the penstock was breached and fractured with classic helical ruptures as evidence of water freezing in the line. This was surprising as I thought I had been pretty conscientious when mothballing (draining) the system in November, but the proof of the contrary is unavoidable. And, this was not even the full extent of the damage to the system (more about that later).
I spent the better part of three days walking up and down the creek to make the repairs to the line itself. I’m still sore. I wound up grafting in about 80′ of new line, requiring 14 new joints.
As occurs every spring I spent some time refining the path of the water line to streamline it and increase its efficiency. And still, every winter I must endure the damage that nature inflicts on it.
Is there a solution to this neverendingly onerous burden? Sure. All it would take is to find someone who could bury 1/4 mile of water line 48-inches deep in a mostly-solid rock substrate. Finding that someone would be a challenge, finding someone to sign the check for maybe $125k is an even bigger problem.
Thus, I learn to embrace the responsibility of putting the system back together every “spring.” There is a lesson there. Whenever I face a particular challenge or hardship, I try ask, “Okay YHWH, what are you teaching me with this one?”
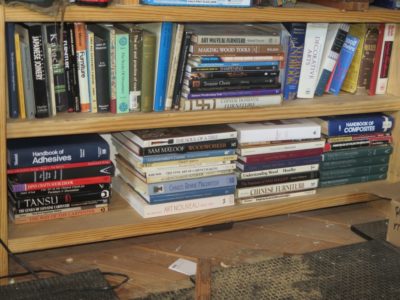
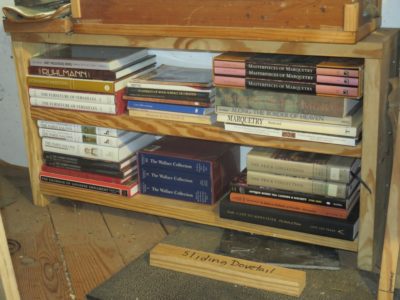
One of the notable absences from the studio ever since I started working there pretty much full time almost ten years ago was the physical distance from my books. Almost all of them were located up on the library balcony on the other side of the barn. Not far, but not close enough for the psychic comfort of 1) being part of the decor of the studio, and 2) being close enough that I could just grab one to browse or look something up whenever I was waiting for the glue to dry or something similar.
Yes, my gunsmithing books were already down in the studio on a shelf over that workbench, but even I do not browse gunsmithing books. They are ther for instructional/informational purposes.
In the studio, I need books for inspiration and peace of mind. It’s one of my many quirks. So, I relocated a goodly number into my immediate work space, and once I get finished with the tool cabinet and empty the plane shelves, will probably fill them with books too.
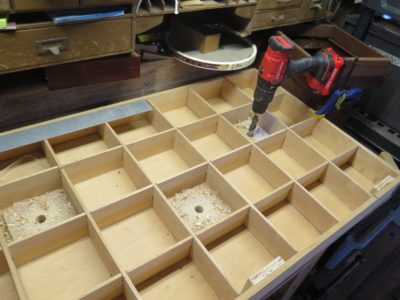
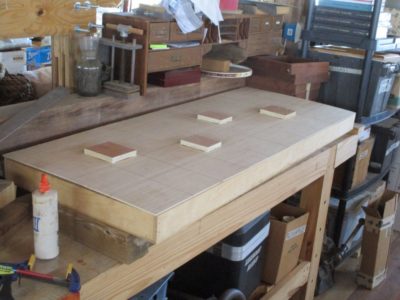
With shop life resuming some vague semblance of normal after late winter and the presence of Li’l T on the scene, I’ve been able to return to working on the Ultimate Portable Workbench. I’ve now reached the stage where I need to layout the holes for the vise screws, and for the holdfasts as well. You see, I’ve decided that even though this is a portable workbench where low weight is among the highest goals, a set of holdfasts can be a much-valued addition. Hence, my exploration of wooden holdfasts. More about that next Wednesday.
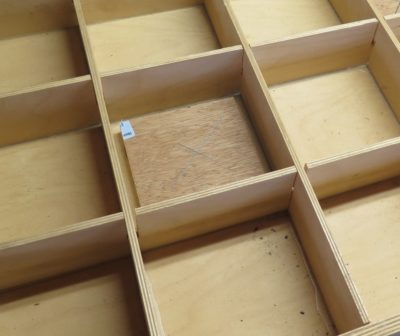
For now my main objective was to locate the holdfast holes so that I could add some backing blocks to the insides of the top and bottom plywood skins. This started by just arbitrarily selecting the locations and marking out the centers of grid boxes and drilling 3/4″ holes.
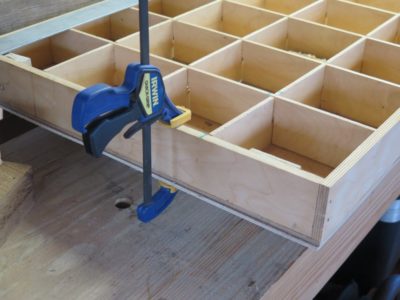
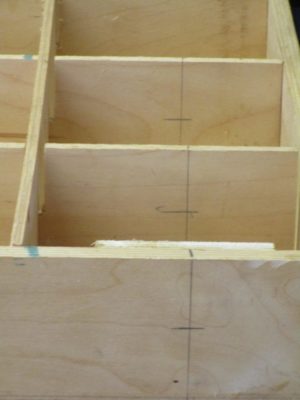
I then clamped the second skin to the underside of the half-constructed torsion box in order to simply use the holes in the first skin to drill the holes in the second skin.
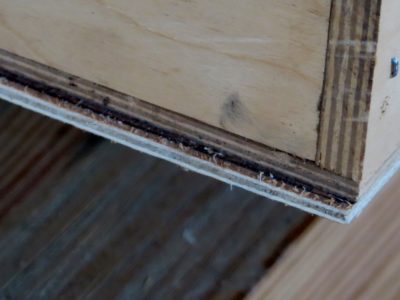
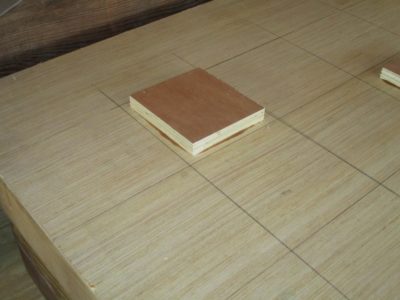
With that step accomplished I marked the grid pattern on the underside of the second skin so I knew where to put the backing blocks. Once again I used T3 adhesive, in part because I had a lot on hand and because I could not always be sure of the environment for the bench.
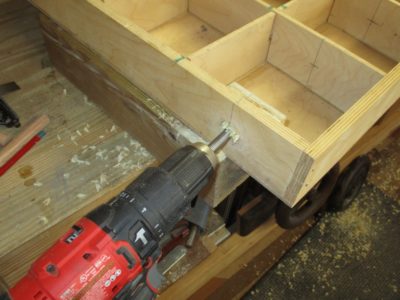
Once the blocks were secured I just used the holes in the skin to guide the drilling of the holes through the block. This process allowed me to get perfectly aligned upper and lower collars in place so that holdfasts could be used in this feather weight bench.
Once that was finished I set the second skin aside and moved on to the threaded holes for the vises. I had already glued backing blocks in those locations.
I drilled the holes through the apron and the grid using a combination of drill bits to accomplish the desired ends. The hole in the apron was 7/8″, in the grid web the holes were 1″ to accommodate the 1″ vise screws.
Fortunately I have a set of extra large taps and dies, rescued from the trash eons ago, so making the matching threaded openings was a snap.
A couple months ago for my birthday Mrs. Barn gave me this remarkable tool to keep handy. I’ve had many headlamps over the years as my fading eyesight is always seeking more lumens, but this one is the first that I’ve tried that is actually comfortable, high performance, and long lasting. The combination of the LED illuminator plus the 2 AA batteries being located at the rear of the unit giving it a perfect balance, I can wear it all day long with comfort. I cannot tell the lifespan of the two ordinary batteries as I have not yet had them go dark after almost 60 hours of use.
She says she bought it at the local feed-and-seed coop, so I am guessing it may be available at Ace Hardware stores.
One of the features of much early work (2008-2012) on the barn was the truth that I was always racing to get things done over a weekend before heading back to Mordor. Since It was weekend-based I was pretty much limited to what materials I had on hand. If I needed some of “X” but only had some of “Y,” well, I had to make do with “Y.”
This pretty much explains the framing around the door to the first floor. It was a Sunday evening, so I had an hour, some scrap white pine lumber, and a tube of construction adhesive, and I had to get a door in place before heading home. Flash forward and it should be no surprise that the doorway was needing an extreme upgrade.
This time I had as much time as I needed, an inventory of pressure treated lumber, a bag of concrete screws, and as much construction adhesive as I might need. The starting point was un-hanging the door and removing the “framing” which took me a half-hour at most.
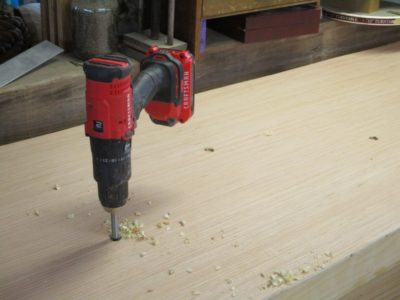
I ripped and crosscut the pressure treated lumber, grabbed the appropriate masonry drill bit and my Craftsman hammer drill, and got to work. A few hours later I was fitting the final pieces.


Recent Comments