New Studley Videos
The Highland Woodworker episode about HO Studley just came out, and if you have not seen it you might find it amusing.
This link should take you directly to it.
The new documentary came out last week and I am very pleased.
The Highland Woodworker episode about HO Studley just came out, and if you have not seen it you might find it amusing.
Knowing my interest in all things Studley, Patrick Leach recently sent me an email with the following:

It has a book-matched mahogany top with vivid grain, the mahogany is 1/2″ thick veneer.
It has a long slot for a sliding dog, but I don’t see any sign of that on the vise, nor do I see that it ever had one. All the other dog holes have their original dogs.
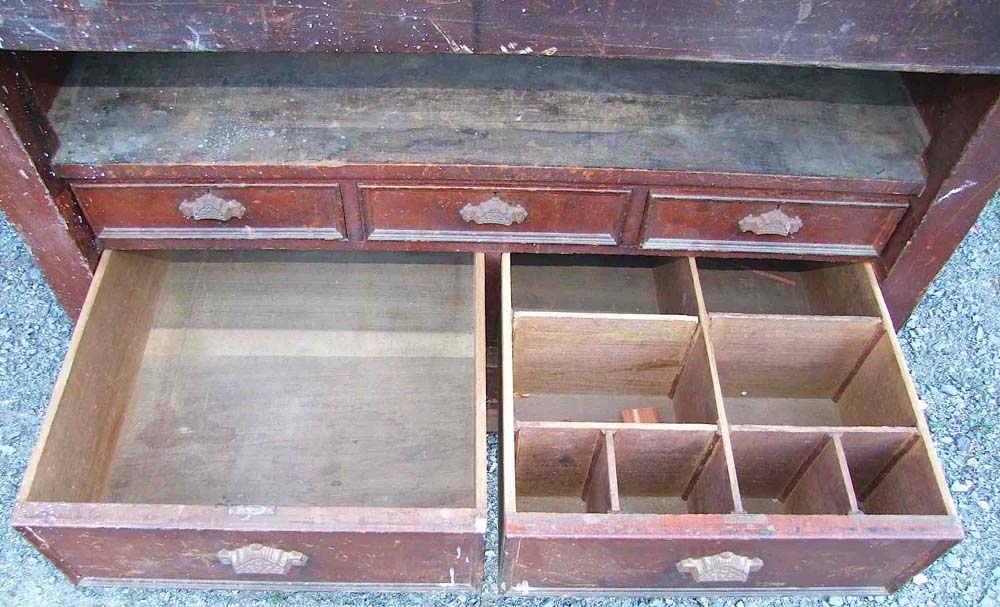
The open area under the bench top is odd. I don’t see that any front/drawer was there.

The vises are both original, and off the bench. Each is a different width and with differing length of travel. The fixed jaw is mounted on the top. The metal is japanned, though there is little left.
The top needs to be scraped, if you want to make the mahogany pop.
It was found near Lawrence, MA, another area for piano making. It’s older than mine. I’d guess it to be ca.1890.
And, it’s for sale! If you are interested, contact Patrick directly. His email can be found on this page.
With the first split successfully re-integrated it was time to turn my attentions to bringing it all together. Since the previous damage(s) resulted in enough loss to the fracture margin the two pieces would not align perfectly, I needed to bring them into proximity using shaped cauls.
My first attempt used a plaster mold made along the outside of the larger piece. I simply wrapped the wood piece in shrink wrap and cast plaster, hoping to use the resulting piece as a clamping and aligning form. I just was not happy enough with the result.

Instead I used the actual tubing from the gun, around which the pump action made the forestock slide back and forth along the tube. To make sure I had the right amount of clearance, and to provide the perfect clamping form, I wound the tube with three layers of waxed paper. This worked perfectly.

Putting the wrapped tube inside the larger of the two broken pieces, I brushed the West epoxy onto both gluing surfaces, the placed them in contact with each other.
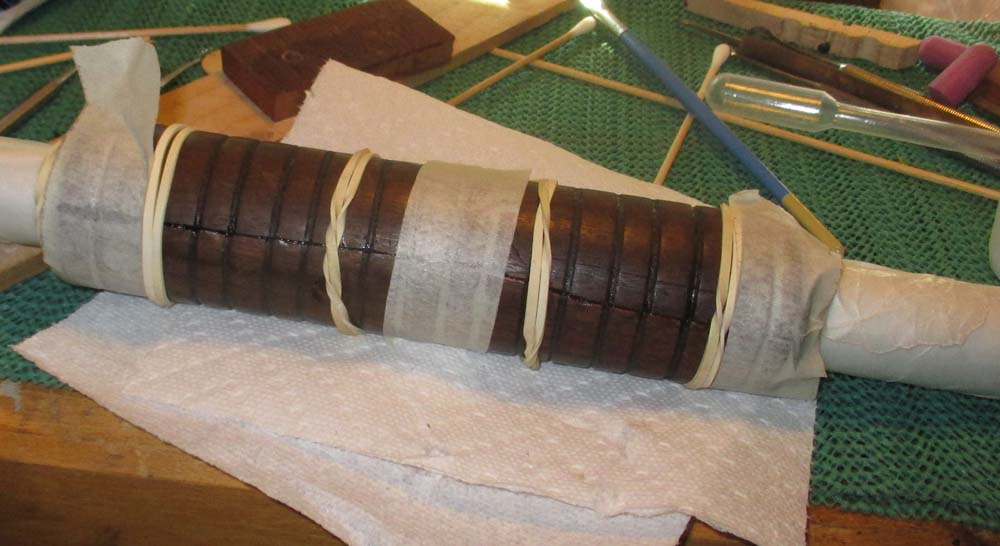
Using rubber bands I gently moved the two pieces into the closest configuration possible, and when that was accomplished I used some small pieces of masking tape to hold everything firm, and let it sit overnight.
The next morning I mixed a small amount of epoxy and added some more to fill the voids in the break. The following day I smoothed off the excess epoxy with dental tools and needle files. The result was acceptable.
To add an additional level of robustness to the stock I prepared a piece of nylon sheer drapery to served as a “bandage” on the inside of the repaired split.
 When it was ready to apply I brushed some epoxy on the inside wall of the forestock, then saturated the “bandage” while it was sitting on a piece of mylar then moved it into place.
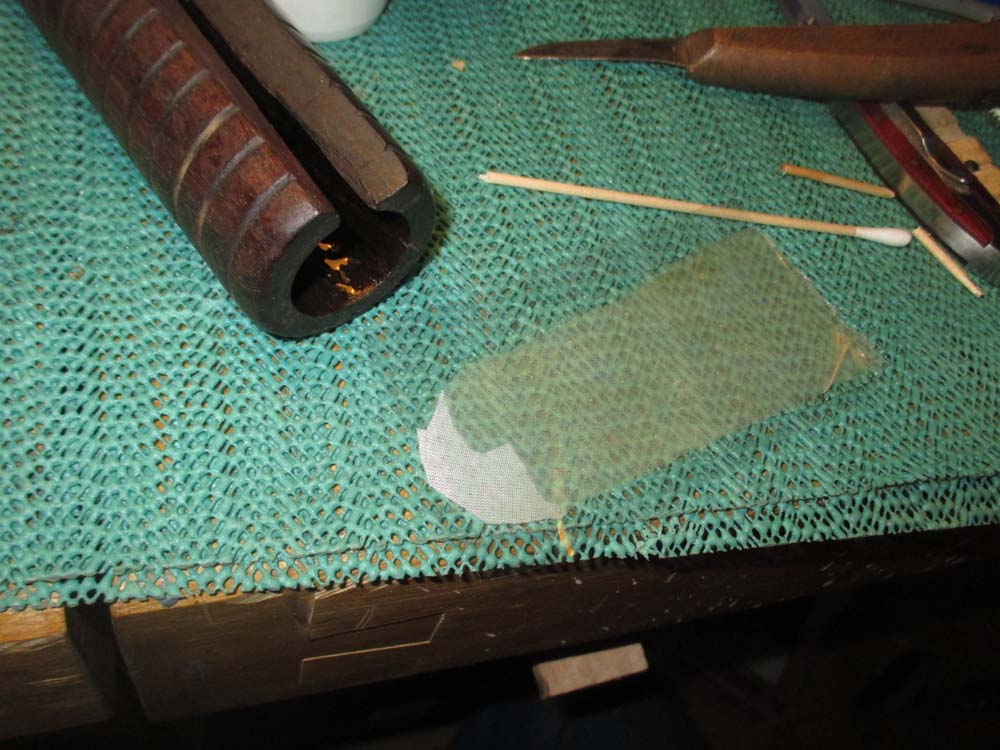

With the small sheet of mylar and the epoxied bandage in place, I used a tube balloon, inflated in situ, to provide the necessary gentle pressure to make sure the epoxy saturated nylon sheer was in direct and intimate contact with the surface.

When I dismantled the glue set up the next morning I was delighted to see that it was successful. A minute with some fine sandpaper wrapped around a large dowel to smooth the inside surface and the structural repair was completed.

The salvaged forestock slid perfectly up and down the tube.
To be in concert with the restoration of the other parts of the shotgun, I lightly cleaned and sanded the outside of the re-unified forestock before applying a couple coats of Tru Oil finish.

I returned the repaired piece to Bob and he was delighted with the end result. He will complete the coatings homogenization.

By buddy Bob is a gunsmith,and lately we have been collaborating on some of his projects. The first one was a split and broken forestock on a client’s ancient shotgun that might have been on the Mayflower. The stock had obviously been damaged and repaired many times, and the evidence of those campaigns was abundant. I could identify at least four different adhesives employed, including polyurinate foam, yellow glue, liquid latex construction adhesive, and something like an acrylic resin gel.
The strategy for the repair was complicate by the fact that these repeated incidents of damage and repair had resulted in the loss of some of the original material at the fracture line. No matter what, this would make the re-gluing an adventure.
On top of all of this the broken piece, being from a functioning firearm, was pretty fully contaminated with lubricant oil. Thus the cleaning regimen required was multi-faceted, including solvent soaking (acetone and naphtha) and many hours with a magnifier and dental tools to scrape and chip off the accretions that would not dissolve.

For the solvent cleaning I swabbed the surfaces repeatedly with my cleaning solvent mixture on cotton swabs, cosmetic sponges, and sometimes just cut pieces of blue paper towels. The amount of oil that can be in a wooden gun part is pretty astounding. Because of the repair strategy I was going to follow I needed to get the entire interior of the stock squeaky clean.

An additional issue was a split in the stock that had not become detached.
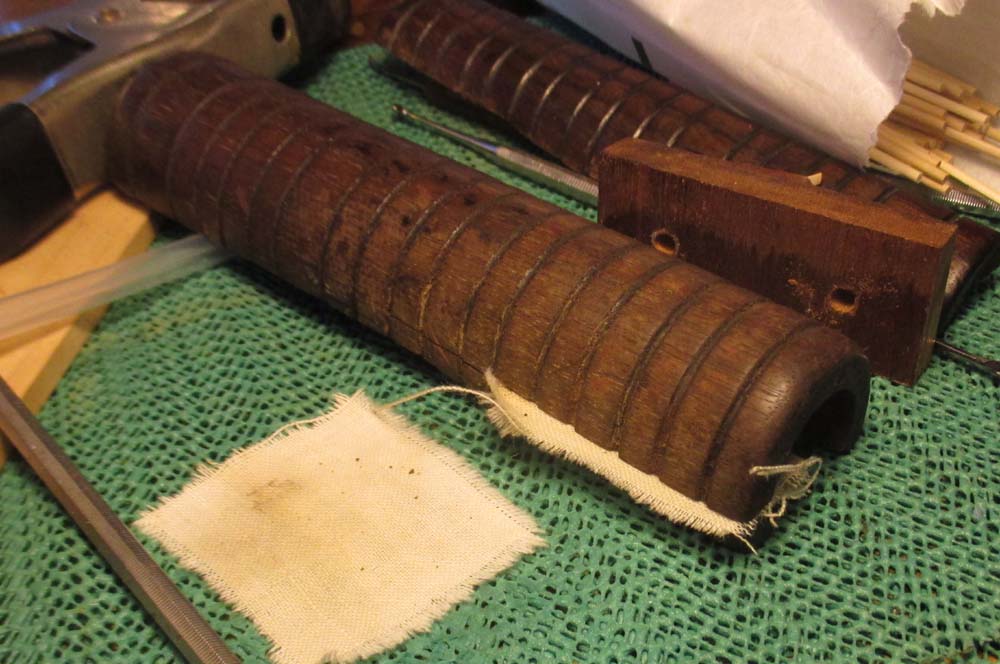
I gently pried it open and slipped some cotton fabric into the split, then wicked in acetone to remove as much of the oil as possible.

Once that was done I introduced West epoxy into the crack, closed it and swabbed off the excess with acetone, then clamped it up to harden overnight.

The next morning I went over the inner surfaces one last time with acetone. Once that cleaning was concluded, I was ready to reassemble to broken pieces. That comes next time.
Some time last year I wrote an honorific on behalf of the clothespin, an integral tool in my workshop.
I’ve overlooked another vital function of this remarkable tool — if you get better-quality pins, as I do, they can be used as wonderful little shimming wedges for leveling something as heavy as a work bench or as a clamping wedge for something as delicate as carved tortoiseshell. I recently moved my workbench a foot or so and it wobbled just the slightest bit. I probably could have worked with it, but alas a wobbly workbench is one of my craziness-inducing hot buttons. So I just grabbed a maple clothespin, took one half as the quick and high-performing wedge shim, and tossed the other half back into the container with its mates for the next time I need another tapered shim.

After much consideration I decided to upgrade the heating in the barn studio. While my existing system of a premium wood/coal stove in the basement combined with a kerosene heater in the studio provided plenty of heat, two problems needed addressing.
For starters, the kerosene heater consumed about 1-1/4 gallons of kerosene for a full day’s heat, at a cost (last winter) of about $5/day. Not a killer, but not irrelevant.
Second, and more significant, was that I have never perfected the knack of keeping the wood/coal stove in the basement burning all night. Thus even though the shop space is super-insulated, every morning when I arrived in the shop, given the usual howling winds here its temperature would be close to the outside ambient temperature. This meant that a great many mornings the shop was in the single digits, and it took a very long time for the stove and heater to get the space and its mass of contents up to an acceptable temperature. My late afternoons were cozy and comfortable, toasty even, but the mornings were mighty brisk.
With that in mind I selected a heavy duty Empire three-panel radiant heater, fueled by propane. It was installed last week, and on its test run made the space uncomfortably hot in short order. The propane service fellow (actually a good friend of mine named Brad) thinks that given the volume of the space and the super insulated walls and ceiling, I should be able to make through the entire winter on a single 80-gallon fuel tank, or about $175 worth of fuel. This works out to about $1.25 a day. My strategy is to keep the propane heater set at about 40 degrees, just enough to keep the space warmer than freezing and much easier to heat up with the wood/coal stove in the morning.
I’ve also purchased a bunch of transparent shower liner curtains to close off one end of my shop, a space where I do not need immediate access most days. Reducing the volume of air being heated by 25% should have a beneficial impact on the micro climate.
Since the heating season in the mountains will begin in about a month, I should be able to report back on the efficacy of the new arrangement soon.
Stay tuned.
My studio space in the barn is a work in progress. It has been so since the first day I put a single, raggedy workbench in there several years ago even before all the walls were up, and the process will continue as long as I work there.

I find that the fluid nature of shop organization is one of the threads binding craftsmen together, and a source of celebration when we gather together. Fortunately for me, I do not have the urgent requirement for maximized cash flow velocity generation from my work space, since my primary source of income these days is in the crafting of words while sitting on my recliner.
And, since I have been limited in the scope of my activities recently I have been reflecting on, and to some degree changing, the spatial flow for the studio. One of the advantages of this long lead time of several years of working there is to evolve a better sense of what the space should be to best serve my needs. And now I am making those changes, albeit slowly as there is only so much you can do on one leg.
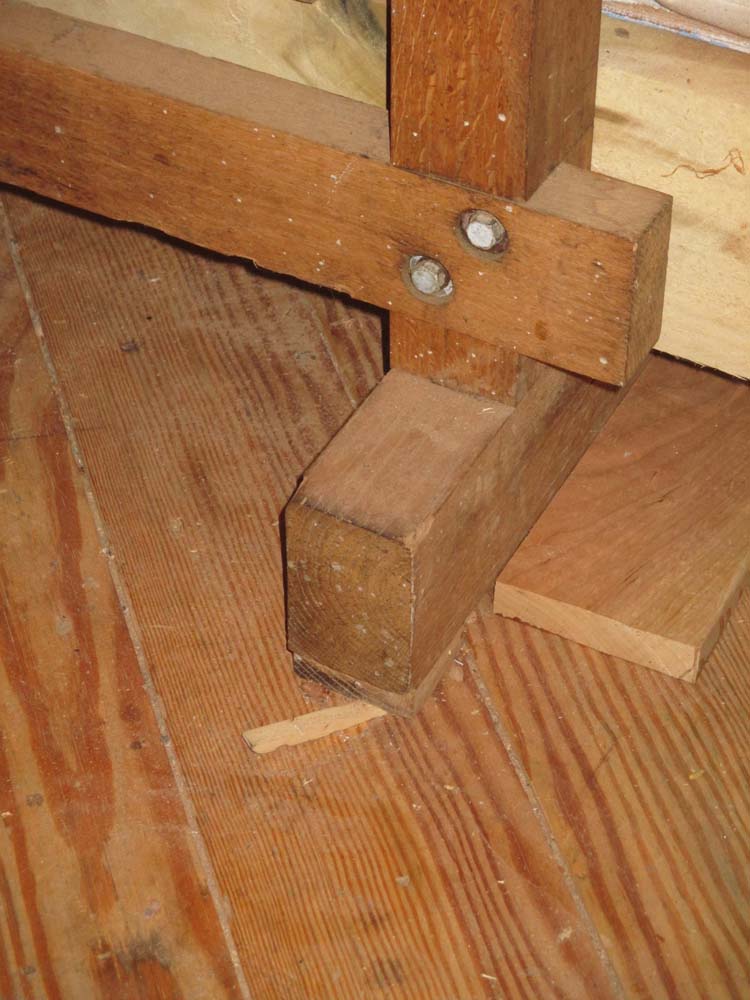
I’ve already written about the reconfiguration of one corner to more optimally serve as my bench for doing the “fussy” work I encounter frequently in the conservation and restoration of decorative artifacts, and increasingly the repair of vintage gun stocks.
Other issues have nagged me, and are now in the process of being resolved. The first of these was my inadequate space in a single location for the residence of my hand planes. I liked the space I had chosen, directly over the planing beam, but I needed to consolidate all my inventory, which involved several steps.

First, I started undertaking a serious evaluation of many of the planes marginal to my work, deciding what to keep and then tossing aside planes that took up space but were not part of my working regimen. Down they came and out they will go.

That cleared some space, but not enough. So, I added more shelving without adding more shelves. How? By simply doubling the depth of the shelves in situ. Why I did not do this from the git go remains a mystery. Then I removed the silly brackets holding my Stanley/Bailey planes and hung them on the wall.
Presto! The result is twice as many planes in the same visual space.
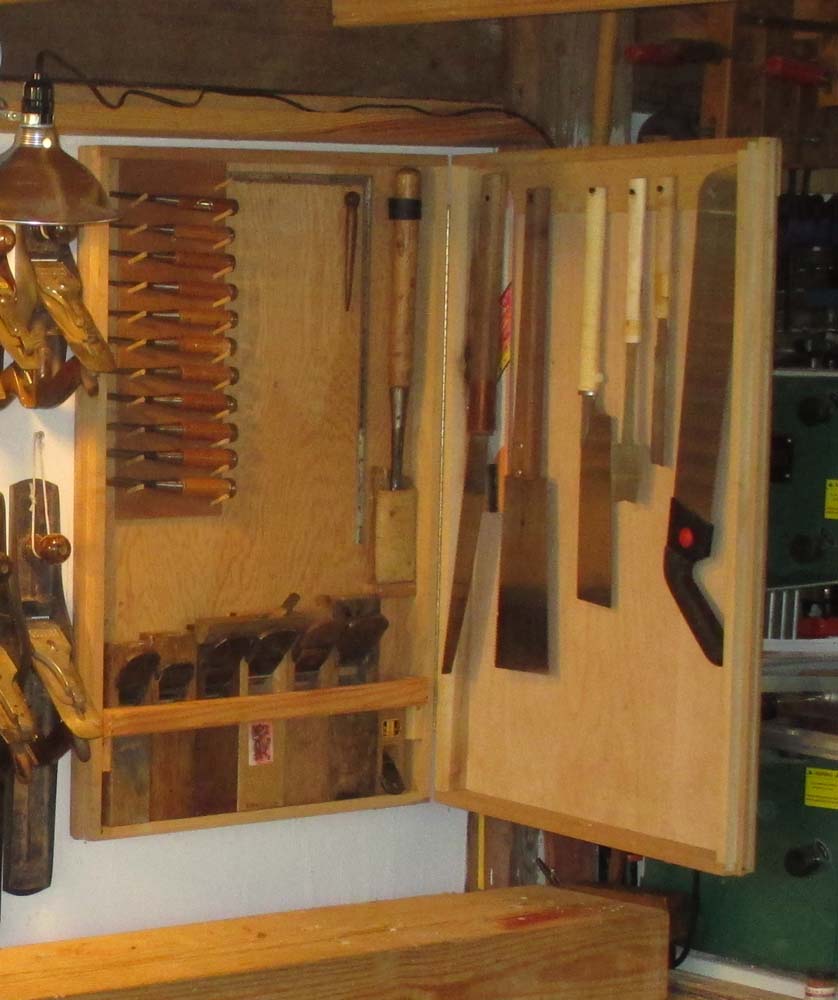
The next move was the consolidation and moving of my Japanese tools from a nearly inaccessible place on the east wall to a cabinet in the remaining niche over the planing beam. With saws on the outside and more saws, chisels, planes (and space for more on the inside) I am pleased with the result. (You needn’t scold me that I have the planes upside down in storage — I do not care)

Two final (?) issues to be resolved are the rat’s nest of a space halfway down the long north wall, which had become nothing more than a pile of stuff, some good, some less so, but all in the wrong place. This hodgepodge will be replaced in October when I build my Nicholson bench prototype for the rescheduled Refinisher’s Group bench-build (probably May 2016). This can serve as another work bench and my sharpening station.
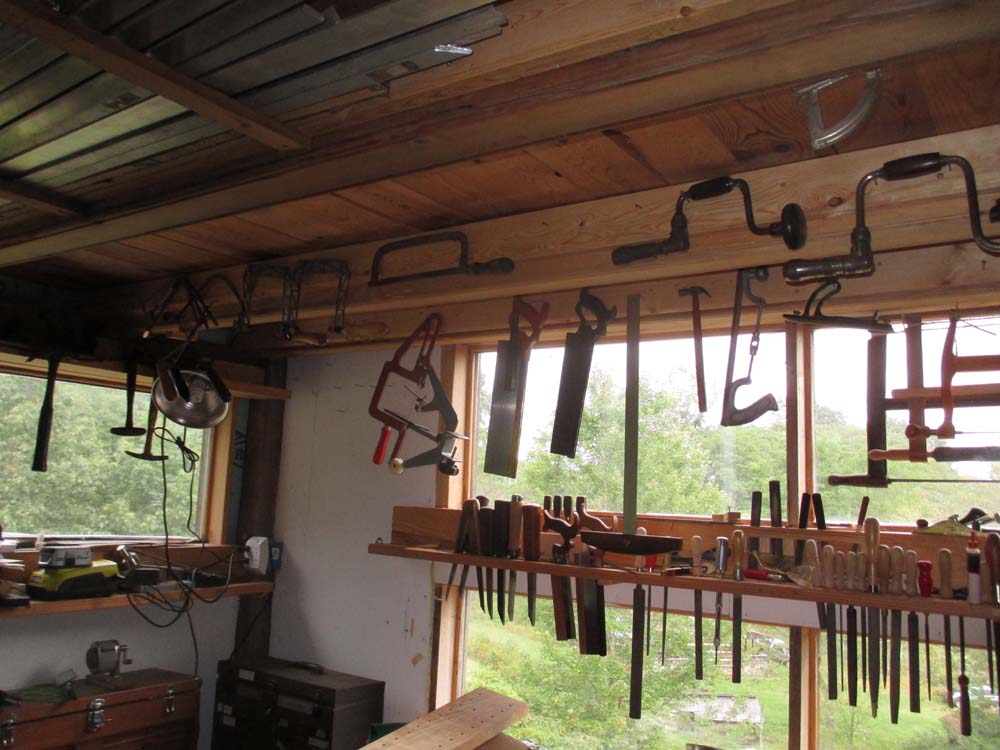
And I keep asking myself: with such a wealth of windows, why do I keep covering them up with stuff? Without a good answer other than, “Because you are an undisciplined slob,” I have begun to deliberately move many of the tools that were blocking the view to somewhere else, like alongside the overhead beams. That one will take a fair bit of trial and error to bring to fruition.
But I am determined to travel much less in the coming year or more, and pouring my time and creative energies into the barn and homestead. This will allow much in the way of improvements and I am anxious for them to unfold.
One of my favorite woodworking web sites is Stumpy Nubs, which I browse regularly. The other morning I was startled to see my face featured prominently, and followed the video link.
It did not take too many seconds before I was laughing out loud. Rose petals and dandelion fuzz indeed. Finally a news report that veers dangerously near the truth. Given the state of modern “reportage” (blogger and law professor Glenn Reynolds has characterized most “journalists” as activists with credentials) it is a relief to find an account bearing any resemblance to reality.
Thanks Stump!
Like many woodworkers, over the years I have compiled more tools than I need (shhhh!; fortunately Mrs. Barn does not read this blog much so she does not need to be made aware of this confession). It was often from noble impulses as I would see a nice tool that was way underpriced, and say to myself, “Let me get that and find a good home for it.”
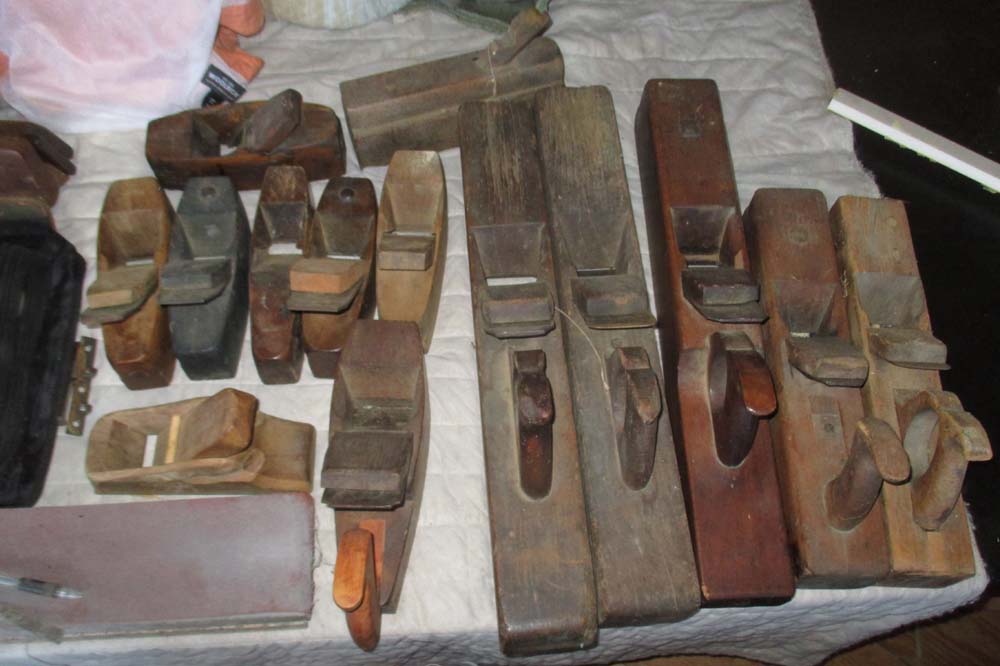
Regardless of the true motive, one undeniable fact remains; that “good home” was not to be my studio. There is no need for me to have several bushel baskets of tools that I do not and will not use. Some redundancy may be sensible, but do I really need six #6 Bailey planes? Or two dozen coffin planes? Two drawers full of bench chisels?
Over the past week I have been trying to impose, or at least, evolve some sort of order and organization to the barn studio. And time after time I would want to derive just the right spot for a tool or set of tools only to find that perfect spot was already full of boxes, bins, and tubs of tools.
So, beginning now and continuing through winter I vow to winnow my tool inventory, compiling a collection that I will sell, gift, or otherwise dispense. I will try to have a nice collection for sale at the Maple Festival in March, but otherwise will find places I can facilitate the parting of company., SAPFM Chapter meetings, etc., and if necessary get a table at MJD’s auction next summer. I am not going into the tool mongering biz– it is done far better by folks like Josh Clark, Martin Donnelly, and Patrick Leach, and others, and I will leave them to it — I am merely cleaning house.
Some tools will be, or can be made into, very nice “user tools.” For example, the #7 Bailey I bought recently for $15, with flaking varnish on the handles and a blade that has never been sharpened. Since I can sharpen fairly quickly it would be nice to get each edge tool presentable.
It will be quite nice to gain the space occupied by these tools, and hope they will do good work in the service of craftsmanship. In someone else’s shop.
And all I have to do is stop buying more tools I don’t need!
© 2024 Don Williams


Recent Comments