
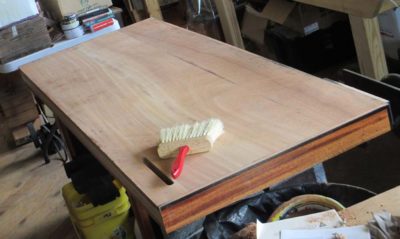
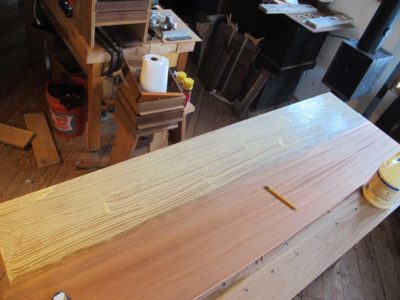
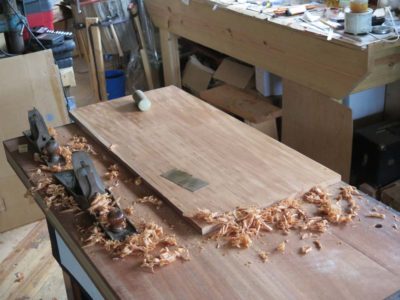
The replica workbench top continues apace. I got the top smooth enough (more about that in a day or two) to seal it with my preferred benchtop finish of 1/2 tung oil with 1/2 mineral spirits, and about 2% japan drier.
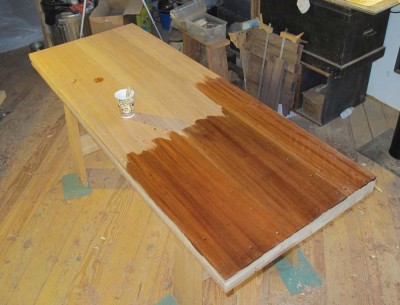
I like this finish as it soaks into the wood deeply and provides a nice robust seal to the wood.
For the exhibit the top will be pretty smooth, but once it gets back home I will achieve my preferred top surface by cross-hatching it with a toothing plane, a technique I learned from my long-time friend and colleague, and Roubo project collaborator, Philippe Lafargue. But for now it is nice and smooth.

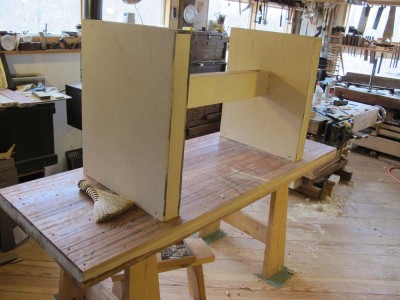
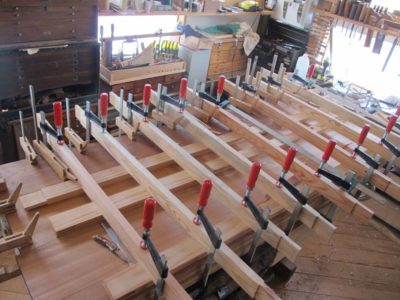
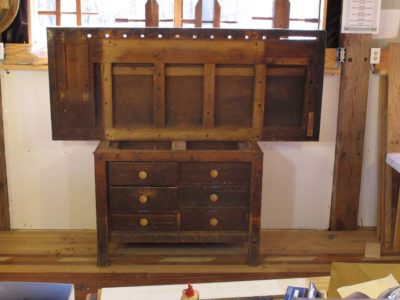
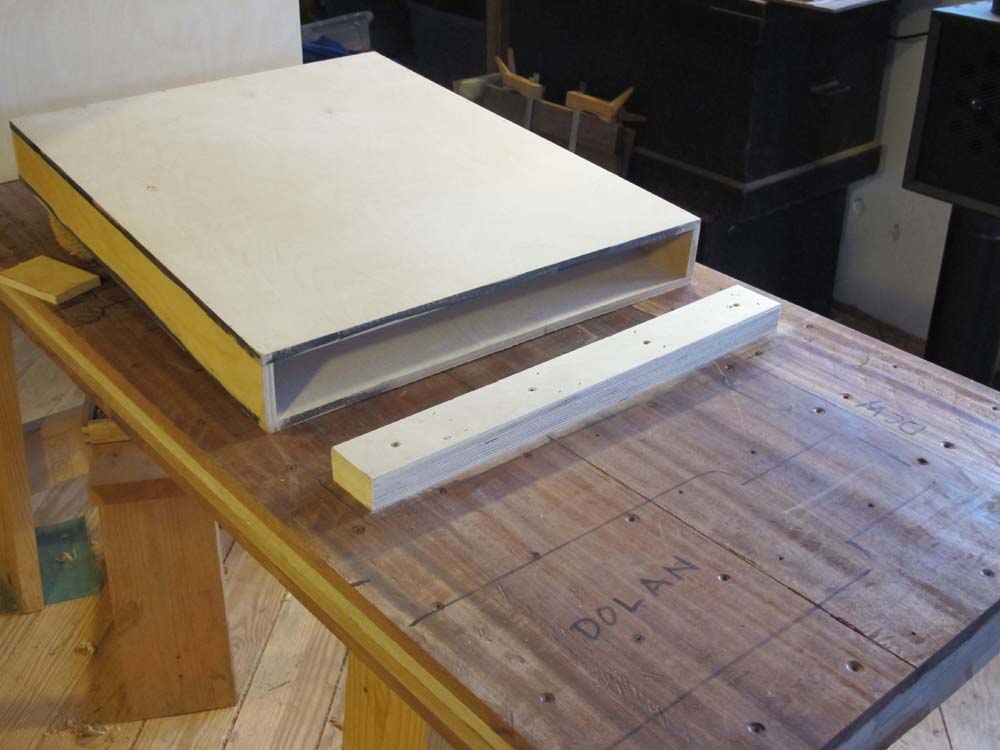
I fabricated the exhibit base for the top from three 1/2″ Baltic birch plywood boxes, fitted them to fastening battens, and temporarily assembled it in order to layout all six of the vises going on it for the exhibit.
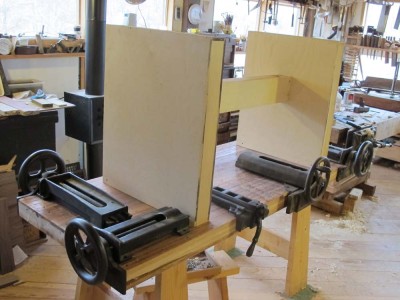
One of the beauties of this exhibit is that it may be the only time in their lives that patrons to a museum-quality exhibit will get the chance to touch and manipulate historic artifacts, namely the six vintage vises hanging from the new bench top.
===================================
If you would like to experience the bench top in person, and oh by the way see the entire Studley Collection, there are still tickets available here.
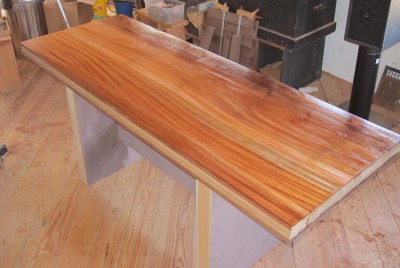
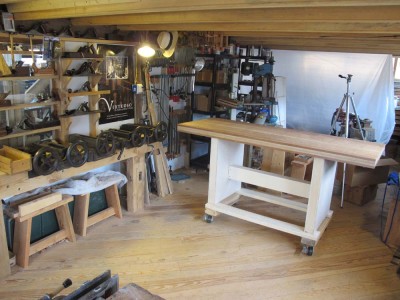
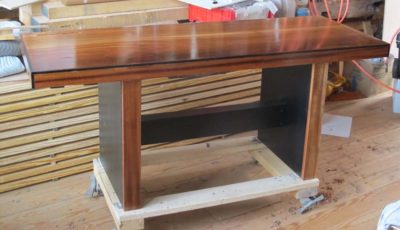
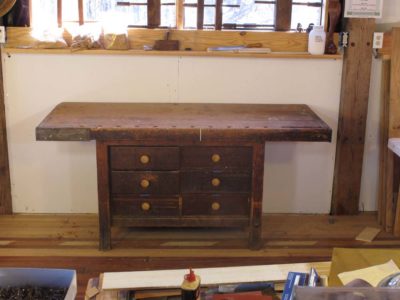
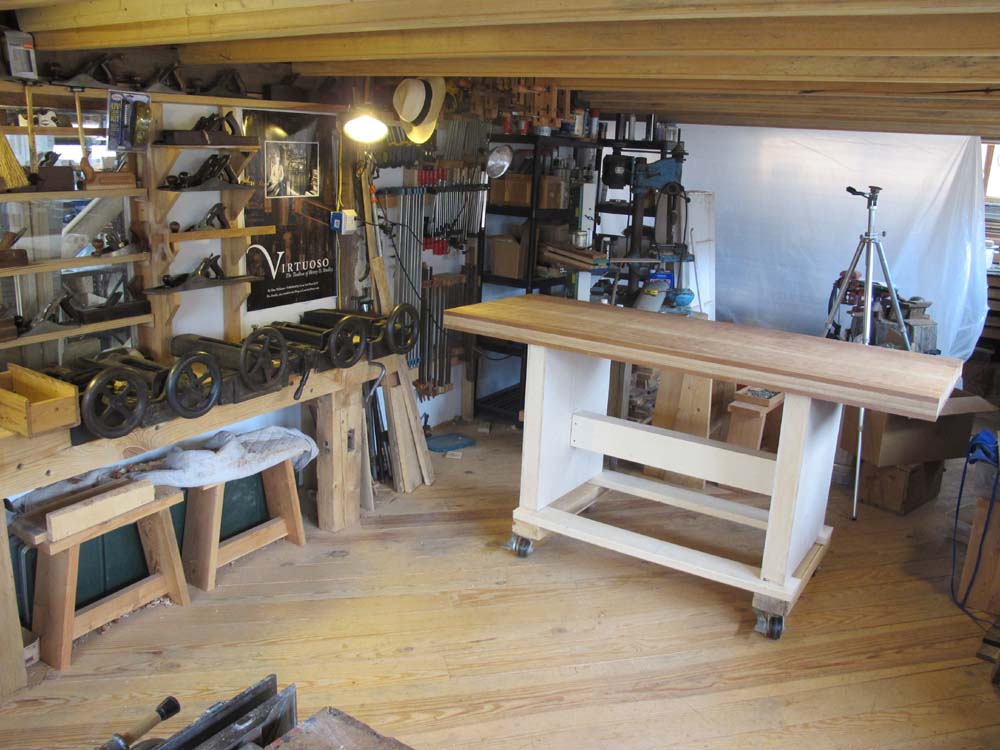
After returning home from the HO Studley exhibit and reassembling the pastiche workbench I changed my mind about completely rebuilding the base. Though the base I built originally was for the exhibit only, to display the construction of the top slab, I found that it was actually a pretty serviceable structure for the daily use of the top. All it needed was a little more bracing for longitudinal triangulation and it could go to work as an every-day workhorse.

I added a stylistically-appropriate skirt and sure enough it was ready to go. The large uninterrupted flat expanse of the slab made this a favorite for assemblies and related projects where the space was particularly helpful. There was the hole left from mounting one of the piano-maker’s vices for the exhibit, but I could live with that.

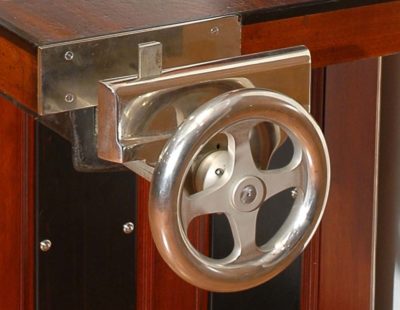
Thanks to the generosity of DrDan I had a piano maker’s face vise already in-hand, and augmented with the Shelton vise the bench could be configured to my liking, more or less. The wheel vise remained as installed in the exhibit picture, and the Shelton was used as the end vise.

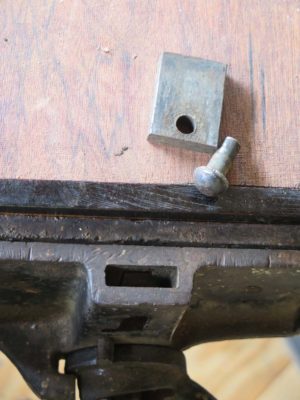
The only down side was that the top was thicker than the Shelton could accommodate in terms of the retractable dog in the moving vise jaw. At this point I had two options; excavate the underside of the bench slab or make and extended dog to project past the top surface. I chose the latter.

I disassembled the dog and replaced it with a new one fabricated specifically to work with the slab thickness. I made the new dog from rosewood.

Installed the vise works just fine, or as fine as a Shelton can. The bench is placed in the geographical center of my shop and gets used on a daily basis, performing its duties skillfully. That is, if an inanimate object can perform, skillfully or otherwise.

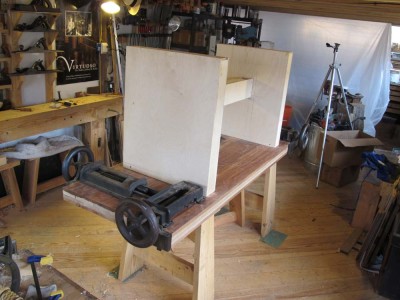
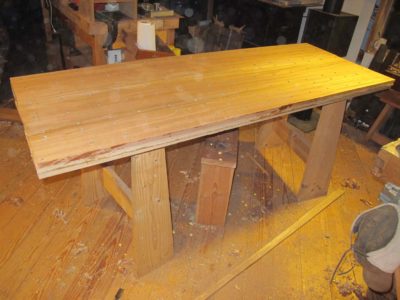
With the laminated slab top assembled the task at hand was to get the Studley bench pastiche ready for the May 2015 exhibit. The purpose of this bench was to show the to the exhibit visitors the construction method Studley used for the top (the top was the only remaining structure remaining from the original work bench) and to hang several vises analogous to those of Studley’s.
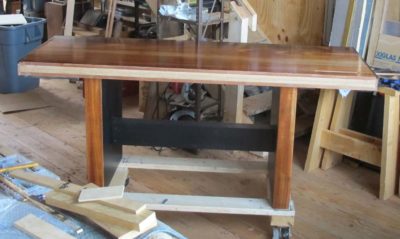
I fabricated a pair of torsion-box end “legs,” joined to the underside by a pair of box cleats, and fitted together with a stretcher adequate to the task of it serving as the exhibit element. I smoothed the top with planes and scrapers, and varnished it nicely for the exhibit; once back home that would be undone as it was a surface unsuited for real work. With the edge trim affixed to two sides to better elucidate the structure, it was ready to hit the road.
It served its role well in Cedar Rapids. Now it was time to get it back home and put it to work.
The main point of this bench was to replicate Studley’s construction of the top for display at the 2015 exhibit of the HO Studley collection in Cedar Rapids, concurrent with the 2015 Handworks event in nearby Amana IA. I had to guess at the details of the actual construction of the top since the owner of the Studley collection would not allow me to take a large core sample or cut a chunk out of the original workbench top.
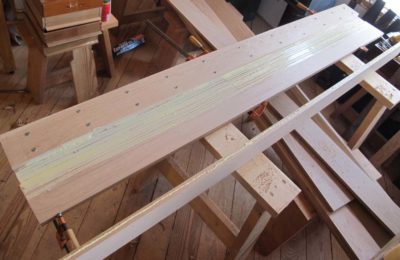

Being limited to the observations I noted last week I charged ahead The white oak I’d purchased from Jameel’s supplier was about the hardest stuff I have ever worked, it was rosewood hard. After coaxing it through my lunchbox planer I assembled the two core lamina using PVA glue and decking screws with washers. Assembling laminate structures in this manner was a technique from four decades ago during my time in the foundry pattern shop where we glued and screwed or nailed everything together so we didn’t have to use clamps. When it came time to sculpt the pattern for the molders on the foundry floor we went back and removed all the metal fasteners first.
I repeated the procedure for the underside face of the bench. C’mon, it was the underside. Who cares if there were dozens of screw holes? I know I certainly did not.
The show face consumed pretty much every clamp I owned in order to avoid the screw holes. In the end I had a terrific flat and stable slab, just like Ol’ Henry did. He was right about that, too.

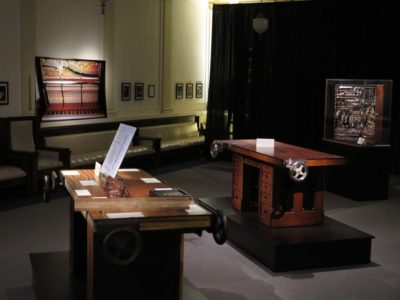
On my first trip to visit the HO Studley tool cabinet I was quite expectantly anticipating the absolute headiness of the experience of being in the intimate presence of this iconic artifact. The drive was a test of restraint as it was a long one and I had to reign in my excitement or I would be exhausted by the time I got there. It was all I could do to avoid the temptation of non-stop daydreaming that would splatter me on an underpass, or calling literally every woodworker I knew to ask them, “Guess where I am going?”
When I arrived and met Mister Stewart, and he ushered me into the room containing the tool cabinet, I literally felt tingles. Indeed, the tool cabinet and its contents were as amazing as I had psyched myself up for, hoping that I would not be disappointed. I wasn’t. But, much to my astonishment I realized that the workbench was every bit the masterpiece that the tool cabinet was. I won’t blow smoke up your shop apron and tell you I spent as much time examining and photographing the bench as I did the tool cabinet, but it was a lot more than I was expecting.
I cannot really see myself using a tool repository like Studley’s for my everyday work, but I definitely could see me using the workbench all day, every day. It was as you might expect from Studley, both ingenious and exquisite and all I kept thinking the day I drove from Studley to Cincinnati for WIA 2010 was, “I gotta make me one of these.” Eventually I worked through Chris Schwarz to acquire a slab of mahogany 4″ thick by 28″ wide by seven feet long to make the top.
I got the slab home and nestled into the barn awaiting the decks to clear so I could begin.
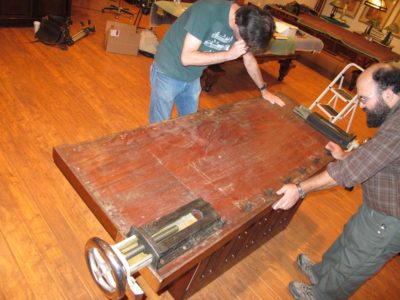
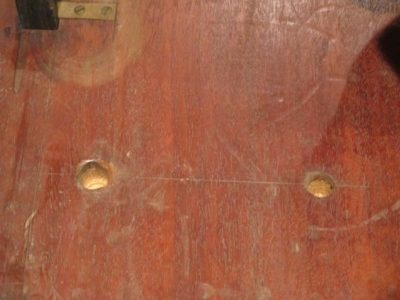
Imagine my surprise when on a later return visit to continue documenting Studley more fully and I was able to study the underside of the bench, and more particularly the holes into which the alignment pins from the under-bench cabinet fit, I discovered that the bench top construction was not what I had expected. Suddenly I had a giant mahogany slab available for another function; Studley’s bench was a laminated construction.
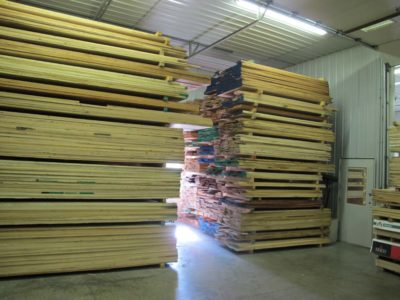
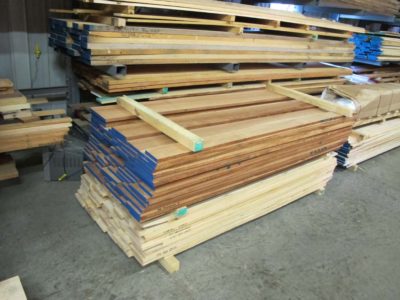
With Jameel Abraham I went to a lumber dealer he patronized and bought what I needed for the bench top. It was select white oak for the core and mahogany for the faces. Notwithstanding the “mahogany” was no such thing, at least I had materials to begin the replica bench to include in the exhibit.
Lest you lose any sleep worrying about the abandoned mahogany slab (it was true swietenia, not the phony pastiche that is often sold as “mahogany”), fear not. I have plans for it in the not-to-distant future.
Stay tuned.

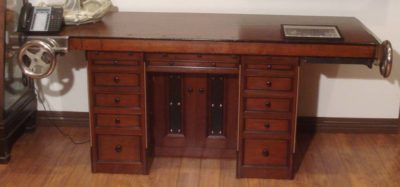
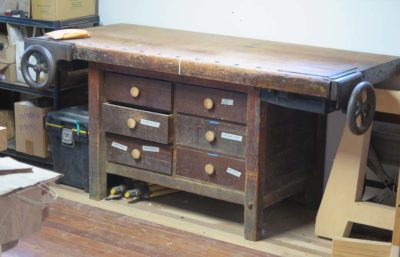
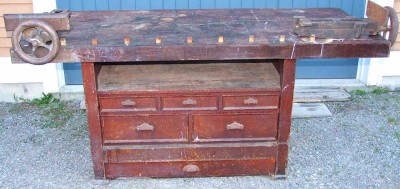
By 2013 the Henry Studley Express was roaring down the rails, building steam and speed with every day. I was driving on long trips to visit the original collection, other examples of similar benches and vises, and compiling research apace. I was almost at the saturation point when, on my birthday, I was contacted by a professor of furniture design who had a piano makers’ workbench that had outlived its usefulness for his work and he was considering selling it. That made for a very fine birthday! He had purchased the bench at a “going out of business” liquidation sale at a piano factory in the early 80s. From what he said, he thought the factory had been there since the 1890s. For years he had worked in designing hand-made furniture but in recent projects he was gravitating towards machine-made/manufactured furniture so his shop was transitioning to reflect these new interests.
We engaged in several rounds of correspondence as the portrait of the bench was clarified, and my interest in it grew by leaps and bounds. Eventually we arrived at a sale price we could live with. Three months after our first conversation I made the trek to upstate New York and picked it up. The drive home was so filled with delight and anticipation that it seemed to take a week to get there, but in reality it was not even a particularly long day of driving.
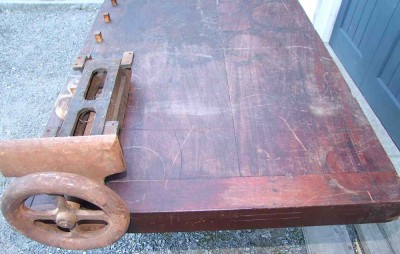
The bench was a modular unit; take off the vises and separate the base from the top and it was a manageable move by myself using a hand truck. In just a few minutes after arriving home it was ensconced in the barn.
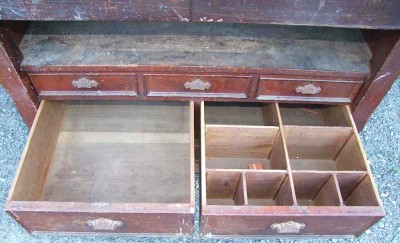
Studying the disassembled bench confirmed my premise that for the most part it was a manufactured work station, probably through the catalog from an unidentified industrial supplier. The base was a run of the mill cabinet that was cranked out for industrial and educational institutions by the tens of thousands, to be paired with a bench top of the buyer’s choice. Did the options include vises? I do not know. The top gives every indication of the same context, but is unmarked regarding its manufacturer.

Further, my investigation only heightened the mystery about piano makers’ vises; this pair, like all the others I have seen, was devoid of any manufacturer’s identifying marks. They were a pretty standard pair for this type of ensemble — a typical face vise that opens 15 inches and an end vise with an integral dog.
The bench has clearly had a lifetime of very hard use and was/is in dire need of a thorough restoration. That remains on the menu for this winter. But then, it was on the menu for last winter, too. At this point my goal is to install a new work surface on top of the well-worn extant one, getting the vises polished and perhaps plated (I located a nickel plating shop in Richmond, and Studley’s vises were nickel plated, so as an homage I must also, mustn’t I?) and making new bench dogs for those that are missing. I wonder what the odds are that the new dogs will be spring-loaded ebony blocks.
For now the bench serves well for students in the classroom but after the restoration I suspect it might get moved.
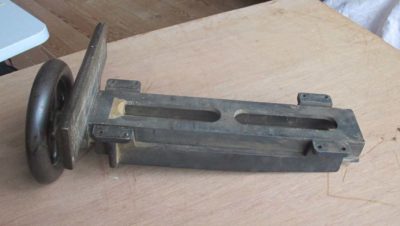
The original end vise from Studley’s bench. The rising dovetailed dog is the giveaway.
I was noodling around the interwebs recently, looking for any new images or information about piano-makers’ vises, (I am in the pattern-making phase of reproducing H.O. Studley’s vises) and came across the web site of Victoria Morozova.

Victoria is a Moscow miniaturist who was steered towards Studley by Bill Robertson, who is both a famed miniaturist himself but also a contributor to Virtuoso: The Tool Cabinet and Workbench of H.O. Studley. The gallery of her work on the bench is breathtaking. Give it a look.
PS – She also has a three-part step-by-step description of replicating (I think Jameel Abraham’s) Roubo bench. Prepare to be blowed away, real good.
I’m in the midst of a project with lots of hand planing (the client requested a small writing desk reflecting the style and technology of 2nd quarter 19th century) so I spent a little time upgrading both the planing beam and the faux Studley workbench.
My main issue with the planing beam was that the flat head screws I had installed as the planing stops were inadequate for the job. Even though they were #14 screws, they were modern #14 screws so they bent under hard use, rendering them useless as retractable pins. In exasperation I got them out and threw them across the room into the trash where they belonged. For a while I just clamped a piece of scrap stock on the end, which worked for some things but was in the way for others.
I decided to come up with a permanent and robust solution.
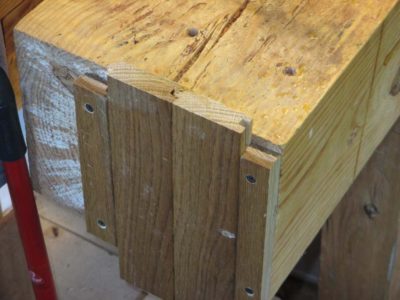
My intention was to make a rising stop that was housed on the end of the beam. A great idea and easy enough to do. Being lazy I found an even easier method than I had thought initially. Since I seem to be genetically incapable of throwing stuff out, when I was puttering around up on the fourth floor looking for some wood to use for the shelf underneath the Roubo bench I was making, I did indeed find two boxes of tongue-and-groove flooring scraps left over from creating the floor of the classroom. Scraps too small to use for anything. Not only did I have enough for a open slat shelf under the new workbench, but another couple of pieces were perfect for the new planing stop.
I made three 10″ pieces of the tongue-and-groove, glued two of them together and ripped one in half. These became the sliding stop and the shouldered housing. I held them against the end of the planing beam, affixed the shoulders with screws to the end of the beam and was making shavings seconds later. I must’ve taken almost six or seven minutes of my time to get it done.
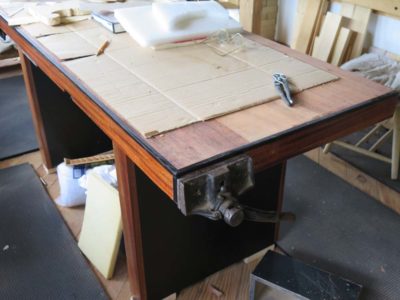
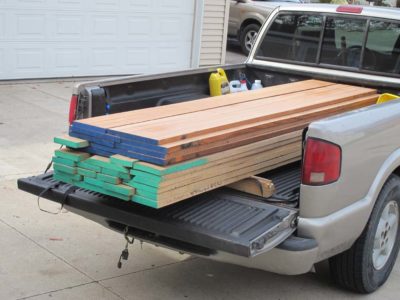
For this desk project I had to prepare some mahogany boards that were about 18″ wide so the planing beam was not the workplace of choice for getting them done. But, it was a perfect application for the broad expanse of the Studley slab I made last year. The only thing missing was an end vise and some bench dogs, so that was the task of the hour.
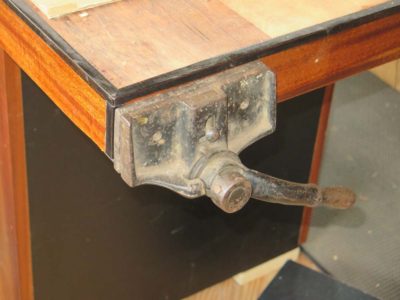
I mounted the Sheldon vise at the end location, but was hampered by the fact that the Sheldon was so small it did not come close to the top of the bench. (I was not confident the Sheldon would serve my needs so am resistant to the notion of excavating the underside of the slab until I know for sure.)
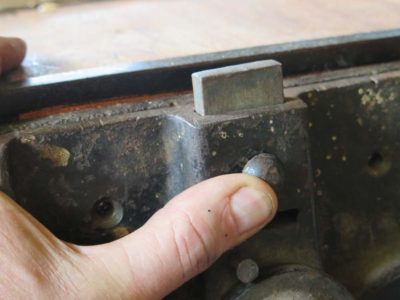
Even with the sliding dog in the fully extended position it only came proud of the top by about 1/32″, certainly not enough to work.

So I made a new dog out of some anonymous tropical hardwood I had in the scrap bin, and made it so that it was even with the top when fully retracted and almost 3/4″ proud when fully extended.

To pair with the new sliding vise dog I took my 3/4″ holdfast boring jig and drilled a series of six holes into which 3/4″ oak dowels were inserted. Works like a dream, but I am still not sure the Sheldon is up to snuff as the permanent solution. I’m still holding out for a piano-maker’s end vise, even if I have to make it myself. But that won’t be happening any time soon.
So for now my faux Studley workbench is fully functional and in heavy and fairly constant use, and the planing beam remains one of my favorite work stations.

You might recall my recent post about Ray Larsen’s piano maker’s workbench, probably with one degree of separation from Studley himself. Ray recently contacted me to let me know he was considering selling the bench to someone who would restore and use it. If you are interested in connecting with Ray about this bench, drop me a note via the “contact” button on this page and I will forward it to him.
I am an entirely disinterested party in this affair, seeking only to match a grand work bench with an enthusiastic new owner.
Knowing my interest in all things Studley, Patrick Leach recently sent me an email with the following:
It has a book-matched mahogany top with vivid grain, the mahogany is 1/2″ thick veneer.
It has a long slot for a sliding dog, but I don’t see any sign of that on the vise, nor do I see that it ever had one. All the other dog holes have their original dogs.
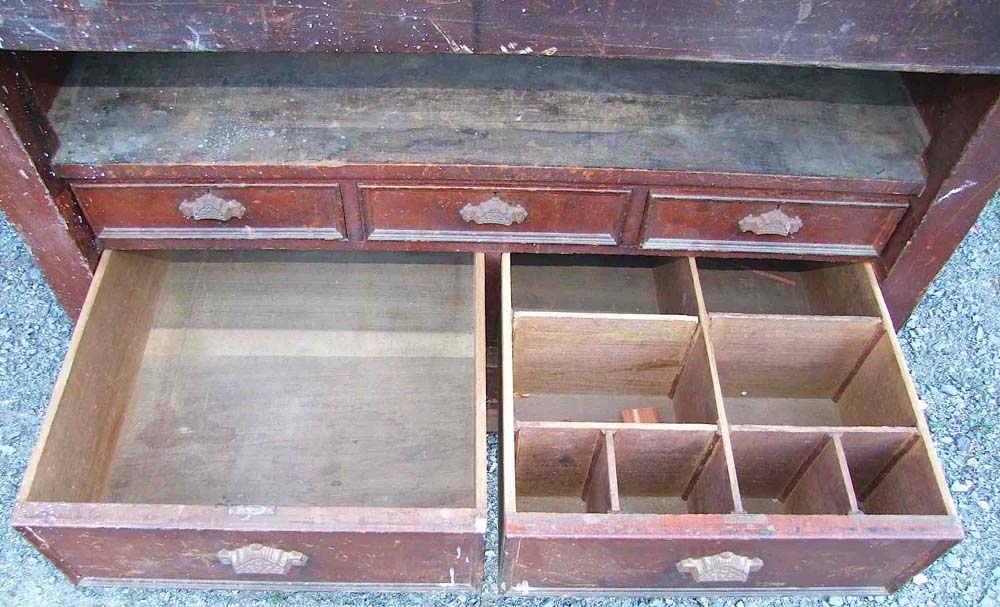
The open area under the bench top is odd. I don’t see that any front/drawer was there.
The vises are both original, and off the bench. Each is a different width and with differing length of travel. The fixed jaw is mounted on the top. The metal is japanned, though there is little left.
The top needs to be scraped, if you want to make the mahogany pop.
It was found near Lawrence, MA, another area for piano making. It’s older than mine. I’d guess it to be ca.1890.
And, it’s for sale! If you are interested, contact Patrick directly. His email can be found on this page.


Recent Comments