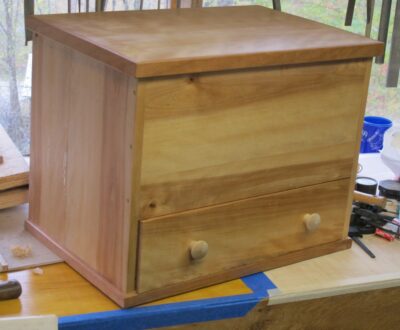
In preparation for his visit to me a couple months ago for us to build his black walnut split-top Roubo bench, Webmeister Tim got together with a woodworking pal and built a small toolbox which he presented to me as a gift. It’s 20″ wide x 14″ deep x 16″ high.
I had already decided to retire my traveling toolbox of the last decade-plus, a repurposed and augmented mahogany box originally made for housing a surveyor’s theodolite. Not that I will be discarding it, but for now it will serve as the repository for small-ish tools gathered for a little boy whose use of them will begin sooner than we can contemplate.
Back to the new box.
The box is exceedingly well-built and sturdy (read: heavy) and capacious so I need to be careful in outfitting it; I still have to haul it to wherever I am working away from the barn. As to the space inside, I will be tricking it out to have lots of sub-sections and fittings to hold the tools I might need to accomplish a full range of woodworking tasks while away from Shangri-la.
To that end I will be spending many hours over the coming weeks to make of its interior what I want and need. Probably not as obsessively as did Henry Studley with his tool cabinet, (our only “profile” of Studley is his tool cabinet and based on that I would guess he was wrapped pretty tight) and certainly not as elegantly — there will be no ivory, mother of pearl, or ebony fittings –but I will have stops and starts as I compose the interior of the box. I will of course be musing silently and not-so-silently about Studley and his interior layout for his preposterously magnificent opus.
Stay tuned on that.
As for the exterior of the box I am undecided. Do I make it a canvas for fauxrushi, or French marquetry? Decisions, decisions. At the moment I am contemplating leaving the recto of the lid alone to let it serve as a work surface.
Thanks to Webmeister Tim’s generosity I have a delightful puzzle to solve.
While rummaging through the closet I came across a small stack of the postcards I had made for the original Studley Exhibit during Handworks 2015. They will not be advertised nor on display in Amana, but if you want one and come up to me in my booth and ask sotto voce for “the post card” I will give you one, until they are gone.
After three years of near-drought conditions (twice last year, once the previous year) I am suddenly deluged with opportunities to teach and present this year. In addition to those I have previously mentioned, there will be a third Historic Woodfinishing workshop, this one at the Barn(!), commissioned by the regional chapter of the Society of American Period Furniture Makers. They’ve had a month to get their members into the class and now I can open it up to the general audience for the last couple of slots. My neighbor is coming over this afternoon to help me rearrange the classroom and move some workbenches down from the fourth floor.
I’m also going to be the banquet presenter for this year’s Annual Meeting of the Early American Industries Association, speaking on the topic of the incomparable Henry O. Studley tool cabinet and workbench.
I even declined a gracious invitation to teach out on the West Coast and another out in the Heartland, but my days of that kind of travel for teaching are over.
When it rains, it pours.
So, here’s what my upcoming teaching/presenting schedule looks like:
April 12-14 Historic Woodfinishing 3-day workshop for the Howard County Woodworkers Guild, Columbia MD
May 20 The H.O. Studley Tool Cabinet and Workbench banquet presentation for the Annual Meeting of the Early American Industries Association, Staunton VA
June 19-21 Historic Woodfinishing 3-day workshop for the regional chapter of the Society of American Period Furniture Makers, at the Barn
July 17-19 Historic Woodfinishing 3-day workshop at Wood & Shop, Earlysville VA
August 21-23 Introduction to Parquetry 3-day workshop at Wood & Shop, Earlysville VA
September 1&2 Handworks 2023, Amana IA (yes, I know this involves long-distance travel but I’ve been committed to this for several years)
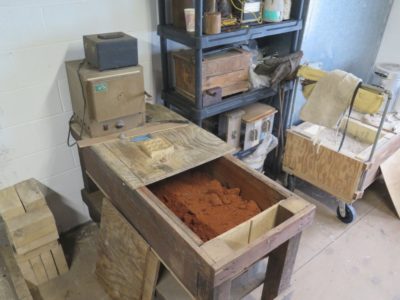
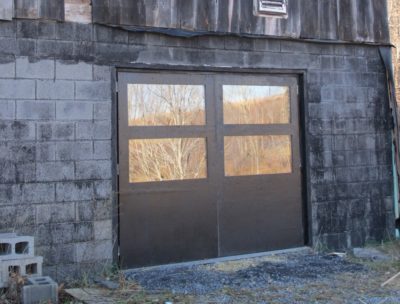
Now that I have the foundry set up on the first floor, I really have no excuse to not start metal casting. Well, except for the need to refabricate the large entryway, allowing me to roll out the smelting furnace from the interior space.
It might be just fine having a thousand degrees worth of hot indoors with a wooden floor above, but I would rather not test that hypothesis as a starting point. Perhaps if there is a streak of ultra-mild days upcoming (it’s been unseasonably warm thus far this winter) I can get that task done.
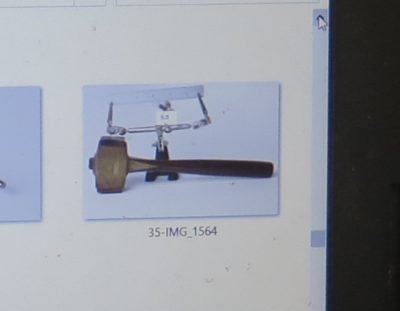
To be sure the first project on the slate for the foundry is to move forward with replicating the infill mallet from the Studley Tool Collection. Having that prototype in-hand would be a great excuse to revisit the collection itself, to compare my replica with the original. Obviously, Mister Stewart gets the first unit off the non-assembly line, should he want it.
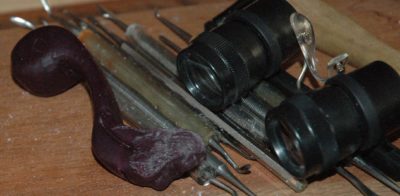
Right behind the Studley mallet in the queue is my finger plane project, with its thus-far three models underway. I started working on these models 15 years ago if the date stamp on the images is correct. I do not need these tools from a utilitarian perspective, but I do need them from a creative one.
Once I get the foundry humming along as a routine activity there is no telling what I can imagine making.
As my Year of Metalworking unfolds I am drawing on lessons from my far distant past. About forty years ago I started a stint working with Don Heller, Silver Objects Conservator at Winterthur Museum. A gruff, curmudgeonly fellow with a heart of gold, Don spent a lifetime as a traditional silversmith before coming to the museum. While most of his job was caring for the stupendous collection of silver artifacts in the museum, a much smaller component was teaching the graduate students of the University of Delaware Art Conservation Graduate Program (I was the first recipient of the undergraduate degree from the same program). Don was constantly vexed by a student or two who only wanted their projects to be, “shiny, not finished.” By this he meant that they wanted to short-cut the process instead of working systematically through the time honored practices of moving deliberately through the steps of getting from Point A to Finished. Instead they would simply make it “shiny” while leaving behind all the marks of the intervening processes, marks that needed to be removed in order for it to be “finished.”
I am once again reviving those lessons from Don in working the shell castings for the Studleyesque infill mallet heads. When they arrive the side surfaces have been cleaned of their cast texture, but that is just the starting point for me. (NB – My assessment of Studely’s original is that the surface is essentially straight from the sand mold, lightly cleaned. Whoever cast the shell was a genius.)
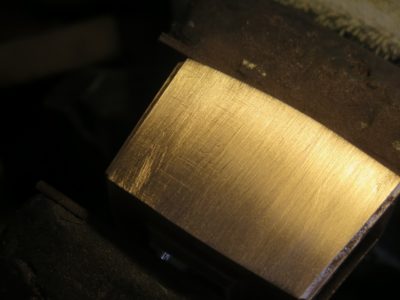
Harkening back to Don’s instructions I step through ever finer abrasive papers to get to the point I want. I do this by first using 80 grit working perpendicular to the pattern left by Bill Martley in his cleaning of the original casting. When I get to the point that none of the original “direction” from Bill is evident I can move to the next step with a finer abrasive.
Then I switch to 150-grit paper, working perpendicular to my 80-grit pattern until all the 80-grit markings are eradicated.
Then 220-grit, perpendicular to the 150-grit until all the 150-grit tracks are gone.
Then 320-grit.
Then 400-grit.
Then 600-grit. And all the evidence of the previous steps has been eradicated, but that absence is proof of their being executed. Finished, not Shiny.
At this point the surface is ready for my final treatment of it.
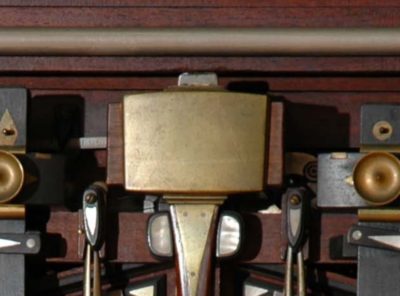
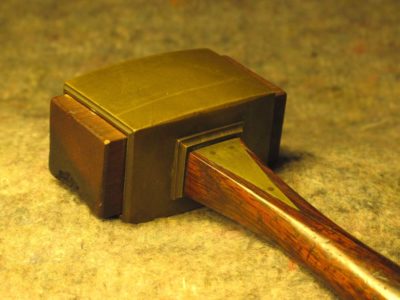
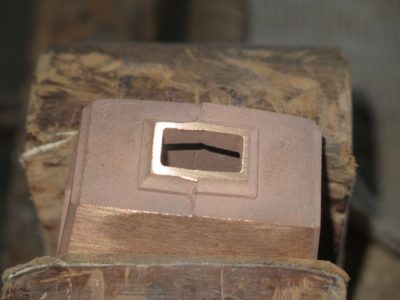
One of the challenges to replicating Henry O. Studley’s incomparable mallet is obtaining the surface texture when it is all done and finished. As someone who comes out of the foundry trade myself I can only shake my had in amazement at the shell he used in his mallet. There is no hint of who produced the brass casting, all I know is that is was provided by a virtuoso. Hmm, that sounds like a good title for a book about Studley. When I originally saw the mallet in person I thought that it was like many of the “finished” casting for the foundry where I worked; the pieces were cut off the sprue tree, ground and filed, then tossed into some sort of bead blaster to achieve a final surface.
However, once I got really up-close-and-personal I realized that was an unlikely proposition as the shadow of the parting line from the casting was still evident, about 1/3 up from the bottom. Abrasion blasting would have almost certainly removed that evidence. Thus I am left with the possibility that the shell casting used by Studley was essentially straight from the sand mold, at least in regards to the surface texture.
As nice as the new castings from Bill Martley are, they are not of the same quality as Studley’s (to be fair to Bill I have never seen contemporary sand castings of the quality evident in Studley’s menagerie) and the surfaces need to be worked extensively by hand to eventually get to a similar place, at least aesthetically.
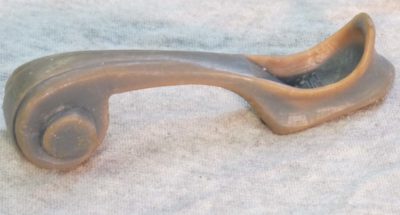
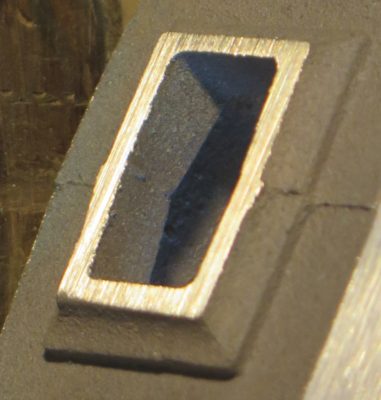
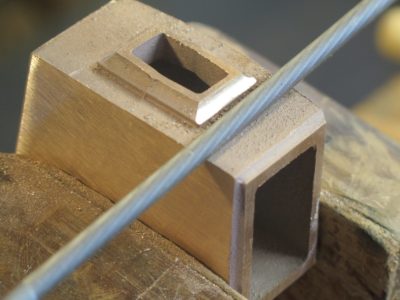
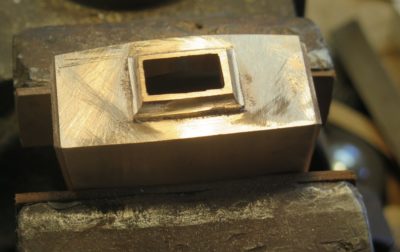
I already referred to establishing the cove profile with a 1/4″ chain saw file, and then cutting the flat edges of the same elements with barrette files I bought from Slav the File Pusher at Handworks last time.
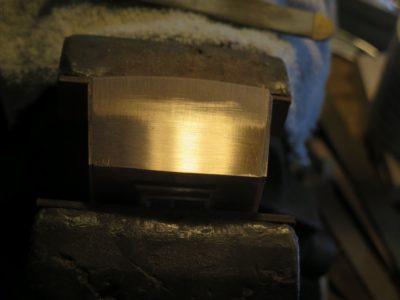
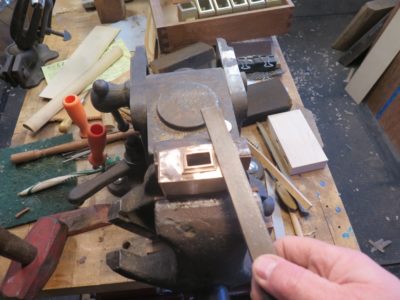
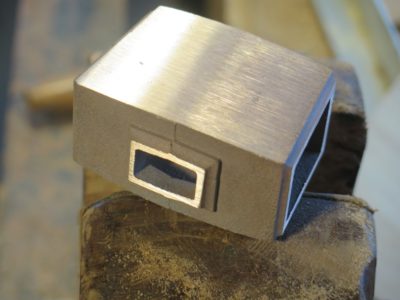
I then proceeded to work on the top and bottom of the mallet shell around the square collar, an always challenging proposition when trying to achieve uniformity on a surface that is not uninterrupted. The first goal is to get everything flat, working parallel to the sides of the rectilinear collar. I did this mostly with a small-ish mill file on which I had removed the teeth on one edge to as not to continue cutting where I did not want to cut.
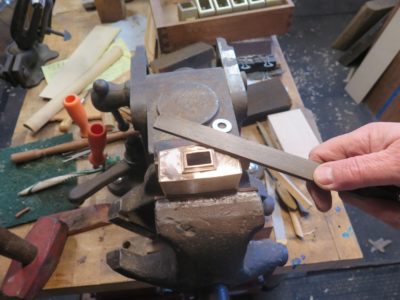
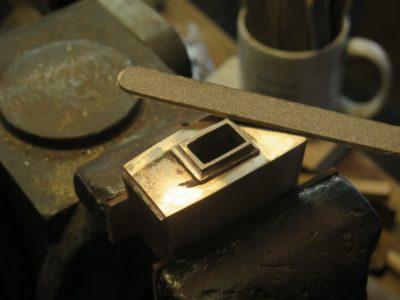
Once I got to flat I began to work with sandpaper sticks to begin reducing the tool marks left by the file. I literally used them flat, “rounding the corners” on the shell surface, working my way from 120 grit up to eventually arrive in the neighborhood of 600. The ultimate goal is to achieve a surface that has as little character as possible.
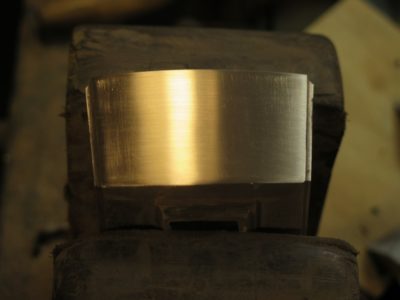
At that point the workpiece is ready for some additional contouring before the final surface treatment. The real design/detail genius of the Studley Mallet is that the primary corners are sharp at the faces of the mallet but quite rounded at the center point of the arc where two planes meet. I’m thinking that might be a seat of the pants exercise. I also began to work on the openings for the infill and handle.
Next time – working the surfaces of metals to “done.”
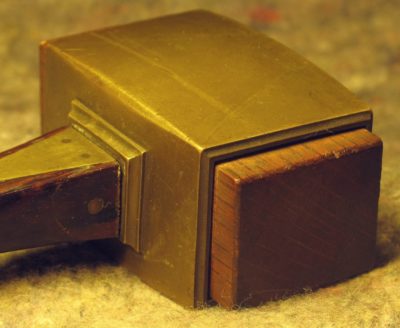
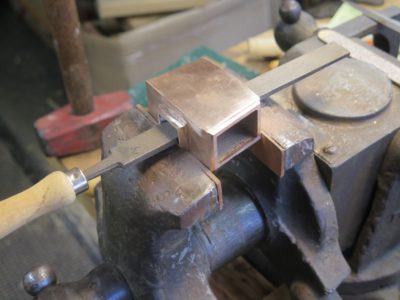
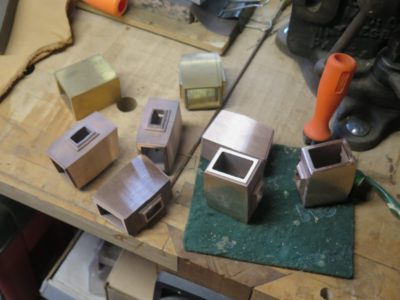
I was recently alerted to the ongoing project by foundryman Bill Martley to replicate the shell castings for the beloved mallet of Henry O. Studley. Well, beloved to me at least. Bill and I corresponded and I ordered the raw castings in his original alloy, a red-ish bronze. You can tell the coloration difference between Bill’s castings and the brass shells I have worked on in the past.
The castings are quite nice and I am working through finishing them to make myself a mallet or six. The amazing thing is that Bill got the pattern really close to the original, without even having access to the Studley book! He said he was relying on pictures I posted on this blog. I sent him a copy of the book as part of our transaction, so he can move forward with the definitive information in-hand.
Bill has been selling these rough castings through his Instagram page, mystic_pickers. If you are interested in acquiring one of the rough castings from Bill you can contact him directly through the Instagram page. If there are hiccups let me know and I will check with him to see if he wants me to post his contact information here.
Since the color of the alloy is wrong for me I have ordered two addition sets of castings from Bill with yellower alloys to see how they look and work.
At the same time I have been tinkering with my patterns for casting the mallet shells myself, just because. (I am determined that 2021 will be a year of metal casting at The Barn with several projects in the pipeline) Once I get the patterns to a point where I am satisfied I will cast them in both silicon bronze and brass in the barn. Since I have the detailed information based on my many examinations and with the blessing of Mister Stewart I am confident that the end point will be successfully achieved. (Let’s just keep it between ourselves, but my ultimate goal is to have finished “authorized” mallet replicas for sale at Handworks 2021.)
I’ll be recounting the project from my end as things proceed and I hope you will enjoy the ride.
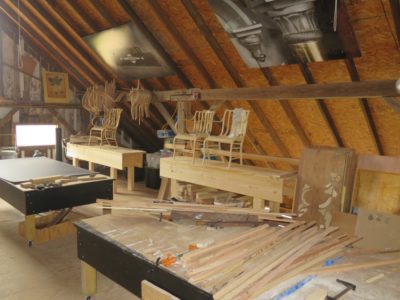
With all of the steam bending done for the Gragg chair workshop John and I spent a little time reorganizing the attic of the barn, now with only the months of waiting for the students to arrive. One more workbench to move across the room and it’s all done.
Yes, we hoisted one and made two new benches and began to place them around the perimeter of the space. At almost a thousand square feet it is a grand luxury for any workshop, and I have only Mrs. Barn to thank for it. I had intended to leave the level of the barn un-floored, but she recommended, correctly, that if I did lay down floor I would find it immensely useful She was correct, again.
So, at the workshop every participant will have a fully outfitted bench plus half of a 4′ x 8′ assembly table on wheels, which are themselves re-cycled platforms for the long-passed Studley exhibit.
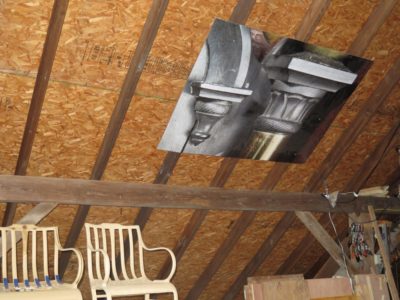
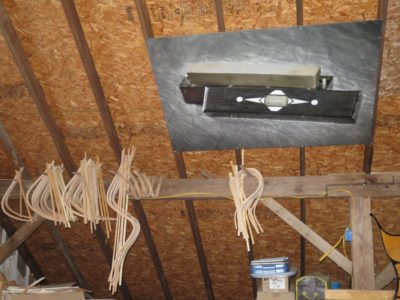
One final decorative touch was to tack the graphic panels from the exhibit over the benches. Whether these inspire or intimidate is yet to be determined.
I’ve still got a few left, awaiting new homes. If there are any more in a week I will just put them in my traveling store and hand them out at upcoming woodworking events. – DCW
Thrashing around my “mail” closet I came across a stack of leftover postcards I had printed in 2014 to promote the then-upcoming exhibit of the H.O. Studley Tool Cabinet and Workbench I was creating for the following May.
Rather than simply throw them away or use them for notes to myself, I decided to make them available to you for free until they are all gone. I guess I could make some charge, but that seems like too much trouble to me.
So, if you would like one of these cards to post on the wall next to your tool cabinet just drop me a note and I will send you one for free (make sure to include your mailing address!). If you feel compelled to compensate me you can buy me a cup of tea or a brownie the next time our paths cross.
I’ve still got some of these left so I am re-posting the offer.
Thrashing around my “mail” closet I came across a stack of leftover postcards I had printed in 2014 to promote the then-upcoming exhibit of the H.O. Studley Tool Cabinet and Workbench I was creating for the following May.
Rather than simply throw them away or use them for notes to myself, I decided to make them available to you for free until they are all gone. I guess I could make some charge, but that seems like too much trouble to me.
So, if you would like one of these cards to post on the wall next to your tool cabinet just drop me a note and I will send you one for free (make sure to include your mailing address!). If you feel compelled to compensate me you can buy me a cup of tea or a brownie the next time our paths cross.


Recent Comments