My first task on undertaking the actual hands-on treatment was to see to what degree I had the pieces in-hand, and how well they fit together. It was my ardent, and ultimately unfulfilled, hope that with a little “undoing” of the previous repairs followed by simple reassembly and the project would be done. It was not to be, alas.
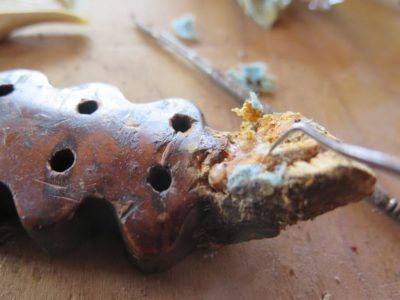
The most readily evident focus of this effort was to “unpack” the broken neck of the lute and the adjacent left hand. This was not particularly simple as I would estimate there had been 5-10 repair campaigns on just this area alone. At least two of these attempts involved the use of a home made wood putty consisting of wood dust and PVA adhesive, used liberally. Someone(s) had evidently seen some advertising about PVAs and figured if some was good, more was better. There was yellow glue goo all over the place.
My favorite technique for removing PVA when integral to a fragile surface, which given the vast number of fractures and repairs these gluing surfaces were, is to soak the offending material with Safest Stripper from 3M, a water-based di-basic ester solution with extremely low volatility and an affinity for polymerized synthetics. In other words. perfect for softening hardened PVA.
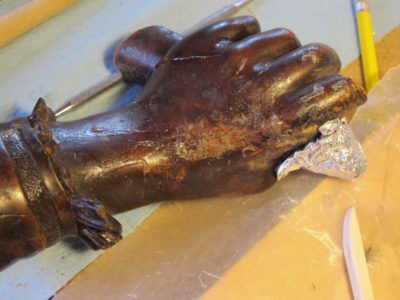
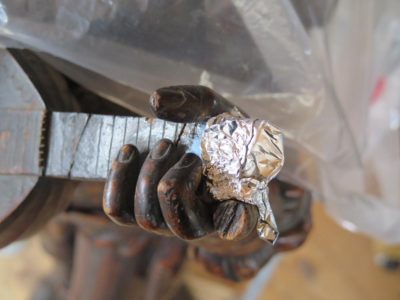
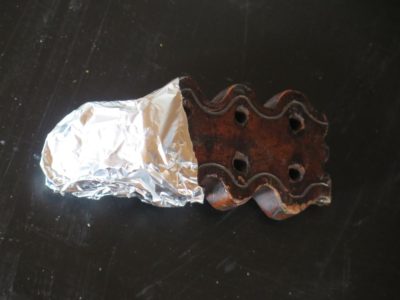
So I slathered on the Safest Stripper on the affected areas, wrapped those areas with aluminum foil, and walked away for three weeks. Yes, I said three weeks. Conservation is not an undertaking for those without patience, whether it is the practitioner or the client.
After three weeks I opened it up and the glue mass was still a little too stiff, so I repeated the process, applied more Safest Stripper, wrapped it with aluminum foil, and set it aside for another three weeks.
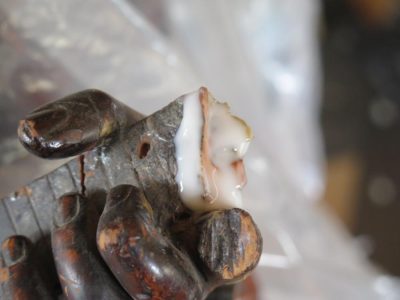
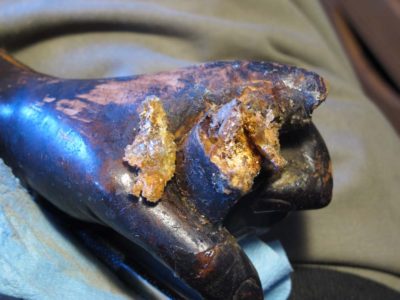
This time when I opened it everything was ready to go. The glue had been thoroughly penetrated with the DBE and had the consistency of very stiff taffy. With dental tools and a gentle tough it came out literally in chunks, but since the material had been softened and loosened from the wood fibers, there was minimal disruption of the gluing surfaces.
One of the characteristics of DBE is that it has a barely-above-zero volatility but it is nearly completely water soluble so it is imperative to flush it out of the fiber matrix before proceeding. I placed damp cotton wadding in contact with the gluing surfaces, changing the wadding out every day for about a week. A the end of that time I let it sit to see if it would dry nicely (the evidence that the DBE is absent), which it did. This told me it was ready to proceed to the next steps.
It is worth noting that while this had been ongoing, other processes were underway as well. Hence, though I am recounting this project in a linear conceptual method, in reality there were other portions of the treatment “in process” so some of the photodocumentation might seem confusing at times, but stick with it. We’ll get to the end without any career-ending injuries, I promise.
A topic that I covered during Groopstock 2014 and emerged again at Groopshop 2016 is dealing with active insect infestation in furniture or other wooden artifacts. By request here is my protocol for dealing with such an issue.
If you determine that there is an active infestation – the presence of frass, a granular excrement and wood pulp mix in tiny pellet form (it often looks like very fine sugar except it is tan in color), or pupal exit holes the walls of which are the color of fresh cut wood – then there is little choice but to address the problem.
Generally the first option is often to find an exterminator who has a vacuum chamber large enough to place the infested artifact en toto (if part of it is infested, you have to assume everything is infested, and you should be suspicious of anything sharing the same uninterrupted space of the object in question) so that it can be impregnated with vaporous poisons like ethylene oxide or sulfurofluoride, or whatever is the toxin of choice these days. I do not draw on this world any more and have lost track.
But there is another low tech, inexpensive, easy, and low-toxicity-to-humans method that works in a large range of applications: impregnation with liquid glycol solutions laced with borate complexes. I have used this method for going on a decade and am very pleased with it.
The ingredients are simple. The liquid required for this is RV/marine anti-freeze sold just about everywhere. Heck, here in the hinterboonie village closest to me there are at least a half dozen places to get it. The second ingredient is BoraSol WP, a disodium octaborate tetrahydrate powder I purchase from Quality Borate Company in Cleveland OH. Ordering through their on-line store www.qualityborate.com is a snap. I bought a 22.5 pound case, which is enough to make over thirty gallons of insecticide.
The only tools you will need to mix and apply your home-brew insecticide are a 1.5-gallon plastic bucket, a paint stirring impeller from the hardware store, a drill to drive the impeller, an 8-ounce paper cup, and an inexpensive pump sprayer. If the circumstances require them, you can add dropper pipettes or glue syringes to the kit.
The borate powder must be agitated in order to disperse it fully into the glycol anti-freeze liquid. Heat helps, so I usually set the jug of anti-freeze in the sun for an hour or so to get it nice and warm, then pour the gallon of it into the plastic bucket.
Into each gallon I put two 8-ounce cups of the borate powder, which amounts to about 11 ounces of borate by weight, and fire up the drill and paint stirring impeller. I agitate until the solution in the bucket is clarified. It is now ready to use. You can adjust the overall size of the batch but the ratio should stay the same. For a gallon, I use two 8-ounce cups (5-1/2 ounces by weight per 8-oz. cup) of dry borate. For a half Gallon, use a single 8-ounce sup. For a Quart, use a single 4-ounce cup.
Note: the shelf life of the mixed borate insecticide solution is pretty short, I make a point to use it within 24 hours.
Using a brush if appropriate, or a sprayer, saturate the wood with the solution. You are now done. Really. All you have to do is set it aside and wait for it to dry, which should be a day or two. I have systematically sprayed all of the timbers in The Barn until they are dripping wet in order to eradicate any critters burrowing inside the wood (or fungi), and mitigate any future attacks.
Obviously for furniture you may not choose to literally douse the piece with the glycol/borate solution as it might affect any decorative or show surfaces, or lift veneer, etc. Besides, when left on a coated surface the glycol solution gets pretty sticky as it dries. If you have a piece of furniture you might consider applying the solution by brush to all the underside or backside surfaces (essentially everywhere that is not a presentation surface) and count on the fact that the glycol/borate solution wicks like crazy. Depending on the species of wood the solution can travel 4-8 inches across the grain, and 4-8 feet (!) along the grain. If swabbing, brushing or spraying does not fit your needs, you can even use droppers or syringes to inject it into the exit holes, as long as you do it adequately to provide the necessary concentration of the solution into the wood matrix. You can remove any excess solution by simply wiping the surface with paper towels or cotton pads, followed by a pad dampened with distilled water, followed by a dry pad.
***Make sure to test this on an obscure surface of your object to make sure it does not harm the appearance!***
Note: Any materials treated with borates are no longer glue-able with PVA adhesives as borate, including borax itself, is a gelling agent for PVA. Adding borax to diluted PVA is how kids make “slime” in science class. To my knowledge and by my experience and observation the borates do not interfere with any adhesive processes employing epoxy or hide glue.
The “official” option for following the same application procedure is to employ a fine product known as BoraCare, which is purchased as a concentrate and diluted 1:1 with warm water and used in precisely the same manner as I described above. I have used BoraCare in the past with great success, but at about $100/gallon for the concentrate (or $50/gallon for the application solution) I switched to home-brew once I needed many, many gallons of insecticide for the barn. The comparative cost is home-brew is about $8-10/gallon for application solution.
I will soon try to recount my process for the anoxic insect eradication technique we used in the museum field and is also applicable for many shop situations.
For the past many months I have been working off and on to conserve a group of three artifacts including a mid-19th century Italian sculpture and this post will present my starting point so you can have a reference for subsequent accounts of the progress. I will follow this over the next coupe of weeks or so with several posts about the objects’ conservation, including detailed descriptions and recitations of my rationale and approach for the processes I used. I’d hoped to get this wrapped up last fall, but being out of commission for six months certainly messed up life’s schedule. I recommend you not inflict a major injury on yourself as it is a major nuisance and fairly unpleasant to boot. I am still busier than ever and do not expect I will be accepting any new conservation projects until next summer.
This sculpture was a new addition to my client’s collection, and he acquired it with some extant damage. His request for a referral was passed on to me by a former colleague at the Smithsonian American Art Museum, and he requested me to work on his artifacts which I agreed.
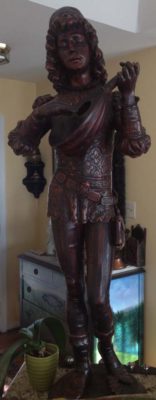
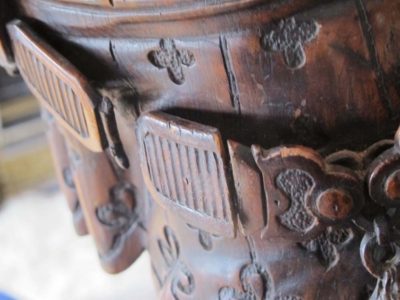
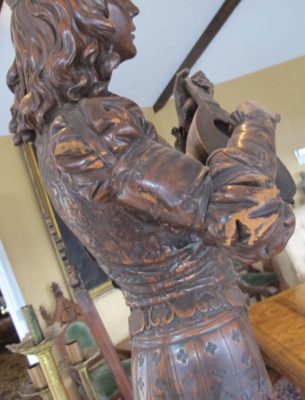
This nearly life-sized sculpture was some pretty amazing work by the renowned artist Valentino Besarel, given that most of it was carved out of a single hunk of softwood log. The base and lute body were carved separately then integrated to the composition as a whole Not too surprisingly the century-and-a-half of wood movement lefts its mark and there were many areas of concern and need for my attentions, and some additional ones which were left for another time.
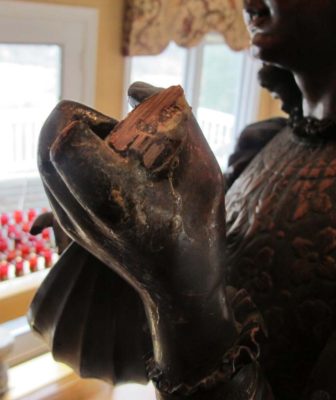
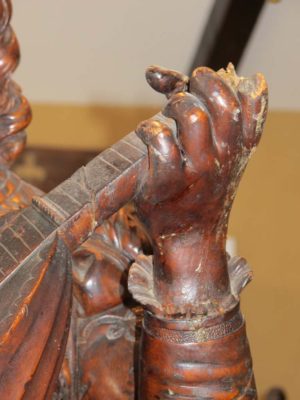
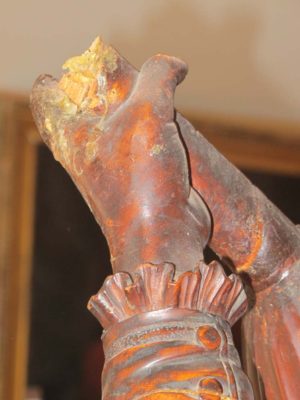
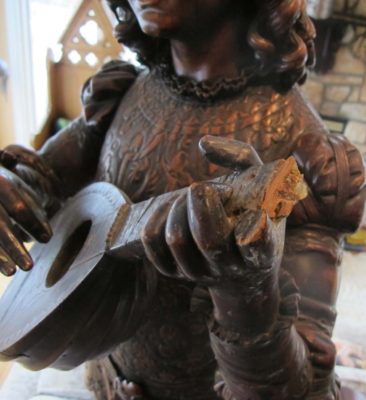
The most serious structural issues revolved around the level of damage between the left elbow and the right elbow of the figure, with the lute in between. None of this was surprising given that it was all tangential and short grain wood. The head of the lute had been snapped off (many, many times it turned out, and repaired less than elegantly) but remained with the object, the index finger of the left hand and the pinky of the right hand were gone altogether, and the neck of the lute had been broken perhaps a dozen times in the past.
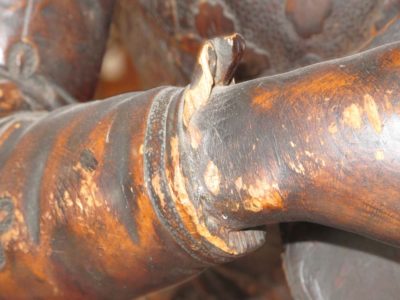
Ruffles on both cuffs had been broken off, and the left forearm had been broken and repaired repeatedly and was loose.
The belt, carved continuously to be separated from the body of the figure by about an inch or so, had been broken and repaired several times and the broken element was now simply nailed in place.
It wasn’t exactly plumber’s crack but there was a pretty noticeable split running for over two feet up the back of the figure.
Finally, the surface was heavily abraded, with accretions of grime and a fair bit of light damage throughout.
I’ve blogged about isolated aspects of this over the life of the project but now you will get a beginning-to-end account.
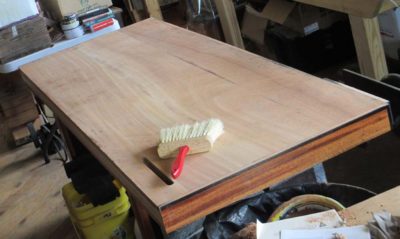
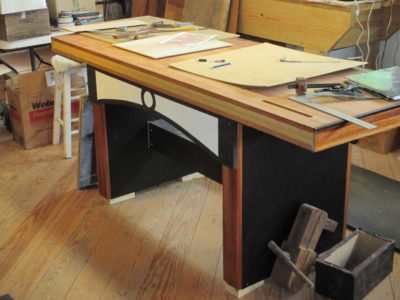
For last year’s Studley Tool Cabinet and Workbench exhibit I fabricated a mock-up of Studley’s workbench top to use as part of the exhibit itself. I set the top on a display base in order to hang a number of Studleyesque vises from it, and to show the construction techniques he used for the slab. I used some *&^%$# African “mahogany” for the outer lamina with white oak for the core, and finished the surface nicely with several coats of Tru Oil.
Since returning home in the aftermath of the exhibit the bench has been sitting in my studio, covered with a furniture pad and cardboard, serving as nothing more than a nice work table. That episode has come to an end as it was time for the little beauty to be put to work.
The first thing that had to go was the slick shiny varnished surface. A half hour with the toothing plane took care of that.
I doused the toothed surface with a 1:3 mix of Tru Oil and naphtha and let it sit over night. The result is very pleasing, providing a sealed surface with a flat but pleasantly textured work surface.
The bench top already had one vise on it, a true piano maker’s vise that was very generously supplied by DanD. For the end vise I will mount a Sheldon in the coming days, not nearly the same quality as the piano maker’s vise but adequate for the task. A series of dog holes will be drilled through the top to make it ready for work.
To overcome the unsteadiness of the base, it shimmied a bit on the longitudinal axis and slides on the floor too much since it was designed as a display stand not a functioning workbench, I first added a pair of apron stretchers to cut the wiggles to a nearly unnoticeable minimum, and that works very well. Some day I may build a cabinet base a la Sleepless Jim, but it will not be this day.
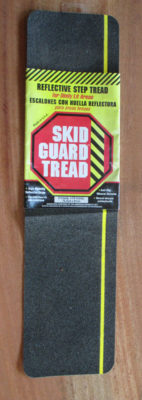
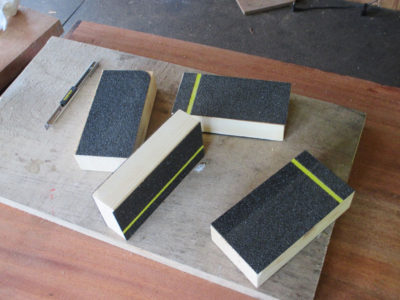
The final step was to get the bench top higher than the 32″ as constructed. I made a set of non-skid spacers to put underneath the feet by cutting some 2x stock to the right size for four spacers and facing them with some PSA non-skid matting for flooring. Slipped under the bench feet, the top is now at a more amenable height and I promise you the bench does not slip on the floor one bit.
Now my Little Pretty is all dressed down and ready for work. I have not yet decided about what to do with the rear edge of the bench so I am leaving that unfinished for now.
This addition leaves my total workbench inventory for The Barn as 3 Roubo benches, 2 piano makers’ benches, 2 torsion-box-top benches, one Nicholson, one Sjoberg Euro bench, one planing beam, and a partridge in a pear tree. Once I get done with the three more Roubo’s I have in various states of completion I will be flush with workbenches. But surely I will have to build myself a Roman style bench, won’t I? And I don’t have a Morvian bench yet, although Will Myers’ video is really enticing. And I still have that extra Emmert #1 laying in the corner…
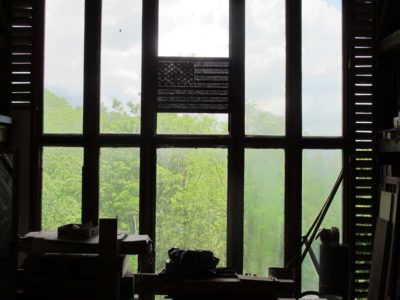
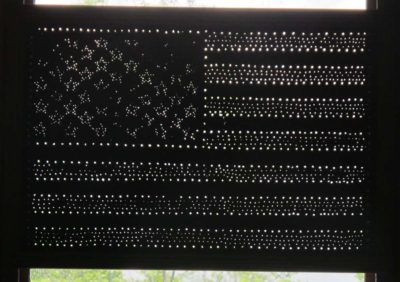
At the recent Groopshop my long time friend Alan Noel presented me with a gift that I will treasure. He recalled my delight in seeing this punch-work US flag when I was visiting him some years ago, and had been saving it to give me ever since. I have mounted the piece at the center of the wall o’ glass facing the morning sun, where it will be a constant presence in the visuals of The Barn.
If I can find a punch-work version of the Gadsden Flag to exhibit along side this one the composition will be complete.
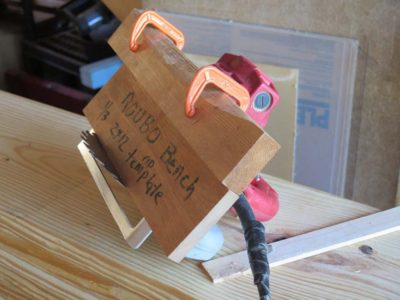
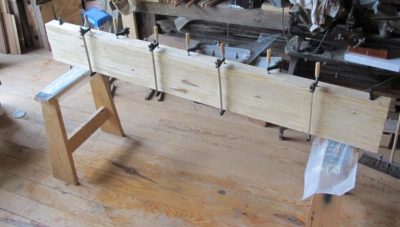
The second option for attendees to the upcoming Workbench Building Workshop at the barn July 25-29 will be to make a butcher-block top Roubo style bench. As with the Nicholson bench described earlier, this one will be made entirely from southern yellow pine I get from over in the Shenandoah Valley from Virginia Frame and Lumber, who stocks amazing 24′ SYP 2x12s. Fortunately for me they can and will cut them to 8′ lengths.
Using a spacer jig to set the fence on my circular saw I cut the 2x12s into three equal boards. During the workshop we will likely joint and thickness these but for this prototype I did not.
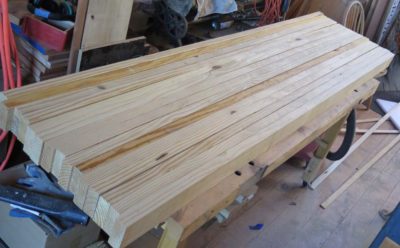
In this case I simply cut up enough lumber to make a 24″ wide top.
Loosely following the protocols presented by David Barron in his excellent video I began by gluing together the central core of the top, that is, the eight pieces glued together to form the lengthwise portion of the bench top between the legs.
Using PVA adhesive and several 12″ clamps I got this done in just a few minutes.
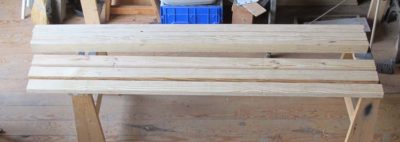
After the slab had dried overnight I lightly scrubbed the unit and was ready for the next step.
=============================================
I’ve still got a couple of spaces for this workshop, so if you are interesting in joining in drop me a line here.
I just noticed that according to the counter , yesterday’s was my 500th blog post. Let the celebrating commence. It wasn’t that long ago that I did not even know what a blog writer did, and now I are one.
The routine for the blog is my trying to get something written four or five times a week, with about 300-400 folks kindly stopping by each day to browse. Some days a little more, some days a little less. According to the blogniscenti the readership of a blog should trend upwards over time unless the blog is offensive or spurious, in which case it will either skyrocket or drop like a stone. My visitorship has remained essentially flat for the past two years which is a curiosity I do not know how to interpret. I know that one aspect of the blog to which I intend to spend more time is posting my Shellac Archive, which is voluminous. I am told that soon the web site re-build will be done and it will make it a lot easier for me to get things done and posted.
Still, 500 blog posts is a lot of verbiage.
Who knew that I had that much to say? Well, pretty much anyone who knows me well. Mrs. Barn has often remarked that one of the reasons I write fiction is that, “You get to put words in everybody’s mouth.” I suppose I would be irked were it not true. I don’t get any fiction published, I don’t really try too hard, but some of the stories work for me including one I have been working on for some time that is probably best described as a thinly disguised textbook on furniture conservation collided with a Frederick Forsythe potboiler. There are another eight or ten novel outlines drafted, just waiting for the manuscripts to write themselves. I am currently noodling some short story ideas based on the theme of “Jesus as woodworker” but those take a while as I need to get the history/historic technology correct and avoid heresy. The first one of those is pretty much done, but I am sketching several others.
I also write the occasional radical social/political commentary that I distribute privately or post anonymously. Combine all that with the ongoing work on leading the charge to get Roubo presented to the Anglophone audience, my currently-under-construction Historic Finisher’s Manual and another bunch of artifact related manuscripts it is an unusual day when I do not spend at least an hour or two writing, some times a lot more. If I knew how to actually type it would go faster, but I don’t so it doesn’t, and if my eyes were not in such bad shape I could read faster but I can’t any more.
Enough celebrating. Back up the hill to the barn. Or maybe just sit in the recliner with the laptop. I have this idea…
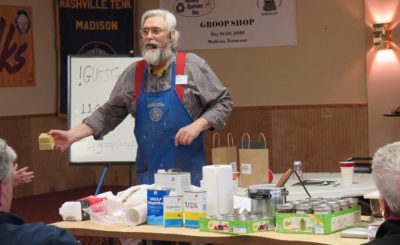
Here is a revised version of my handout at Groopshop.
==========================================
Custom Blending Paste Waxes in the Shop
Don Williams
Martin O’Brien in absentia
The fundamental thing about paste waxes is that they are a solution, consisting of a solvent (or solvent blend) into which is dissolved a solute (or blend of solutes). For the most part furniture relevant paste waxes are super concentrated solutions consisting of roughly 1/3 part wax or waxes to 2/3 part solvents like turpentine or naphtha. Sometimes other additives are included, these may be soluble in the solvent, such as low molecular weight acrylic resins or oil-soluble dyes, or suspensions like abrasives or pigments.
No single paste wax solution is satisfactory for all applications. Some require ease of use, some higher in-use performance, and these two are often mutually exclusive. We overcame this problem with the invention of “Mel’s Wax” emulsion, a stoopid-easy-to-use but premium high performance product while at the Smithsonian, but that is a subject for another time.
In order to keep the variables down to a mere multitude, for today’s exercises we will concoct recipes blending variations of the following components:
Waxes
Beeswax
Carnauba wax
Shellac wax
Microcrystalline 190 wax
Solvents
Turpentine
Naphtha
T.R.P.S.
Odorless mineral spirits
Additives
Dry earth pigments
Lithography pigments
Crayons for coloration
Rottenstone
Arkon P-90 acrylic resin
We will start with these basic recipes and head off down the rabbit trail from these points. We can mix them and then apply them to sample boards, and evaluate them tomorrow after they have flashed off and been buffed with linen, flannel, and bristle brushes. All recipes were prepared in heated containers warm enough to melt the waxes but not hot enough to risk burning them. I melt the wax first then add the solvent. My favorite set-up for melting is to use a fixed temperature (165 F) fondue hot plate and a Corning sauce pan.
It is important to remember two points. 1) if the paste wax is difficult to apply and distribute evenly over the surface, that is a solvent proportion issue. If there is not enough solvent, applying paste wax is nearly impossible. 2) if the dried wax film does not buff out well, or rubs off too easily, or has some other fault, that is a wax blend issue.
Recipe #1 – the old favorite soft paste wax, a bit smelly for my preference (turned out very nice to apply, performance was satisfactory)
2 parts beeswax
1 part naphtha
3 parts turpentine
Recipe #2 – a nice harder surface (very difficult to apply, nearly impossible to get an even distribution; solvent fraction was too low; another 2 or 3 parts of solvent would have made all the difference)
3 parts beeswax
1 part carnauba
2 parts naphtha
2 parts turpentine
Recipe #3 – a nice clean intermediate-to-hard surface that is less stinky than #2 (very difficult to apply, nearly impossible to get an even distribution; solvent fraction was too low; another 10 portions of solvent would be worth trying)
12 parts beeswax
4 parts shellac wax
12 parts naphtha
3 parts turpentine
Recipe #4 – slightly hard with a little “slickness” (very difficult to apply, nearly impossible to get an even distribution; solvent fraction was too low by at least 100%)
100 parts beeswax
10 parts carnauba wax
1 part acrylic resin beads
50 parts naphtha
30 parts turpentine
Recipe #5 – trying to split the difference (applied pretty well but another 2 or 3 parts of naphtha would have been perfect, performance was excellent)
5 parts beeswax
1 part microcrystalline 190
7 parts naphtha
Recipe #6 – trying for better performance (applied pretty well but another 2 or 3 parts of naphtha would have been perfect, performance was excellent)
5 parts beeswax
1 part shellac wax
1 part microcrystalline 190
7 parts naphtha
Recipe #7 – MartinO’s favorite (applies and performs beautifully)
1 part beeswax
2 parts odorless mineral spirits
Recipe #8 – harder but more difficult to buff out, otherwise excellent performance
115 grams beeswax
15 grams shellac wax
15 grams carnauba wax
2 grams Arkon P-90 acrylic beads
250 grams t.r.p.s solvent
(Bonus) Recipe #9 – so darned nice I might start manufacturing this one. Really. This was sold at Mike’s Mostly Honest Auction and I am awaiting feedback from the buyer before proceeding.
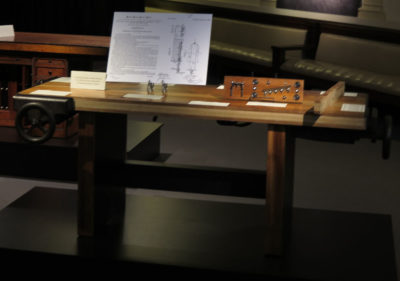
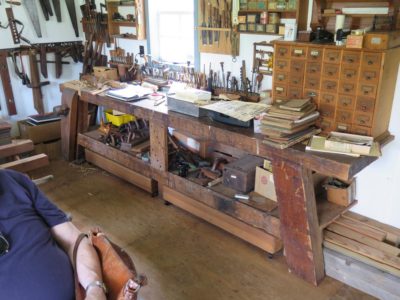
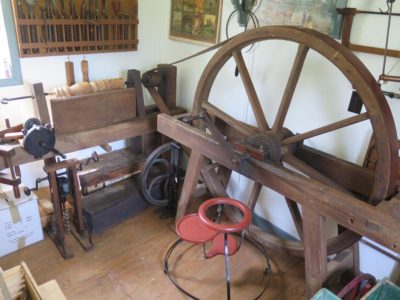
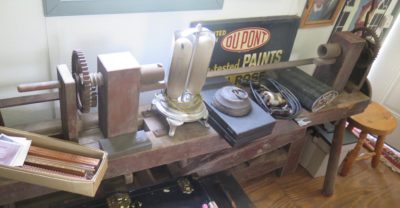
Recently while making my visit to the ripple molding cutter and its owner Jerry, when we were finished ogling that special machine and the remarkable things it made he took us across the yard to another shop. I believe this one was actually never a working shop but instead built as a repository for the tools belonging to his father and grandfather, both renowned local craftsmen. The assemblage of tools used by these men in the pursuit of their livelihood was astounding. My camera battery died or I would have shown the drawers and cabinets filled with the inventory.
There were lots of eye-popping things to see, beginning with this Moravian style workbench I think was 10-feet long.
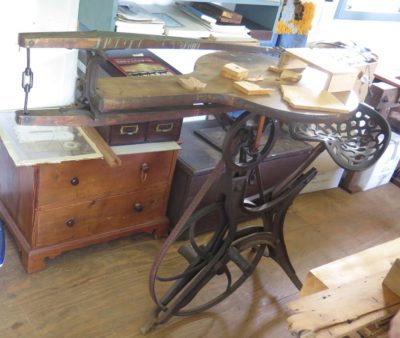
Or the original Barnes velocipede scroll saw.
Or the Great Wheel lathe.
Or the post threader, conceptually similar to that invented by Henry Boyd, one of my personal heroes. This turned right hand threads on one end of a bed rail and left hand threads on the other, allowing the entire bedstead to be assembled in seconds by completely unskilled hands. Here is a another article about him, and this video is worth a look. Truly, given his life story and creative accomplishments, I long ago came to see Henry Boyd as a Force of Nature and a man to be emulated.
The circumstances of getting my busted hip fixed was that the break occurred at lunch time and the structural repair was completed in the middle of the following night. I think I got back to my hospital room about 3AM in something resembling a drug-induced coma. A close friend is an x-ray tech for a hospital and when she described how the orthopedic surgeons manipulate the hip joint to make sure the bolts are set at the right depth such that they hold the joint together but do not interfere with the joint movement confirmed the need for that level of anesthesia. Just hearing the description of the stresses they put on the joint made me hurt.
About six hours after the repair the surgeon stopped by to see how I was doing. Admittedly I was not in the clearest frame of mind as pain and narcotics were doing their balancing act. Dr. H said, “I’ve got a present for your wife. It’s something I made. You won’t know what it is but she will probably like it.” With that he pulled a small ornament from his pocket and held it up.
“Oh,” I said, “it’s something you made from Dalbergia tulipwood on a Rose Engine Lathe.” That stopped him in his tracks! Woodworking and woodturning have occupied more of our conversations than my hip ever since. It’s not that he was inattentive to my healing, but rather that once those conversations and examinations were completed, another discussion continued on wood topics. The beautiful little ornament now resides on the top of a bookcase in the living room along with a multitude of other treasures.
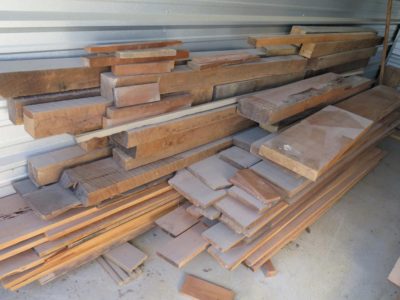
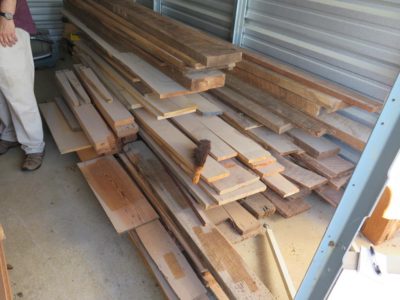
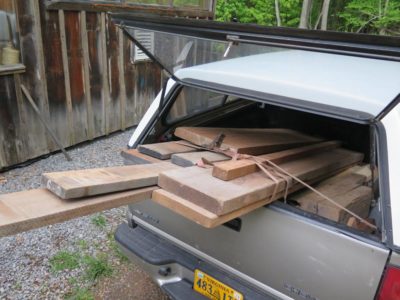
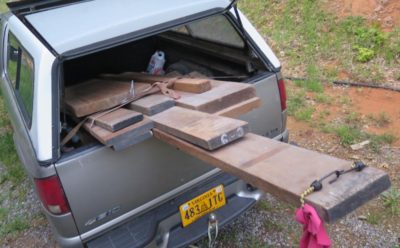
Recently he invited me to come and look over some piles of lumber he was liquidating in his ongoing downsizing as he intends to concentrate exclusively on ornamental turning rather than general woodworking. These were mostly a mix of walnut, including a lot of 5/4, 8/4 and 16/4, figured maple, and black cherry. I was not especially interested in these, although I may talk myself into some of it. If you are interested in buying this pile of vintage lumber that has been seasoning since around 1920 (he wants to sell the whole pile en toto), drop me a line and I will pass it along to him. It is in Bridgewater, Vitginia.
The lumber he had that I was interested in, and purchased, was some ancient mahogany. I bought about 90 board feet, and have just the right project for it. More about that later.


Recent Comments