The complete 2018 Barn workshop schedule, which I will post every couple of weeks to help folks remember the schedule.
************************************************
Historic Finishing April 26-28, $375

Making A Petite Dovetail Saw June 8-10, $400
Boullework Marquetry July 13-15, $375

Knotwork Banding Inlay August 10-12, $375
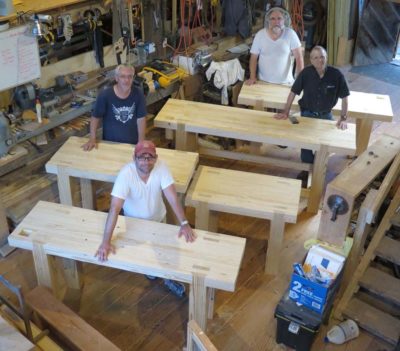
Build A Classic Workbench September 3-7, $950
contact me here if you are interested in any of these workshops.
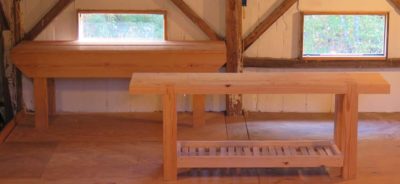
And speaking of workbenches, you’ll have the opportunity to work with me at The Barn building your own version of either a basic Roubo or Nicholson bench in Southern Yellow Pine. Thanks to my adapting David Barron’s innovative system for building laminated Roubo benches, and the elegant simplicity of the Nicholson bench, you can arrive empty handed (except for your tools) on Monday and depart at the end of the week with a bench fully ready to go. The only likely hindrance to this outcome is if you spend too much time simply looking at the mountain vista on the horizon.
The finished bench does not include holdfasts or vise mechanisms; if you want those you can supply your own or I can order them for you separately. And if you prefer a 5-1/2″ slab for the Roubo bench rather than the 3-3/4″ slab, there will be an additional $100 materials fee.
============================================
The complete 2018 Barn workshop schedule:
Historic Finishing April 26-28, $375
Making A Petite Dovetail Saw June 8-10, $400
Boullework Marquetry July 13-15, $375
Knotwork Banding Inlay August 10-12, $375
Build A Classic Workbench September 3-7, $950
contact me here if you are interested in any of these workshops.
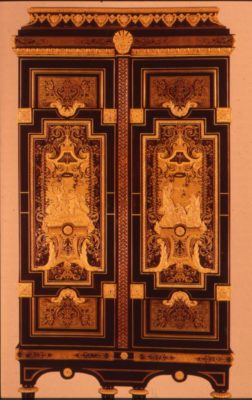
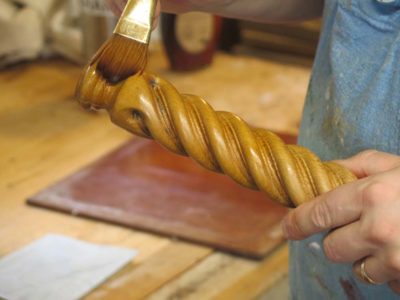
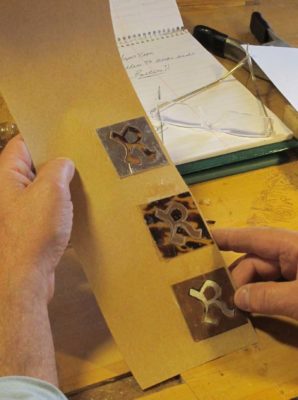
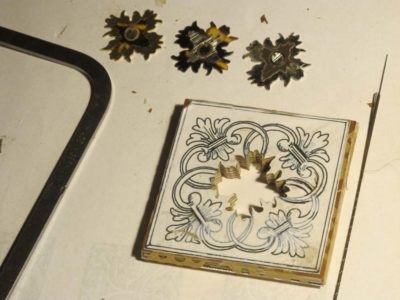
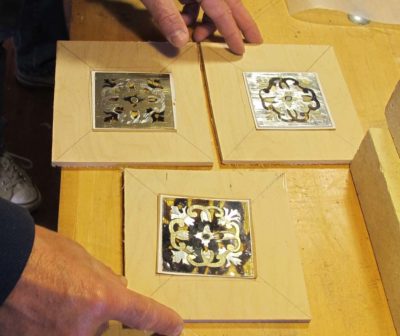
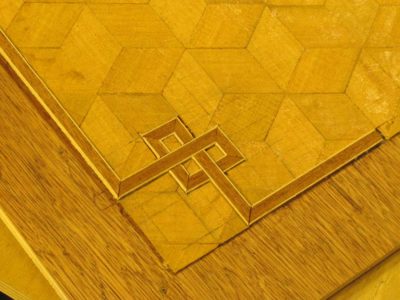
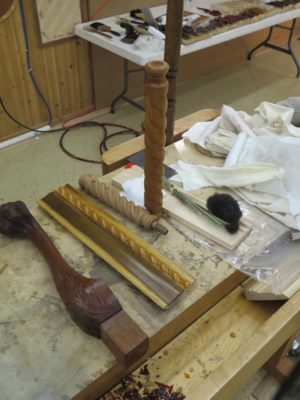
Since seeing my first piece of antique furniture decorated with tarsia a incastro, or “Boulle work,” I have been captivated by both the art form and the technique.
This ancient method of using a minuscule blade in a frame saw, usually a jeweler’s saw in our time, for cutting patterns in two or three layers of material comprised of the shell of a sea turtle, a sheet of brass, and sometimes a sheet of pewter, remains captivating to this day. The result is the same number of completed compositions as the original number of layers in the stack.
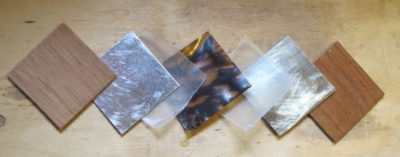
Due to the prohibition of trade in turtle shells I invented my own very convincing replacement material I call Tordonshell.
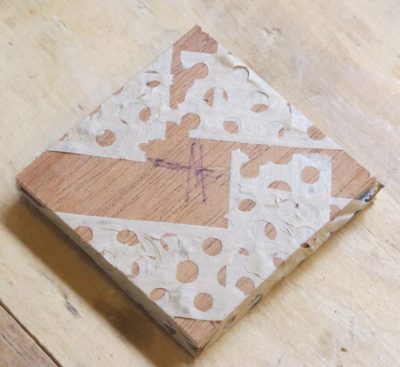
So these three days will comprise of making your own piece of Tordonshell (I will have some pieces made in advance for the workshop) and sawing patterns from packets we will assemble for cutting.
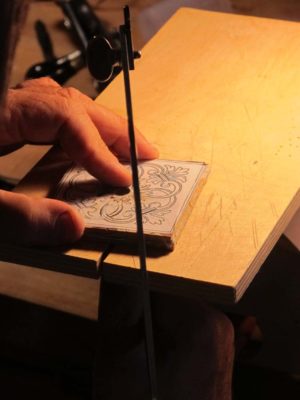
Though we will be cutting them vertically to begin, there is a chevalet in the classroom and anyone who wants to give it try is welcome to do so.
*********************************************************
The complete 2018 Barn workshop schedule:
Historic Finishing April 26-28, $375
Making A Petite Dovetail Saw June 8-10, $400
Boullework Marquetry July 13-15, $375
Knotwork Banding Inlay August 10-12, $375
Build A Classic Workbench September 3-7, $950

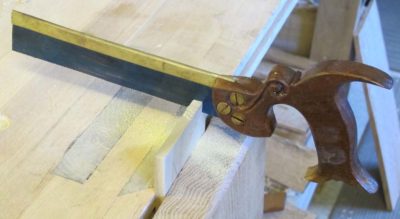
In recent years my projects and inclinations have guided me towards more diminutive work in thinner stock. This makes cutting dovetails somewhat of a challenge when using a standard saw, which is often too aggressive and thus harder to control effortlessly. As a result of that I began exploring the prospect of fabricating my own petite dovetail saw. I wound up making several with good-to-excellent results. We will replicate that process and send you home with your own.
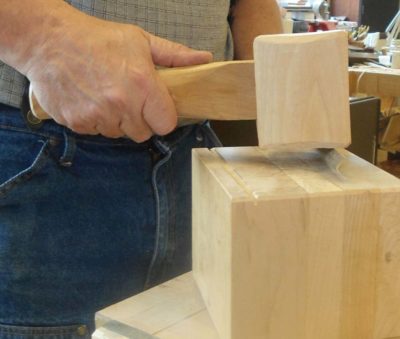

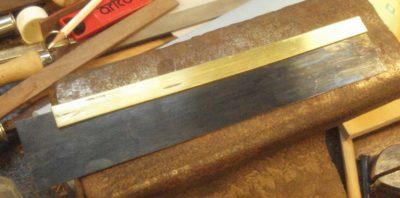
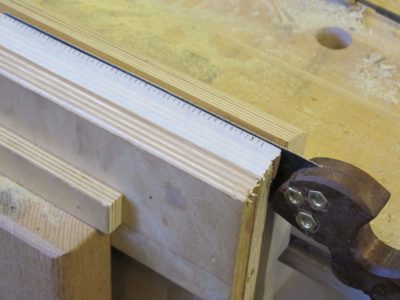
If you have a particular piece of wood to use for the handle (tote) feel free to bring it to work with. Otherwise I will provide all the materials for this workshop. We’ll aim to fold and finish the back, taper and insert the plate/blade, fit and fashion the handle to your hand, and file the teeth.
The tool list for the workshop is a short one and will be sent to attendees well before the event.
****************************************************
The complete 2018 Barn workshop schedule:
Historic Finishing April 26-28, $375
Making A Petite Dovetail Saw June 8-10, $400
Boullework Marquetry July 13-15, $375
Knotwork Banding Inlay August 10-12, $375
Build A Classic Workbench September 3-7, $950
Here’s a list of the Barn workshops I’ve pencilled in for this year. I will blog in greater detail shortly.
Historic Finishing April 26-28, $375

Making A Petite Dovetail Saw June 8-10, $400
Boullework Marquetry July 13-15, $375

Knotwork Banding Inlay August 10-12, $375
Build A Classic Workbench September 3-7, $950

Right after the conclusion of the Parquetry workshop at the Marc Adams School of Woodworking I dove in again with three days of Historic Finishing (reminder to self — DO NOT do this again. The logistics of changing horses mid-week is a headache you can do without). This class had more than a dozen students, and the enthusiastic feedback had led Marc to ask me to develop an expanded week-long workshop on the same topic, which we will do in 2019.
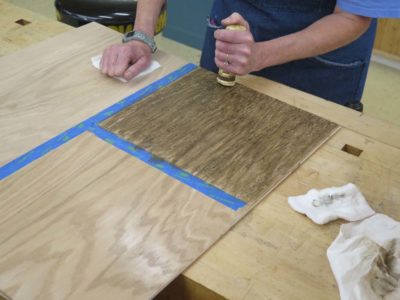
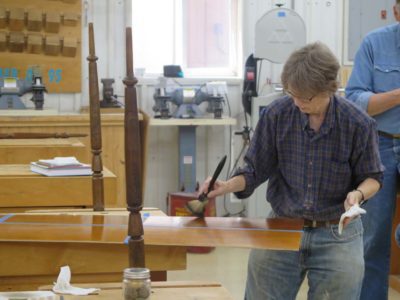
I’ve pretty much got this workshop dialed in, as I do with Parquetry, so there is a fairly fixed syllabus here. The emphasis is on processes and work habits rather than having a “completed” project at the end, concentrating on shellac spirit varnishes and beeswax applications.

The starting point is this 24×48 panel building up multiple brushed applications of 1-1/2 pound cut shellac to about 18 layers over the first day and a half. Getting this to “done” allows us to explore the detailing and polishing of the surface.


We used polissoirs for preparing surfaces and applying wax, and filled the grain with molten beeswax. Then we made and used polishing pads for applying spirit varnish.

Each student got to address the problems of finishing undulating surfaces,
applying pigmented wax grain filler,
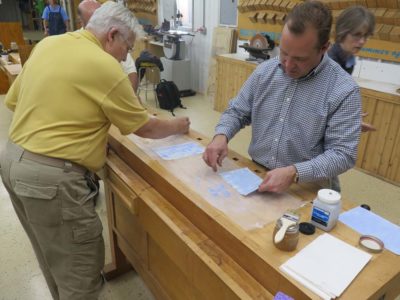
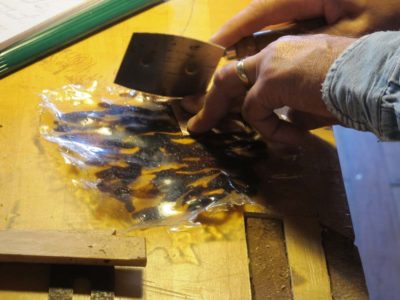
and even making historic sandpaper.
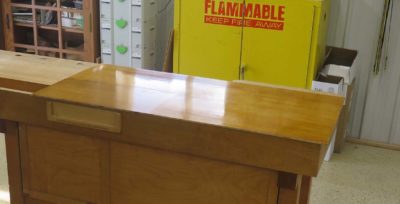
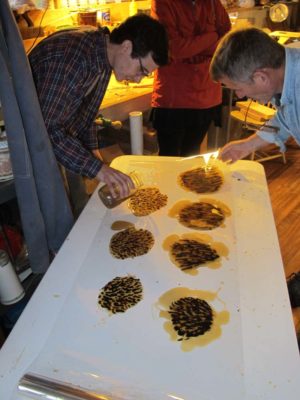
The giant panels were polished out with a variety of period-appropriate abrasives,
and one quadrant was glazed with asphaltum.
All in all, it was a great time of fellowship and learning. How could it not be, we were finishing!
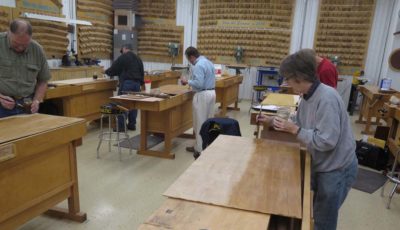
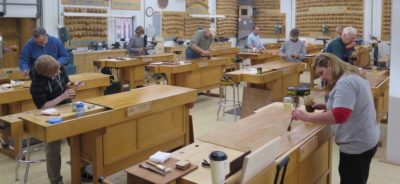
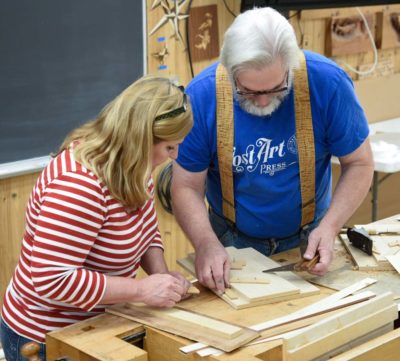
I recently spent a week at the Marc Adams School of Woodworking, teaching two three-day courses. I believe this was an experiment on Marc’s part, road testing some new scheduling concepts such as a three-day workshop during the week as opposed to only on weekends.
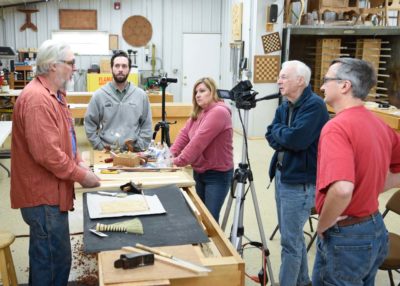
The Parquetry workshop had three enthusiastic attendees (plus a most excellent teaching assistant), a number the Marc told me precludes any repetition of the topic. This is an entirely fair conclusion on his part as he has a huge footprint to support. With several classrooms in simultaneous use I’m guessing he needs somewhere between 35-50 attendees every day for six months to make it work.
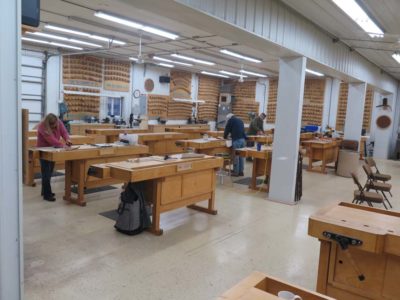
In fact our merry little band was in a huge, well equipped classroom with twenty (?) workbenches. The spaciousness was both unnerving and delightful as the students could spread their projects as widely as they wanted.
This workshop is somewhat unusual for me in that there was a finished project at the end, while I tend to prefer teaching a skill-set rather than a project.
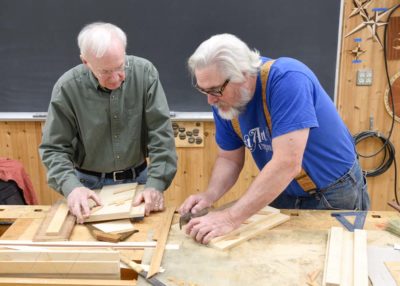
But skills and processes were taught and practiced, including the making of sawing and planing jigs,
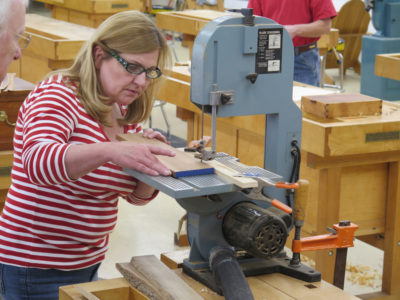
sawing veneer stock for making the patterns,

the assembly of the patterns,
fabricating and integrating simple bandings,
and gluing them down to a substrate.


In the end they were cleaned up with toothing planes, files, and scrapers making them ready for the finishing process.
Though I will not be teaching this workshop again at MASW, I will not completely set the general topic aside. I am hoping to have a workshop on knot-work banding perimeters there in 2019.
After long and careful consideration, I have concluded that I simply cannot host any workshops at The Barn this coming summer. The combination of the Studley book and exhibit, brutal winter aftermath with a mountain of things to do on the homestead, projects that have languished in the studio, and the need to wrap-up Roubo on Furniture Making (almost twice as large as Roubo on Marquetry) leaves me with no time nor energy to dedicate to workshops at the barn. I had planned on a historic finishing workshop in late June, but that will have to wait until net year. In September I will host a week-long workbench build for my friends of the Professional Refinishers Group web forum.
This is not to say I will be entering my long anticipated hermit phase. My presence and teaching elsewhere over the summer will be evident. Check these out.
Henry O. Studley Tool Cabinet and Workbench exhibit – May 15-17, Cedar Rapids IA
Making New Finishes Look Old – Society of American Period Furniture Makers Mid-Year Conference, June 11-15, Knoxville TN
Gold Leaf and its Analogs – Professional Refinisher’s Group Groopfest, June 24-26, Pontoon Beach IL
The Henry Studley Book and Exhibit (breakfast banquet address) and Roubo Parquetry (demo workshop) – Woodworking in America 2015, September 25-27, Kansas City MO
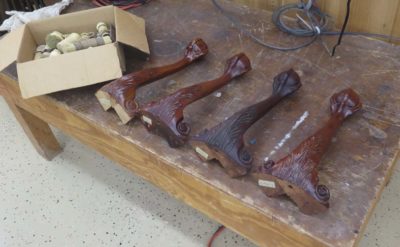
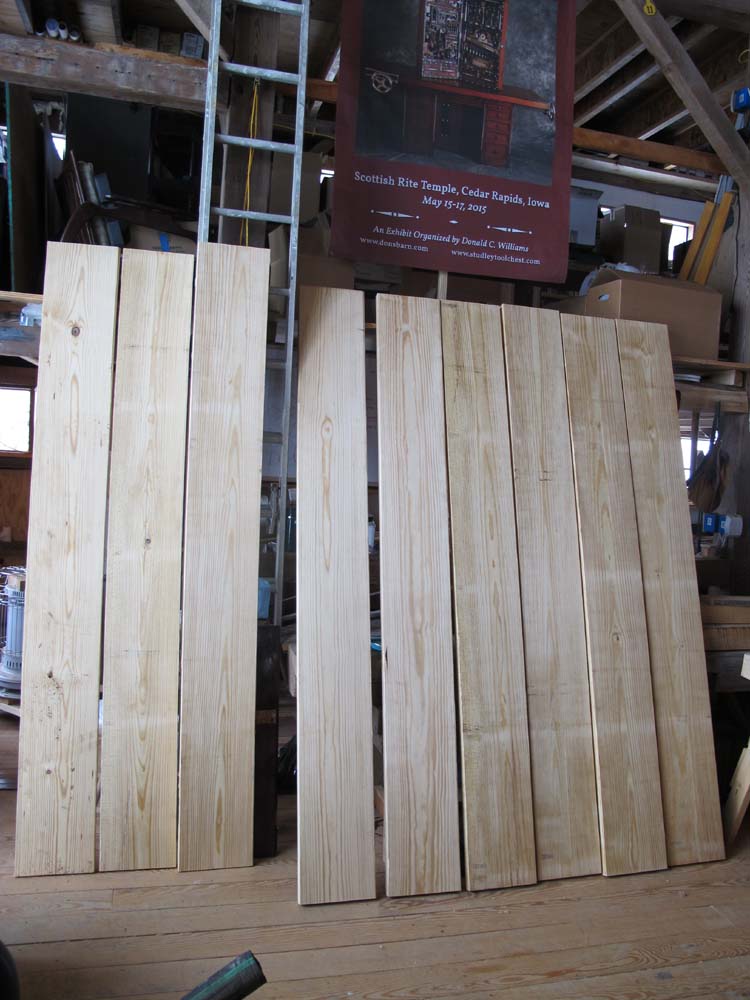
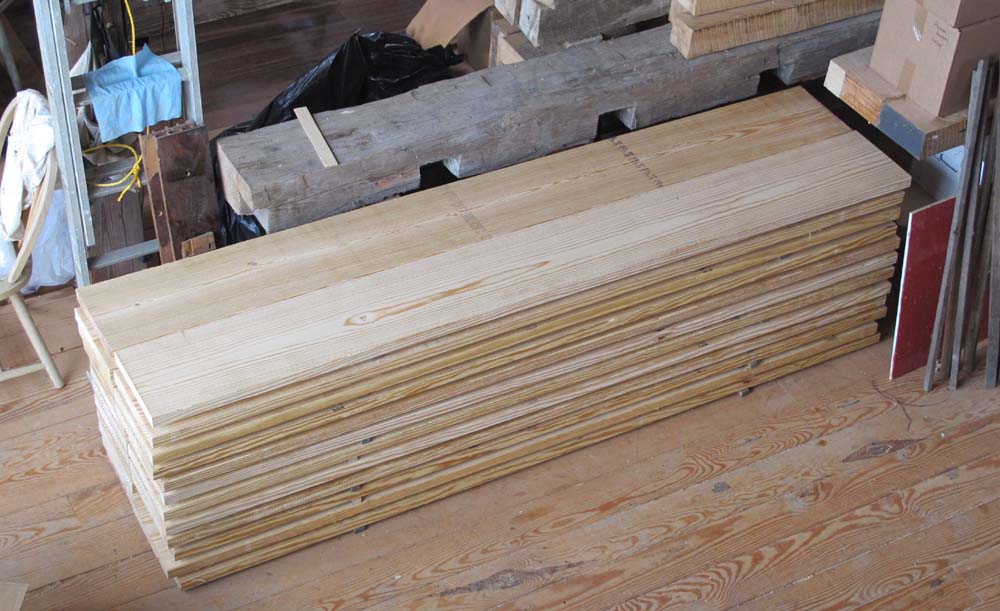
Last Friday on my way to the annual banquet of the Society of American Period Furniture Makers at Colonial Williamsburg I took the opportunity of my foray into “civilization” (or is it “out of civilization?”) to make a number of stops purchasing materials and supplies for ongoing and upcoming projects.
Perhaps the most important of these stops was at Virginia Frame and Builders Supply in Fishersville, just a hundred yards or so from I-64. Virginia Frame is renowned for having large, long, and lovely lumber in stock. I bought some 24-foot long southern yellow pine 2x12s, mostly clear and some even select. Since my pickup has a 6-foot bed, the folks at Virginia Frame cut the 24-footers into 8-foot sections and we stacked and strapped them into the bed for the long ride to Williamsburg then back to the mountains.
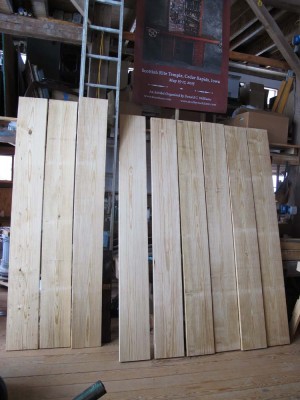
This September I will be hosting ten members of the on-line forum Professional Refinishers Group, a treasured mostly-virtual community to which I have belonged for many years, for a week of workbench building. The lumber from Virginia Frame will serve as the raw stock from which I will make a Roubo prototype and a Nicholson prototype, to work out all the bugs in the fabrication process. Once I do I will order the same lumber as necessary for all the workbenches being built in September.
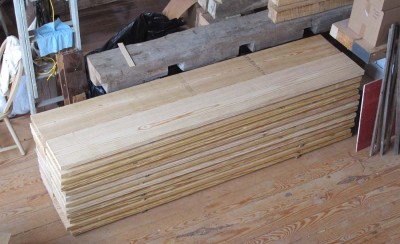
There was rain on my trip, so when I got back Saturday afternoon I spread out the boards to let them dry, then yesterday morning I stacked them to allow them to sit properly before I build the benches in February and March. I love working with southern yellow pine, and these boards are magnificent.
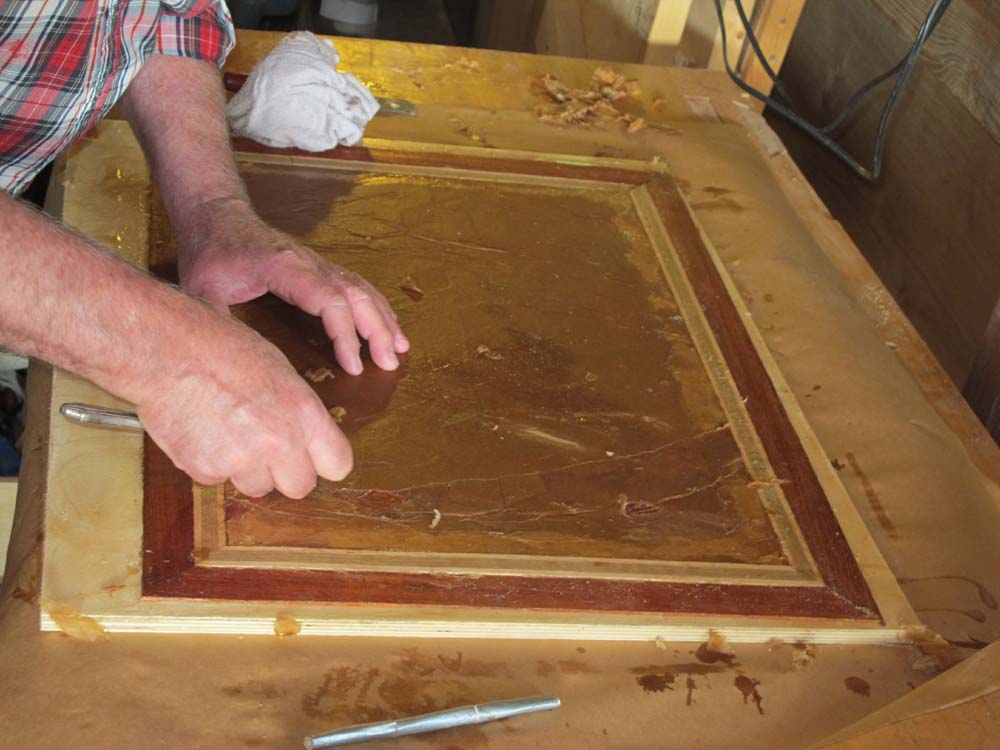
But first I have to make a replica of the Henry O. Studley workbench top for the upcoming exhibit.
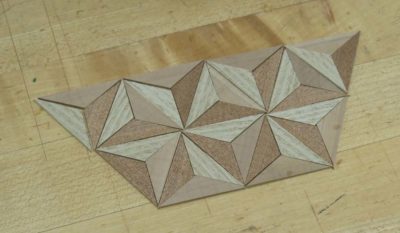
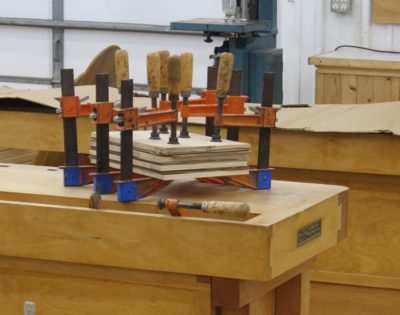
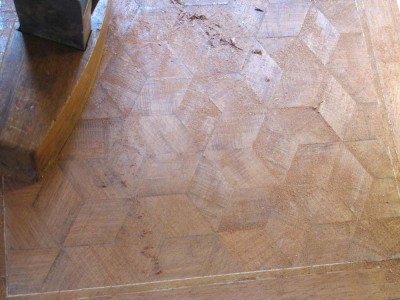
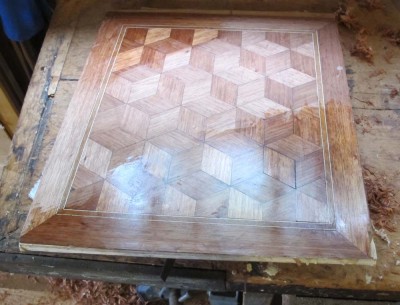
The day began with the excitement of seeing the glued-up panels. We had slightly oversized 1/2 baltic birch plywood for each of the panels so that they could be trimmed precisely to size one the project is complete.
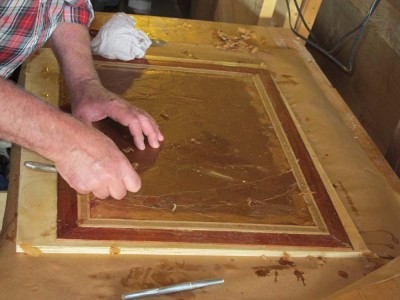
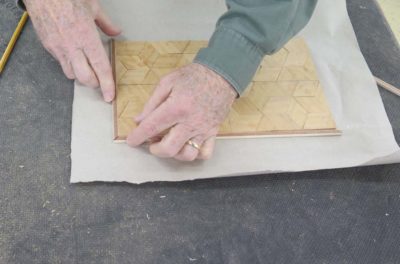
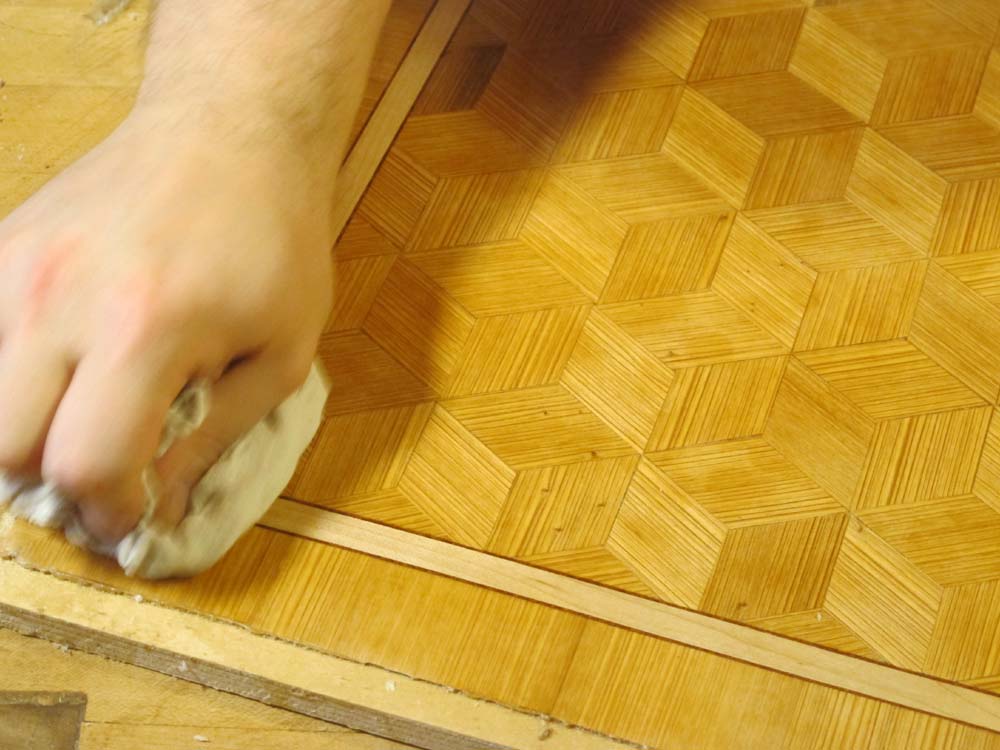
The first step to getting finished from this point was to moisten and peel off the kraft paper that served as the support for the assembling of the pattern, banding, and border.

It was a delicate balancing act, moistening the surface enough to remove the glued-down paper, but not so wet as to lift the veneers. Once the paper is removed begins the tiresome task of dampening and scraping off all the glue left behind.
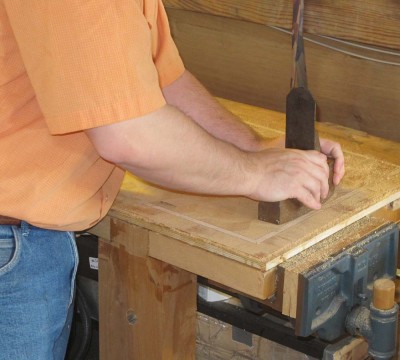
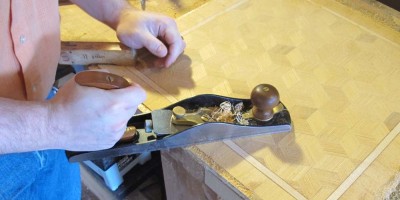
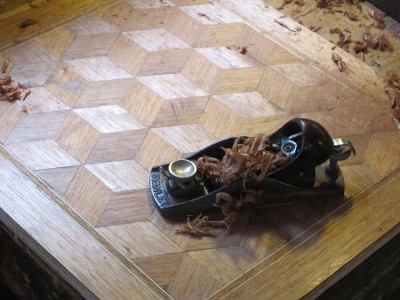
A quick stint on front of the fan to dry them, and then we brought out the toothing planes, scrapers, and small planes to get everything flat and smooth.
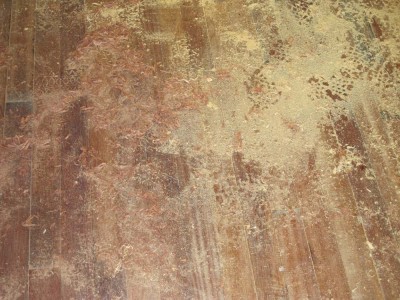
The conditions of the panels,

and the floor indicated we were making great progress.
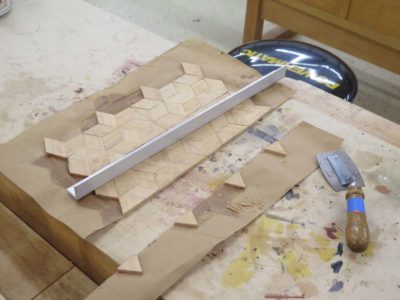
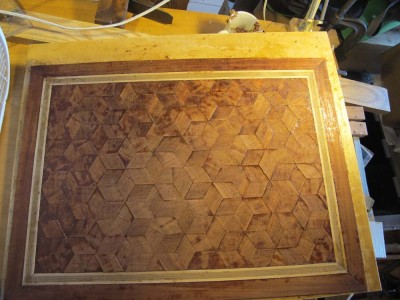
In a normal 3-day parquetry workshop this would have been the final process,
but these guys were working so efficiently we made it all the way through a finished project by the time they left.
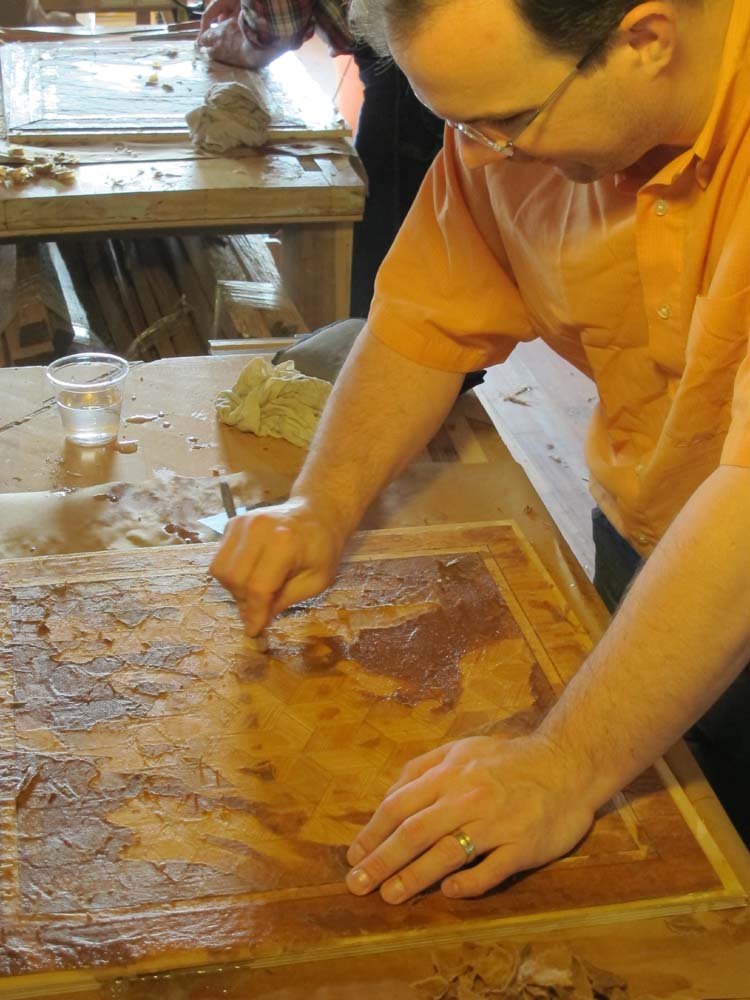
Using one of my panels, I demonstrated the simplest finishing approach to the parquetry, and they charged ahead.

Burnishing with polissoirs came next,
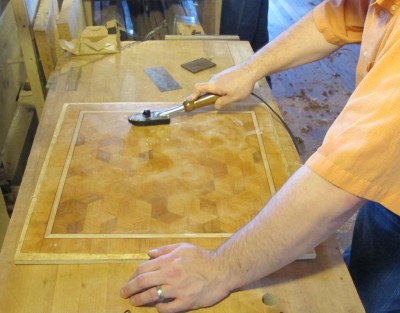
and then the molten wax treatment for the final finish. The wax was first dripped on the surface, then trowelled around with the tacking iron. Again it was important to use the iron delicately to melt the wax enough to impregnate the surface, but not to heat the surface enough to lift the veneer.
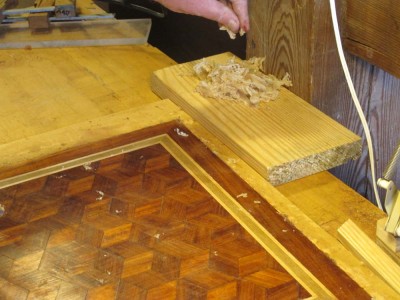
Once the surface was fully impregnated the panel was set aside to let cool and harden, then the excess was scraped off,

and the remaining surface was buffed with a linen rag.
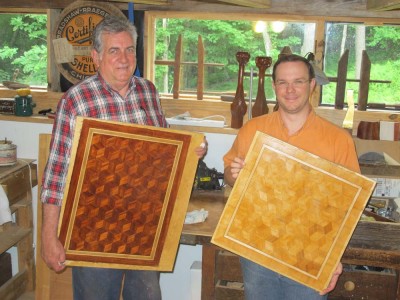
The results were eye popping, and demonstrated what can be done with very little wood in a short while. If you snoozed on this one, you loozed. Joe and Joshua now possess another important tool for their design and fabrication toolkit for the future, and when they get home they both plan to trim their panels and build a small table around them.
Great job, guys!


Recent Comments