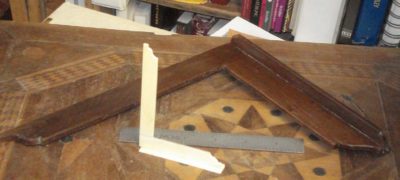
One of the more pleasant aspects of creating the English-version of the Roubo books has been to integrate the images of tools and the descriptive text of their use in the atelier. Roubo had a particular take on a range of measuring devices to be used in the fabrication and assembly of furniture, and I was especially taken with his cabinetmaker’s squares. I have made a variety of them in wood, brass and ivory and find them a delight to use.
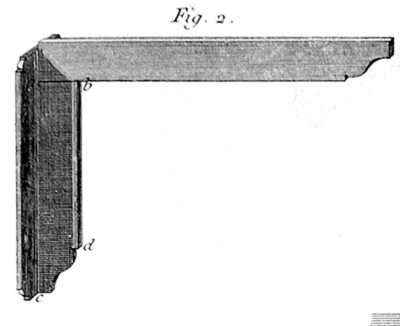
In the upcoming workshop on Making A Nested Set of Roubo Squares each student will make a series of stepped squares, in other words each one will be a step up or step down in size from the next. These will be fashioned from solid brass stock with the base/shoe silver soldered to the beam of the square as illustrated by Roubo (his squares were welded steel, I believe. The text is ambiguous if I recall correctly). We will use one of Chris Vesper’s sublime squares as the reference for all the tools made this week. Chris told me that the square I bought from him has an accuracy of no worse than least 0.0005″ per foot of blade length. If that is not good enough for you it is time to check into an asylum.
The class will be June 20-22, and the cost including materials is $425. You can contact me here to get more information.
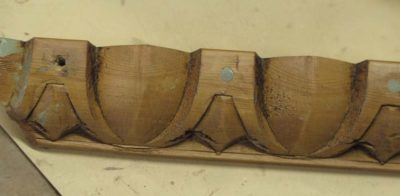
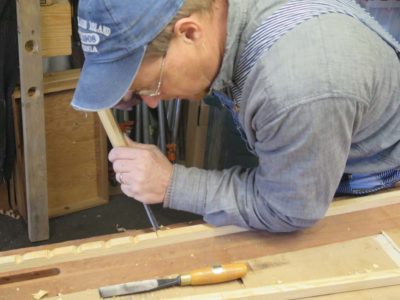
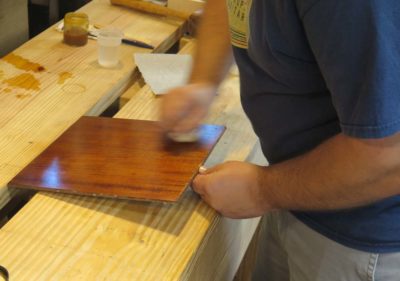
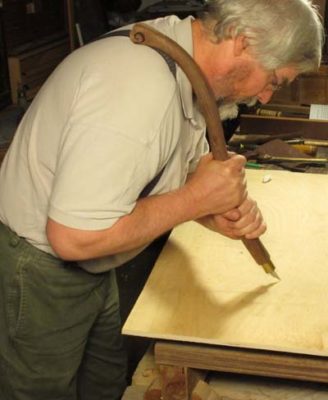
Recently I was called by a nearby acquaintance asking me for a lesson on carving egg-and-dart molding. Sam is a talented restoration carpenter who is a whiz at saving houses old and new, but this project required him to flex a bit and branch out into carving some moldings needed for a fireplace mantle. I said sure and we scheduled a couple of times for him to work in the studio.
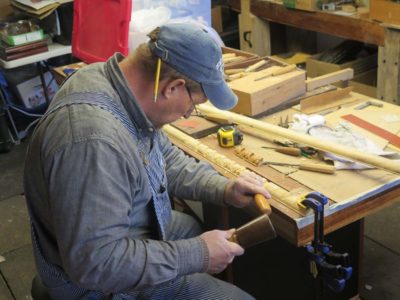
Most egg-and-dart molding involves a very limited number of carving gouges, and the sample he needed to match fit that description. Fortunately for him I had exactly the sweep and size he needed. I sat down and showed him the steps of the procedure then turned the sample piece over to him to, well, practice. I used to carve quite a bit, and there was a period 45 years ago I though about becoming a carver. Not becoming someone who could carve, but someone who was a carver. Big difference. But the lure of the finishing room soon won out, and ever since I’ve only really undertaken carving to replicate missing pieces from my projects.
After a couple of sessions in the Barn, Sam was ready to execute the moldings for real. The initial struggles he had with the fairly coarse-grained workpiece was alleviated the second time around, and the results were gratifying.
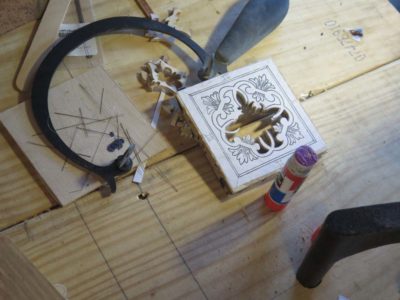
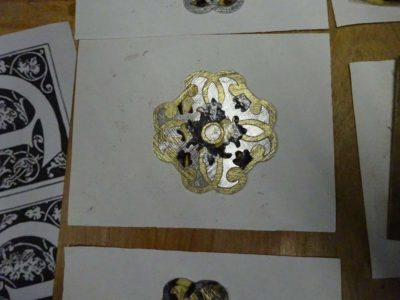
By the third and final day everyone was charging ahead, in the groove, and making great progress on the second exercise, a three-part composition of tordonshell, pewter sheet, and brass sheet.
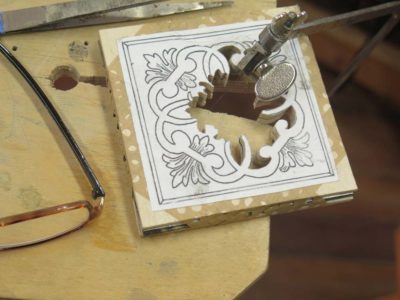
Again, the critical thing given the assembly of our packets was to begin sawing in the center of the design and working you way out systematically. As things progressed it was very exciting to see the composition(s) taking shape.
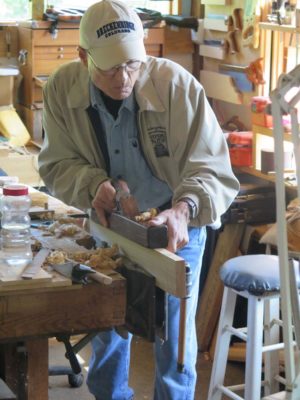
Honestly there is not a lot to say verbally, so I’ll just let the pictures do the talking.
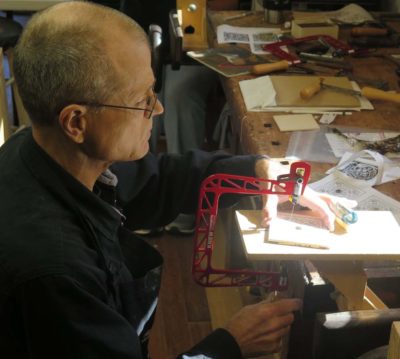
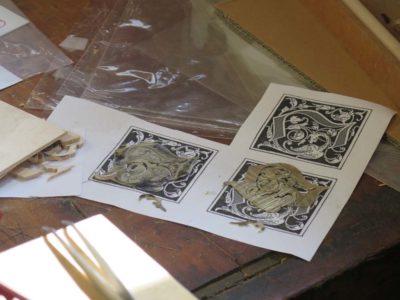
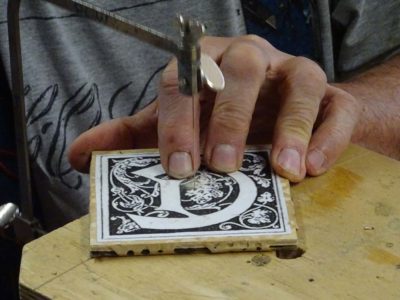
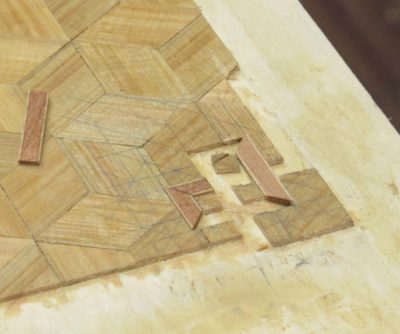
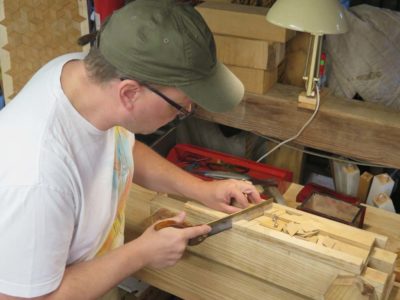
Day 2 was a time to really get down to business with sawing the first exercise, a two-part tarsia a incastro composition with each person doing a decorative rendition of their own initial (in reverse).
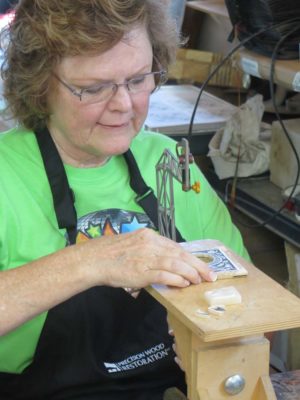
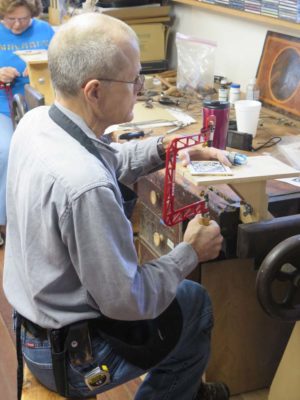
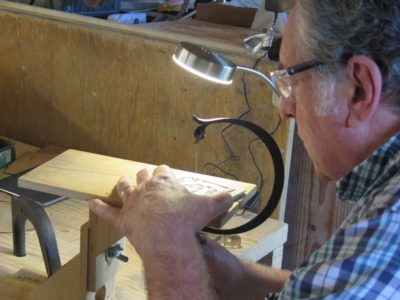
Soon everyone was adopting their preferred sawing posture.
Unfortunately we got Gwen’s initial relationship to her sawing station wrong, and before too long an old neck injury reared its ugly head. Even after adjusting her posture and sawing height, the damage was already done, limiting her experience considerably.
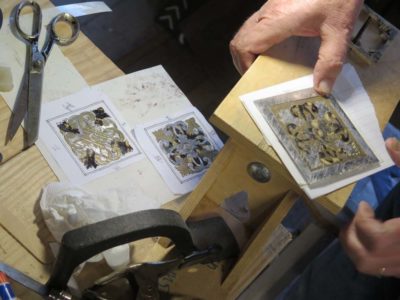
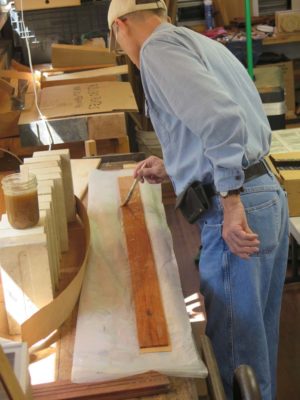
Before long the compositions of the mirror representations for their initial were taking shape.
By the end of the day we were all moving on to our second exercises, a three-part composition requiring three layers of media, pewter, brass, and tordonshell, and two supporting bookends of 1/8″ plywood.
Drilling a tiny hole near the center of the pattern for feeding the saw blade through, And we were off and running with the new project.
I have settled on the topics and approximate schedule for next summer’s classes here in the hinterlands, with three of the four classes emphasizing toolmaking. I will post about them in greater detail in the near future. One minor change I’ll be instituting next year is that three-day workshops will now be Thursday-Friday-Saturday rather than Friday-Saturday-Sunday as before.
June’s class will be a metalworking event, Making A Nested Set of Roubo’s Squares. The objective will be for each attendee to create a set of four or five solid brass footed squares, the sort illustrated in Roubo’s Plate 308, Figure 2. The special emphasis will be on silver soldering, a transforming skill for the toolmaker’s shop. The tentative dates for this are June 6-8 or 20-22, $375 + $25 for materials.
July’s class will be my annual offering of Historic Wood Finishing. Each participant will complete a series of exercises I have devised for the most efficient learning experience to overcome finishing fears and difficulties. Of particular importance are the aspects of surface preparation and the use and application of wax and spirit varnish finishes using the techniques of the 1700s. Probably July 11-13, $375.
In August we will continue the pursuit of Roubo’s tool kit, this time Making and Using Roubo’s Shoulder Knife. I have no way to know exactly how prevalent was this tool’s use in ancient days, but I suspect more than I can imagine. Each participant will fabricate a shoulder knife to fit their own torso, so its use can be both the most comfortable and the most effective. Probably August 15-17, $375.
The final class for the year will be a week-long Build A Ripple Molding Cutter. As I have been pursuing this topic and blogging about it, fellow ripple-ista John Hurn and I have settled on a compact design we think can be built by every attendee in a five-day session. Together we will be teaching the process of ripple moldings and fabricating the machines that make them. September 23-27, $750 plus $200 materials fee.
Save the dates and drop me a line for more information.
Every three or four years I teach my approach to Boullework, a branch of marquetry technically known by its original Italian title of tarsia a incastro (literally “interlocking inlay”) that was so prominent in the 17th and 18th Centuries . This identifier probably comes from the fact that all the elements of the composition — positive, negative, and sometimes additional accents — are cut simultaneously and do in fact “interlock” with each other. I always cut my marquetry vertically by free-form rather than horizontally on the chevalet, due to the fact that I have almost fifty years of muscle memory doing it the way I do it. This approach also has the advantage of allowing newcomers to begin work with only a flat board as a sawing platform, a frame saw, and some tiny saw blades, investing very little resources to begin.
My approach also has the component of using a persuasive imitation tortoiseshell (nicknamed “tordonshell) I invented several years ago to compensate for the fact that true sea turtle shell is a proscribed material as a result of the world-wide adoption of the Convention on International Trade in Endangered Species adopted in 1975, essentially forbidding any commerce or other transactions involving the two species of turtle shells integral to Boullework.
That is where the three-day workshop begins, with a brief chemistry/materials science lesson on protein macro-molecules and their polymerization and the morphology of tortoiseshell.
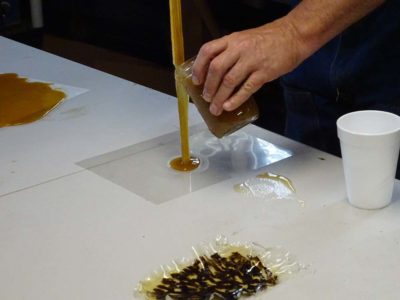
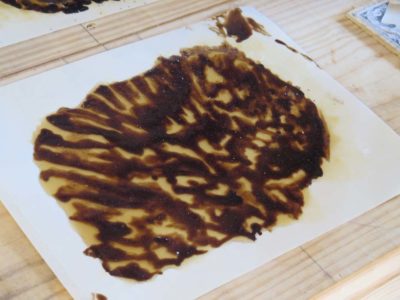
Using materials I prepared in advance, and the addition of ingredients at the moment, the attendees begin the lengthy process of making their own to take home with them afterward (this recounting of that is condensed from work over the three days).
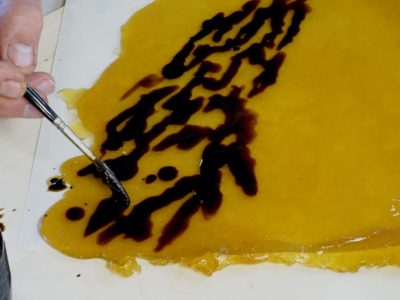
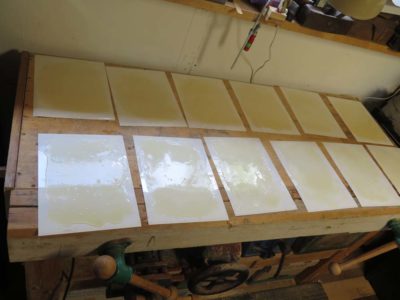
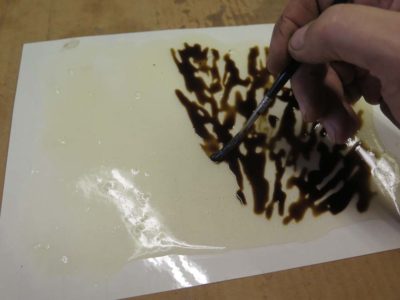
First they cast out a film that would become tordonshell, then created the pattern endemic to the material.
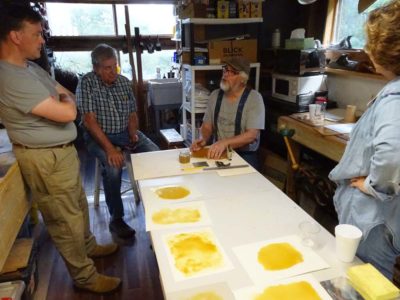
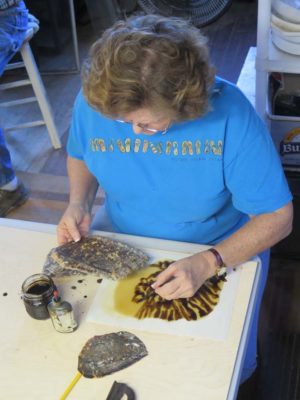
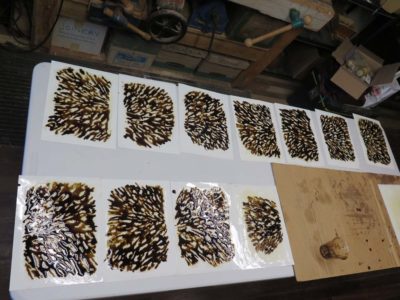
After watching me make a piece they set about to making their own. The results were gratifying.
The process took them the three days to get finished, in part because the chemistry was fighting me. In all the times I’ve made tordonshell I had not wrestled with the fundamental exothermic nature of the polymerization, but it was sure rearing its ugly head this time.
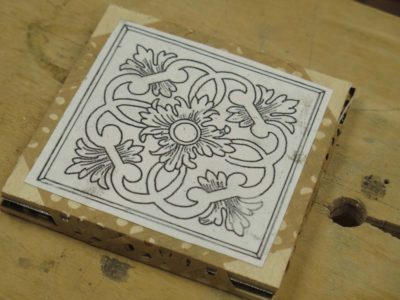
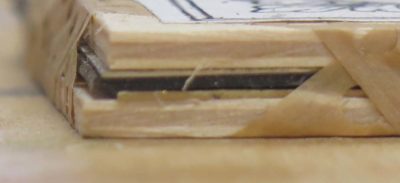
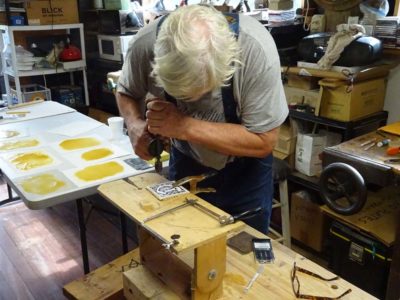
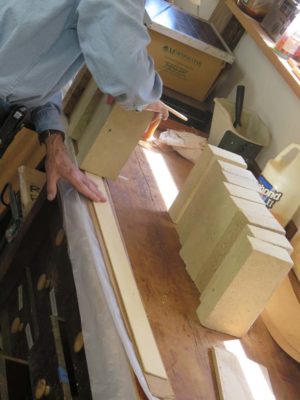
We then assembled 4″ x 4″ packets to saw (I was working alongside the attendees, I find they like me to be working on the same type project so they can peek over my should if necessary), consisting of a 1/32″ annealed brass sheet, a piece of tordonshell, and a 1/8″ plywood support. All of this was wrapped with veneer tape and the mirror-pattern of their initial was glued on to the surface with stick glue.
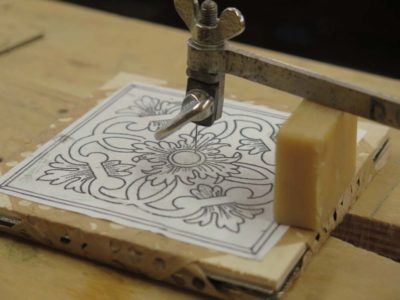
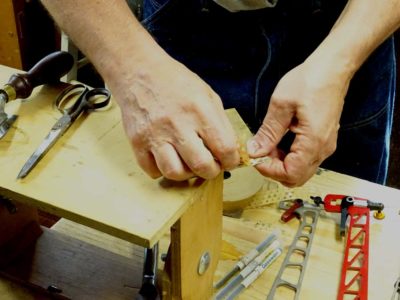
This approach requires beginning the sawing at the center of the composition, so a tiny hole had to be drilled with my ancient mini-eggbeater drill.
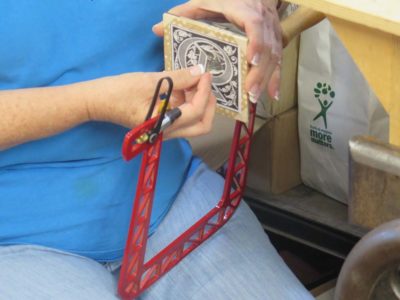
Once that was completed the saw frame was set-up and a 0000 blade was fed through the hole and the frame tightened down. this can be a frustrating task the first time, requiring four hands until you get the hang of it.. After that, no problem.
After waxing the backside of the blade the sawing (and blade breaking) began in earnest. There is a real “touch” to sawing like this, so indeed the blades were snapping right and left. Not a problem, I was expecting it. I provided the tools and blades for the most part, but John had recently purchased a new Knew Concepts saw and was giving it its first road test.
Joe had an intriguing saw from Green Lion, I only wish I’d had a chance to test drive it myself but Joe kept it busy. I think I may have to get one, just to round out my inventory. For the most part the others used Knew Concepts saws from my collection.
The sawing continued apace until Mrs. Barn called us to supper.
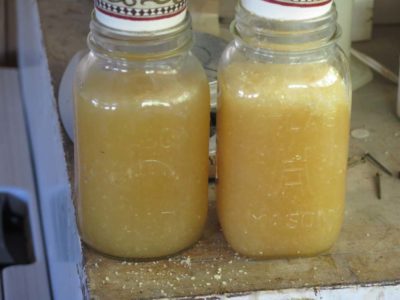
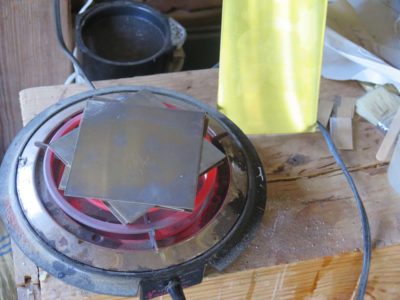
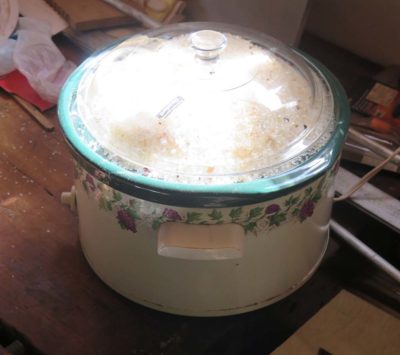
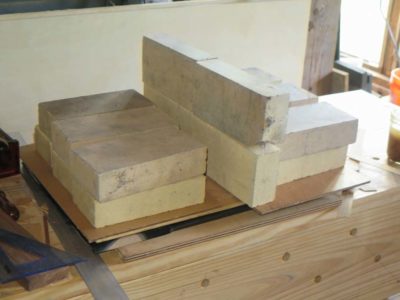
I spent part of the weekend getting ready for the upcoming Boullework Marquetry workshop at the barn. The main items were to cut and anneal the brass panels for the workshop exercises, and making some tordonshell.
I anneal the brass sheet by placing the pieces on a hot plate and letting everything get as hot as it can get and leave it there for a couple hours. When it has turned from a bright brass color (upper right) to a dull purple/brown it is ready to work. This renders the material much softer and easier to saw with the near-microscopic blades we will be using.
Actually the most time consuming thing (clock-wise, not me-wise) was reconditioning some silica gel to desiccate the tordonshell after making it. But all that took was digging out a slow cooker and the Gamma dog food container I use as a desiccation chamber for dealing with the tordonshell after it is made. I cooked the silica gel for about twelve hours to drive its RH down to about 10% so it should serve as a drying chamber nicely.
As for the tordonshell I cast and hand-painted several pieces of it, enough for everyone to have plenty for the class exercises. Since our first activity the morning of the first day is for everyone to make some for themselves to take home after the class, they will get the full experience of creating and working with artificial tortoiseshell and brass.
This topic is on my “make a video” list, perhaps for late next year.
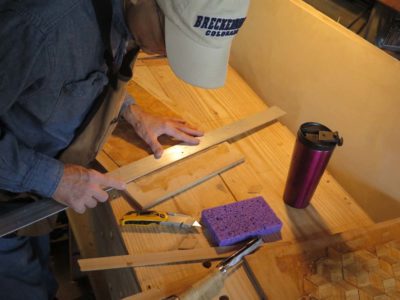
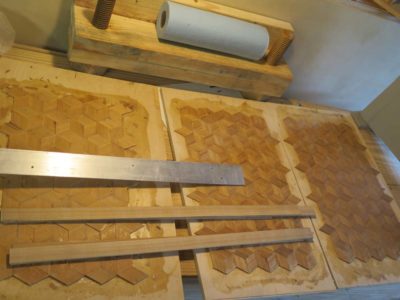
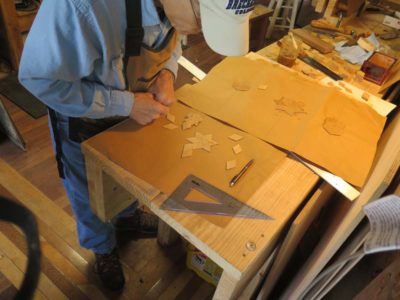
The day began with the unveiling of the parquetry backgrounds glued up just before stopping yesterday. A bit of water on a sponge allowed the paper backing to be removed easily and quickly. The hot hide glue had congealed nicely but was still pretty green so we placed them in front of a fan to help dry faster.
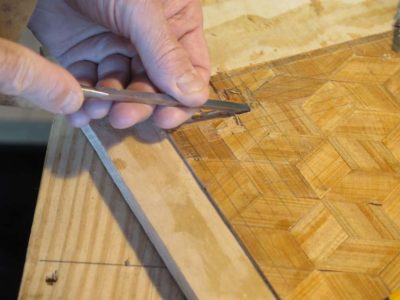
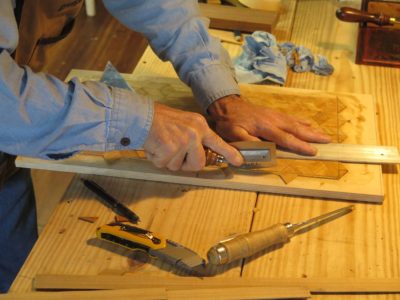
Then it was on to trimming edges, laying out the knotwork inlay and excavating the channels for the banding.
Much of the incising as done with utility knives, but Brint in particular took a liking to my shoulder knives. He gave both of them a long test drive and had definite preferences for them. So much so that he encouraged me to have a workshop next summer to allow the participants to make one (or two). We will get together over the winter to work out any bugs for that workshop.
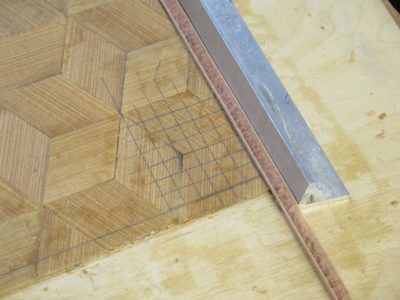
Meanwhile I was noodling around and found a donkey-dumb simple way to lay out the knotwork pattern with pieces of the banding itself as the measuring devices. Palm meet forehead.
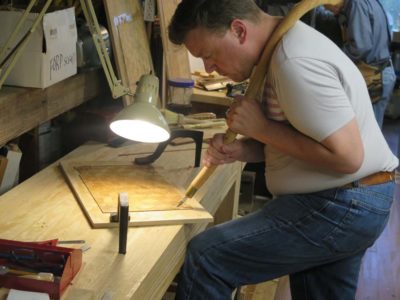
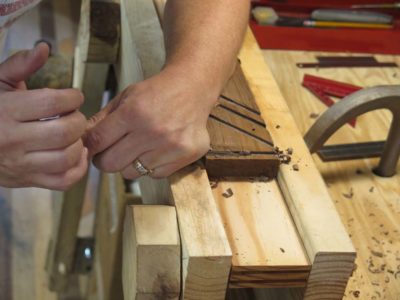
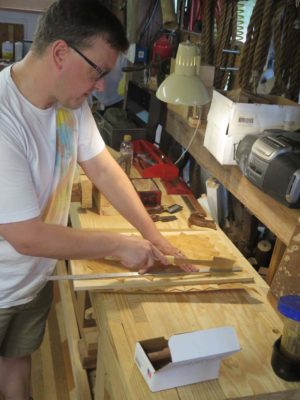
For Brint and John, once the excavations were far enough along it was time to create the template block for the individual pieces of the composition.
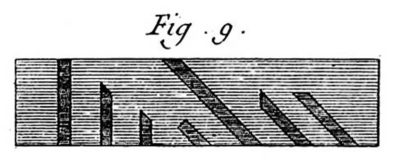
Following the guide of Roubo they took blocks of walnut and created right-angle and 45-degree channels for the banding to be sawn and planed, then placed pieces of the banding as stop blocks in the channels. This allows for limitless production of identical elements and very fast work in creating the knotwork pattern.
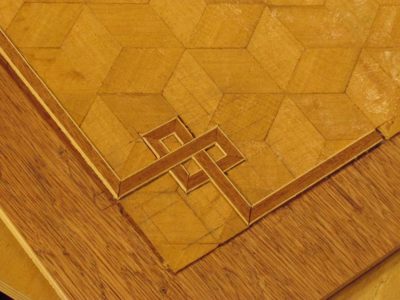
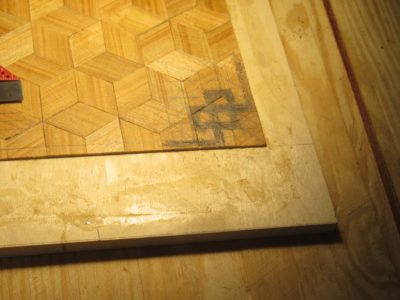
And knotwork corners became manifest on the boards.
Three weekends ago I taught the workshop Knotwork Banded Inlays, based on Roubo’s Plate 287. This was the first time I had taught this particular subject, although I had shown it many times before. But, working it through from beginning to end with students was a challenge. Fortunately I had not only some of my previous exercises but also my print that had been removed from a mutilated First Edition of L’Art du Menuisier to use as guidance.
The only way I could figure out how to get all the way through the exercise for the students was to give them a head start, so even before they arrived I had fabricated panels with the backgrounds already made and glued down. With those ready to go I had the students begin at the beginning, creating their own parquetry backgrounds so they would have the full experience of the process.
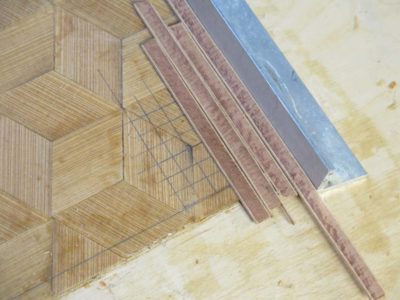
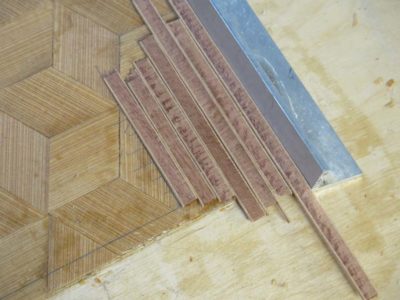
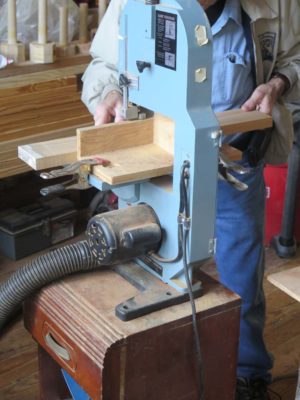
This started with cutting the veneer strips needed for the parallelogram lozenges that comprise the pattern. Once again my tiny band saw served us well, with each student making their own stock. After three or four passes on the band saw they shot the edge of the lumber and again returned to the saw until the had enough raw material to proceed.
After that it was cutting 60-120-60-120 lozenges by the score.
While one was occupied with cutting their parquetry elements the other glued up the materials for making the banding slices for use later on.
Then on to building the parquetry backgrounds in earnest, gluing down the elements to kraft paper backgrounds. Once those were complete they were set aside until the end of the day.
They then turned their attention to the already-prepared panels to trim them and begin the layout of the knotwork corner compositions. I had a number of veneer saws to try out, and the Japanese mortising saw and the Gramercy heavyweight French style veneer saw (the “King Kong” model) were much admired.
Soon the knotwork pattern layouts emerged.
We then glued the new parquetry backgrounds to plywood substrates for them to play with tomorrow and called it a day.
Forty years ago, being younger and foolisher, I believed that buying “Name Band” pricey hands tools was necessary for good craftsmanship. Turns out that might be true sometimes, but not always. In fact some “name” brands are capable of producing dreadful products, poorly designed, poorly executed, and actually moving you backwards as a craftsman. Or, sometimes it is just that your way of working is not reflected in the way the tool works. Such is the case with my first “professional” dovetail saw.
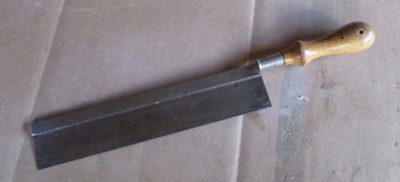
Prior to that moment I had been “making do” with this un-branded “gent’s saw,” progressing in my skill to the point where I was making real dovetail-ish constructs. Given my circumstances at the time I am nearly 100% certain that I bought this saw at Sears in the mid- to late ’70s, back when they were a purveyor of quality merchandise rather than a real estate management/liquidation enterprise. But as I fell under the thrall of the Fine Woodworking ethos it became (falsely) apparent that I needed better, brand name, tools to make better progress.
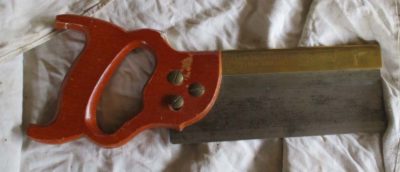
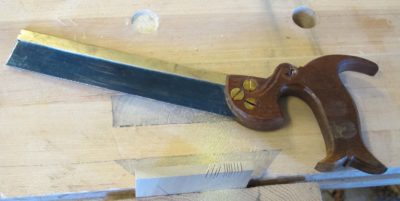
Then came a third try at college with the three years of a highly restricted purchasing and time regimen attendant to that. In 1984 I started employment at the Smithsonian Institution’s Conservation Analytical Laboratory, allowing for a modest tool budget. This was in the days prior to our current Golden Age of Tools and tool making so the options available to anyone outside the vintage tool network were limited to one or two mail-order catalogs. So I went to the best hardware and tool store in the DC area and bought the best, most “Name Brand-y” pair of back saws they had. How was I to know in advance that the “dovetail” saw was dreadful? It only took me one or two sessions at the bench to realize that this was the case.
Everything about this saw’s ergonomics was wrong. The handle did not fit my hand as nicely under fire as it did when being admired at the store (was Angus MacAskill their hand model?). And though the cutting length was nice, in fact the teeth were excellent, the height of the saw plate combined with the absurd weight of the overly stout brass back made the thing so unwieldy for me that my facility at cutting joinery actually regressed when using it. It might have been a fine tool, in a purely theoretical sense, but it was not suited to me.
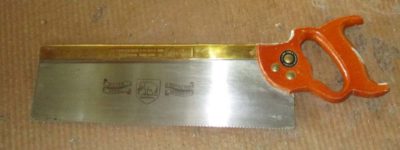
The odd(?) thing is that the companion tenon saw I bought, same time, same maker, suits me almost perfectly for its purpose.
So I tossed the dovetail saw aside for more than two decades, no, make that three decades. With my little gent’s saw I made steady progress in my workmanship. I even augmented that with a Bad Axe standard issue dovetail saw early in that company’s existence. Though these were excellent saws I found that when working in thin stock making petite joinery they were too aggressive.
Me being me, I decided to try to make my own little saw and that outcome was excellent, resulting in not only a perfectly suited saw but even better, some Ivory Tower Coin of the Realm — a publication! I continued making more saws, becoming more confident in them, giving most of them away as I finished. I even commissioned Bad Axe to make me a custom saw based on what I learned in making them myself, and that saw remains an integral part of the inventory.
But let’s return to the saw whose shortcomings led me down this path; could it possibly be rehabilitated? After all, the cutting edge was excellent, it was just everything else that was not.


Recent Comments