Here’s a list of the Barn workshops I’ve pencilled in for this year. I will blog in greater detail shortly.
Historic Finishing April 26-28, $375

Making A Petite Dovetail Saw June 8-10, $400
Boullework Marquetry July 13-15, $375

Knotwork Banding Inlay August 10-12, $375
Build A Classic Workbench September 3-7, $950

After long and careful consideration, I have concluded that I simply cannot host any workshops at The Barn this coming summer. The combination of the Studley book and exhibit, brutal winter aftermath with a mountain of things to do on the homestead, projects that have languished in the studio, and the need to wrap-up Roubo on Furniture Making (almost twice as large as Roubo on Marquetry) leaves me with no time nor energy to dedicate to workshops at the barn. I had planned on a historic finishing workshop in late June, but that will have to wait until net year. In September I will host a week-long workbench build for my friends of the Professional Refinishers Group web forum.
This is not to say I will be entering my long anticipated hermit phase. My presence and teaching elsewhere over the summer will be evident. Check these out.
Henry O. Studley Tool Cabinet and Workbench exhibit – May 15-17, Cedar Rapids IA
Making New Finishes Look Old – Society of American Period Furniture Makers Mid-Year Conference, June 11-15, Knoxville TN
Gold Leaf and its Analogs – Professional Refinisher’s Group Groopfest, June 24-26, Pontoon Beach IL
The Henry Studley Book and Exhibit (breakfast banquet address) and Roubo Parquetry (demo workshop) – Woodworking in America 2015, September 25-27, Kansas City MO
Last Friday on my way to the annual banquet of the Society of American Period Furniture Makers at Colonial Williamsburg I took the opportunity of my foray into “civilization” (or is it “out of civilization?”) to make a number of stops purchasing materials and supplies for ongoing and upcoming projects.
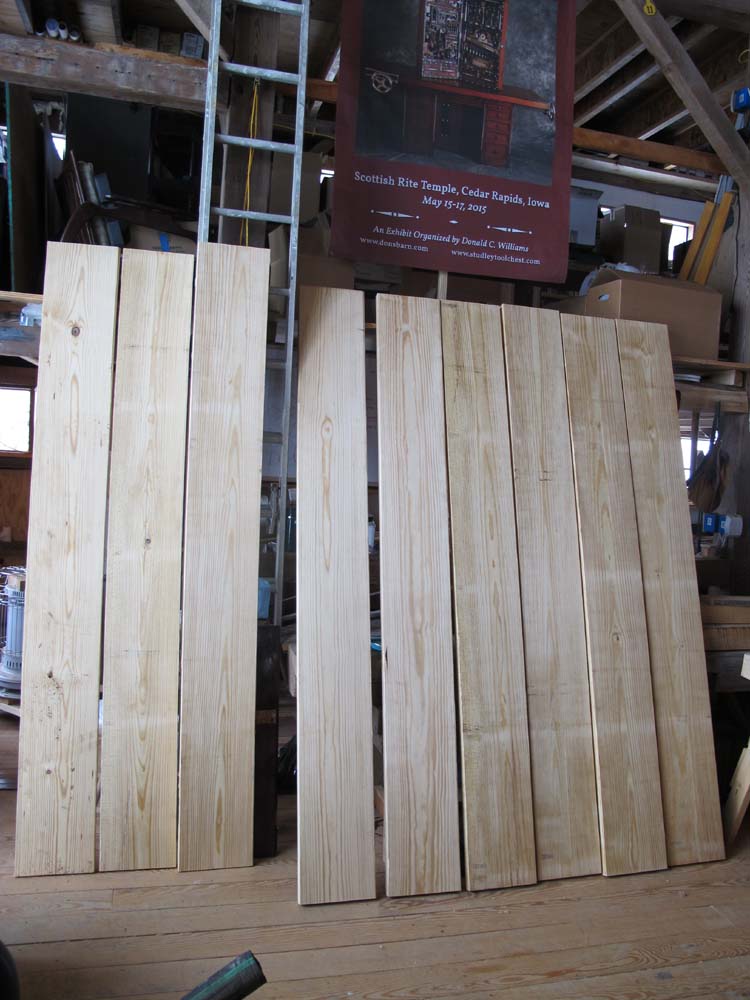
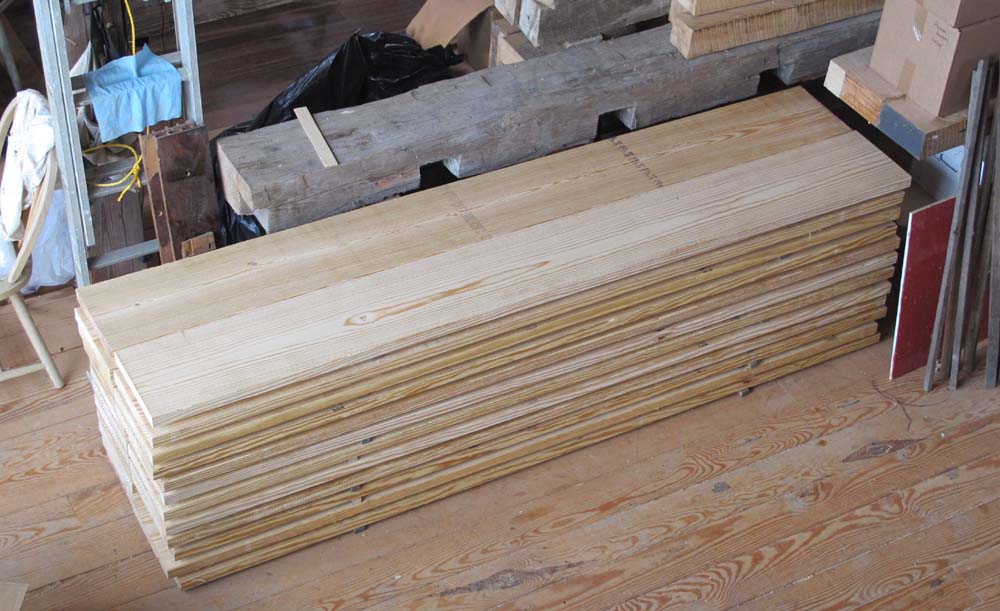
Perhaps the most important of these stops was at Virginia Frame and Builders Supply in Fishersville, just a hundred yards or so from I-64. Virginia Frame is renowned for having large, long, and lovely lumber in stock. I bought some 24-foot long southern yellow pine 2x12s, mostly clear and some even select. Since my pickup has a 6-foot bed, the folks at Virginia Frame cut the 24-footers into 8-foot sections and we stacked and strapped them into the bed for the long ride to Williamsburg then back to the mountains.
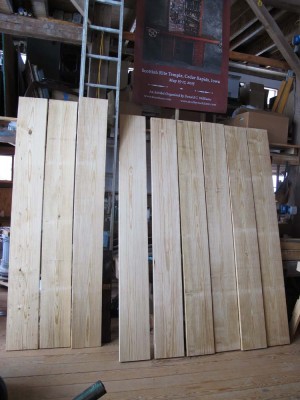
This September I will be hosting ten members of the on-line forum Professional Refinishers Group, a treasured mostly-virtual community to which I have belonged for many years, for a week of workbench building. The lumber from Virginia Frame will serve as the raw stock from which I will make a Roubo prototype and a Nicholson prototype, to work out all the bugs in the fabrication process. Once I do I will order the same lumber as necessary for all the workbenches being built in September.
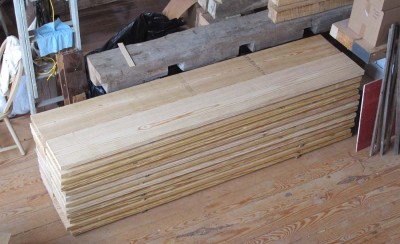
There was rain on my trip, so when I got back Saturday afternoon I spread out the boards to let them dry, then yesterday morning I stacked them to allow them to sit properly before I build the benches in February and March. I love working with southern yellow pine, and these boards are magnificent.
But first I have to make a replica of the Henry O. Studley workbench top for the upcoming exhibit.
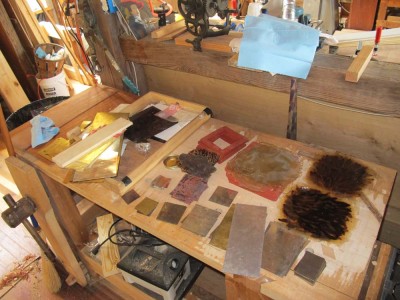
This coming Friday through Sunday I will be teaching a three day workshop on the Boulle technique of marquetry at The Barn. This is something I very much look forward to. So, for the past few days I have been punctuating my days by preparing the classroom space for the event.
One of the parts attendees seem to enjoy the most is the making of tordonshell, and here is a batch I have prepared for them to use. They will make their own to take home.
Come Sunday afternoon they will have some finished panels, the number and complexity depending on their interest and the time it takes them.
I still have an empty slot for this, so if it interests you drop me a line at the Contact portal for the site.
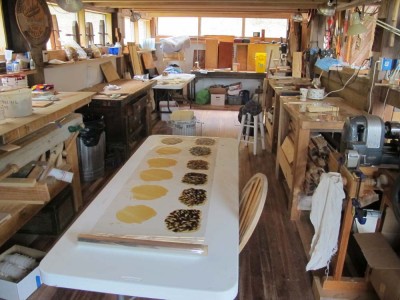
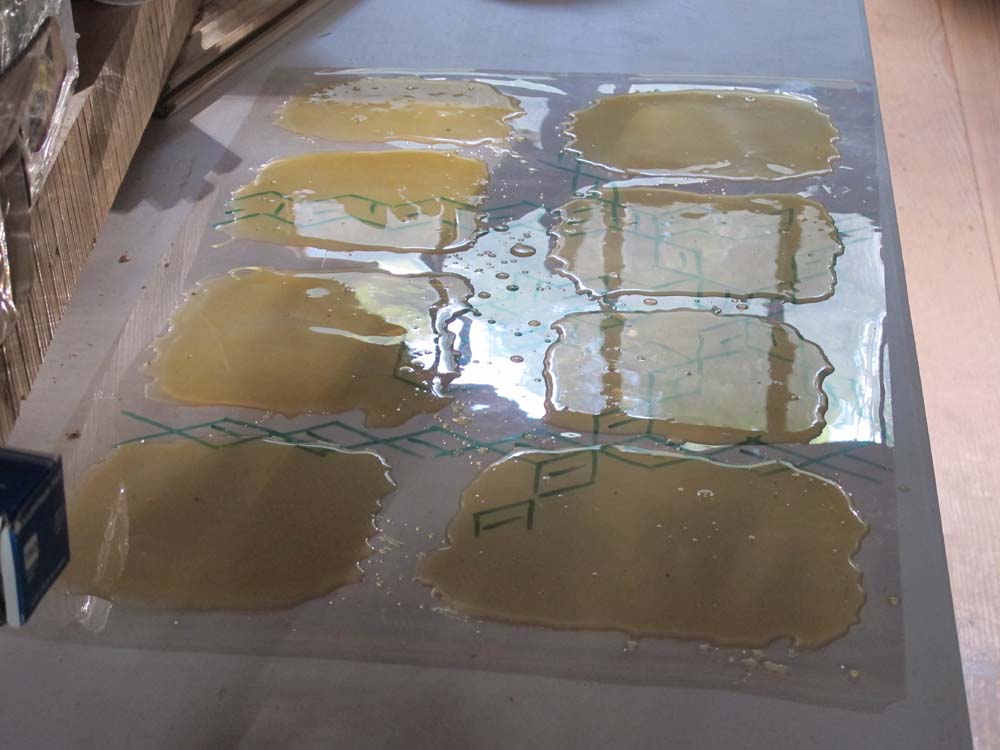
We’ve got a weekend workshop on Boullework Marquetry coming up at The Barn the first weekend of October. Recently I made a batch of artificial tortoiseshell for us to use in that workshop, with at least two pieces for each participant. One of the exercises for the weekend will be to make another batch so that each attendee can make their own once they get back home.
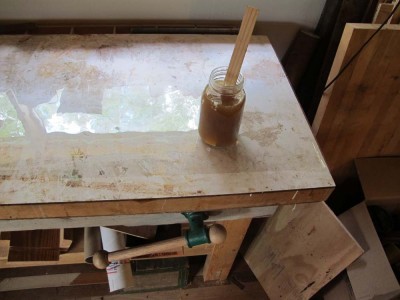
My method is described somewhat in an article I will post next week in the Writings section of the web site, but here again is how I did it this time. Start with a flat clean surface with a sheet of mylar on which to cast the artificial shell on.
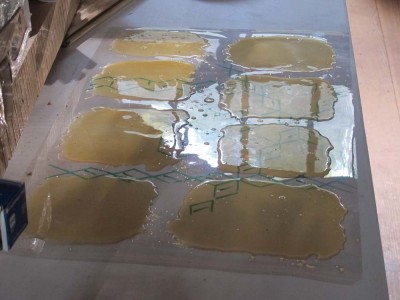
Cast out the material on the mylar,

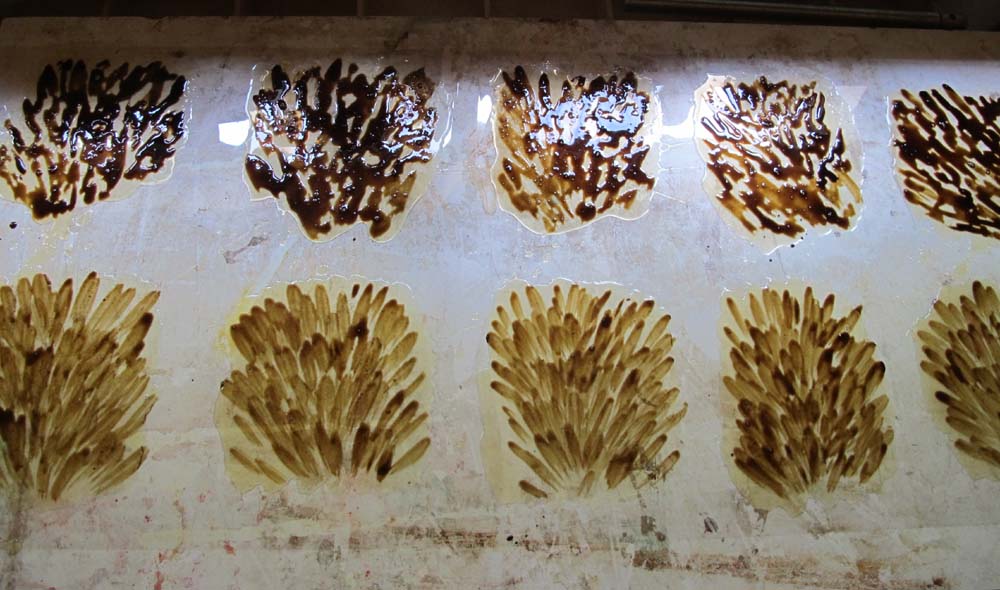
then create the pattern. The upper row of scutes is made to mimic “hawksbill” turtles, and the lower row “greenback” turtles. Once that is firm, cast a second layer of polymer on top of the pattern to complete the composite, and you are done.
PS – I purposefully left out all the chemistry stuff. It’s in the article
PPS If you are interested in joining us for the course, drop me a line through the “Contact” function of the web site.

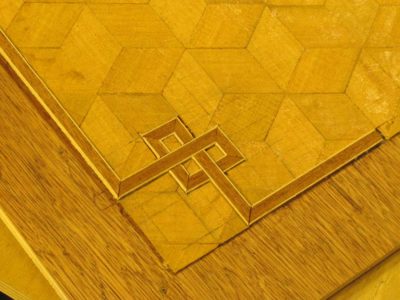
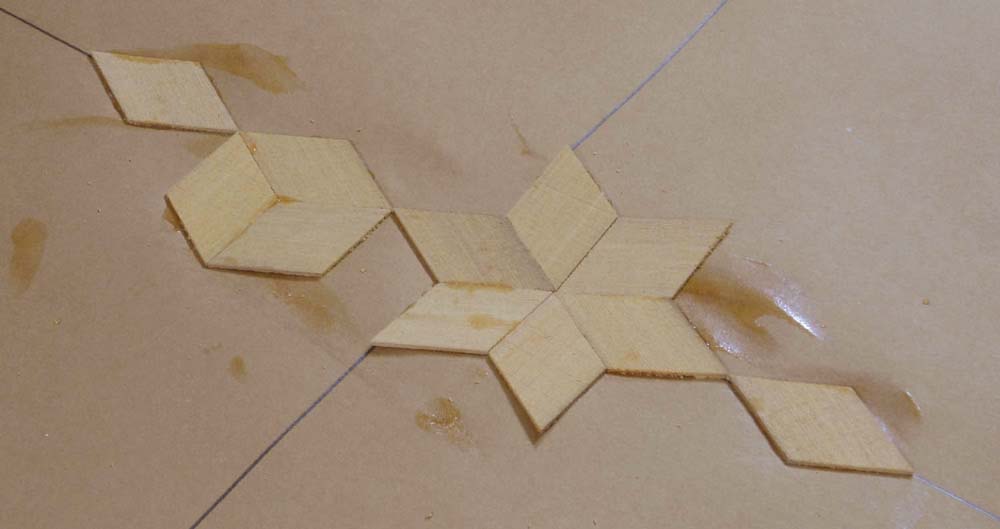
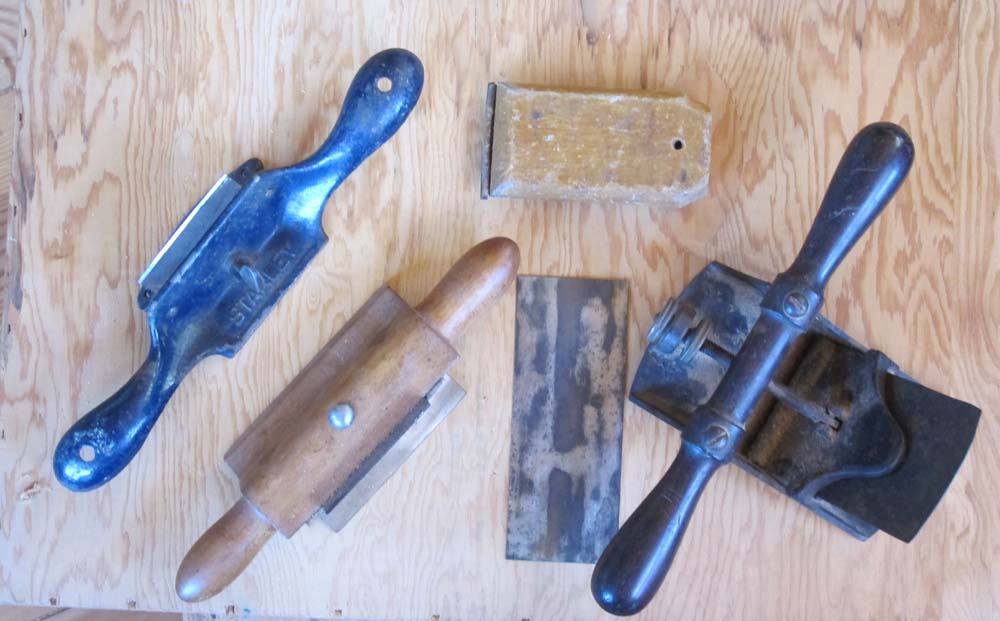
One of the beauties of parquetry, aside from its, well, beauty, is that it is a decidedly simple process requiring only a few tools to get started.
When we gather for the workshop at The Barn in less than a fortnight each student will need only a few tools, none of them exotic or impossible to find or purchase or even make.
These are not presented in any order of importance.
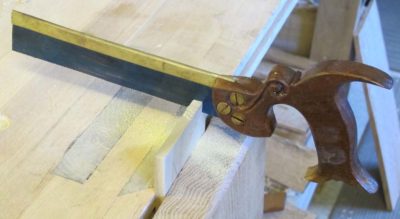
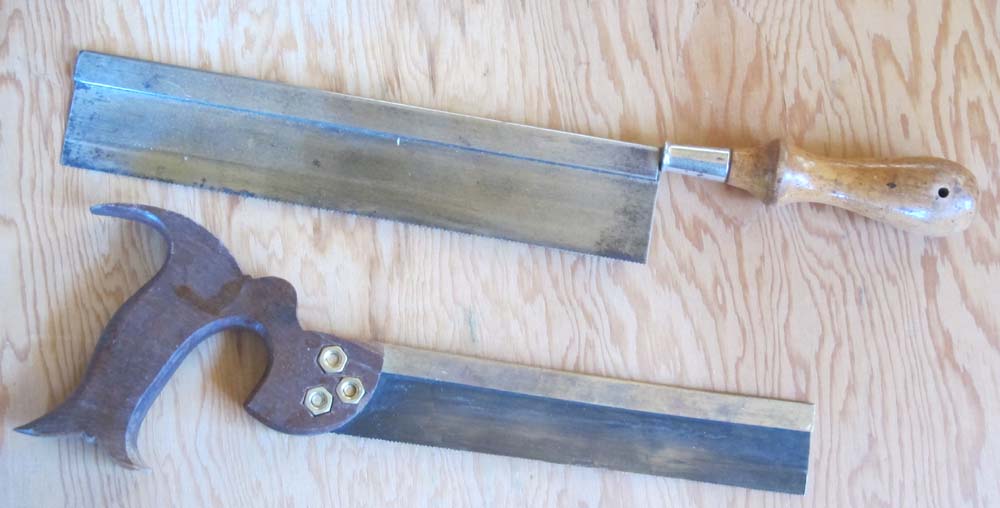
1. Small back saw
The first tool needed is a small dovetail-type saw, used to cut the already fashioned veneer strips into equilateral parallelograms. Almost any kind of small back saw that cuts cleanly will do.
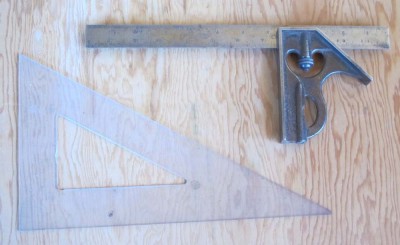
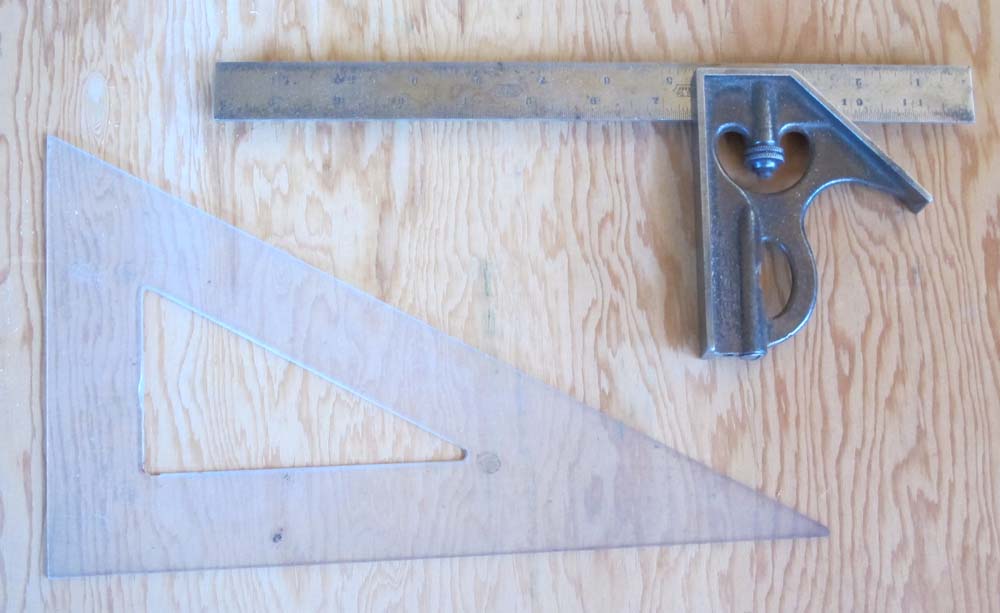
2. 30-60-90 triangle
Since this type of parquetry is based on the 60-120 degree equilateral parallelogram, a 30-60-90 triangle is required. A decent quality plastic one from the big box store works just fine. Or you could do what I do and just pick them up at yards sales for a quarter apiece. That does sorta explain why I have a whole drawer full of them…
3. Bevel Gauge
To both prepare the sawing jig and the layout of the veneer panel, a bevel gauge is needed. In the preparation of the sawing guide it is the fence against which you ride the back saw for establishing the initial kerf. As long as the blade of the gauge is straight and the locking nut locks, you are good to go.
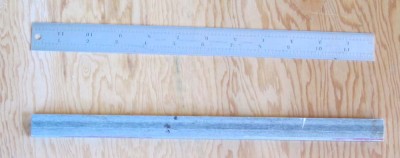
4. Straightedge/ruler
In order to assemble the parquetry pattern properly you have to establish the greater and lesser axes so you know how to assemble the pieces on the kraft paper backing. The straight edge makes this an easy task, especially if it is a ruled bar used in concert with the aforementioned triangle.
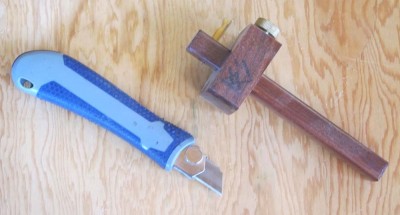
5. Utility knife
Many times in the course of a project you need to cut or trim something, so some sort of utility knife is called for. Equally applicable would be a straight ship carving knife.
6. Cutting gauge
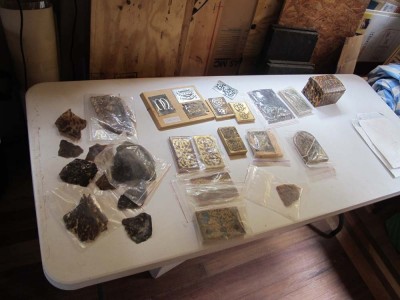
If you are including banded inlay into your composition, a cutting gauge (pictured next to the blue utility knife) is useful for establishing the edges of the channels into which the banding will be glued.
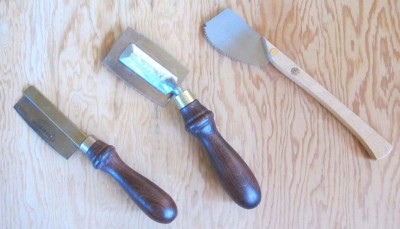
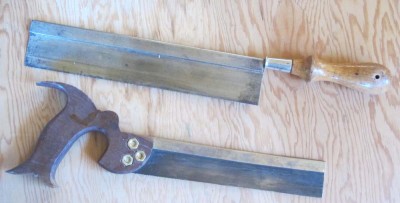
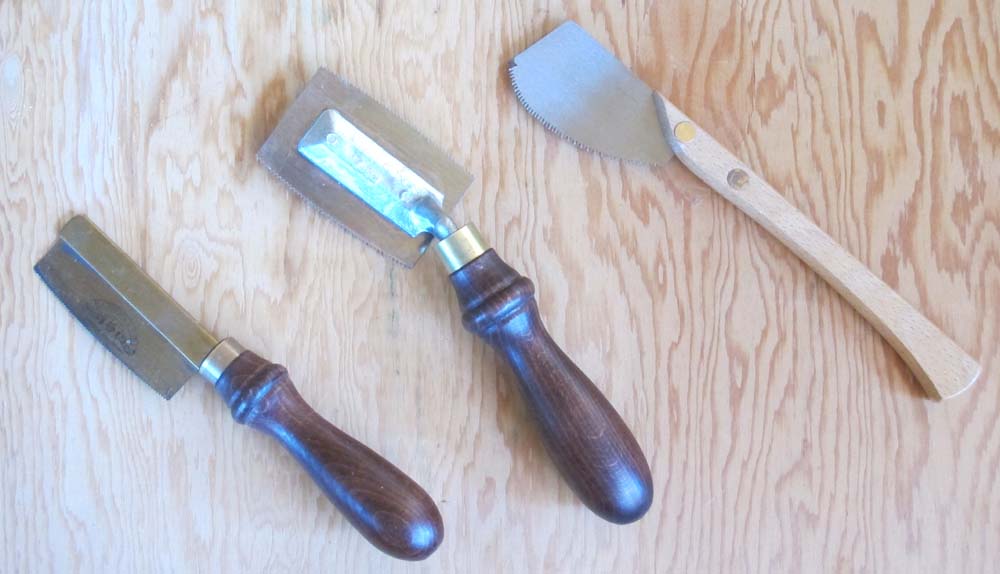
7. Veneer saw
For finishing the edges edges of the marquetry panel, or establishing the channels for the banded inlay, and marquetry saw is a godsend. I show three different iterations; on the left is an “English” style, the center one is I believe of German heritage — both of these saws cut on both the push and pull stroke — and the one on the right is Japanese, hence cuts only on the pull stroke. I have tried but do not yet own the new design from Gramercy Tools, but it is superb. Since much of my future work will be parquetry, I will order one.
8. Small bench chisel
To clean out the channels for the banded inlay.

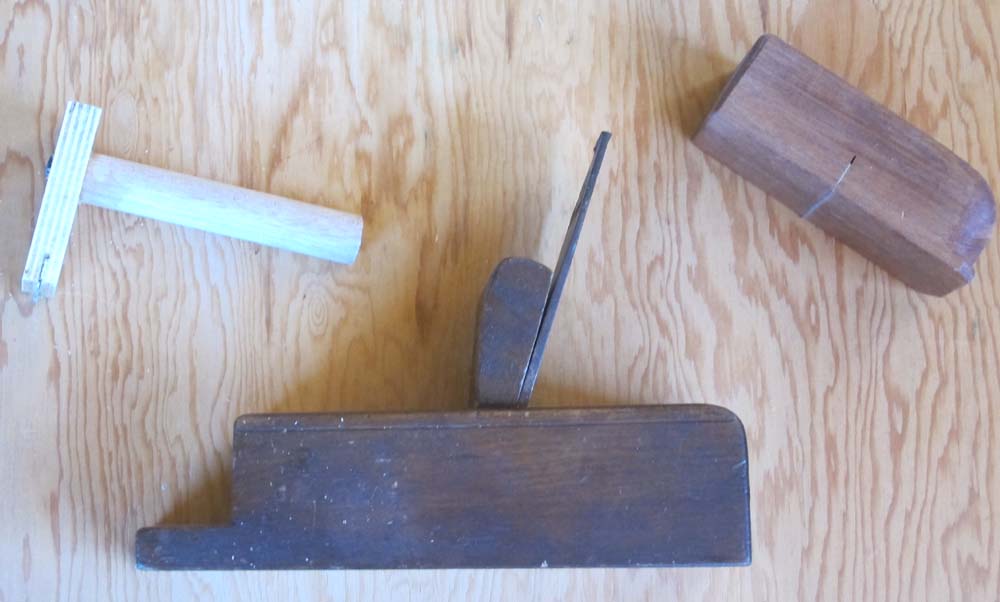
9. Toothing plane or analogue
When the parquetry panel is assembled and applied to the substrate, it will be neither flat nor smooth. A toothing plane will accomplish the former. I have about ten, but if you don’t have one you can make either a low-tech block toother or a squeegee-style toother, both of which employ hack saw blades.
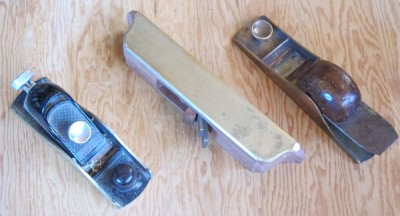
10. Block plane or similar
Often the parallelogram lozenges need just a touch along an edge to make it fit perfectly, and the sharp block plane is just the tool. Later on, you will need the block plane to follow the toother in the finishing.

11. Scraper
The final step of smoothing is done with a scraper. Whether you use a card scraper or a block scraper is immaterial, all that counts is that it be cutting nicely and leaves a perfect surface.
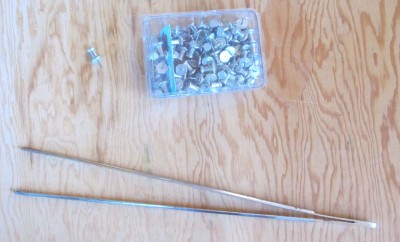
12. Miscellaneous tools
I always like to have a pair of tweezers laying in the vicinity, and a bunch of metal-headed thumb pins, to tack down the banding while the glue set.
That’s pretty much all you need tool-wise to get started. Next time I’ll talk about making and using the sawing and planing jigs.
===================================
If spending a weekend in Virginia’s Little Switzerland making a parquetry panel sounds like fun, drop me a line and sign up for the class. It is a week from Friday-Sunday.
(think the scene from “Wizard of Oz”…)
It’s the first day “after” Groopstock but still the crowds are here. The impulse for continued fellowship is so strong that we continued through the morning as folks were packing, parting, and moving out.
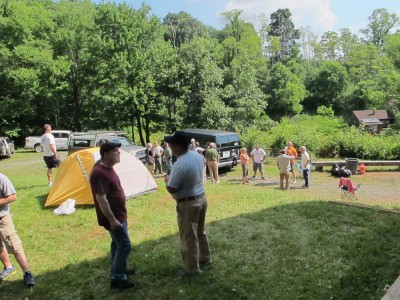
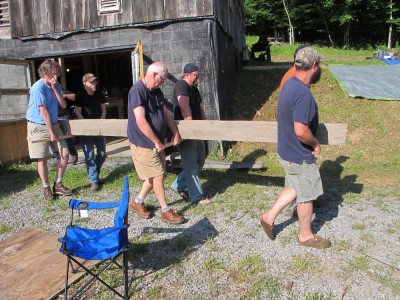
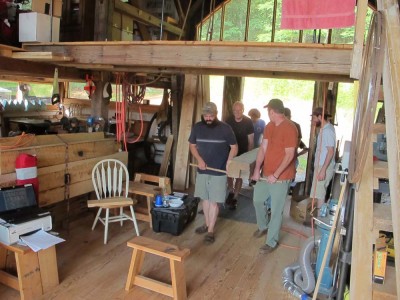
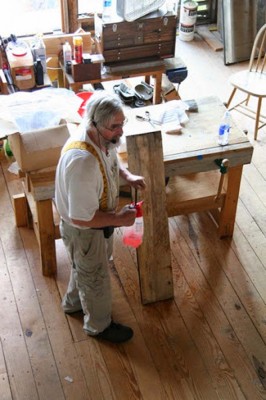
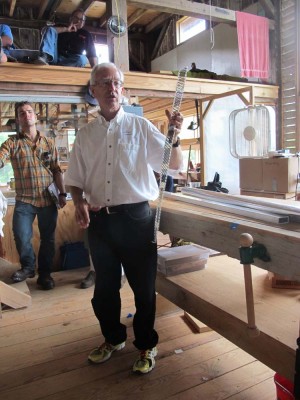
While I had so many sturdy bodies at the ready, I asked them to move the mondo SYP hand hewn timber from the first floor (basement) up to the second floor. Six of the men jumped in to volunteer, and they got the job done in about 45 seconds. This timber will soon become a 13-foot-long planing beam in the center space of the main floor, and that transformation will provide me with an excuse to blog about planing beams in general and this beam in particular.
By lunch time we were down to a half-dozen exit stragglers, and by supper only one overnighter was left.
The next phase of the summer would be finally (!) getting my own workshop space in order. Saturday and Sunday were still decompressing time, but by Monday I was back in the shop all day. Tales of that start tomorrow.
Stay tuned.
The final day of Groopstock has, in the past at least, been capped off by a gargantuan meatfest for dinner. We did it again this year, but first the highlights of the day.

photo courtesy of Joshua Klein
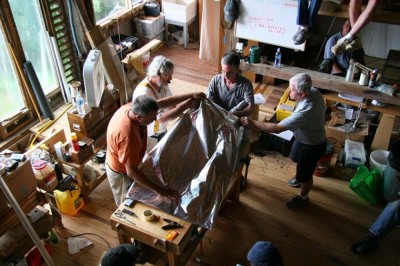
Bill Robillard and I built the folding portable workbench in real time to start the day. I will build another one in a month or so in order to blog in detail, and then compile those blogs into a downloadable PDF.
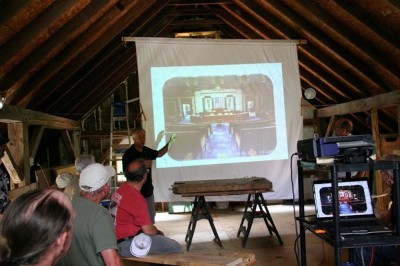
photo courtesy of Joshua Klein
He then left to present a monumental project of restoring the dais and rostrum for the US House of Representatives. I was still working downstairs, but I got to hear it at least.
After lunch Dave Reeves, Bill, and I began the ritual of meat grilling. I grilled up ten racks of ribs while they worked on 85(?) bratwurst, cooking them first in beer and onions before cooking them over real wood charcoal, as I was doing a dozen yards away. I had heard of Tennis Elbow, but this was the first time I’d ever been afflicted with Barbeque Shoulder. Flipping those dozens of pounds of meat really got tiring, and I was pretty sore by the time it was all over.
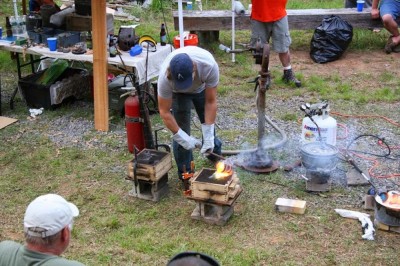
photo courtesy of Joshua Klein
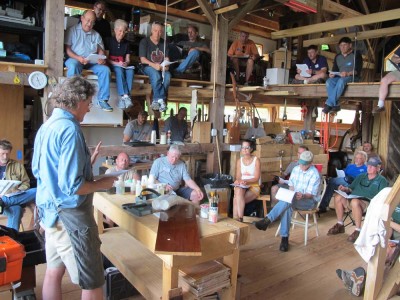
While this was going on in the yard, up the hill at the Barn there were presentations by Jon Szalay on molding and casting (I think they did cast some bronze), Brian Webster on Building a Website, and finally Jim Young and Bruce Hamilton on Pricing and Estimating.
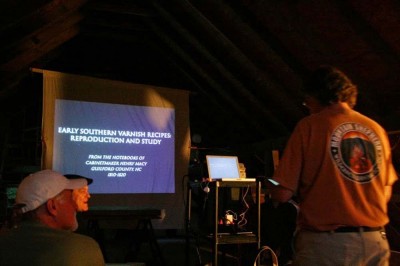
photo courtesy of Joshua Klein
Those who were still mobile and non-catatonic after gorging on meat traipsed back up the the barn for Martin O’Brien’s discussion of historical varnish recipes recorded in the archives of the Museum of Early Southern Decorative Arts, which I still maintain is about as close to perfection as a museum can be.
Following that, a bunch of the crowd wanted to watch the rough cut of my upcoming video Historic Transparent Finishes, but by midnight I pulled the plug and told everybody to go to bed. They did not necessarily obey, but I was asleep and did not care.
For any enterprise like Groop, there are many layers of dynamic activity. Such truth is enhanced immensely when the members gather together during their irregularly scheduled GroopShops, of which there have been many over the past fifteen years, including three at the Barn. It is then that fellowship goes into overdrive.
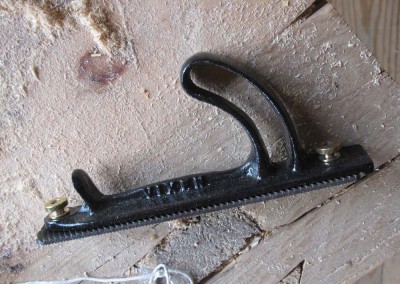
After dinner on the second night, Group Trustee Mike Mascelli took to the floor to give a heartfelt recitation of Groop, reflecting on its founder Alan Marriage and his untimely death a dozen years ago. (Somehow I did not get a good picture of Mike) Mike also launched a round of memento giving, including this super cool Vixen file to me, knowing of my passion for tortoiseshell and the similarities between Vixen files and French tortoiseshell rasps known as “grailles.” It has already been put to work, which is the highest compliment you can pay regarding a tool Mike has bestowed on you.

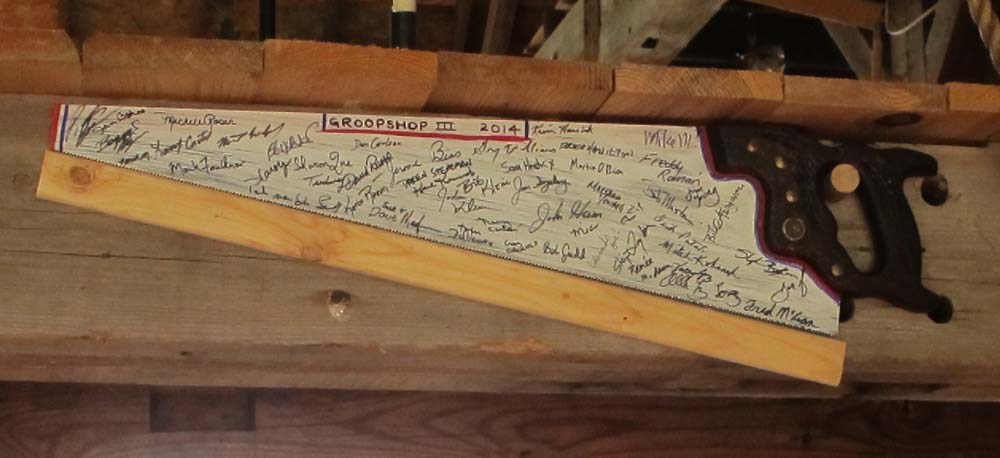
Groopster Dan Carlson once again was the ringleader for an aggregate gift commemorating Groopstock, this time a vintage saw purloined from my ample stash of saws “to be fixed up, some day,” painted then signed by all the attendees.
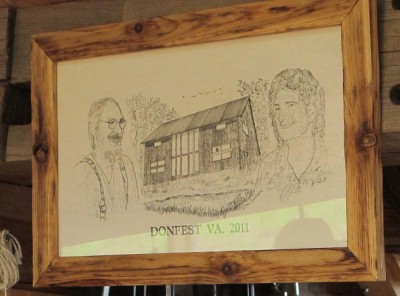
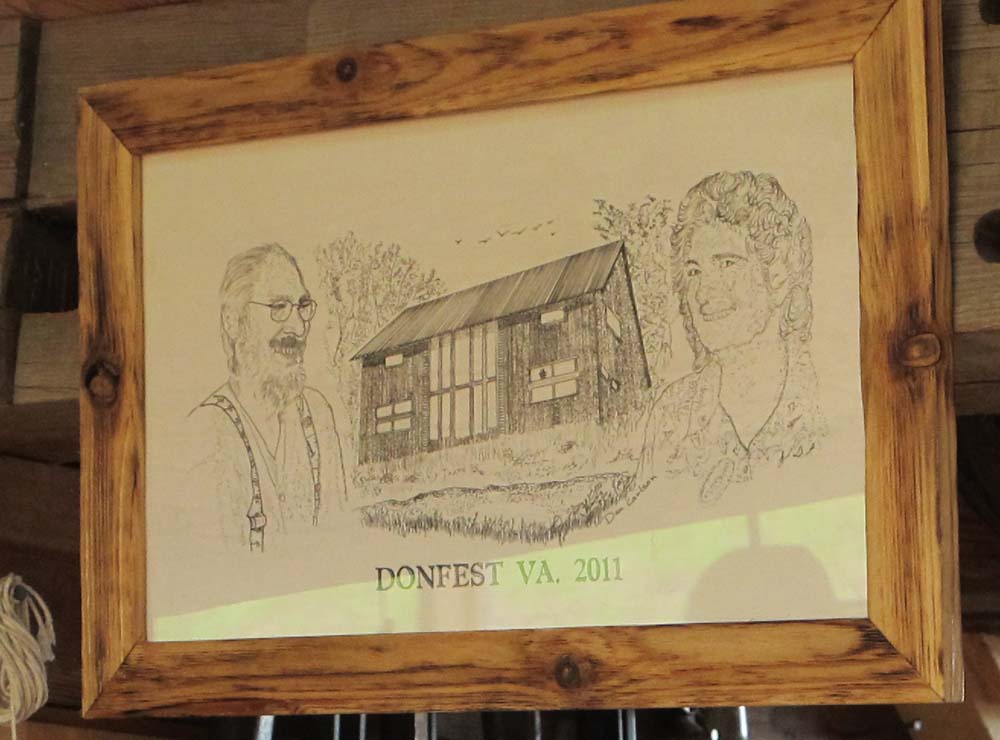
It has already taken its place of high honor near the gift from three years ago, a portrait of my wife, me, and The Barn.
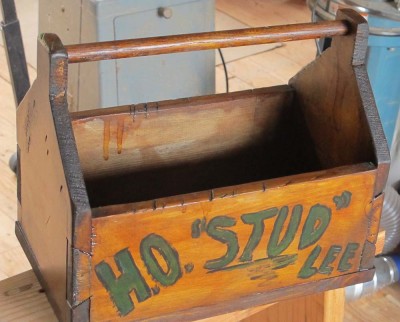
Dave Reeves brought down the house with his lengthy and convoluted tale of my fascination with the Studley tool cabinet, and told of his tireless efforts to find me a legitimate replica, and the joy of learning that his pickers had found one. I will let you judge their efforts, but I am not certain they comprehended his instructions adequately.
If you want to follow the adventure of the REAL Studley ensemble, including the upcoming exhibit in May 2015, you can do that by going here.

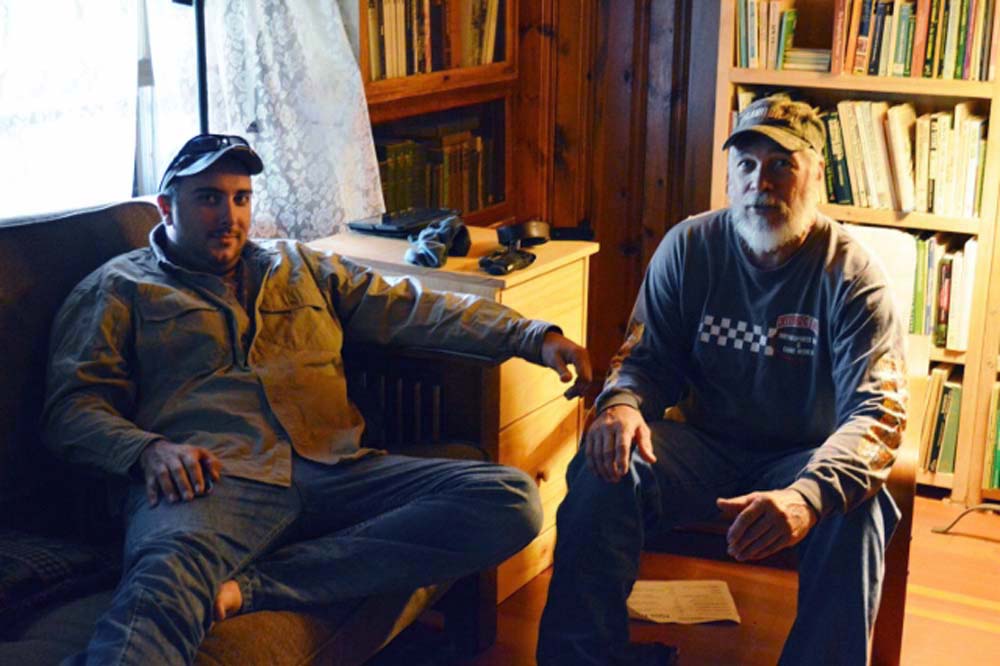
One final treasure of the week was spending it in the company of my brother and nephew, without whose tireless efforts the lawn would not have been mowed, the new shower in the barn not installed… Thanks guys.
It does not get much better than this.
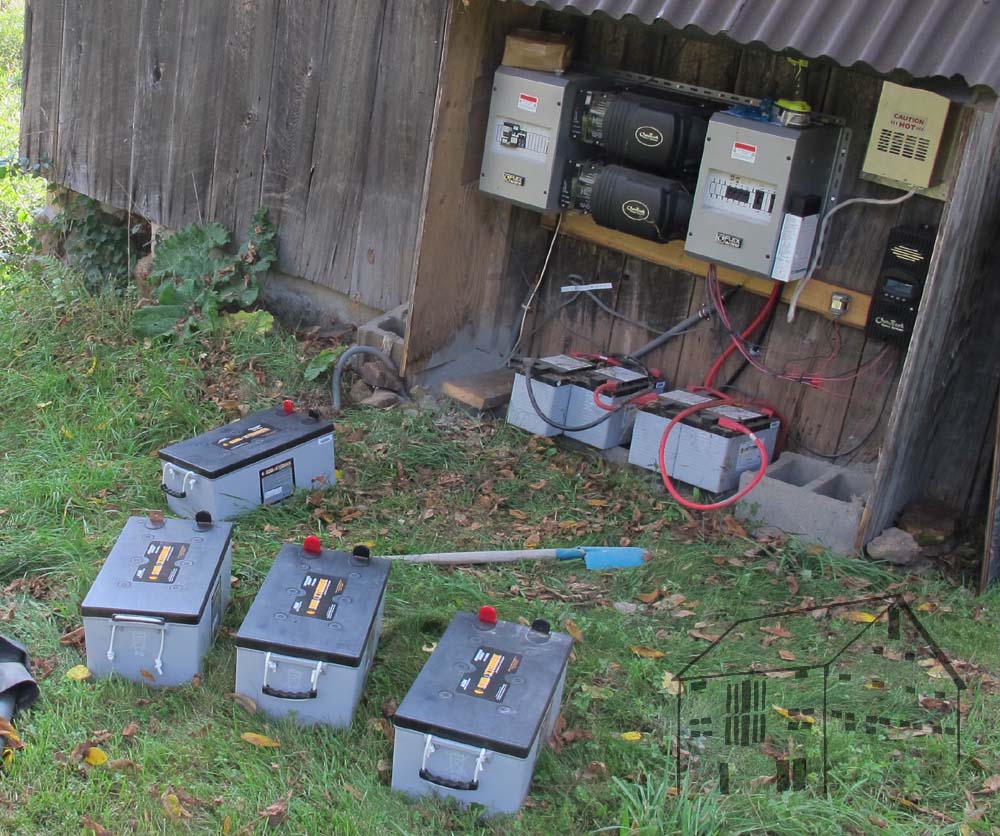
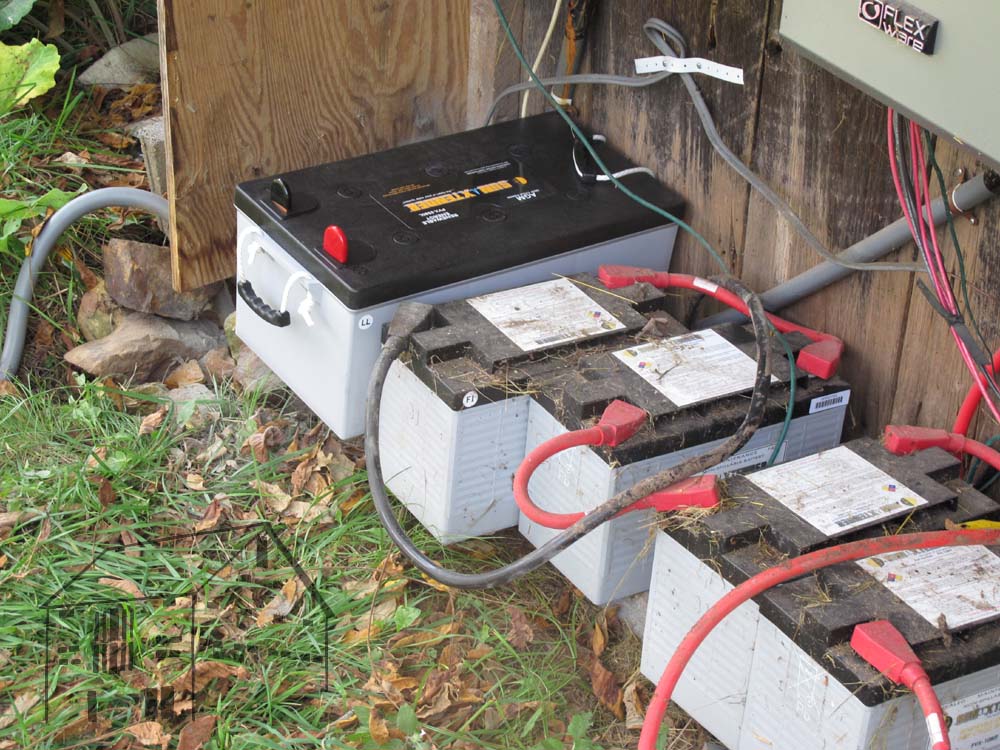
Day 2 was a bit more traumatic for me as I started the day as I almost always do, going to check the status of the power system. My heart was immediately in my throat as I saw that it was stone cold dead, and would not re-boot.

Notwithstanding my battery upgrade last year, when I replaced the four original oversized deep-cycle truck batteries with four OVERSIZED deep cycle batteries, which at 192 pounds apiece were the largest 12-volt batteries available in the US and quadrupled my storage capacity, the system was not operating.

Frantically I consulted with BillR, who has been instrumental in the conception and installation of the system, and he made a “Kentucky windage” guess that the system needed to charge up its reservoir to restart, so all we had to do was wait for the sun and the creek to do their magic.
In the mean time I had four generators ready at the gate, and I fired up my sweet little 3.5kW Suburu generator and made a quick gas run. Unfortunately I missed the beginning of Martin O’Brien’s presentation on color theory and inpainting techniques.
I was checking the system every half hour or so, and at 11:15 it started up. After a lot of head scratching we got it figured out. Apparently during the night someone had started up (or left on) the mondo exhaust fan on the fourth floor and eventually the system shut itself down when the batteries got too low. The fan consumes about 800 watts of juice, and the water turbine output is about 500 watts. Adding the fan juice to the wattage consumed by just the system itself being powered up (200 watts) and the multitude of phones and computers plugged in to recharge, we had no chance in getting through the night unscathed.
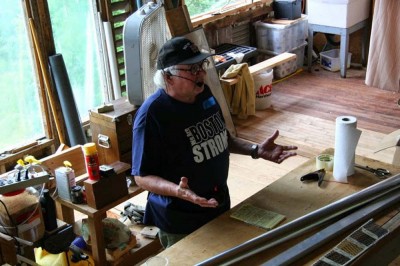
After lunch I was on stage presenting Insect Eradication, covering the low-ish-tech methods available to craftsmen facing the problem of powder post beetles or termites in the wood, carpet beetles of other creepy crawlies in the upholstery, or similar troublesome critters.
Covering both aqueous borate salt treatments and anoxic suffocation treatments, the attendees were equipped with the knowledge needed to address this problem. I will be blogging about this topic in late July or August, and will compile those postings into a PDF that you can download as a reference.
Closing out the afternoon were Bob Judd speaking on the topic of dealing with the mass media on a local scale for obtaining free publicity, and Dan Carlson commenting on a variety of rust-suppressive coatings for metals.
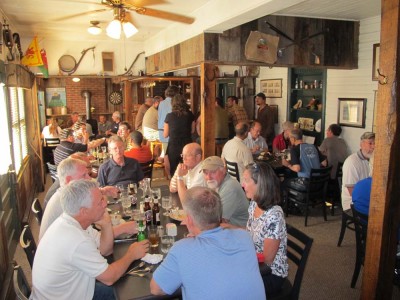
For our evening meal we held our traditional dinner at the Highland Inn’s Black Sheep Tavern, where a grand time was had by all. Heartfelt histories were recited, and many gifts and mementos were presented. More about that later.

Back at the barn at 9PM Joe Amaral began a fascinating presentation first on the repair of a damaged polyester coating, followed by an absolutely captivating discussion of his explorations of oriental lacquer techniques. His own sample boards were a sight to behold, and the crowd stayed strong and attentive until the very end.
After a quick scolding from me regarding the power consumption, I went to bed.
Special thanks again to Joshua Klein for his permission to use many of his photos for this posting.


Recent Comments