I’ve made furniture in the past, and still do on occasion, but I do not consider myself a furniture maker. I have made exactly one kind of chair in the past, present and future, but definitely do not consider myself a chair maker notwithstanding being at the halfway point of teaching a six-day Gragg chairmaking workshop in the barn attic. In reality I might just be an old coot with a lot of tools and wood in my dream shop located in Shangri-la.
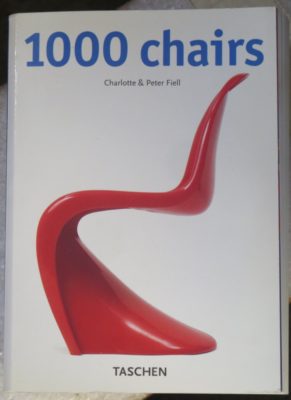
That said, recently while waiting for some wax to melt I pulled down the book 1000 Chairs from the shelf for the first time in many, many years, perhaps fifteen, but certainly not since moving here almost a decade ago.
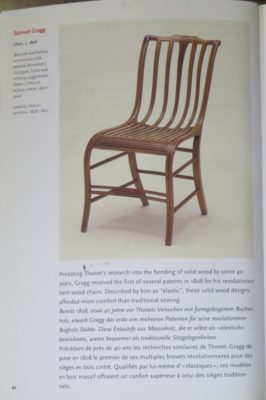
I had not remembered that a Gragg chair was the first offering in the book. It was a bit of a surprise, to be honest. It’s not the top-of-the-line Gragg chair like we are composing this week but is a beauty anyhow.

As I browsed through the book I found a number of chairs that intrigued me, but only a few that interested me enough to consider making them. One of the first of these was this recliner by Josef Hoffman, whose vocabulary should be much more widespread throughout the design/craft community.
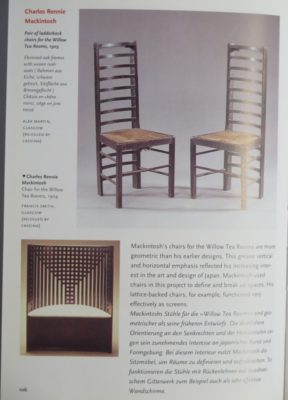
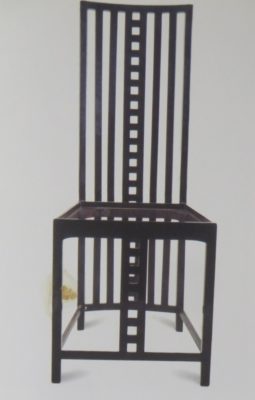
One of my all time favorite designers is Charles Rennie Mackintosh, I find captivating his work in almost any form. I keep thinking that the pair of white wardrobe cabinets from Hill House(?) might make some mighty nice tool cabinets. And, some of his chairs have been eating at me for decades, beginning with the receptionist’s chair and his many iterations of dining chairs. I’ve even got the idea that I could somehow merge the influences of Stickley and Mackintosh into the same KD chair. It would be interesting to try, although some of the later Prairie Style stuff comes pretty close.
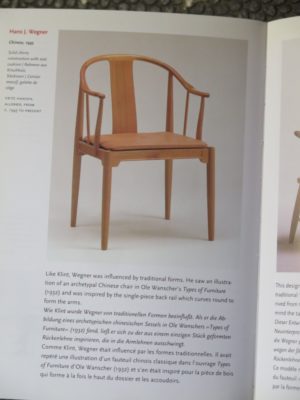
I have always loved classical Chines furniture, none more than the “horseshoe” chair. Hans Wegner’s interpretation of the form is almost to good to believe. But that could be said about much that Wegner designed.

Returning to the theme of (laminated?) bentwood chairs is the chaise from Alvar Aalto. Sublime.
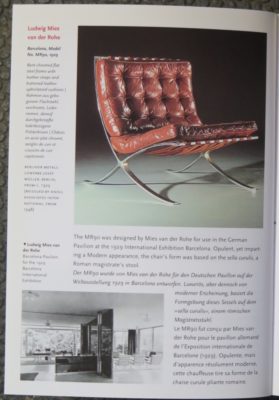
Closing out this romp through chairs I might make some day is Mies van der Rohe’s Barcelona chairs (always presented in pairs). The challenge is, could these metal structural elements be reproduced in bentwood?
Just stuff to think about as I try envisioning cool projects in the future. My mom lived to almost 104 and kept her wits until her last few days, so I figure I might have another 35 years of woodworking left in me.
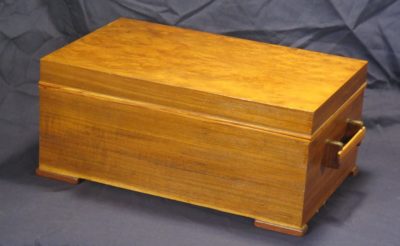
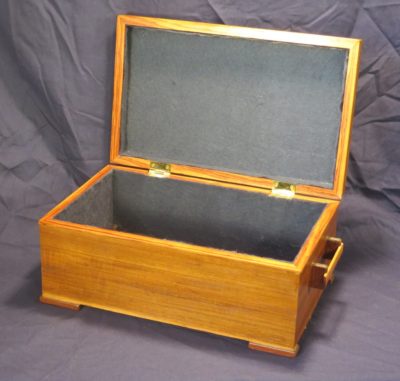
Recently my brother visited and dropped off a box I made for all the cards our parents received on their 50th wedding anniversary in 1993 (my older brother and his wife celebrated their 50th a couple weeks go and Mrs. Barn and I celebrated our 40th anniversary recently).
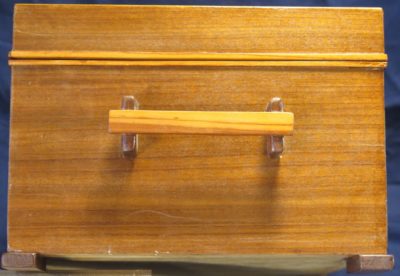
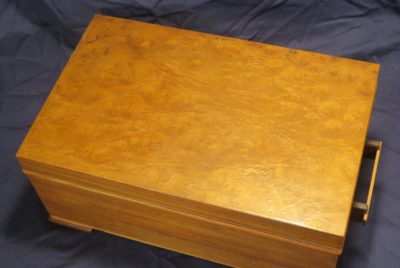
My memories of the project are a bit hazy, but I am pretty sure the core substrate is 1/2″ baltic birch plywood with walnut veneer for the sides and an unidentified figured veneer for the top.
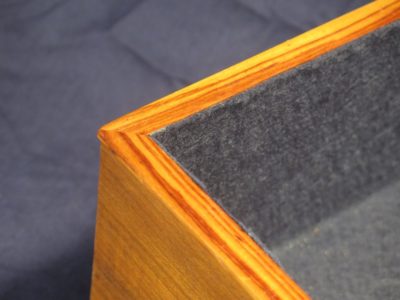
The trim woods were tulipwood (dalbergia) and macassar ebony. It’s had a few bumps and bruises over the years but my mom had it displayed prominently in her bedroom during her final years. In retrospect I still find it a beautiful reflection of a loving marriage that ended with my dad’s death only a month before their 60th anniversary. Every time I cast my eyes on it I will celebrate their years together, and ours as well.
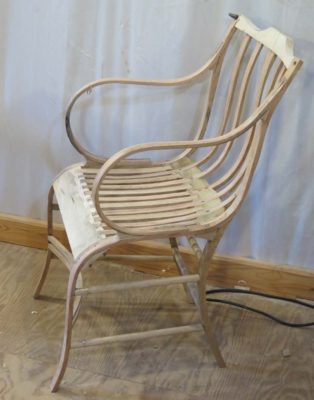
As a general rule I think of “cut lists” as further indication of the inexorable decline of Western Civilization. Still, one of the participants for next August’s “Making A Gragg Chair” workshop at the barn has asked me for a list of parts for the chair. Since he is not likely to be the only one with interest, here goes (these are all nominal sizes, the finished elements are somewhat smaller):
long serpentine (2 pcs) – 1-1/8″ wide x 1/2″ thick x 50″ long
arm (2 pcs)- 1-1/4″ wide x 1/2″ thick x 36″ long
rear leg (2 pcs)- 1-1/8″ wide x 1″ thick x 23″ long
curved seat/back splat (5 pcs) – 1″ wide x 3/4″ thick x 32″ long *
short seat slats (6 pcs) – 3/4″ wide x 1″ thick x 14″ long
Crest rail (1 pc) – 2-1/4″ wide x 2-1/4″ thick x 19″ long **
Rear seat rail (1 pc) – 3-1/2″ wide x 3-1/2″ thick x 19″ long **
Front seat rail (1 pc) – 4″ wide x 1-3/4″ thick x 22″ long **
front stretcher (1 pc) – 1-1/2″ wide x 1/2″ thick x 21″ long
side and rear rungs (6 pcs) – 3/4″ oak dowel x 19″ long
*the center curved splat is widened by tapered glued elements at the top
** these are sculpted elements, not steam bent
Another thing I am working on is a set of full scale construction drawings for the students of the workshop. If there is interest I could see about having them for sale in the Barn Store. Stay tuned on that one.

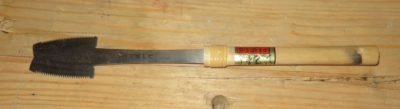
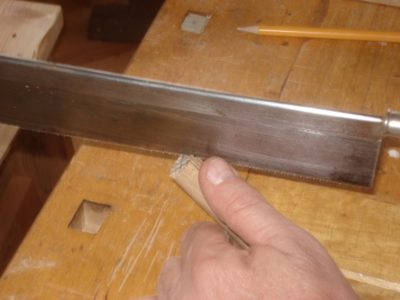
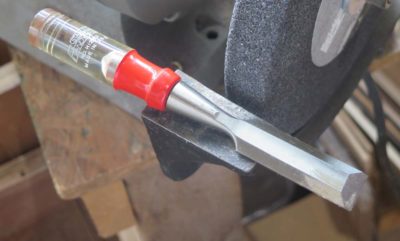
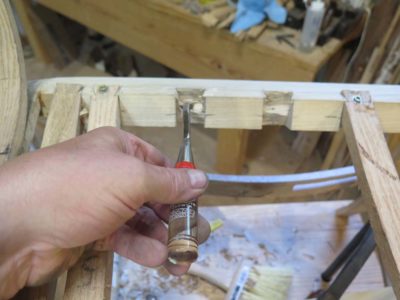
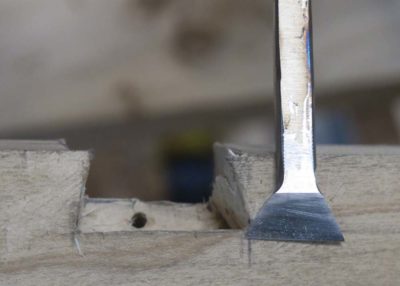
Making a Gragg chair requires chopping 17 mortises for their respective tenon partners. No big deal. Except these mortises are only 1/8″ wide. For that task you obviously have to possess a 1/8″ mortising chisel. You could get by with something 5/32″, but probably not 3/16″ The stock is just not beefy enough to try that.
I have three chisels in my arsenal for this process. The first is one that came for a box of tools I got at a flea market, it is a 1/8″ long chisel with a turned bulb handle. A second is from a no account 1/4″ Stanley chisel that I ground down to 1/8″ wide, and the third an my “go to” chisel is one I made from a derelict plow plane iron. All three are delightfully short in their overall length, a definite advantage when working inside the quirky confines of of the Gragg chair.


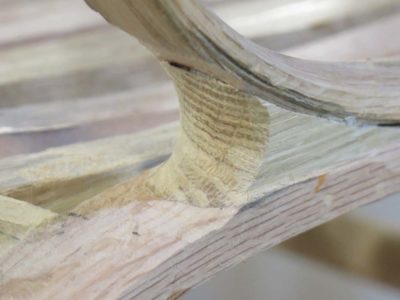
The mortises in question are for the rungs and fitting the seat slat tenons into the underside of the crest rail.
I’m not sure if the 1/8″ mortise chisel is THE most important tool in the project, but I do know that Gragg himself did not use the mortise-and-tenon method for attaching the rungs – he just drilled full-size holes and punched the rungs through – and every Gragg chair I have seen is broken at this point. This is definitely one case where an acolyte can improve on the methods of the master. I once asked some engineers to analyze my approach with Gragg’s, and they told me the 1/8″ M-n-T construction was ultimately 4x to 5x less likely to fracture than the original.
The Gragg chair is more like a sculptural assemblage of curvy parts in space and at several points in shaping the chair components there is only one tool type to suffice for the task, namely the rasp. Or in my case, a few rasps and similar tools like floats.
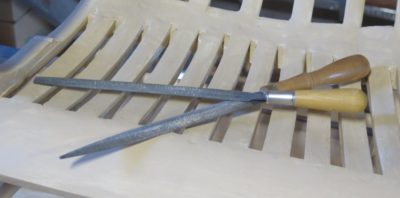
I generally include four tools in this category; an Ariou cabinetmaker’s 10″ rasp (or its analog a Nicholson #50 patternmaker’s rasp),
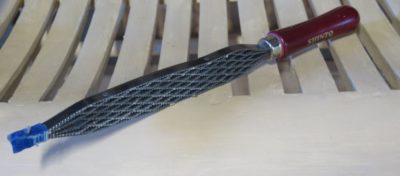
a Shinto rasp, and a pair of fine Iwasaki floats, both flat and half-round. In procedural order the processes requiring them are as follows. Sorry about there being no picture but I could not find one in my compewder. They’re there, I just cannot find them.
First is the touch up of the diminutive tenons for the rungs when the side units are assembled. This is necessary only when the tenons are cut too full and need to be nibbled down to fit the mortises. Generally I accomplish this task with either the Shinto rasp, if there a a fair bit to remove, or the flat Iwasaki float or small Ariou rasp if just a little.
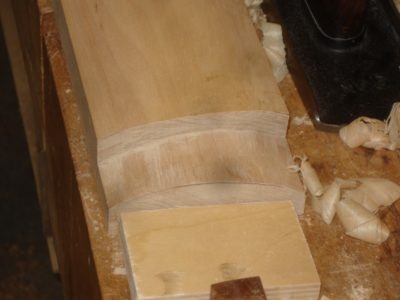
Once the assembly of the cross elements begins I tend to concentrate on the front seat rail, letting the rear seat rail and the crest rail dimensions be established with tacking strips. For the front seat rail the rasp is critical for two distinct steps. First the curved surface of the end lap joints must be shaped to fit the underside of the serpentine leg element. Though most of this step is accomplished with a saw and chisel, the final fitting is fastest with the Shinto rasp.
Then, once the stock is fitted and affixed in place I remove the most of the square shoulders of the excess with a block plane but the configuration of space and the element means that the heavy lifting for roughing the shape (and the embedded half-blind dovetailed seat slats) falls to the rasp.

Fitting the crest rail to the tops of the serpentine pieces is a mix of saw and Shinto rasp, but the actual sculpting of the crest rail shape is accomplished through a combination of spokeshaves and the Ariou rasp, followed up with the pair of Iawsakis to get a surface ready to paint.

The final place for rasp work is both a “mere detail” and an elegant hallmark of a Gragg chair, the rounded glue block underneath the front of the curved arm and the meta-volute at the bottom terminus of the arm. With the Ariou rasp I can usually cut these shapes into the square-ish stock in about 5-10 minutes.
While not necessarily unique to making Gragg chairs a variety of detail saws are certainly part of several processes in the making of one.


Probably the most peculiar of these is cutting the curved dadoes in the rear seat rail to accept the bentwood seat/back slat elements. While I know that making the curved bottom configuration of the dado can be achieved in multiple ways perhaps my favorite is to use a Japanese veneer saw, which with its deeply curved cutting edge is very well suited for the task. One problem I have encountered recently is that I cannot seem to find source for the saw, so I will probably attempt to make some myself.
One option I have tried is to employ a Japanese mortising saw, with some success. The problem with this saw is the exceedingly long neck which causes some flopping around of the head. I’ll probably order another saw and move the handle up next to the head.

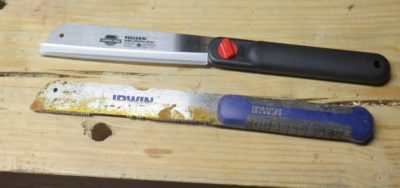
Without having the saw in the tool kit it is possible to cut the margins of the dado with a small Japanese detail saw and then excavate the curved bottom of the groove with a bevel-down bench chisel. Actually I find myself reaching for the Irwin and Shark saws far more often than I first expected. Clearly, this Irwin has had a tough life in my carpentry kit, I need to re-cut teeth on it.

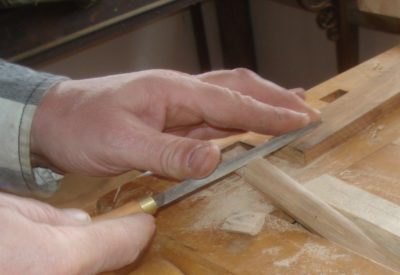
Elsewhere on the chair there is the need to cut the shoulders of the half blind dovetails on both the front and rear seat rails,


and the tenons on the ends of the back slats to insert their tops into the underside of the crest rail, and to cut the tenons on the ends of the rungs. For these tasks pretty much any fine back saw will work, I go back and forth between my custom specced Bad Axe (now in their inventory), my treasured old Sears backsaw I bought new in about 1970, and my Japanese dovetail saw. My habit is to cut the half blind dovetails with the Japanese dovetail saw and all the teeny tenons with the Bad Axe.
Next time – rasps.
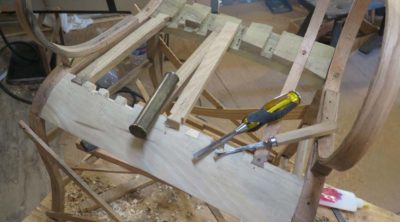
One of the more challenging aspects of building a Gragg chair is the need to chop 17 half-blind dovetails for the ends of the seat slats, eleven on the front seat rail and six on the rear seat rail. Unlike cutting half-blind dovetails in drawers or casework, the workpiece cannot be oriented to be most easy for the workman; these dovetails have to be cut after the chair frame is already assembled due to the fact as I have state before, making a Gragg chair is more akin to composing a sculpture in three dimensions than any other furniture-making exercise I have encountered. Because of this there is no opportunity to adjust the orientation of the workpiece to the tool and the maker, requiring some contorted tool work.


In my development of techniques for replicating Gragg’s work, reverse engineering as he left no account of his own processes, I found the need for a task-specific dovetailing chisel is requisite. I’ve tried working with fishtailed gouges, skew chisels, and probably a host of other tools lost in the fog of memory, but have settled on making my own tool which has now been in use for the past several chairs with excellent results. The key is to make the business end of the tool match precisely the pocket being excavated.
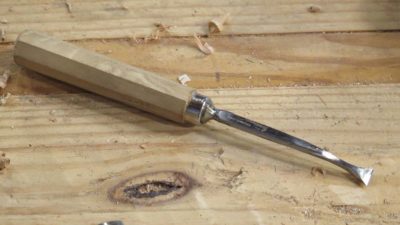
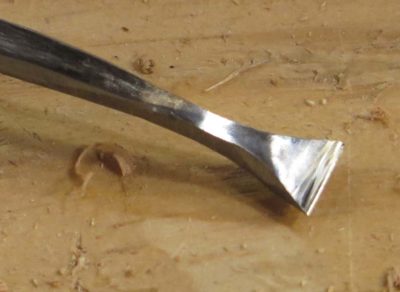
In general there are two primary approaches to the problem, one much more expensive that the other. The expensiver option is to take a 1/2″ curved fishtail gouge and regrind the tip configuration to match the angles of the pocket being excavated. This yields an excellent tool for the task. (Unfortunately, I think this tool fell into a crevice behind the workbench in the video studio and cannot be reclaimed unless I remove the siding on the exterior barn wall, an option I am loathe to even contemplate).
In my case, and probably in yours too, the problem was solved inexpensively by recycling a no-account cheep bench chisel from my scrap tool box. Yes, alas (?), I keep an inventory of scrap tools along with scrap metal along with scrap ivory along with scrap tortoiseshell along with scrap wood… Sometimes I think all our shops should just be call “the scrap yard.” Part of me understands my late father-in-law’s mindset (and my late father’s as well) that it is difficult to dispose of materials that do indeed have utility. Anyway, I took this old cheap Stanley bench chisel, probably available for a quarter at any tool swap or flea market, and ground away all the material I did not need for the final configuration. This was an exquisitely efficient expenditure of time as this one tool reduced my time for cutting the half-blind dovetails in, well, half.
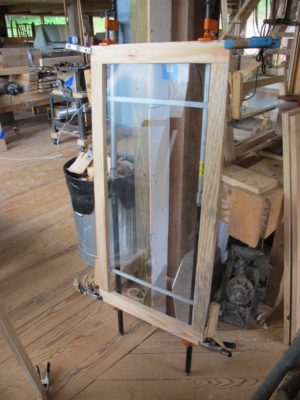
One of the foci for shop projects for this winter will be a series of projects addressing the “door” needs around the place.
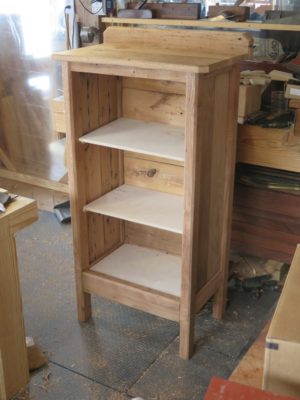
This will begin with the completion of fashioning the doors for Mrs. Barn’s small clothes cabinet I built a couple years ago. I’ve had the vintage chestnut lumber picked out ever since the cabinet was made, but somehow that task never percolated to the top of the pile.

I’ve also got another eight doors to make for the book cases in the balcony library. Again, I’ve had all the stock prepared awaiting assembly, and now is the time for that to happen. I’ve not observed any mouse damage to the books yet, but given enough time it would occur.
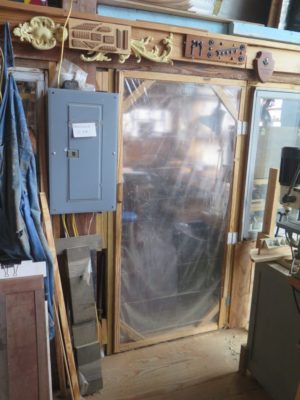
Finally, I need to replace the double-plastic-sheet doors to the workshop. They do a surprisingly good job but the time has come for real doors with real insulated glass.

Once all of these jobs get done I will turn my attention to the door(s) into the machine shop/foundry. These doors were damaged long ago during a fierce wind and will be replaced by a configuration still to be determined. At the moment I am leaning toward a single door with a removable glazed wall alongside it.
Stay tuned.
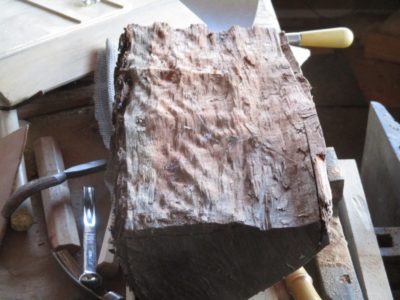
A while back a local friend brought me a pile of wood from his firewood pile. Not until he cut and split it did he realize that it was a load of quilted cherry. Quick as a bunny he brought it over, and I have been waiting for the best time to saw it up into usable boards. Unfortunately that time has not yet come, but my eyes glance over to the pile every time I go down to the first floor of the barn to feed the stove.
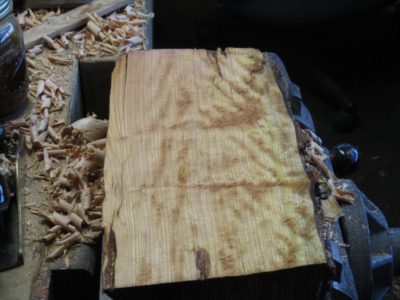
Even when viewing it along the cleavage line from splitting it is clear there is something pretty special inside. A few minutes with a scrub plane and fore plane, followed by a dousing of shellac, confirms the initial optimism. Given the firewood-size of the pieces, this one was about eight inches wide, I’m thinking of some particularly figured panels or small-ish boxes.
Spectacular, and I am betting that if you have a firewood pile there is plenty of woodworking and woodturning treasure in there too.
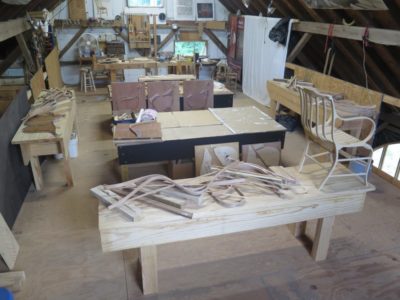
In addition to bending all the necessary parts for next August’s Build A Gragg Chair workshop John and I spent some time setting up the attic for the event as it is the only space in the barn large enough for the activity. I already had two eight-foot workbenches up there, but in order for all the participants to have their own bench we needed three more.
One of them was a simple problem to solve, at least conceptually. Just take one of the benches from the classroom space on the second floor and host it up with my vintage compound block-and-tackle. We did accomplish that but we are definitely not as young and probably not as strong as we once were. Plus John probably weighs about a buck fifty if you put bricks in his pockets. Even with a compound hoist, a 350-pound bench weighs 350 pounds.
But hoist it up there we did.
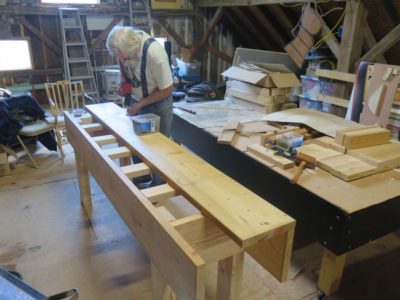
For the other two I made two more Nicholson benches after carrying the individual boards up the stairs one at a time, definitely an easier path to glory. At the moment they are sans vises and holdfast holes but that will be rectified soon enough.
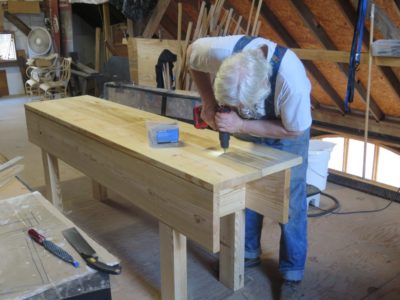
Now my total workbench inventory for the barn is 19, an entirely appropriate number in my opinion. This is probably the end of the run for new Nicholsons or laminated Roubos as the recent prices for lumber have definitely scared me off. For example, I recently needed two ordinary (untreated) twelve-foot 2x8s, they were $23 apiece. The 24-foot 2x12s I’ve been buying for workbenches used to be $54, now they are $97. Fortunately I had just enough of my old inventory to build these two benches.

Recent Comments