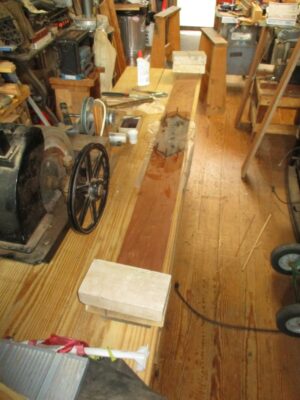
Looking through my lumber inventory for vintage cherry boards from which to make the trim for the new bay window, I found some beauties. Unfortunately, all the boards I had on the top of the pile were about 4″ shorter than I needed for the lintel and base trim. The deeper into the pile I looked, the more frustrated I got as these were too short also. Aaaargh!
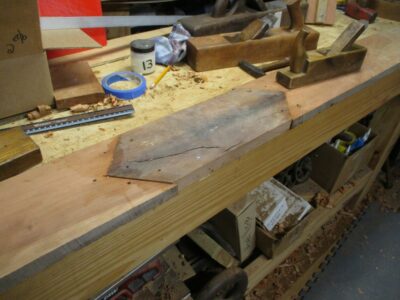
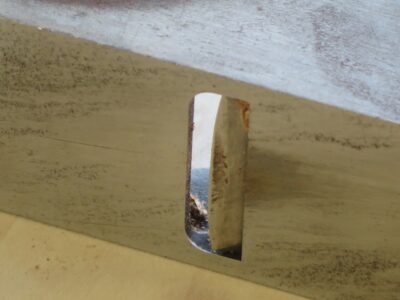
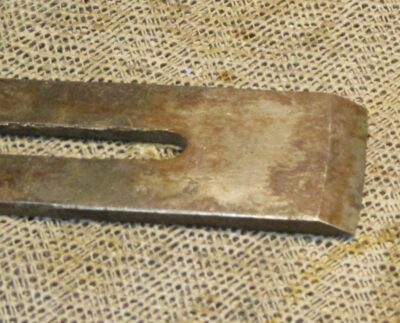
After many days of ruminating on the problem, including contemplating a trip to a sawmill to get some new lumber, I settled on a plan to stretch my boards by grafting in some diamond “dutchmen” as decorative elements into the center of the boards I had. I rough cut the boards with my circular saw and a fence, then fed them through the lunchbox planer.
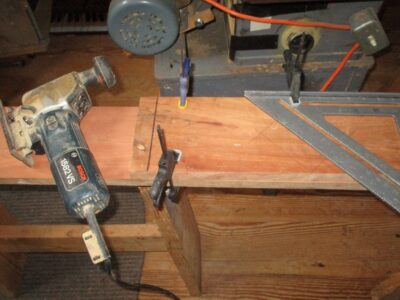
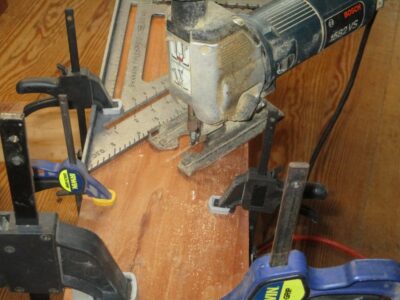
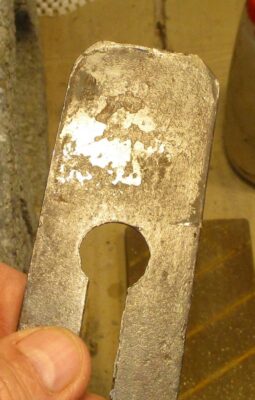
I laid out the dutchman on the inlet, clamped the inlet board and the longer board together, and cut the angles with my reciprocal saw and a speed-square fence. The kerfs were smoothed with my Iwasaki float to fit them together well.
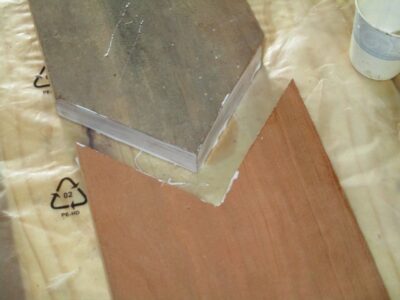
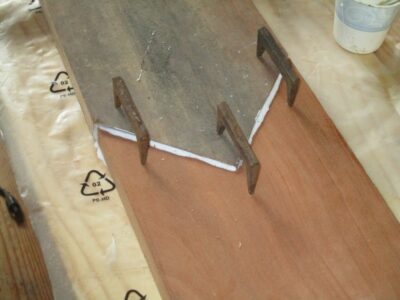
Using pinch dogs on the verso as the clamps (indispensable accessories I first used in the foundry patternmaking shop when I worked there 45 years ago), the glue margins drew together very tight with nice squeeze-out of the PVA I was using as the adhesive.
To counteract the slight curling induced by the pinch dogs being only on one side of the assemblage, 10-pound bricks were placed on each end of the gluing-together element to press them flat on the bench top.
The next morning they were ready for me to work by hand.
After last week’s web site hack, as Webmeister Tim was noodling around he noticed that a lot of the site platform elements were very old and is undertaking a top-to-bottom update this weekend. One important consequence is that the “Comments” function should be working perfectly.
Fingers crossed.
The past three years have seen the dramatic improving of the envelope of our domicile, part of which is a c.1890 chestnut log cabin and the other a c.1985 modern kitchen, dining room, and bathroom. Three years ago we had the stone/block walls of the crawlspace underneath the whole insulated and the ground underneath sealed with heavyweight plastic sheet (depending on your physics literacy the system was either wicking cold in or wicking heat out like a champ, the only thing that was for certain was that before the insulating and sealing the floor was icy all winter long); two years ago we had the cabin completely re-chinked with all the old chinking stripped out and new chinking skillfully installed. The combination of the two improvements made the floor much warmer, room temperature as opposed to refrigerator temperature, and reduced the air flow ~90% or so. Not a small thing when you live in a windy, wintery place.
Last year we intended to continue the trajectory by having all the windows in the home replaced. The extant units were all of modest quality from the 80s, with the sash windows augmented by aluminum triple-track storm windows. One feature of the latter is that they provide excellent ventilation, open or closed, year-round. Ever since we moved there in 2013 I have been taping plastic over the windows every winter just to keep the interior somewhat congenial.
We ordered the new, high-performance windows about eighteen months ago, but given the disruptions to the manufacturing and supply chain the windows did not arrive for more than a year. When they finally did arrive, a local contractor installed them lickety-split, replacing more than a dozen old windows in two days, all finished.
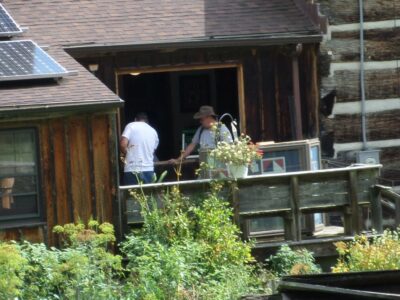

Except for Mrs. Barn’s prized new bay window in the dining room.
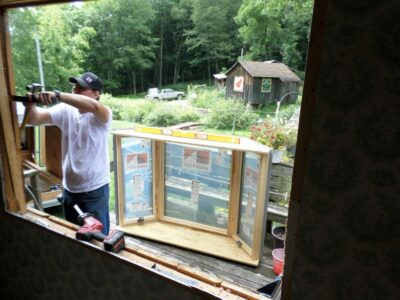

That one took four days of work, reframing the opening and installing the new custom unit. It transforms the whole house.
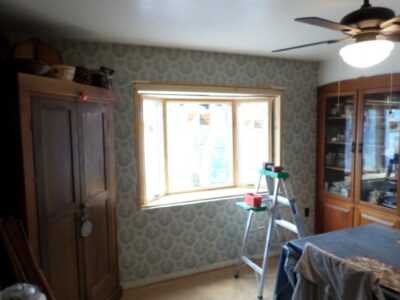
Extending the schedule of the bay window project was the need for me to fabricate all new trim for the unit. We decided to go with some of my vintage cherry lumber to be harmonious with the built-in cherry china cabinet already in the room. The only hitch was that none of my cherry boards were long enough for the upper and lower trim boards, missing the mark by just a few inches.
Next time you will learn about my board-stretching technique.
Stay tuned.
My fundamental operating preference is for almost all of my hand plane irons to have camber, or some degree of curve along the cutting bevel. About the only plane irons that are not cambered are 1) block planes, of which I have many and use nearly every day, 2) smoothing planes, 3) “miter” planes for use on shooting boards, and 4) rabbet/dado planes for crisp shoulder/joinery work. Otherwise, pretty much everything is cambered.
And, since it such a routine part of my work, I have developed a simple, easy, and straightforward process to deal with inducing camber and sharpening cambered edges. It has to be simple and easy or I would not go there.
Exactly how much camber depends on the use of the tool. For general-use bench planes like jointers it’s a teensy bit (the precise technical description) and for scrub planes it is a gob of camber (again, the precise technical description), and jack planes and foreplanes somewhere in the middle. How much camber, and when to induce it, are almost whimsical at this stage of my life after decades of creating and maintaining them. That said, the basic process is the same in that it depends on how my hand bone is connected to my arm bone, and my arm bone connected to the shoulder bone.
The most basic truth is that the hand/arm/shoulder joints function as pendulums (pendula?) and their pivot points. As a result, while I use a sharpening jig to establish the bevel on a new or really trashed old iron, virtually all of my sharpening at the stone is designed to overcome or counteract this pendulum imperative. I will not go into depth here on my theory and practice of sharpening (ask three woodworkers about sharpening and you are likely to get 74 opinions), in routine sharpening I am a freehand sidewinder, and in the world of cambers this is an added benefit.
Here is how it works for me.
Holding the iron so tha the bevel is flat on the stone surface, when pushing the iron away from my body I press down hard with my thumb. On the return trip, pulling the iron back towards my body, I press down hard with my index finger. With this simple process camber is induce. Exactly how much camber depends on how many strokes you move fore and back, and how coarse the stone is.
With the iron bevel-down on the sharpening stone, I establish (or discover) the bevel angle moving the blade fore and back. Here’s the sublime part, camber-wise — all I have to do to induce the camber is press more on the trailing edge on the push stroke and on the pull stoke to begin a rocking action and remove more material in a near perfect curve on one side for the push stroke and the other side on the pull stroke.
Simple as that.
Again, exactly how much camber and when to induce it depends on the purpose of the iron. For bench planes I induce it at the 600-grit stage of the sharpening process. NB – my progression for a new or derelict iron edges is to work up through very coarse silicone paper or diamond stones to 220 diamond to 600 diamond to 1200 diamond/1000 water stone to 8000 water stone, followed by stropping with micro-abrasive impregnated into a wooden board.
=================================
BTW I am playing with creating short shop-based videos, and if there is enough interest I could easily feed this topic into the pipeline.

When restoring a plane iron my starting point is always flattening the back, a frequently arduous task as a surprisingly few irons have undergone such a corrective action. As a result, the time and energy for this step is an outsized proposition. Even with coarse stones, diamond plates, or abrasive paper, flattening the back of a derelict iron can be a real workout. Generally, I’ve found that it is practically impossible to work the iron too hard on the abrasive, whatever it is. And, although I have pretty big, strong hands, it can be wearying session. To make it less of a nuisance I need a force multiplier.

This is where The Magic Stick comes in handy. This fundamental tool was introduced to me by my late, lamented and much-missed work pal Mel Wachowiak (his obituary is still tacked up in my shop), who in turn learned it from somebody working on a Japanese plane iron. The tool is beyond basic but required for a new Japanese blade as the “grabbable” real estate for handling the blade is roughly half that of a Western blade.

With the Magic stick you can really, really bear down on the blade when working it on the stone or sandpaper or diamond or whatever.

By gluing a piece of very coarse sandpaper on the bottom of the stick with epoxy, and pressing that coarse surface against the upper side of the iron, you are no longer limited by hand strength and endurance for flattening the back. You can basically impose the downward force of your entire upper body on the workpieces with surprisingly little effort. This approach cuts my work time for the initial set-up of the back by at least 75% and at times 90%.
Recently I brought up to snuff a narrow coffin plane that had been originally used as a semi-scrub plane, and it had been worked mighty hard if the mushrooming of the iron heel was any indication.
Looking closely at the iron I saw that the bevel had been established on a bench grinding wheel or something similar. But the edge had never been honed and the back never flattened. The iron was essentially straight-from-the-factory forge. I knew this because the fire scale had never even been touched! (I’m still kicking myself for not getting better pictures of this.)
Fire scale is the deposit that forms on the surface of metals when they are worked at high temperatures, it is the stuff that sloughs off when a blacksmith is working a piece of wrought iron or steel. Not being a metallurgist I am not 100% clear on the composition of ferrous fire scale. All I can tell you that it behaves carbide-ish, hard and tough. Very hard. Very tough.
So, on this blade I had a lot of fire scale that needed to be ground off to accomplish the preparation of the vintage iron blade. Just abrading it on a diamond stone was brutal work by hand, but with the Magic Stick it was doable in about 10 minutes. BTW, the carbide-ish ferrous fire scale was so tough that it trashed my 120 grit diamond stone. Absolutely trashed it. I wound up doing most of the work on a piece of folded silicone carbide paper.

Working my way up through the grits on diamond and water stones, a dozen seconds at a time, was a piece of cake thanks to the Magic Stick. This blade is not the previous one with extreme camber, but an example of a blade back that was prepped in just a few minutes.

Chopping mortises and fitting tenons.
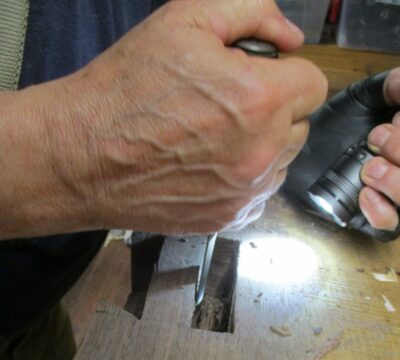

I am fairly confident that had Roubo’s contemporaries owned Shinto rasps, they would’ve used them That’s my story and I am sticking to it.
That is all we did, all day. That, and listen to music.

Then, with the gentlest taps possible we put the pieces together for the rear half.


Since the whole thing had to be disassembled for the trip home we made little effort to get it, well, all together. We did just enough to know that it could go together once it got there.
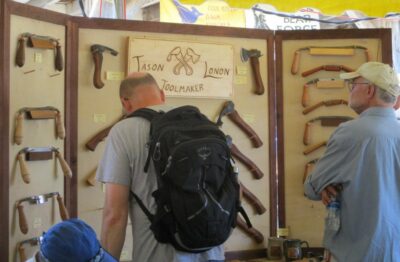
Saturday foot traffic to the booth was less than Friday’s, although the demo and product interest remained the same. Since John and I had zero time to wander the town on Friday we each took an hour in the early afternoon to do just that. There were scads of toolmakers I had never seen, although to be honest I was unable to browse HW2015 (Studley tool cabinet exhibit) or HW 2017 (working the booth all alone).
Here’s the pictorial travelogue with minimal commentary. NB – My effort of traveling photojournalism was greatly hindered by the crowds, which were much more than in the Festhalle. Still, I hope you get a taste of the many flavors present.
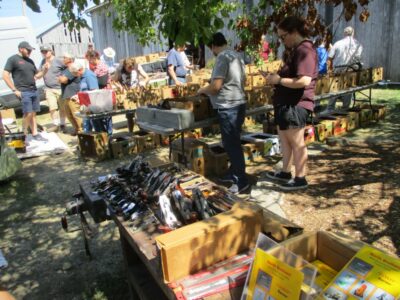
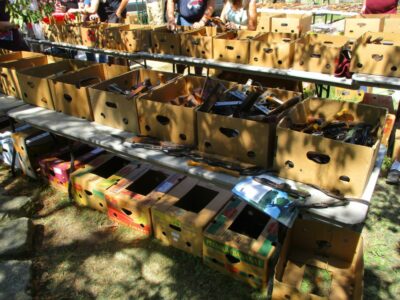
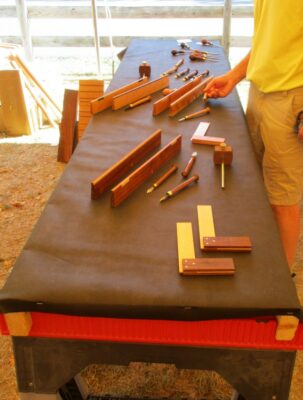
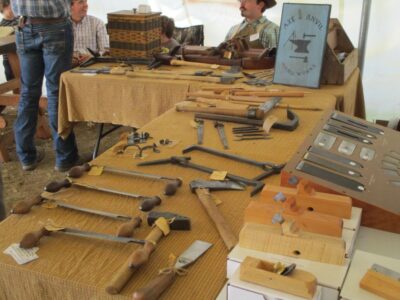
Just outside the Festhalle was this most impressive inventory of vintage tools.
Wandering over to the stable area with its big circus tents, the feast continued.
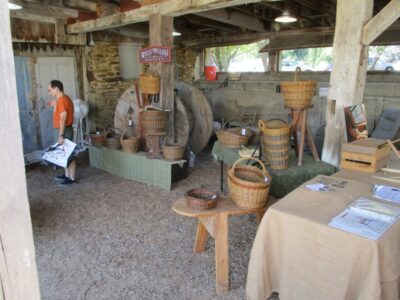


Immediately adjacent to the stables were a pair of circus tents, chock full of baubles but mostly packed with people (hence the paucity of images).

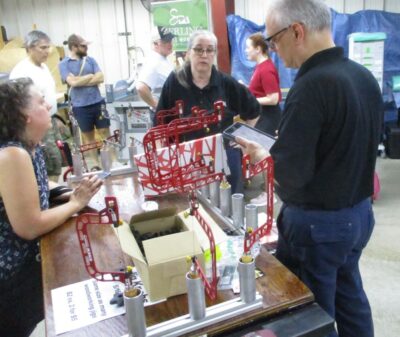
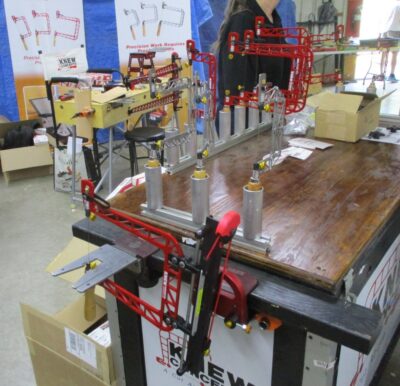
Wrapping up the walking tour at the Amana Furniture warehouse room, I was especially impressed with the Knew Concepts display, including the large vertical chevalet, for which I was an enthusiastic collaborator an own Serial #1, and its new little brother.

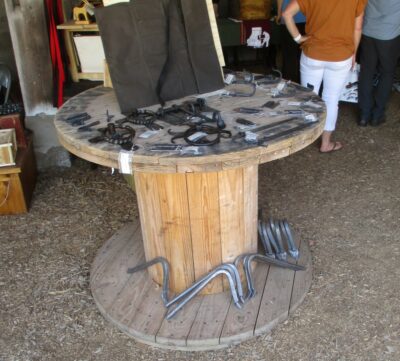
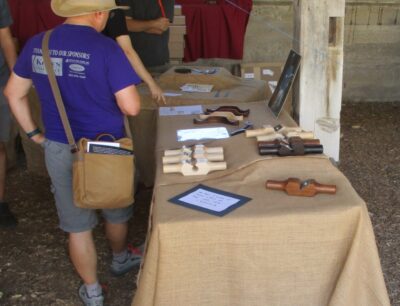
The crowds in the stable, tents, and warehouse were such that I was only able to photograph about one third of the offerings there.
Then it was time to get back to the Festhalle and finish up the day, pack up, and head for home first thing the next morning.
Beginning even before “Starting Time” we were inundated with a constant stream of visitors and the Donsbarn.com booth (the cracks in the barn door opening was soon breached by boomer sooners, who were eventually told to get out until 10 AM). I was working one aisle, John the other, and engagement was spirited.


As I alluded in previous posts I had decided to give two 45-60-minute demonstrations of taking a parquetry panel from the rough to glossy, including the preparation and use of the polissoir. Each of the four demos was well attended — 15-20, which was all about the capacity of my 10′ x 10′ booth — with the observers arriving early and staying until the end. The 11AM demos were focused on cold beeswax finishing with true French polishing (wax and water), while the 3PM demos were all about molten beeswax followed by spirit varnish pad polishing.
Not much more to say or show visually, we were engaged with the flowing audience non-stop through the day, and we did not catch our breath and sit on out stools until 4.50, ten minutes before closing.

Awaiting show time Saturday morning.

Our booth was a perfect location for the Roy Show, but he stood exactly behind the post in the center of the frame.
The only difference in Day 2 was the huge crowd at the beginning of the day as the doors were opened at 9.30 in advance of the presentation by Roy Underhill. The rest of the day Saturday was much like Friday, with the only difference being that each of us were able to do an hour long walkabout to visit all the other venues and toolmakers. I’ll show some pics from my walkabout next time.

Early on I had decided to incorporate demonstrations to the program at Handworks, and in order to have something on which to demonstrate I made a set of parquetry panels.


I’d begun these some weeks before, you can follow their development in my earlier post about Bandsaw Parquetry. One of the points I was trying to get across was the importance of surface preparation so I was going to start with some surfaces that REALLY needed preparations.
Finally, after two weeks of assembling stuff to go, two days of playing TETRAS loading, unloading, and reloading the truck full to the brim, off we were. After two long days of driving, we got to Cedar Rapids for a good night’s sleep before heading down to Amana for the Handworks set-up. I wish I could’ve said confidently that I prepped thoroughly and tied up all the loose ends but the odds were near 100% that several hours into the set-up or Handworks itself I would remember something I left behind.
John and I showed up bright and early for setting up, the building opened at 9AM and we were there around 9.15. I think we were the first booth to be completely set up
Here is a walk around the Festhalle during the set up time. Upcoming posts will document other spaces and activities for Handworks.


I was in my usual spot, on the center row near the Lie-Nielson booth up on the stage, and between Jeff Hamilton in front and Gary Blum to my rear, with Matt Bickford across the aisle on one side and Patrick Leach on the other. I took the picture of the main space from the stage, where L-N set up very late in the day. While they were working on their display Tom Lie-Nielson stopped by and we had a nice long chat.

My setup took only a couple hours, leaving lots of time to visit with friends from years past. I especially cherished the time with the Bickfords, folks who are definitely on my wavelength.

Across on aisle were Matt Bickford and a chairmaker I did not know (there were actually a lot of exhibitors and tool makers I did not know),

and across the other aisle was Patrick Leach’s seductive vintage tool emporium. Amazingly enough, I escaped the weekend without buying a single tool.

Immediately behind/adjacent to me was Gary Blum with his innovative workbenches and accessories, and hand planes.

Konrad Sauer was just down the way with his spectacularly high-performance planes,

then Lost Art Press. I think Gramercy Tools was between them but had not set up when I was walking about.

Benchcrafted was the booth greeting the visitors immediately on entry. It makes sense, they’re the ones who pulled the whole event together.

Back in the corner was innovative genius Jeff Miller who was showing off this device that hollowed out bowls. It was the coolest thing I saw at the event. Over his shoulders you can see the Lee Valley booth, but they had not begun setting up yet.

Rounding out the Festhalle setups from that time was Ron Brese, closest to Benchworks at the other end of the center row.
With the rest of the day free we had a chance to go visit all the other booths in the three other venues, although some of the booths were not ready until late in the day or even the next morning.
We were girding our loins for a wild couple of days starting at 10AM the next morning.
I first met Webmeister Tim during my research for the H.O. Studley tool cabinet book, probably around 2012 or 2013. I got an email from a fellow who said, “Hey, I think I’ve got a vise like the ones you are talking about.” I arranged to meet him in person at a diner in southern Maine and sure enough, he had a vise much like the ones about which I had been waxing ecstatic. Tim was a wood turner but not yet a full-spectrum woodworker, so he allowed me to borrow his vise to study, and eventually, to display in the 2015 exhibit that coincided with Handworks 2015. Of all the piano-lakers’ vises I’ve seen his is the closest to Studley’s.
Our agreement was that he would come and get it, “Whenever.”
Well, after more than a decade of long-distance friendship, including dozens of phone calls relating to the business of the donsbarn.com website, which he now steers, “Whenever” finally occurred last month. Finally aligning the stars of our respective lives, he was able to come to Shangri-la and spend a week with us in the Virginia hinterlands. It was truly a great time of fellowship and productive work together.
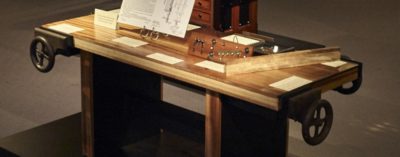
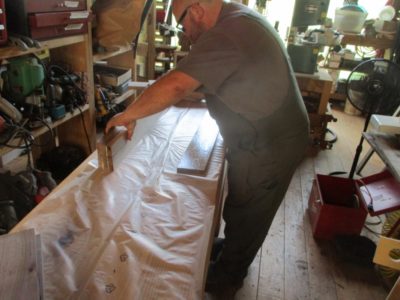
Our focus for the week was to build him a heritage workbench that would last the rest of his life and probably any eventual grandchildren and great-grandchildren as well. The raw material for the bench was my slabbed black walnut, the style of the bench a split-top Roubo.
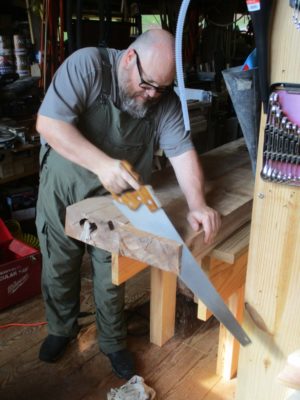
I worked him really hard during the week, beginning with hand sawing the almost 5″ thick slabs to length.
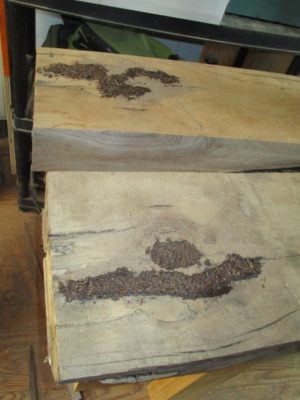
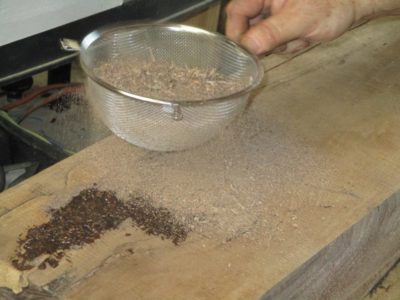
There were a couple of regions of the slabs needing attention, so we saturated them with diluted West System epoxy and walnut sawdust, followed by a top sprinkling of sawdust on top to provide a good surface for final finishing when it got to that point.
I did not have slab stock for the legs and stretchers, so we had to laminate them from black walnut cut from the same tree and some vintage stock I had in my lumber barn. For the newer stock we ran them through my little Ryobi 10″ planer that has been serving me well for about 35 years.

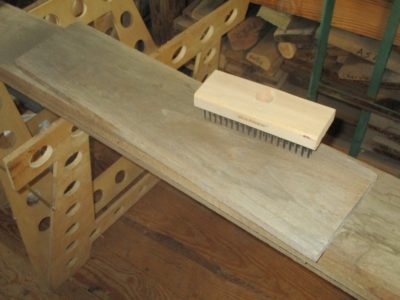
For the vintage stock from my barn, they had been planed eons ago so all they needed was a quick scrubbing with a wire brush to remove any debris and freshen up the surfaces for gluing.
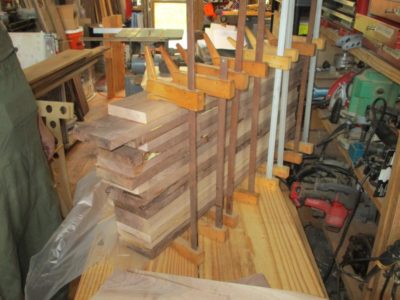
Then glued-up they were with T3 to accommodate any situation the bench might find itself in the future.
Thus endeth Day One of the Great Webmeister Tim Bench Build.

Recent Comments