Remember. Always.

I am reminded by my friend Col. Steve’s remark, “I wrote a blank check to this nation and signed it in my blood.” Remember always those men and women who did the same thing on our behalf.
I am reminded by my friend Col. Steve’s remark, “I wrote a blank check to this nation and signed it in my blood.” Remember always those men and women who did the same thing on our behalf.
Early in our four decades-plus of marriage, Mrs. Barn learned that whenever I was browsing through the card catalog of my 3,000+ record albums, I was in a mood. Could be a mood of contemplation, sometimes a mood of problem solving, occasionally (or not so occasionally) a mood of being just plain old cranked up about something. But, she knew to let it run its course.
As I grew older (and perhaps [?] more mature) I could be found browsing my bookshelves instead or just working my way through my collections of vouchered wood samples. (Sorting the card catalog for my vinyl records was pointless in an age of CDs as the records were placed [and remain] in deep storage. I recently bought a new cartridge for the turntable and may just dust off the record collection. But, I digress.)
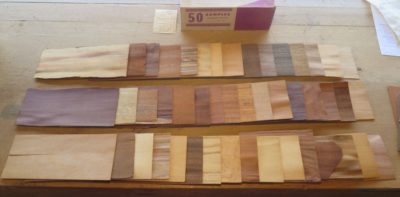
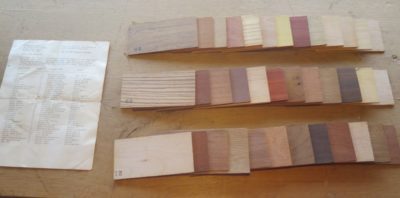
To this day I find a peculiar comfort in shuffling my version of playing cards, using the fascinating beauty of this natural resource as inspiration for creativity.
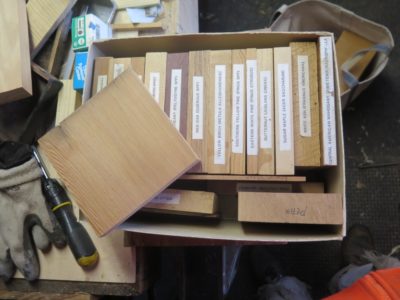
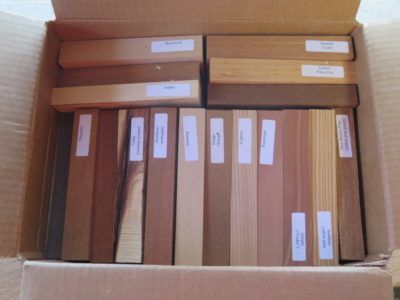
To the best of my knowledge these are all vouchered specimens, or at least ostensibly scientifically identified, and the oldest collection dates back maybe 75 years.
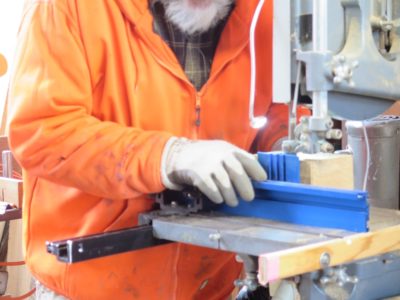
As I continued preparations leading up to last Saturday’s Boullework presentation to the SAPFM Blue Ridge Chapter I was able to make good progress once I discovered the cause of my earlier frustrations. Which was, as I realized once the initial center cut was completed and the material removed, that the first blade break resulted in a small fragment being embedded in the kerf. Every succeeding blade was damaged by encountering this fragment, continuing the sawing difficulties. When you’re talking 0000 blades it does not take much to throw them off.
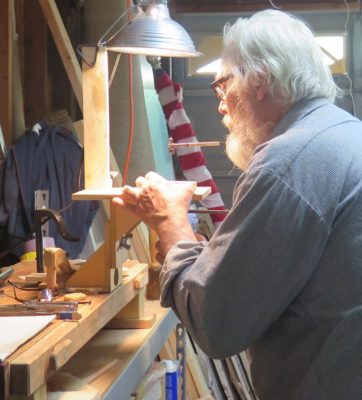

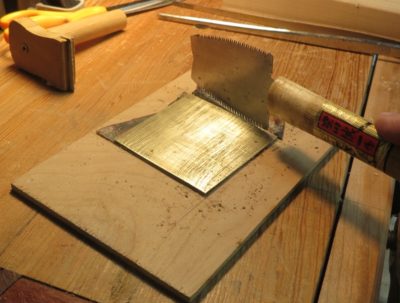
Getting a little more sawing done and assembling the demo materials was pretty straightforward.

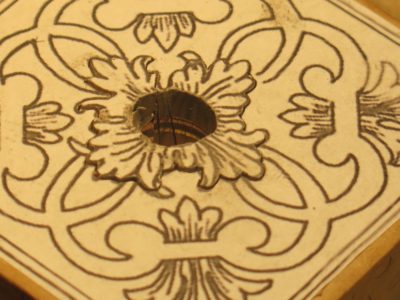
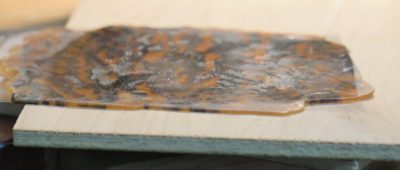
I even made a scute of tordonshell. Fun, fun, fun.
PS Since I am on the home stretch for reviewing the Gragg chair video (probably about a dozen finished half-hour-ish episodes plus a bonus episode or two) and creating the edit sheets for the project, I am casting my brain forward to next winter. I am thinking about a shorter series on Boullework, Don-stye. Or at least revising and updating my original monograph from my presentation in Amsterdam.

In the aftermath of the apparently premeditated psychotic rampage in Uvalde TX, once again we have to decide — either protecting kids at school is important or it is not. To the good people of Early TX it is obviously important. It is a model that should be replicated from coast to coast.
We cannot wish evil away, sanctimonious posturing will not do.
Our political vermin could ship $40-50-60 BILLION to Ukraine at the drop of a hat and spend ~$800 BILLION annually on “education” in the U.S. But, we have had a almost a quarter-century since Columbine, a decade since Sandy Hook and four years since Parkland to secure our schools and chose not to.
If it offends you that I have thrown this ice cold bucket of reality in your face on my own woodworking blog, tough. I will give your offense all the consideration it deserves; okay, I’m done with that.
I have no desire to say more on this matter.
Even though I have decided to de-emphasize (read: discontinue) scheduled workshops at the barn, I am not inclined to give up on teaching altogether. Recently I was approached by Joshua Farnsworth of Wood and Shop, inquiring about my interest in teaching at his traditional woodworking school near Charlottesville VA. My answer was an enthusiastic, “Yes,” and after some conversations we decided that I would teach one class this year and perhaps more next year if things work out well.
My first offering for Wood and Shop will be “Introduction to Traditional Woodfinishing” this coming July 14-16. You can contact Joshua for registration and course details. I am not entirely sure when the announcement/registration goes live on his web site.
I will still teach at the barn by request. If you and a few friends want to commission a workshop at my place, just drop me a note and we can talk about it.
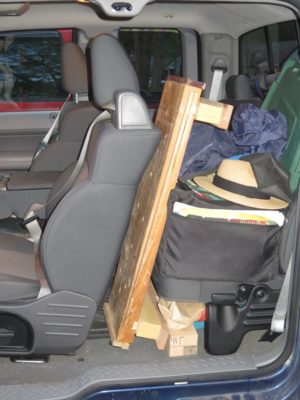
One of the unintended outcomes for my cypress auxiliary bench is that it fits perfectly behind my driver’s seat, making it nearly effortless to take it with me whenever I travel. Given my frequent travels to visit family I’m thinking this auxiliary bench will log a lot of miles.
Until this blindingly obvious flash of insight I always laid the auxiliary bench flat on the seat or in the bed, sometimes causing a logistical conundrum about how to stack the cargo, and in what order. Now all of those concerns are assuaged, and the inclusion of this accessory will simply be routine.
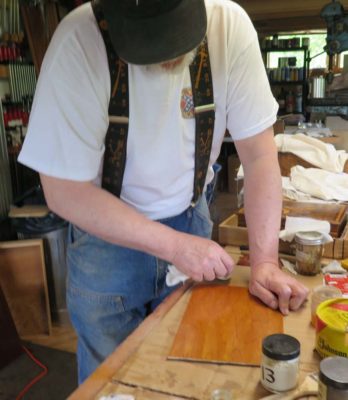
For the past couple of months I’ve been spending the occasional minutes sawing veneer for my tool cabinet.
When calculating the amount of veneer I need for a particular parquetry project, I generally take the object’s gross area plus an additional 1/3rd, parquetry being at times a very wasteful undertaking. This is all the more true when deriving the raw veneer stock from irregular sources. In the case of my under-construction tool cabinet the gross area is roughly 4′ x 1-1/2′ plus 4′ x 3′ plus 4′ x 1-1/2′, or put more simply, 4′ x 6′, or 24 square feet. Adding another 8 square feet for waste I need to come up with 32 square feet of veneer stock.

For the most part my starting point for creating the sawn oak veneers requisite for the tool cabinet parquetry was this pile of roughly 6x6x6 chunks salvaged from the FORP trash pile. I did have some larger pieces left over from my bench but I was saving them for something else.
My initial thought was to resaw the blocks into <1/8″ slices on my newly tuned up bandsaw. Alas, that bandsaw’s motor was just not up to the task even with a brand new variable pitch blade. Sawing 6-inches of dense, vintage white oak was just too much.

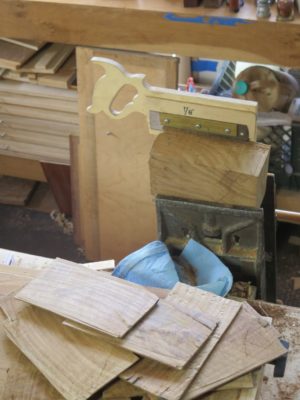
I found it was actually faster to cut the slices by hand, first scoring the edge all around the block with a kerfing plane, then moving on to the actual re-sawing with a hand saw. Normally this would be where I grab for one of my Roubo-esque frame saws, but the spatial logistics precluded that. Instead I used my 3-1/2 t.p.i. rip saw.
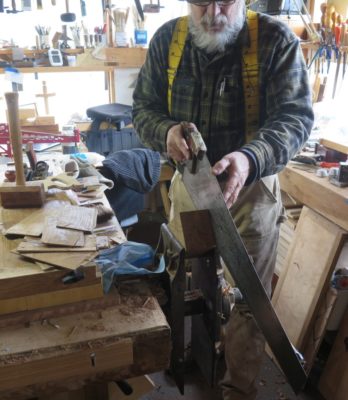
I found that this routine yielded around 2 square feet for an hour’s work. I was satisfied with that.
A few months ago I fulfilled a nearly two-year-long search to comply with Mrs. Barn’s admonition to purchase a new (to me) truck to succeed my 2003 S10 with 225,000 miles. I went round and round, at one point early in the search I was ready to purchase a new 2020 Tacoma 4WD based on reviews and friends’ recommendations. I went to the local-ist dealer ready to write out a check for the full amount of a new truck. That is, until I actually sat in one of them. I would not even turn the key and take it out for a drive. The bucket seat was among the most uncomfortable seating platforms I have ever experienced. Yes I had many objectives for the new-ish vehicle but among the non-negotiable ones was that had it be a comfortable fit for my aching hips and back. It meant that I had to go back 15 years to find a truck that fit the description.
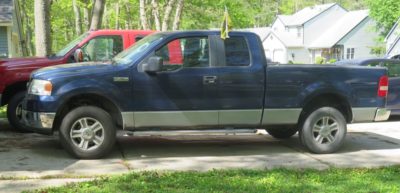
But I did find one that fit my body, and once I knew what I wanted I just hunted until I could find one in good shape to buy. In the end I settled on a 60k-mile 2007 Ford with the fold-down console/semi-bench seat rather than the bucket seats that are apparently in every truck ever since. I do not suppose I need to recount the screaming insanity that is the car market these days, so I won’t. (Any person using the term “transitory inflation” has revealed themselves to be a belligerent ignoramus/ideologue unworthy of my attention.) The truck was 1/3 more than I expected to pay, but I did anyway.
It had many features I liked, but one void was the covering for the bed. I looked at a variety of option$ for this feature and remain in price $hock. It $eem$ the lift-up $hell I wanted wa$ in the neighborhood of $2000! Phooey on that.
Then recently while noodling around on youtube looking at woodworking videos I came across this Irish fellow building a cedar-strip canoe and was fascinated.
Use your imagination about how I just might combine my truck’s need for a lifting bed cover with this guy’s project. Instead of cedar strips I still have this pile of vintage 11/4 cypress…
Whenever I have a metalworking file that gets to the end of its usefulness, whether for sharpening saws or just shaping metal over at the fabrication bench, and regardless of the cause of its infirmity — is it worn out or just boogered up? — I never discard the old tool. It is almost always a great source of very hard tool steel so it goes into my scrap inventory for me to make something out of later.
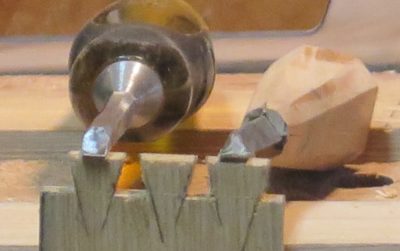
This habit and experience served me exceedingly well recently when we were up visiting L’il T (and his parents, of course). I carved out a little work station in their garage and just invent projects to occupy my time when I am not puttering around with house chores. Well, this trip I was making a tray for the traveling tool kit I bring with me. Much to my aggravation I realized at a particular point that I had not brought a dovetailing chisel for the small dovetails I was cutting into the ~5/16″ cypress stock I was using. My first attempt to chop the dovetails with my 1/4″ bench chisel did not yield a satisfactory result.
Since I am not at home on these trips I make a frequent, almost daily, pilgrimage to their local excellent hardware store. I set the project aside and figured I would see if the hardware store had a decent rack of steel bar stock I could use to make myself one of the triangular dovetailing chisels I like so much for small work. I have made several and find them indispensable for making tight petite dovetails. Although the hardware store did not have any bar stock that struck my fancy, I noticed their file rack nearby, and that they had a triangular file that would certainly fit the bill for about $7.
Sold.
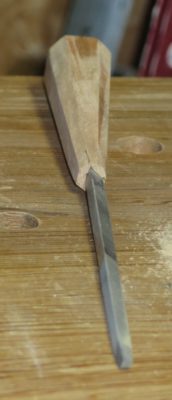
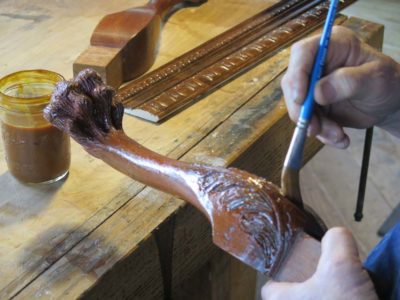
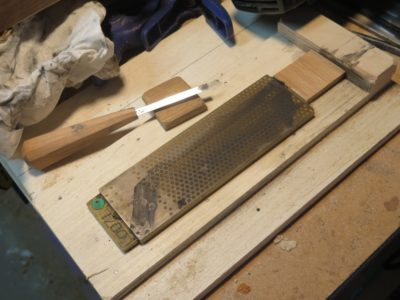
I brought the file home and set to work on it. Yes, it probably was a travesty to use a brand new file, but that’s all I had access to. My first task, undocumented alas, was to fashion a tapered octagon handle from some cherry in my scrap stash. I drilled and then drove the file tang into the handle. A little too vigorously, as it turned out. At some point soon I will fit the handle with a bronze ferrule, but I have not got there just yet.

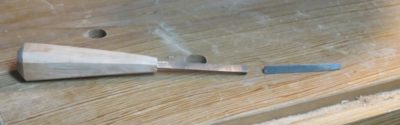
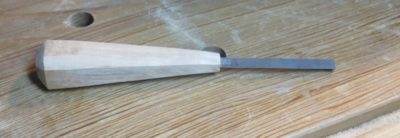
Using a Dremel tool with a cut-off wheel I chopped the file roughly in half.
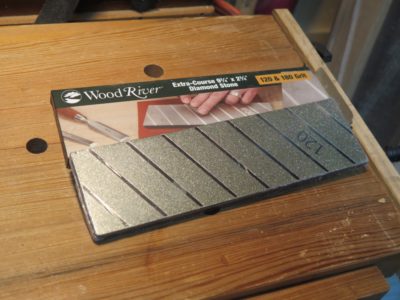
It was time to reach for my new-ish extra coarse diamond stone and get busy grinding off the file teeth and creating the bevel. This is exactly the kind of task this tool was created to accomplish, which it did surprisingly fast.
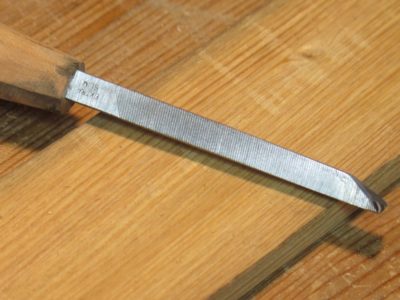
Once the coarse diamond stone had done its work I switched to the finer combination diamond to bring the surface to the place where it took only a few strokes on the 10,000 grit water stone to bring the bevel and the back to perfection.
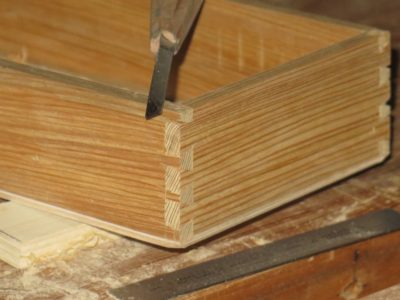
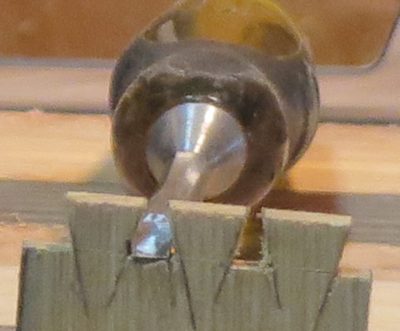
In battle the new soldier performed with valor. You can see the blow out on one of the dovetail shoulders resulting from using the 1/4″ bench chisel. The rest of the joint shoulders were fashioned with the new tool, which is rapidly becoming one of my favorites. The fact that I fabricated it myself by re-purposing something extant only enhances my affection for it.
1/4″ bench chisel vs. the new tool

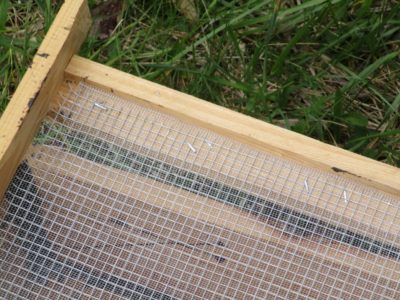
The end was definitely in sight. All I needed to do was make the fitted lid with two layers of screen, window screen supported by 1/4″ hardware cloth and haul it the 350 yards to the weir dam. Somehow I have misplaced the camera with most of the lid-making images.

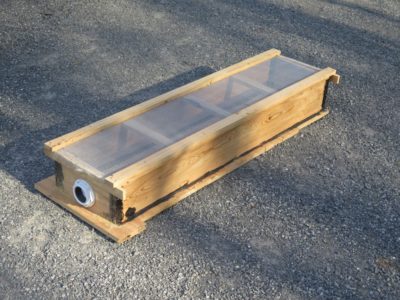
It was very satisfying to see the unit all together, ready to get to work. The only hard part of the project, really, was hauling it up the hill. It is very awkward and though not especially heavy, it was not a feather weight either. I actually strained a tendon in my left hand rasslin’ it up the hill but that is recuperating nicely.

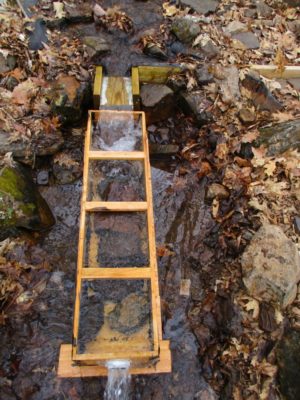
Once I got it up to the top I had to spend some time re-configuring the creek bed since the new box is so different from the old Rubbermaid tub. But when it went in place with a solid WHUMP! as it filled with almost 100 pounds of water I knew the this was just right. To make sure it would stay put from either a rushing thunderstorm torrent or a rummaging bear I filled it with several hundred pounds of rocks.

The connection to the pipeline was a slip-fit gasket inside the shower drain fixture so I hooked it up and we were off to the races.
*Now all I have to do is make a new metal chute and it’s done.
© 2024 Don Williams

Recent Comments