The events of the past several months, including Mrs. Barn and me losing our remaining parents and my becoming closer to 70 than 60, are leading me on a path of deliberate winnowing of my shop and barn contents. Given that my sister is still going through my mom’s stuff — and she lived her last years in a one room “mother in law” apartment with my brother and sister-in-law — and the literal tons of belongings in my father-in-law’s four bedroom, two car garage house with a large back yard where he lived for 59 years, I am determined to reduce my material possession burden to my heirs as much as possible. Since my mom died at 103 I may have some time to get it all resolved, which is a good thing when there are 7,000 square feet and 70+ acres in the discussion.
Other contributors to this long-term process are the realizations that barn-based workshops will not have the prominence that I once thought would be true, and given my current set-up on the fourth floor I really do not need a second floor classroom outfitted with a perimeter of workbenches (I do however still use that space mostly for development of the ripple molding cutter). Also I recognize that at some point in time life in the mountains would just become too hard physically, and I would see the barn in my rearview mirror. Not any time soon, but it is inevitable in 10, or 15, or 20 years. One small step we are taking to delay that day as long as possible is to try to find someone who can execute most of the mowing and bush-hogging tasks around the homestead, but when you live in the least populous county east of the Mississippi River it can be a challenge to find someone to work for you.
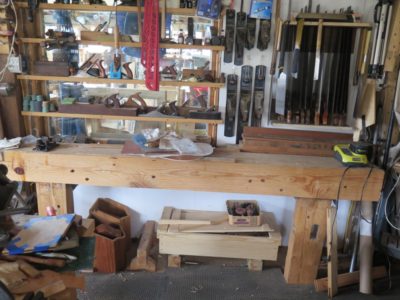
One of my upcoming tasks will be winnowing the workbench inventory. Do I really need eight workbenches in my own workspace? Of course not. So, I will begin reducing that particular footprint almost immediately and there are definite “Workbench Wednesday” implications.
The first of these will be to replace my first workbench built for the space, the timber planing beam, with a low bench of the Jonathan Fischer/Roman/Estonian variety. Since completing my French Oak Roubo Project bench I have had no need for the planing beam so it will be resawn and joined to become the slab for that bench. It will occupy roughly the same space but serve a more immediate need as my knees and hips are becoming more troublesome and working while sitting is ever more congenial.
This change will also allow me to construct a standing tool chest to hold a copious inventory of hand tools, to be placed at the end of the low bench where my saw rack and metal hand planes hang on the wall. Since seeing Walter Wittmann’s cabinet a few years ago I have seen this as a solution to my tool storage problem and now is the time to act on it. The Japanese tool box will reside where Walter’s large lower drawers are located.
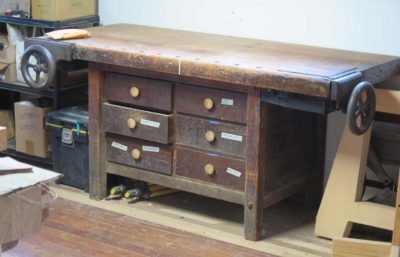
Of the plans for the workshop changes these are two of the three at the top of the list. The third is to restore my piano-maker’s workbench in order to make it a proper gift for my son-in-law, and move it out of my workspace. I m still cogitating on the ultimate home for the Studley-ish bench I built for the exhibit.
On top of everything else I have stock for at least another half dozen workbenches still unbuilt, but that may be moved on to other folks with the time, energy, and need that I do not have. Among these are the gigantic mahogany slab and vintage walnut 6×6 that would result in an eye-popping Roubo bench, a 14/4 curly maple slab already glued up, a stack of oak 10x15s, some 12-foot long 7×15 Douglas Fir timbers…
Making a Gragg chair requires chopping 17 mortises for their respective tenon partners. No big deal. Except these mortises are only 1/8″ wide. For that task you obviously have to possess a 1/8″ mortising chisel. You could get by with something 5/32″, but probably not 3/16″ The stock is just not beefy enough to try that.
I have three chisels in my arsenal for this process. The first is one that came for a box of tools I got at a flea market, it is a 1/8″ long chisel with a turned bulb handle. A second is from a no account 1/4″ Stanley chisel that I ground down to 1/8″ wide, and the third an my “go to” chisel is one I made from a derelict plow plane iron. All three are delightfully short in their overall length, a definite advantage when working inside the quirky confines of of the Gragg chair.
The mortises in question are for the rungs and fitting the seat slat tenons into the underside of the crest rail.
I’m not sure if the 1/8″ mortise chisel is THE most important tool in the project, but I do know that Gragg himself did not use the mortise-and-tenon method for attaching the rungs – he just drilled full-size holes and punched the rungs through – and every Gragg chair I have seen is broken at this point. This is definitely one case where an acolyte can improve on the methods of the master. I once asked some engineers to analyze my approach with Gragg’s, and they told me the 1/8″ M-n-T construction was ultimately 4x to 5x less likely to fracture than the original.
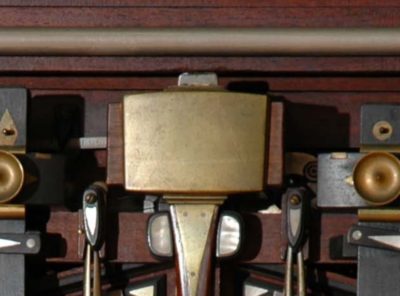
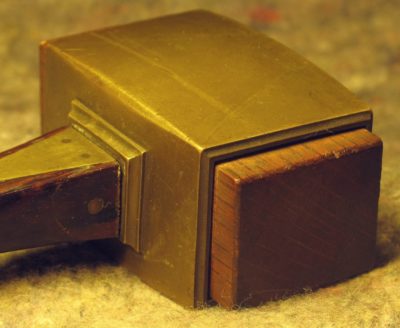
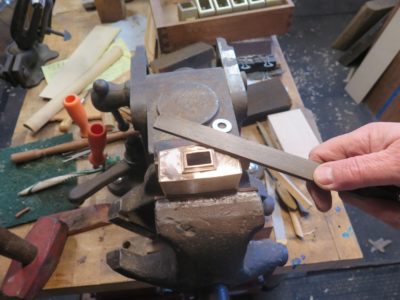
One of the challenges to replicating Henry O. Studley’s incomparable mallet is obtaining the surface texture when it is all done and finished. As someone who comes out of the foundry trade myself I can only shake my had in amazement at the shell he used in his mallet. There is no hint of who produced the brass casting, all I know is that is was provided by a virtuoso. Hmm, that sounds like a good title for a book about Studley. When I originally saw the mallet in person I thought that it was like many of the “finished” casting for the foundry where I worked; the pieces were cut off the sprue tree, ground and filed, then tossed into some sort of bead blaster to achieve a final surface.
However, once I got really up-close-and-personal I realized that was an unlikely proposition as the shadow of the parting line from the casting was still evident, about 1/3 up from the bottom. Abrasion blasting would have almost certainly removed that evidence. Thus I am left with the possibility that the shell casting used by Studley was essentially straight from the sand mold, at least in regards to the surface texture.
As nice as the new castings from Bill Martley are, they are not of the same quality as Studley’s (to be fair to Bill I have never seen contemporary sand castings of the quality evident in Studley’s menagerie) and the surfaces need to be worked extensively by hand to eventually get to a similar place, at least aesthetically.
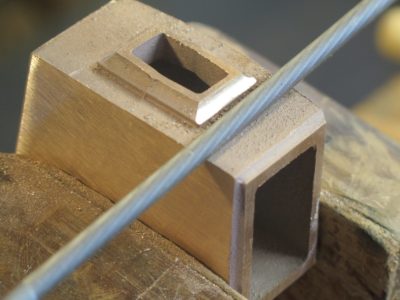
I already referred to establishing the cove profile with a 1/4″ chain saw file, and then cutting the flat edges of the same elements with barrette files I bought from Slav the File Pusher at Handworks last time.
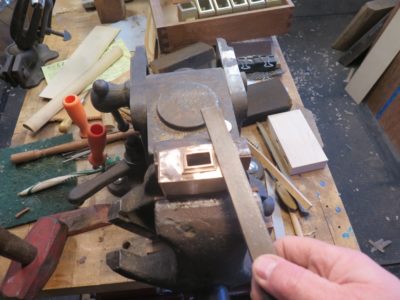
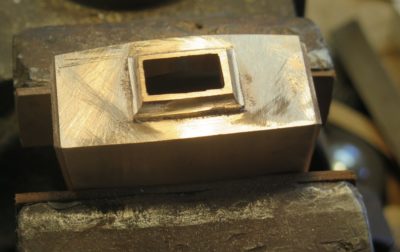
I then proceeded to work on the top and bottom of the mallet shell around the square collar, an always challenging proposition when trying to achieve uniformity on a surface that is not uninterrupted. The first goal is to get everything flat, working parallel to the sides of the rectilinear collar. I did this mostly with a small-ish mill file on which I had removed the teeth on one edge to as not to continue cutting where I did not want to cut.
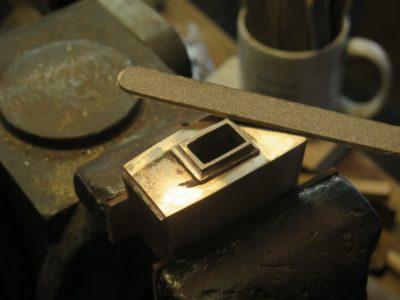
Once I got to flat I began to work with sandpaper sticks to begin reducing the tool marks left by the file. I literally used them flat, “rounding the corners” on the shell surface, working my way from 120 grit up to eventually arrive in the neighborhood of 600. The ultimate goal is to achieve a surface that has as little character as possible.
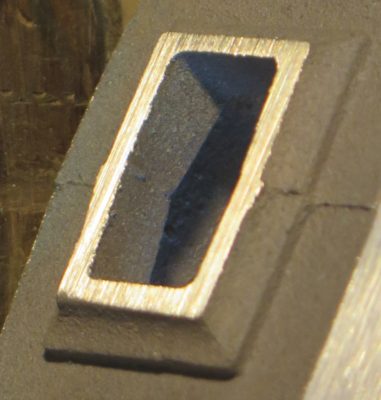
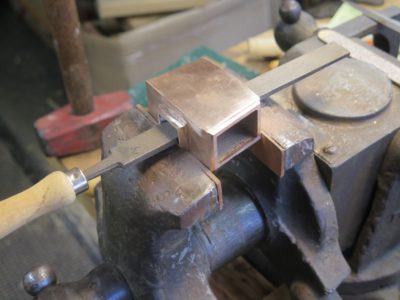
At that point the workpiece is ready for some additional contouring before the final surface treatment. The real design/detail genius of the Studley Mallet is that the primary corners are sharp at the faces of the mallet but quite rounded at the center point of the arc where two planes meet. I’m thinking that might be a seat of the pants exercise. I also began to work on the openings for the infill and handle.
Next time – working the surfaces of metals to “done.”
While not necessarily unique to making Gragg chairs a variety of detail saws are certainly part of several processes in the making of one.
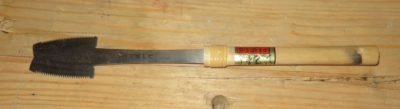
Probably the most peculiar of these is cutting the curved dadoes in the rear seat rail to accept the bentwood seat/back slat elements. While I know that making the curved bottom configuration of the dado can be achieved in multiple ways perhaps my favorite is to use a Japanese veneer saw, which with its deeply curved cutting edge is very well suited for the task. One problem I have encountered recently is that I cannot seem to find source for the saw, so I will probably attempt to make some myself.
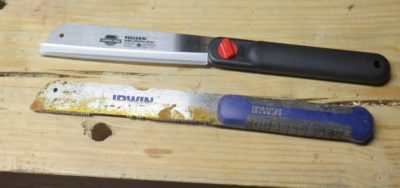
One option I have tried is to employ a Japanese mortising saw, with some success. The problem with this saw is the exceedingly long neck which causes some flopping around of the head. I’ll probably order another saw and move the handle up next to the head.
Without having the saw in the tool kit it is possible to cut the margins of the dado with a small Japanese detail saw and then excavate the curved bottom of the groove with a bevel-down bench chisel. Actually I find myself reaching for the Irwin and Shark saws far more often than I first expected. Clearly, this Irwin has had a tough life in my carpentry kit, I need to re-cut teeth on it.
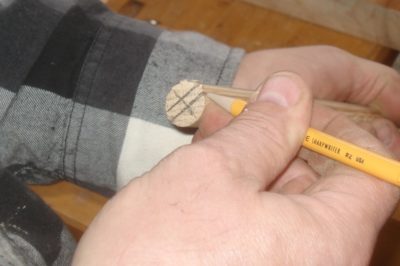
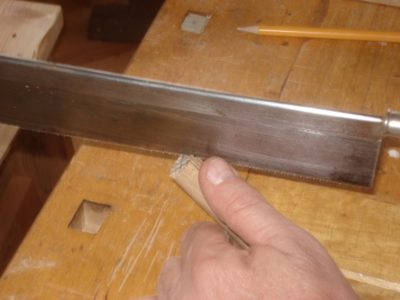
Elsewhere on the chair there is the need to cut the shoulders of the half blind dovetails on both the front and rear seat rails,
and the tenons on the ends of the back slats to insert their tops into the underside of the crest rail, and to cut the tenons on the ends of the rungs. For these tasks pretty much any fine back saw will work, I go back and forth between my custom specced Bad Axe (now in their inventory), my treasured old Sears backsaw I bought new in about 1970, and my Japanese dovetail saw. My habit is to cut the half blind dovetails with the Japanese dovetail saw and all the teeny tenons with the Bad Axe.
Now that they have begun to acquire the timbers to rebuild Notre Dame, I’m guessing the market for vintage oak slabs for Roubo benches is going to tighten up.
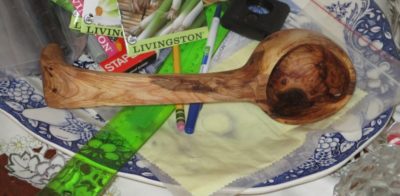
I could not push the envelope too far when shaping the bowl of the ladle due to the squirrel-y-ness of the wood, but the end result was fairly pleasing. Once all the shaping was complete I worked the entire surface with graduating levels of sandpaper, starting at 150 and ending with 400.
Then I mixed up some absolutely positively food-safe paste wax of 2/3 walnut oil and 1/3 beeswax, and burnished that into the surface with a fine abrasive pad until the surface just glowed. It was a pleasure to the senses at that point, with the smooth surface and the nice lines and the soft beeswax scent.
This is a food-safe item, with the epoxy impregnant fully reacted it should tolerate moderate temperatures and liquids with no problem. Were it to be left in a steaming tureen of stew for a long stretch, of that I am not so certain of the outcome. Not of any toxicity problems, the epoxy being fully reacted would be inert, but it would be a touch thermoplastic and soften just a bit. And the walnut oil/beeswax polish would just melt into the pot with virtually no notice, and could be re-polished after washing.
The finished implement is now displayed on the serving table in the dining room, though at the moment it is surrounded by all the seeds and shoots Mrs. Barn is planting in the garden when weather permits.
For a first-time spoon carving project, I am not displeased.
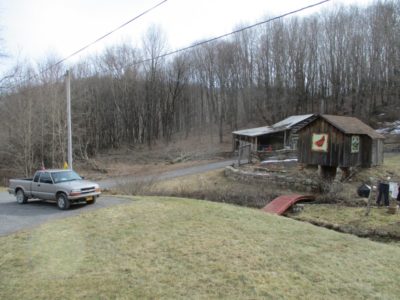
With the first hints that Winter may be drawing to a close and Spring will soon be upon us a young girl’s fancy turns to… gardening! With that in mind last week I hired my pal Bob to come and fell a bunch of trees surrounding the old log barn. The barn did not care, but the trees had become so dense and tall that they were shading a small garden plot Mrs. Barn has been cultivating for a few years, including some small pear trees, right next to the garden shed behind the stone wall. The trees have not flourished as she had hoped primarily because the the limited direct sunlight in that spot.
So, the trees had to suffer mortal wounds. Only three or four of the trees were very large as these things go, perhaps a foot or so at the base, but even that tree weighs a couple tons and could really ruin a day. Plus a number of the smaller trees, 6-8 inches at the base, were sorta leaning the wrong way for me to drop them easily and in the right direction. that’s where Bob comes in, having been a woodsman much of his life he really knows how to “read’ a tree and get it to go where he wants it to go. even then we had to “push over” several of the trees once he could to a critical point in the cutting. On tree immediately behind the barn was too large and leaning too much for us to get this time, I’ll have to hook up a winch to pull it in the right direction when we cut it in the future.
But for now we have a whole lot of new sunshine coming through, and nearly a full winter of firewood on the ground.
It is fascinating how the metrics of life change over time, and in relation to the context of the moment.
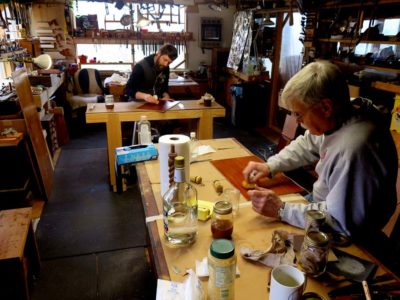
Evidence of another good and productive day at the workbench. Who knew that some day I would smile at assessing a day based on how much I needed to sweep the floor in the morning?
On top of that we are in the midst of several days of warming temps and brilliant sunshine.
If I did not already own one I would be interested in bidding on this 4-foot (!) veneer saw at the upcoming May tool auction at Live Free or Die Tools. If you have case of the Roubos coming on, this might be the medication.
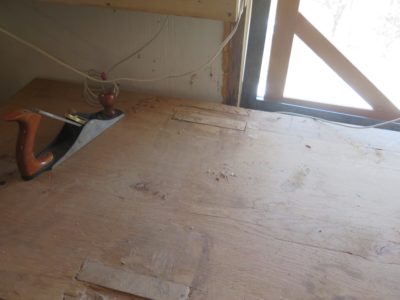
One of my quirks is that I usually like to lay a piece of sacrificial sheeting on top of my workbench most of the time, and today was my day to swap out the old one for a new one on the FORP Roubo bench. As I was making the swap I noted that it was also time to address one of the two main manifestations of Seasonal Affected Disorder that afflicts (?) wood in the natural course of events, sometimes called hysteresis, sometimes called rheological cycling, but generally known to us folks at the workbench as “wood expands, wood contracts.” One of the consequences is that when there are pieces of wood assembled with different grain orientations eventually they get out of sync dimensionally. In a Roubo workbench this become manifest as the tops of the leg tenons eventually protruding past the top of the slab.
As I was fitting new pieces of luan plywood to lay on the bench top I noticed that the tenons were quite proud of the slab, perhaps 1/16″. I only assembled the bench a couple years go and did not notice the issue when I laid the initial sacrificial covering at the time, but it was there now.
You might have thought that since the bench was initially fabricated eight years ago it should be fully settled into its new environment. Maybe, maybe not. If the old adage that wood seasons at the rate of “one year for every inch of thickness” is true then the answer would be “yes.” Since I moved to the hinterlands and talked to some of the local wood guys I have come to appreciate their view of seasoning woods, especially dense hardwoods. To them “one year per inch” does not hold true; instead they use a formula of “one year for the first inch, two additional years for the second inch, three additional years for the third inch,” and so on. By that metric my five-inch-thick bench top will pretty active for 1 year + 2 years + 3 years +4 years + 5 years, for a total of 15 years.
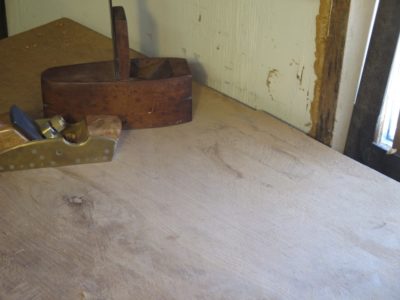
I dealt with the tenon ends directly in about an hour this morning, and will address the slight crown of the overall bench perhaps at the end of summer.
It might be worth reiterating that once I get a slab bench top flat I prefer to hit it with a toothing plane to give it a little texture. I lose none of the planarity but gain a lot of grip on the workpiece.


Recent Comments