Over the last few weeks I’ve been cleaning and organizing/reorganizing my studio, resulting in a more compact spatial scheme and, thus a space for my secret weapon in writing. Yup, I brought down my secret mojo into the studio to psyche me into attacking the completion of A Period Finisher’s Manual with gusto.
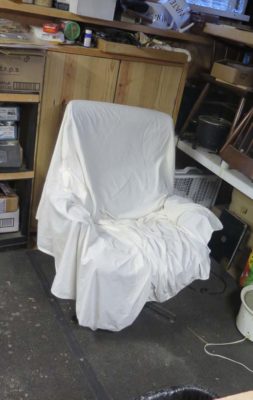
Sure, it is a raggedy third generation Eames knock-off (here draped in an old sheet to keep it clean-ish) but it is perhaps the most comfortable chair I’ve ever owned. It would be interesting to know the dimensions of Charles Eames’ physique because the chair fits me as though it had been custom-made for me. It’s sorta like a friend of mine, an armorer and devotee of Sig Sauer pistols, who tells me they fit him like a glove. Indeed S-S are superb precision tools, but the secret sauce to that recipe is that my friend is literally the hand model for the tool — of course he thinks they fit him perfectly, because they were designed to fit his own hand!
Anyway, I have already begun to work on revising the APFM manuscript with vengeance as I am simply tired of having it hanging over my head. Michele has advanced far ahead of me on the Roubo front so I need to get this one done and turn my attention to catching up with her.

I’m hoping this mojo works as well as in the past, when I could work expediently on a manuscript in my chair (even with cats draped allover me while I was revising Roubo 1).
Handworks is now six months away and we are busily preparing for stocking the booth for the onslaught of the thousands of friends old and new bound by the love of traditional hand woodworking tools.
My broom maker has a standing order for dozens of polissoirs to make sure I have plenty of these magical tools for show and sale. Unfortunately(?) I still get orders almost daily so building up the inventory is going slower than I would like. I go to the post office every week with a bag of packages to send.
The broom maker and his wife have finally moved into their dream house he has been building for the past several years, and is having trouble finding the time to set up his own workshop just the way he wants it. I spoke to him this morning (I had actually run out of the Model 296 polissoirs) and just yesterday he was able to begin using the workshop in the new house. I will be providing a complete set of polissoirs as a door prize for Handworks.

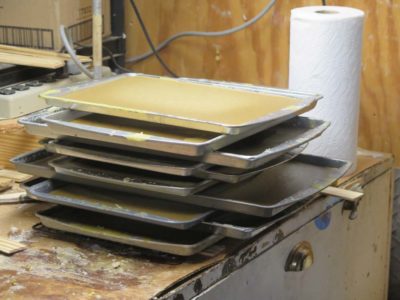
Here on the homestead I have been refining the raw beeswax, known in the apiary/honey/beeswax world as “slum gum”, to provide the purified raw material for Mrs. Barn to make into beeswax bars. There is nothing quite like the beautiful appearance of the amber nectar after the final filtering as I cast it out as molten material in cookie pans.

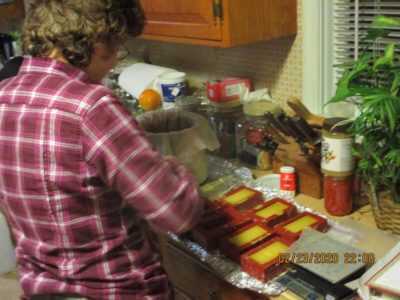
This is a favorite winter activity as it both heats the kitchen a little with her dedicated crockpot going almost 24/7 and imparts the lovely scent of clean molten beeswax throughout the cabin.

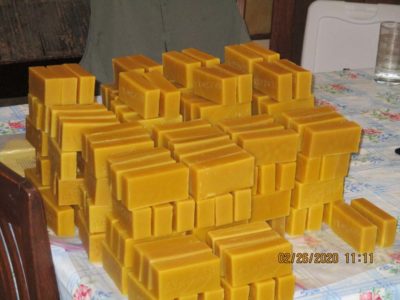

Over the days the pile of finished bars grows and grows, eventually becoming wrapped and placed in their storage boxes.
Meanwhile up in the Waxerie I’ve added casting more shellac wax and Blend 31 bars to my mix of activities. This is a nice punctuation to my other ongoing projects in the shop as it does not need my immediate attention all the time.
I plan to have a full inventory of polissoirs and waxes and stuff and will schedule hourly demonstrations at my booth at Handworks, and will expound on these as things come together.
A couple weeks ago while clearing out some stuff from my basement workshop at my daughter’s house, I came across an experiment that is almost forty years old.
In the world of historical fine art one of the premier positions is held by “panel paintings,” or fine paintings composed on a solid wooden panel. Given the age and prominence of these artworks, and the fact that they are unbalanced construction on an inherently unstable base given the presence of a precisely constructed laminar gesso and paint layer on the front side of the solid wood panel, caring for these artworks takes a high place in the preservation hierarchy. Very early in my museum career I found this problem to be a fascinating one, and the data points of my career projects (when I was able to choose the projects to work on, which was most of the time) revealed that it was the quality of the problem that motivated me much of the time, not necessarily the notoriety of the artwork/furniture. That explains my final project, which was the stabilization of a pair of wooden flag poles that encompassed a peculiar approach to addressing the problem of split timbers.
Back to panel paintings.

(Photo by H.L. Stokes via Wikipedia)
To counteract the unbalanced construction on a dynamic foundation, many, perhaps even most, ancient panel paintings have been augmented with a framework applied to the back side to both balance out the construction somewhat, but also to mitigate the tendency of the wood panel to warp. Sometimes these added features, called “cradles,” are elegantly sophisticated. Others are sophisticated and deleterious to the panel as the “floating” spines bind in the “pass through” blocks that are glued to the back side of the panel, inflicting new fractures to the panel along with the distortions as the panel attempts to expand and contract while the bound spines hold it in fixed dimensions, essentially a fixed cross-grain construction. This problematic outcome caused the entire concept to be reexamined beginning about the time I was coming into the museum world and many panel paintings have been de-cradled.
Shortly after hearing a seminar presentation on the topic in 1982 I decided to construct a prototype integrating my understanding of what wood is and how it behaves with some out-of-the-box thinking. Given that many of the old cradles were actually damaging the panel paintings, clearly a different approach was needed. Believe me, the number of alternatives to traditional cradling were legion, and even the last panel paintings conference I attended included several novel and unrelated options.

So I made a full scale model to test some ideas I had rattling around my brain pan. For starters I selected a less than premier piece of wood, it was literally a 2 x 12 resawn, planed, and glued together with hot hide glue into a “panel” approximately 20″ x 30″.

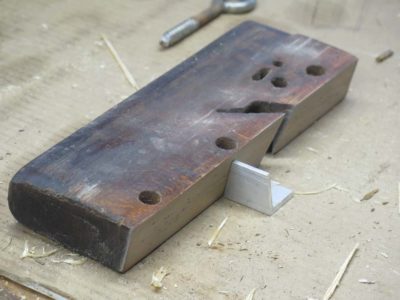
I then fabricated a series of “pass through” blocks with rounded contact points for the floating spines, which were themselves fairly lightweight, with the entire system glued to the back side of the panel.

You can see the construction of the blocks from this one that had been broken somewhere along the line. I applied spray dry Teflon to both the rounded faces of the blocks and the floating spines, hoping that the shape and permanent dry lubrication would prevent the blocks and spines from binding together (Teflon being the slipperiest substance on earth).

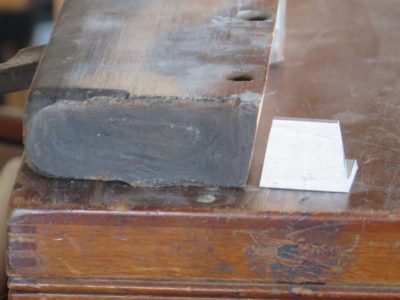
After assembling the entire model and showing it to the paintings conservators at the museum (I was working at Winterthur Museum at the time) I set it aside and literally forgot about it for almost four decades. Presumably it has been just sitting in the basement for all those years, responding to changes in the unregulated environment of the space. Over the life of the panel there have been swings in humidity from 100% to maybe 25%, more than enough to impart hysteresis cycles a’plenty.

Much to my delight the assemblage has suffered no ill effects over the decades, so at least the concept proved sound. The original construction is still perfectly flat and there are no instances of long-grain fracture to the wood. Admittedly the panel is balanced in that both faces are raw wood open to the microclimate so there was very little impetus for severe warpage. Still, I would have expected some loss in planarity if there was a flaw in the concept. Nope, still dead flat.
Now that I have reclaimed the experiment I will create a simple paint scheme on the face to mimic the structure of a typical Renaissance panel painting and see how the experimental cradled panel responds over the years. I will leave it sitting out of the way in the barn essentially exposed to the elements except for rain. I’ll check back with it in, say, another 38 years to see how it did. I’ll be 103 then, but I just got back from celebrating my Mom’s 103rd so that might not be too crazy.
If it still looks good then I’ll let someone in the museum world know about it.
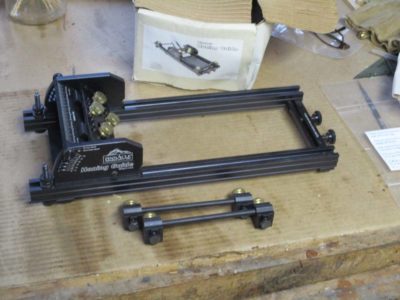
Several months ago I was at a tool flea market and picked up this sharpening jig just because I thought it was neat and the price was right. I use jigs to establish the blade geometry but finish them up freehand, so this might come in handy when rehabbing a damaged edge. Ironically, I made a wood version of this concept and found it useful, so I look forward to giving this unit a tryout.
Stay tuned.
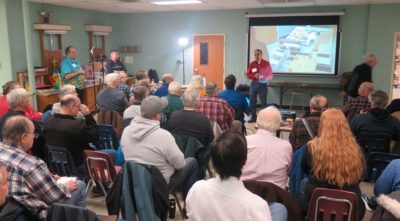
A week ago Saturday I had the great good peasure to spend the day with two DC area woodworking groups, the Manassas Woodworkers and the Washington Woodworking Guild, as they co-hosted a day of Japanese toolification with my friend Wilbur Pan of Giant Cypress fame. The event was at the Manassas group’s space which turned out to be almost perfect for it. I did not take an exact head count but the room was crowded with an estimated 75-100 folks, some of whom came from surrounding areas as distant as Fredericksburg or even the Virginia frontier. Since I have been in that circle of woodworkers for a long time I knew many of the folks in attendance.

Beginning at noon and winding up at supper time, Wilbur walked the audience through the many facets of using Japanese tools in his woodworking, taking pains to refer to those areas where Japanese tools are different from European traditions and where they are similar and complimentary.


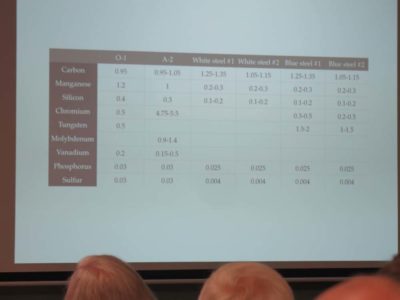
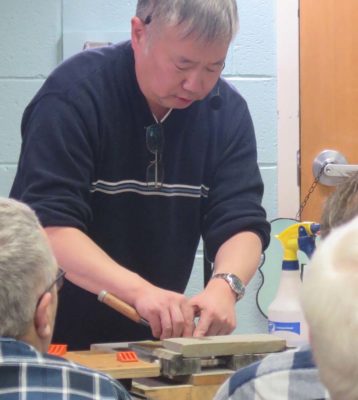
Systematically he reviewed the major tool categories — planes, saws, and chisels — including a full menu of reference information ranging from metallurgy and manufacturing technology to edge geometry to ergonomics and kinesthesiology. My impression was that this was unfamiliar to many in the audience, but there is no way anyone could depart at the end of the day without a deeper understanding of woodworking in general and Japanese woodworking in particular.
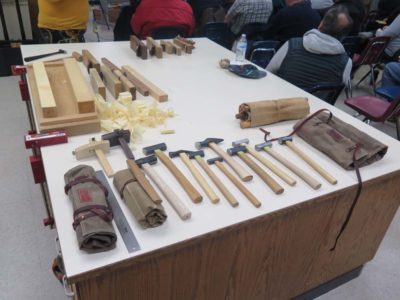
In addition to Wilbur’s tools for the demonstrations, WWG member JayC brought his sizable inventory of tools for show and use. This was one of three or four tables Jay had set up for his tool collection. As we were cleaning up and clearing out afterwards I noticed Jay giving instruction to some of the attendees who wanted to try things out.
I finally got back to my daughter’s home around 9.30, just in time to Skype with other daughter and SIL. It was a darned near perfect day; breakfast with a friend who is a political mechanic, strategerizing about disrupting the malevolent Virginia political establishment, woodworking toolism with friends old and new all day, a delightful dinner with same, and ending with Mrs. Barn and me chatting with the ones we love most dearly.
One of the projects soon to be underway in the studio is to make one (or three?) Japanese planning boards complete with sliding dovetail legs and perhaps even a dovetailed planing stop. But first I need a dovetail plane. I had another derelict 1″ dado plane up on the shelf so the raw material was already in hand. This poor thing had the snot beat out of it in ages past, so it was $3 at the PATINA tool event two years ago. If you are anywhere close to northern Maryland on March 14, you should go. The deals are simply amazing.
The first step was to decide on the dovetail angle on the sole and cut it on the table saw. It was sooper dooper easy, I just got out my zero-time-zero-cost home made dovetail template from the drawer and set the saw blade to that angle, positioned the fence, and ran it through.
Done.
Follow along on the remaining steps of the journey in the coming posts.
When reviewing the voids in the tool set for the Japanese tool box I decided to make as many of the missing tools as possible. Sure, I can find them easily in the marketplace and for the most part afford them, but if I followed that path I would miss the joy of making the tools. Sometimes I revel more in tool making than woodworking.
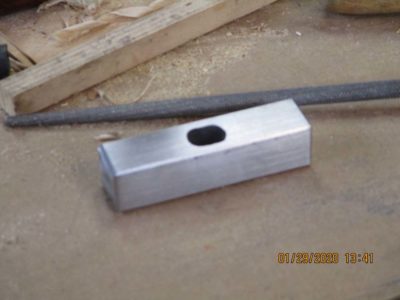
The first and easiest one to make was a small-ish joinery hammer. I’d guess it took about four or five hours over three days to make, and the materials included a 3/4″ x 3/4″ piece of mild steel bar stock from the scrap drawer, a piece of padauk or similar tropical hardwood from the box of wood scraps, and a couple pieces of ivory from my ivory pile. The steel for this hammer came from the larger bar.

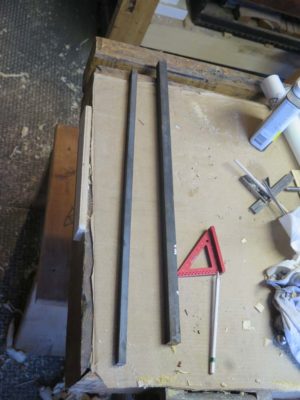
I started by cutting a three-inch piece of the steel bar stock from the larger piece of scrap. As is my preference for a lot of similar cutting activities I use a German jeweler’s saw with a #4 blade. While I was at it I sawed the smaller bar for a plane-setting hammer I will make soon.

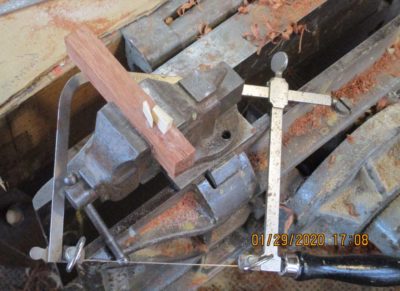
After the steel bar was cut I dressed all four sides on my granite block with 60 grit sanding belt, I drilled out the two holes that established the eye hole for the handle, then filed them into a nice oval. I originally intended to make the eye hole with the cross feed vise on my drill press, but the vise was so cheezy it could not hold anything steady and I wound up just drilling two holes instead and filing out the oval.
Once I had the eye hole the way I wanted I dressed the chamfers on all the corners, mimicking the character of a Japanese hammer, albeit with slightly “off” proportions since this was perfectly square in cross section. True Japanese hammers are slightly taller than they are wide in cross section. In addition my chamfers are a bit light, I will make them heavier on the next one.
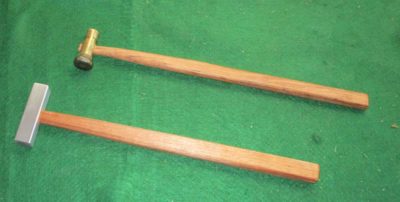
Looking through my pile of wood scraps I picked out a piece similar to what I used for a plane adjusting hammer some years ago, it actually might have been from the same piece. I like the handles on such hammers to be long and slender.
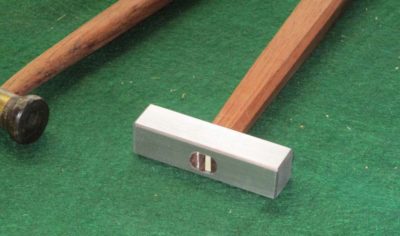
With the handle made and fitted to the hammer head I got out some ivory and cut a pair of wedges, which I drove into the pre-cut kerfs in the end of the handle. A little smoothing out and the tool was done.

The only other thing I might do to this little beauty would be to blue the sides to an almost-black appearance, and do a little engraving through the bluing. That would look nice, I think. As is it’s a very nice addition to the Japanese tool box and feels great in my hand.
As they say in the world of supply logistics, “Three is two, two is one, and one is none.”
The great thing about providing all your own power for a facility is that you get to provide all your own power. The bad thing about providing all your own power for a facility is that you get to provide all your own power. Thus you are enjoying the fruits of your own power plant or you are tending to the power plant. That is why I have redundancy built in to my system. For example, in the winter when I decommission and drain the water line to the hydroturbine I can fall back on my solar panels, which usually suffice. And if it is a particularly cloudy stretch of days I can fire up the 6kw gas generator.
But sometimes even that is not enough.
Recently I did some routine maintenance to the system requiring me to take the solar panels off-line. It was nothing exotic, I was just cleaning the battery terminals for the storage batteries. When I brought everything back on-line the solar system simply refused to work properly. Grrr. If it had been performing at zero efficiency I would know one thing. If it performed at half efficiency, I would know another. But those stinkers are only performing at about 10%, which has me and the engineers scratching our heads. I need to undertake thorough troubleshooting session once the weather warms a bit.
So, I fired up the generator and sent the juice up the hill. But friends, when the temps are in the teens, pull-starting an 11HP motor can be a challenge. Under those conditions pull-starting a big motor can result in pulling a muscle in your abdomen. Which happened. Grr, grr.
Still for three weeks I relied on my generator, but that has its own problems too. A typical generator provides “dirty” power meaning that the current is pulsing and so too do the lights. The eye can get used to that, but the video camera cannot. Thus we had to cancel a long-scheduled video session, no small thing since Chris now has a full time job, a new/old house, and a baby on the way. We have not been able to schedule the make-up session, and I really need to get the Gragg chair video finished. Grr, grr, grr.
In semi-desperation I undertook another upgrade/redundancy to the system and have yet another in the works for this summer. I hired the electricians who have worked with me in the past to come about two weeks ago and wire in a 50A 220v circuit from the cabin to the control shed, so now I have the option of sending ~11kw of clean juice up the hill if needed.

This summer I will build a second hydroturbine about 100 feet downstream from the current Pelton wheel micro-turbine, but this one will be a cross-flow turbine with an open hopper penstock so it will not need to be decommissioned in the winter. I’ve got the perfect location for the sluice and hopper where it will capture 100% of the water flow with about a five-foot drop and will begin work on them as soon as the weather is more congenial and I get caught up on my projects in the studio.
I am currently four-is-three and will soon be five-is-four…
Stay tuned.
While working on the Maryland house I have found one tool that is now integral to my everyday activities in or out of the shop, and two tools re-purposed to even greater utiity for the execution of tasks.

The first one is this superb little Japanese-style saw from Lowes, I think was about $14. I bought it as a semi-disposable tool for cutting cedar shingles as house siding, and before long I was keeping it in my tool belt or my ancient Skillers tool vest all the time, for every project. I went back to Lowes and bought three more so that I have one at my daughters house, one in the cabin in the mountains, one in the studio in the barn, and one more in reserve in the Japanese toolbox.

Then while I was prepping to do a little spackling to touch up the wallboard from when I had to removed and reinstall the cypress trim in the living room, I simply could not find my sheetrocking tools. Exasperated I looked around to see what I could use to “make do” on the shelves of the basement. I grabbed a couple of tools and much to my surprise and delight they worked even better than anything else I have ever used for the task.

First I applied the joint compound with a square-end masonry trowel that I used for a small patching job at some point long ago. It was easier for me to control than a typical taping knife. Then to smooth out the freshly applied spackling compound I used a plastic bondo spreader. It also worked better than anything I have ever tried before. Brilliant!
Now all I have to do is wipe the areas with a damp sponge and they will be ready for paint.
Sometimes we just gotta be Keith Jarrett (more about that later).

Once all the disassembly and glue surface cleaning was complete I set to the task of making the pieces into a whole thing. Not precisely a whole long rifle, as that would imply functionality, but at least a whole assembly of the parts.
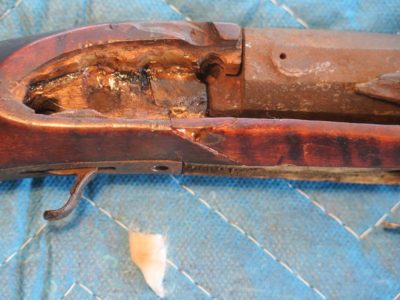
My first step in this process was to determine if the pieces actually all fit back together again without any modifications. Temporarily re-installing the barrel I decided that indeed the major elements fit nicely back together.
Since the configuration and shape of the rifle precluded my ability to really clamp anything together I used foam pads and wedges to hold everything in the precisely correct position and wicked-in some dilute hot hide glue into the break, just to hold things in place for what was to come next.
After allowing the glue to set fully overnight, I was delighted to pick up the rifle gently and realize that it stayed together. With the proper shape established I then wicked-in slightly diluted West System epoxy with extra slow hardener to allow it to wet out the gluing surfaces and voids completely. I let this sit for a week before touching it again.
Stay tuned.
***Apologia – somewhere I think I have a few more pictures of this process, but I either put them in the wrong directory or they are on a wandering SD card and have not been uploaded to my compewder yet. If I find them I will post them.***

Recent Comments