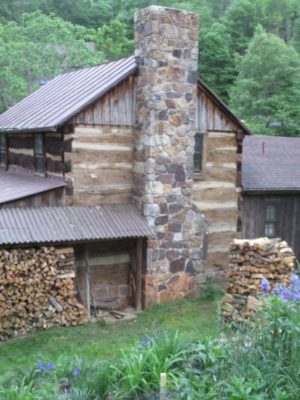

During the process of removing the ancient chinking and other fills on the log cabin, a disturbing find was a fist-sized hole on the north side wall. The hole was not necessarily a surprise as the north side was the most weather beaten with considerable surface lichens and some localized fungal rot, including some pretty substantial damage to some of the structure around the chimney (more about that next time). But the hole was concerning since it went all the way through the log!


After consulting with Tim, the owner of the log cabin restoration company, I decided to have him attempt the localized repair rather than cut out the whole log section or fill it with an epoxy-based composite. Tim thought he had just the right piece of weathered chestnut to make the fill, and the results confirmed his confidence in his skills and my confidence in him.
He had to excavate several inches on either side of the hole to get back to sound wood, and seeing the size of the pocket was a bit unnerving. But, the final results were indeed impressive.

A couple months of weathering and the fill will be invisible. Like I said, impressive.
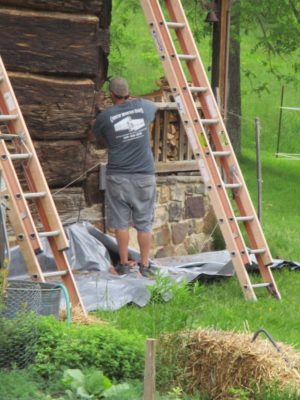
Just the sight of this brutal work made me all the more delighted that I passed the task on to other folks. With hammer and chisel and prybar the several hundred linear feet of concrete chinking was removed, along with the mesh lath and fiberglass insulation underneath. There was a mountain of debris at the end of every day, carefully collected and hauled off.
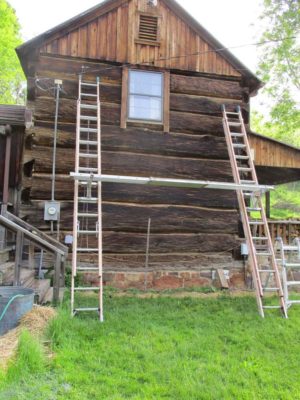
We had them start the project with this side of the cabin because this is where Mrs. Barn plants her pole beans, and we needed to get that done first.
After the joint void was cleaned and any decrepit wood was removed to leave a clean and sound substrate (there was a fair bit of this as the original chinking had not been relieved and the top of each course of chinking acted like a gutter, drawing in rain. Good thing the logs were old growth chestnut. It’s probably the only thing that saved them), the joint surfaces were saturated with borate solution to increase the rot resistance of the structure.
Though this description is brief I can attest to the scope of the work that took several days to accomplish.
A few weeks ago my friend B came for a couple days to test drive the shoulder knife making workshop that will be at The Barn later this summer (August 23/24). We had a great time of visiting while he was working on a natural branch from a fallen tree, cleaning it up an fitting it to his torso for use as a marqueteur’s shoulder knife.
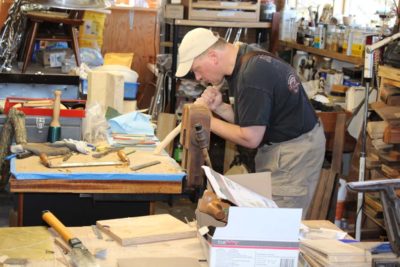
He made great progress and we are anxious for the real event in a couple months. If you would like to come and make a shoulder knife for yourself, just drop me a line.
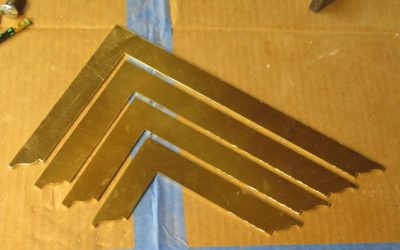
As for my current activities I have been busying myself getting ready for the students arriving for the Make A Set of Roubo Squares workshop later this week.
I chatted recently with the cattle man who runs his herd on the pasture through which I drive coming and going to and from the homestead, and he was fine with me harvesting the Juncus that is burgeoning in the fields. I am pretty sure I will be able to harvest as much of it as I can possibly use, and then some, come August or so. Fortunately the cattle have no interest in it so it should just keep on growing until I harvest the bundles and get them drying. The clusters of the grass popped their heads last week, so now it is simply a matter of waiting for nature to take its course. Fortunately most of the densest growth is adjacent to the road.

Over the winter I will start making Juncus polissoirs for sale, although since I have to do every step myself by hand they will be pricey. If they do not sell, I will just keep them here for workshop students to use.
Imagine you are a vaguely middle-aged man who has spent decades at woodworking, honing your skills and acquiring the mountainous supplies and tools requisite to follow your passion. Actually, given the likely nature of the readers of this blog, you do not have to imagine this scenario very hard. It is what you live.
Then imagine you have managed to find a niche for your woodworking and built a nice business from it, enough to support your family. For a few of us I suppose this is not too far-fetched, for the rest of us it is a stretch.
Now comes a little more challenging imagining: imagine you leave your shop and home one day, and it disappears into smoke. Literally. What would you do? The business assets, at least the physical ones, have turned to ash. Your home is gone. And worst of all you are not the only ones as tens of thousands of your neighbors have suffered exactly the same fate as you.
If you can envision such a scenario you have an inkling of the challenges still facing Rob and Kristy Hanson of Evenfall Studios. Rob has chronicled the catastrophe they suffered and many of you have ponied up some financial support for them. I know they are immensely grateful for the help. Though Rob and I never met in person we have been internet pen-pals for quite some time, and I have maintained an ongoing correspondence with him over the past several months.

Paradise CA. Photo courtesy ABC News.
The struggles they continue to face trying to make this particular Phoenix arise from these particular ashes is daily and daunting. Let us continue to help a fellow woodworker trying to rebuild his life.
There are a couple things you can do.
First, once again donate as generously as you can with contributions via their web page. Just because this story is long gone from the news — hey there are POTUS’ tweets to get hysterical about, and Mordor nitwittery to make us clutch our pearls! — the consequence of the wildfire is still immediate and ongoing for the Hansons. With the scale of the destruction encompassing the entire region, recovery is unspeakably problematic.
Second, through my lengthy correspondence with Rob I finally persuaded him to send me a list of tools he needs to get back on his feet. I printed it out and keep it on one of my classroom workbenches as I mosey around the joint, poking in boxes and corners looking for stuff he needs. This week my daughter and son-in-law, visiting from North Korea, er, Northern California, will assist me in assembling some “care” packages of useable tools to get Rob up and running that will be sent as soon as the boxes are ready to go. This gesture serves me in many way. First and foremost it helps me clear the inventory of surplus tools I have accumulated over the years. I’m betting that many of you have the same affliction, and could use this cure. Of greater importance this allows me to exercise my Christian Charity, and as a Follower of The Way I am commanded to do this.
If you are so led for whatever motivation, contact Rob and inquire as to what surplus tools you have that he might need. Sometimes it really is little things, tools that you (and he) cannot even recall because they are so common. I’m including some spring clamps and utility knives along with my more purposeful woodworking tools, and I bet you can too.
Third, if you are anywhere close to driving distance from Rob I know that he needs a portable-ish workbench on which to work. A 500-pound Roubo is probably not appropriate, they are in tight quarters at Kristy’s parents after all, but check to see if you have something that might fit the bill for him working in the garage, carport, or even out in the yard. I have plenty in this regard but it makes little sense for me to ship a full-sized workbench from one remote area near the East Coast to another remote area near the West Coast.
In surviving and prevailing through this epoch with fortitude and resilience we know what Rob and Kristy are made of.
Now it is time to show them what we are made of.

Building up my inventory of Gragg chair parts.
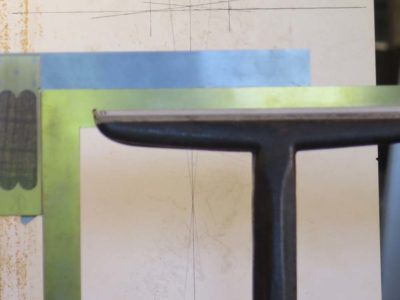
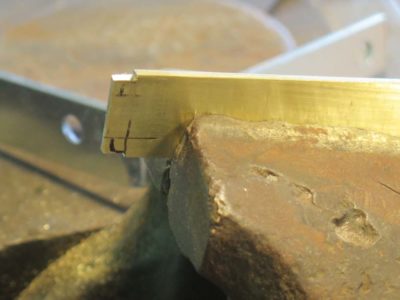
After the blade-and-beam are prepped and trued with the reference square from Chris Vesper I cut and shaped the shoe being soldered to the outer edge of the beam.

Then I prepped the surfaces themselves by cleaning them with 400 grit abrasive paper, and placed them together with flux in the contact of the joint. The square was held in place simply by placing it between two fire bricks.
A propane torch and some wire solder finished the task.
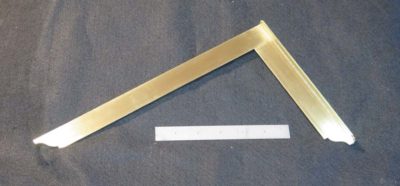
A little clean-up and the square was ready to get to work. Now do that several more times and you have a nested set.
This workshop will be June 20-22, 2019
===================================
Other workshops at the Barn this summer are:
Historic Finishing
Make A Roubo Shoulder Knife
Make A Ripple Molding Machine
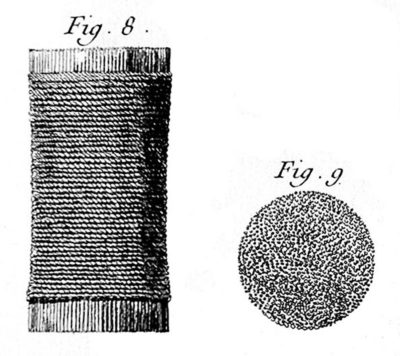
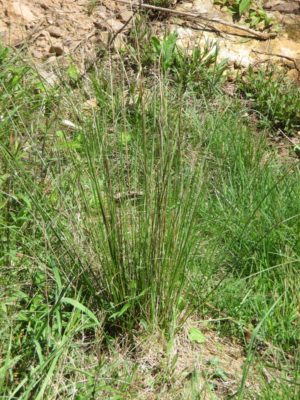
A couple weeks ago as we were driving up the road to the cabin, (our road cuts through a few pastures along its way, so there are literally times we have to wait for the cattle to move aside) Mrs. Barn remarked that there were clumps of Juncus effusus grass popping up in the fields. I asked around, and it turns out that it is considered a noxious invasive in these parts, spreading in many pastures but inedible by the cattle, or at least not preferred. So I am delighted that there will be dozens of Juncus bundles of new polissoir stock in a couple months, and our local cattleman will be pleased to have me cut it down.
For those who like me have been bitten by the polissoirs bug I will be harvesting then hand-making polissoirs for sale come this fall. They will be identically configured to the Model 296. My broom-maker is not set up to make these, he is set up only for working with the sorghum straw. Juncus is simply too different from sorghum, most especially in that sorghum compresses comparatively little when bound whereas Juncus compresses about 60-70% during the binding.
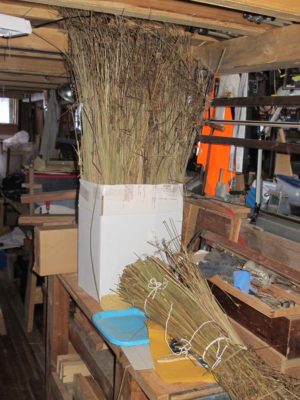
Some Juncus left over from my last harvest. I will use this to improve my manufacturing technique.
They will be labor intensive and thus pricey, but if you gotta have one, I’m your guy. They will be, quite literally, as close to what Roubo described as I can get without a Time Machine. These are not better nor worse than my other polissoirs, they are just different.
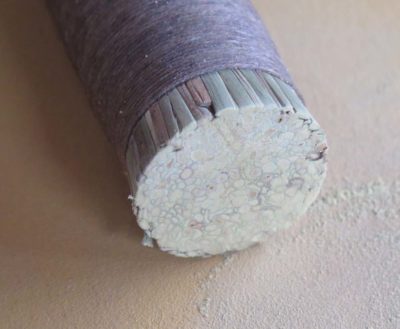
A Juncus polissoir.
A couple weeks ago we had two excellent days of videoing for my Make A Gragg Chair video. As my pal MikeM observed, doing video slows everything down by at least three-fold.
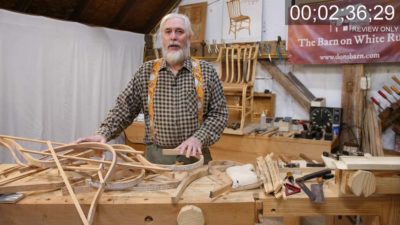
We are now to the point of actually assembling the pile of bentwood pieces into a chair, beginning with the sides of the chair in an assembly jig (after attaching the side rungs via mortising them into the legs) and then starting to fit the cross elements.
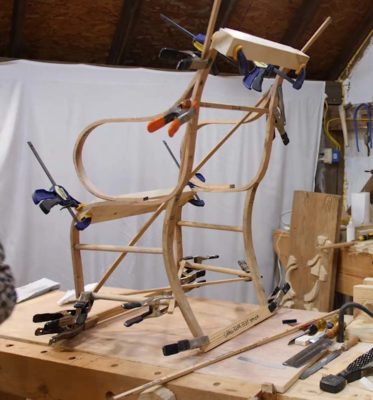
One thing is for sure, it’s pretty important to have a large number of simple spring clamps and temporary bracing to keep everything together.
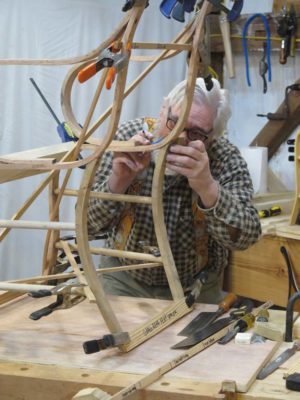
This is a really exciting project for me, and my earlier projections are falling by the wayside regarding the length and detail of the final product. I’m sorta guessing this might be in the 10-12 hour range once we get all finished.

I am also getting a better sense of how to create a six-day workshop for making Gragg chairs. I just might be able to pull it off. When the video is finished I’m going to embark on a focused exercise to see if it is truly possible.
Stay tuned.

A couple months ago I had a “crisis”(?) with the power system for the barn. I made it through most of the winter just fine, invariably shutting down the system on my way down for supper and turning it back on in the morning to save the power that would have kept the system up overnight. Suddenly the power accrual fell off the cliff and I really got concerned. A day that should have been inputting 300-400 watts into the system was instead producing 70, or 50, or even 20. Since I had a generator wired into the system last year I was not at risk of being without power while working but the dysfunction was not insignificant despite the fact that I seemingly had enough power to work in the shop all day.

I trouble shot every aspect of the system I knew, even getting so desperate as to READ THE INSTRUCTION MANUAL (even my pal BillR who is an EE and MS Robotics guy says the system product information is almost impenetrable). In desperation I corresponded with Rich, the EE who sold me the system, and BillR, who installed the solar components. They too were scratching their heads about the situation.
Then at about the same time they both had a suggestion: make sure the Dump Load switch is turned on. The Dump Load is a resistance coil to “dump” any excess electrons once the batteries were charged to full capacity to prevent them from being damaged by over-charging.
Yup, that was the ticket. Apparently during one of the evening shut-downs I absent-mindedly (or at least inadvertently) threw the Dump Load switch to “off” and left it there. The Dump Load switch is right next to the switches for the inverters. With the Dump Load off the system would literally only accept the trickle necessary to keep the batteries topped off. So, when I saw the system first thing in the morning and last thing in the evening, where no meaningful consumption was ongoing, the system had told itself to choke off any wattage input from the solar panels to protect the batteries. During the day when I was using electricity the system would have shown an input equal to my usage but I would not have seen that.
In the moments following my turning the Dump Load back on I literally let out a whoop as the input went from 20 watts to almost a kilowatt because throwing that switch told the system to go full bore.
So I didn’t really have any kind of crisis, other than the one in my own mind due to the fact that I did not understand fully the intricacies of the power system, even after all these years.
Good thing ignorance is curable.


Recent Comments