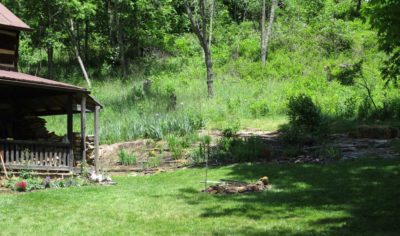
Mrs. Barn has been especially plagued this year by the wildlife endemic to our remote mountain retreat, most especially the bunny rabbits coming to nibble off the tops of her flowers in the bed she has been cultivating for many years on the hillside adjacent to the cabin.
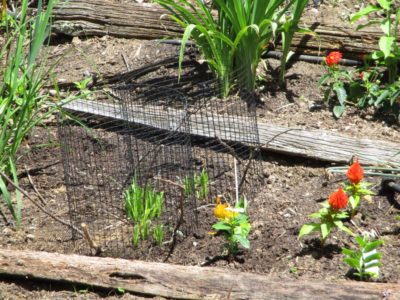
To mitigate the problem I made several cylindrical enclosures from 1/2″ hardware cloth to fit over the plants under attack, painted them black to make them less visible and placed them where they needed to be. In fact they are nearly invisible from a typical viewing distance, and so far they have done their job.
Now we are hoping the deer don’t take a liking to these plants. That might take, um, a more impactful pyrotechnical response.

With prep time barreling down the rails, and given the zero interest thus far in September’s workbench building workshop at the Barn I’ve decided to cancel that event and use the week for ripple moldings instead. It might be or might not be a reprise of last year’s First Annual Meeting of the International Ripple Molding Association or it could be just me and my friend John noodling on ripple cutters in the shop. I really need to concentrate on perfecting my machine and maybe building another one, and I’ve asked videographer Chris Swecker to mark his calendar just in case John and I decide to make a video as we make both the machine and the moldings.
If you might be interested in joining in, let me know.
The point of the week in Arkansas was not to make a workbench, well, not the only point, but rather to use it to undertake a series of activities that would allow the participants to begin integrating traditional hand tool work into their regimens. Fundamental to this is the ability to make lumber pieces thinner (resawing), narrower (ripping), and shorter (crosscutting). And since virtually no woodworking involves only a single monolithic piece of wood, multiple pieces had to be brought together via joinery. I tried a few test-run exercises in advance to see if they could work out for the students, whose level of experience was unknown to me. So, beginning with a piece of the select 4/4 x 10 SYP I bought a couple months’ ago I gave it a shot.
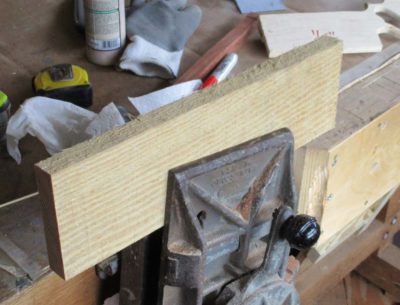

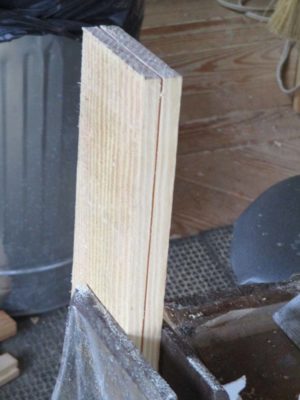
With an eye towards what could be accomplished in four days (remember, the first day would be as dedicated to making the workbench) I decided to have them first pursue a pair of winding sticks, which would emphasize resawing, ripping and truing, then make a planing stop. The first step was to use the kerfing plane around all the edges then resaw an 18″ piece of the 4/4 x 10 in half, yielding the stock for both of these exercises.
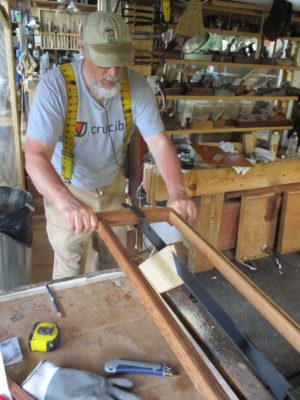

The Bad Axe frame saw has become an integral workhorse in my shop, and I am delighted to have this arrow in my quiver.
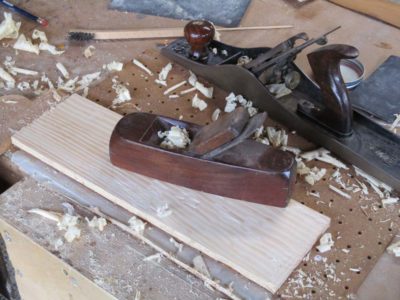

I planed the surfaces flat, then ripped one of the two pieces in half. By executing these process carefully and with precision the task of creating the winding sticks was nearly done. After all four sides of the two pieces were planed smoothly and placed against each other, then one of them switched end-to-end repeating the edge planing, both pieces were identical and parallel.
But I was not done with these two boards. I notched a doe’s foot in one end of each of them so that the winding sticks could serve double duty as clamping devices. Viola’, we have winding sticks plus.
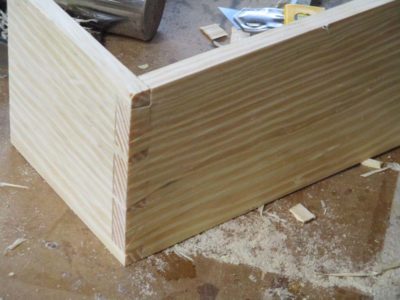
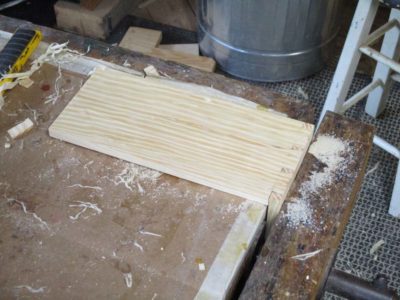
The remaining resawn board was crosscut at the 2/3 point, and the ends shot on the bench hook (I also was going to have them make bench hooks but that was so simple I felt no need to emphasize that here). I dovetailed them together and the result was a planing stop to fit into the face vise of the bench.
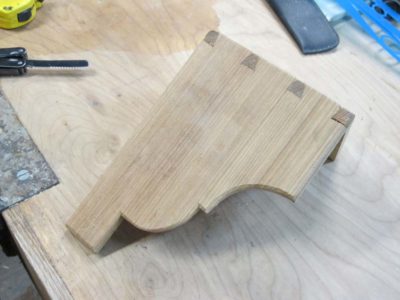

My own every-day planing stop was made from cypress many years ago has been tucked underneath my workbench ever since, and I use it frequently.
I was pleased with the simple straightforwardness of these projects, believing it would take them about 1-1/2 days to complete. That would leave 2-1/2 days for something slightly more demanding.
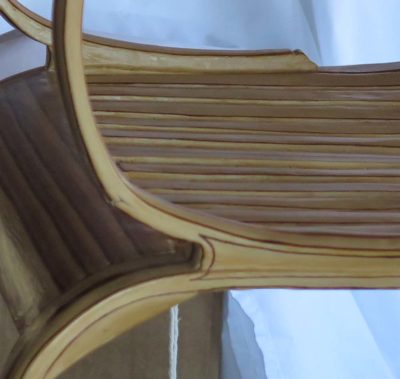
The first pair of considerations when designing a conservation treatment plan for an artifact, in this case my own Gragg Chair, is to weigh the nature and needs of the artifact versus the nature and needs needs of the user. Without comprehending the location of the artifact on the entropy time-line and achieving user buy-in no process can derive a balanced response to the damage being addressed. As a property rights absolutist I am fine with that; if you own a priceless treasure and choose to incinerate it in the front yard, so be it. Short of that, there is a wide range of locations for the fulcrum of this competing pair.
The process of understanding the nature and needs of the object can be fairly straightforward. What is it? What is its intended purpose? From what and how was it made? What is its condition? What action is needed for it to maintain its existence or function? All these questions are fairly straightforward as the artifact is, in essence, a static (or not so static) entity at a particular point on its entropy curve, or as my late friend and colleague Mel Wachowiak, Jr., used to say, “On it way back to dirt.”
In the case of this chair the continued existence of it in its current form and condition was not really in doubt, only one or two of its functions. The chair could be left completely unattended and remain “as is” for decades or centuries as a thing, but one of the primary functions of this particular chair form and presentation, namely that it is a comfortable and beautiful thing, was compromised due to the breaks and attendant distortions of the arms. That damage, and its disruption of the chair’s “beauty” is a real and meaningful void in its current “function” and regaining that beauty is not a whimsical undertaking.
As for the nature and needs of the user there is far more variability in both theoretical and practical perspectives. In the case of a chair, the user may need for it to actually be functional as a structure that can support a grown adult for the chair’s intended purpose: to be a chair. Or, the user (owner) may prefer for it to be an antetype, prototype or example of the generic or specific chair form, or that it simply represent the form and historical attributes of this particular type of chair. If, for example, one of the legs were missing altogether but the user’s desire was to preserve the remaining fabric as-is, the fabrication of a plexiglass support in place of the missing leg would be entirely defensible.
This is not some bar stool, this is an aesthetically sophisticated and technically refined form, one that is both artistically notable and historically significant. Its current damage reveals — at the very least — a failure of its maker to anticipate the stresses that might be paced on it in “normal” use and his failure to accommodate those stresses in its structural design or manufacturing execution. (True enough, I did not anticipate the unauthorized use of the chair by a morbidly obese person and the damage that would result from his frenzied effort to extricate himself before I returned to the booth) From this context the user may choose to leave the static damage exactly as it is as a painful reminder of that failure.
In this object vs. user consideration, more than with the coming two pairs of contending concepts, balancing the needs of the chair with the preferences of the user results not at a single point of agreement or strategic objective (or one and only one “exact” way to proceed) but a continuum of options that can respond to both competing needs to some degree.
It was a minor glitch, everything back on line now with my Gmail account. But, we are still trying to figure out the hiccup that prevents me from getting notes via the website “Contact” feature.
I hate compewders.
A requested piece from my long time friend and collaborator Michele Pagan, a textilian as long as I’ve been a woodworker. — DCW
Knowing that good rags are a foundational tool for the woodfinishing shop, my good friend and colleague, Don Williams, invited me to provide some comments regarding the characteristics of cotton and linen, both plant materials, for the woodworking community. I am delighted to share my decades of experience in the subject with you, and appreciate Don’s invitation.
If you are a savvy, practical shopper, as I know Don and I both are, you might look for pieces of cotton and linen in your local thrift store, or maybe even an antique shop. Pieces which are possibly already damaged are a very good idea, if your intent is to cut them up into smaller pieces, anyway, to use in various aspects of woodworking and maybe conservation.
Don’t be confused by labels that declare “Table Linens” or “Bed linens” – those are just generic terms which say nothing about whether the table napkins you are considering are actually made of linen. You could find genuine linen in the men’s shirt department – garments always include a fiber content label, which is very helpful in this case. My favorite thing to do is buy cotton flannel sheets, and then use them as table covering in my textile studio.
It’s not always obvious whether you are holding a piece of cotton or linen, for 3 main structural reasons: every fabric has a fiber, a weave structure, and a finish.
All together they can make cotton look like linen, and vice versa. Let’s look at each of these factors sequentially:
First the fiber, and maybe these 2 photographs will help illustrate the difference:

Cotton fiber, cross-section and longitudinal.

Flax cross-section and longitudinal view.
Cotton fiber under the microscope resembles a slightly twisted ribbon – which creates a softer, pliable surface texture. It also allows cotton to absorb a great deal of moisture, and this makes cotton stronger when wet, than when it is dry. Just try to rip apart a piece of wet cotton fabric!
Linen, on the other hand, resembles stalks of bamboo, stiff with crosswise nodes. It is because of this more orderly and stiff structure that linen is stronger than cotton – not terribly much so, but stronger. The strongest of all fibers is nylon, these days used commonly as one of the microfibers – but that is another topic for another day, or blog!

In fact, this chart shows you the abrasion resistance of many of today’s fibers. As you can see, there are many synthetic fibers which are stronger than either of the 2 cellulosics that we are discussing, but for our purposes, let’s just focus on flax (from which linen fabric is made) and the slightly less resistant to abrasion fiber, cotton.
In fact, the most basic test you can do – admittedly, not while you are in the store, though – is to place a drop of water on the surface of your used fabric. With linen, you can literally watch the water travel sideways down the length of the yarn.inally, let’s talk about the finish on the surface of any fabric. This is the final step in fabric manufacture, which gives it the beauty which is so desirable.
Normally, linen has a shinier, heavier feel than cotton. It has a nicer “hand” we say. Even though it gets wrinkled just as much as cotton, it has a more elegant drape to it and just feels heavier. Admittedly, this is an acquired skill – feeling the additional weight of linen vs cotton.
And… this is where finishes come in. Finishes can be added to cotton to make them appear shinier and smoother than linen, but often these finishes wash out. Certainly with cottons that are bought at antique and thrift shops, the finish may be completely gone. I’m thinking of fabrics like Polished Cotton, or even chintz, which are achieved by the addition of a shiny finish to the top surface of the cotton fabric.
Here’s a very good website, with reasonable prices, in case you just really need to order exactly what you need, rather than trying your luck at the local thrift shop.
For reasons that remain inexplicable my Gmail account has been suspended, so if you have been using that and need to correspond with me please just leave a note in a blog post Comment section. If it is clearly correspondence I will not add it to the blog Comments.
Once the Gmail account is back up and running I’ll post a note about that.
The final large scale undertaking for the trip to teach in Arkansas was to make the wood screw sets for both the face vise and the Moxon vise, enough for ten benches. There was nothing special about it other than the scale of the work, in total I made 20 long screws and 20 short screws.
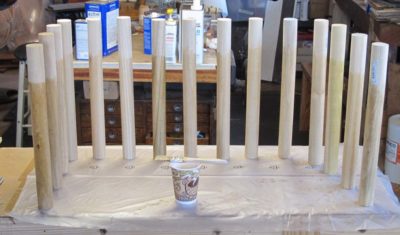
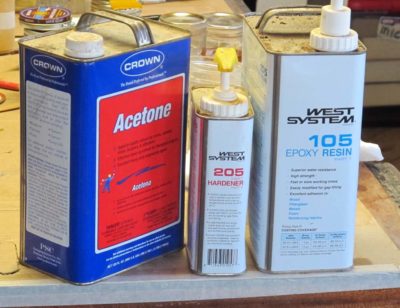
Again I doused the tulip polar dowels with acetone-diluted epoxy and set them aside, moving on to the octagonal knobs.
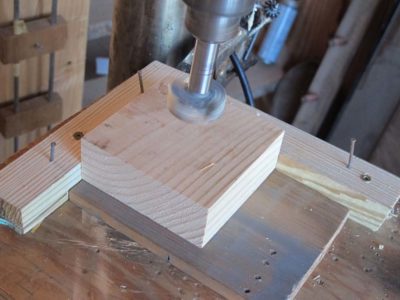
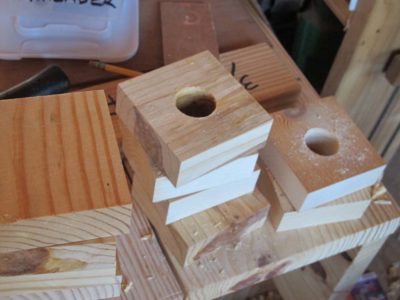
I ran off the 60 squares needed for the knobs (the face vise hubs were double layers) then moved to the drill press to punch the center holes into which would go the threaded dowels.
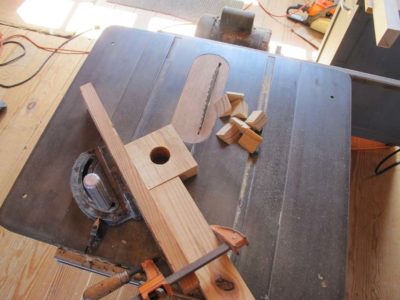
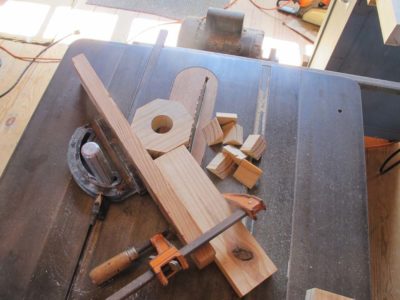
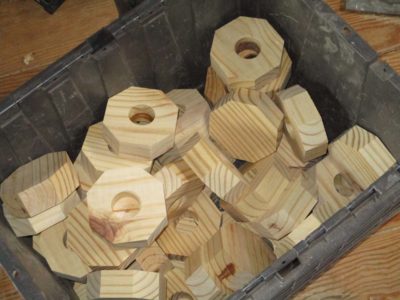
Once I had the requisite pile of holed blocks I returned to the table saw and octagonalized them. I must say that drilling the holes first made it a lot easier to handle them in this process, there was always somewhere to grab to hold them firm against the fences for the miter cuts.
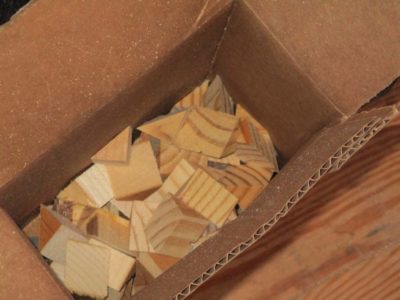
A pleasant by-product was a box of glue blocks from the off-cuts. I’ll set that aside and will no doubt use them over the coming months and years.
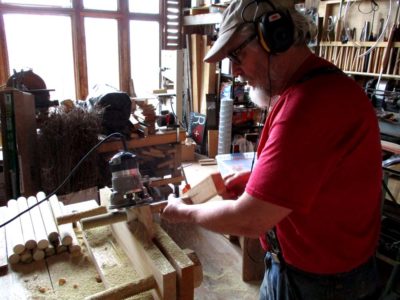
I dealt with the long screws a little differently from the short screws at this point. This had to do with the arrangement of the Beall thread cutter. With the long screws passing through a double thickness of stock for the movable jaw I could get close enough to the thread cutter for the threads to work fine by making a split handle to hold and turn them. This was not true for the shorter Moxon screws, so I fed them by using a small plumbers wrench as a grip to get the threads far enough toward the head.
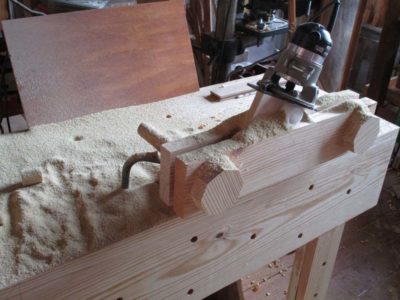
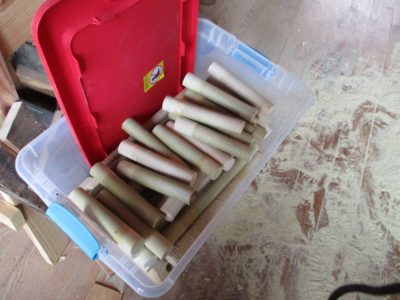
Off to the thread cutter, where a couple hours of concentration and labor ensued. Before long I had a large tub of thread stock.
I glued the knobs on them using yellow glue.
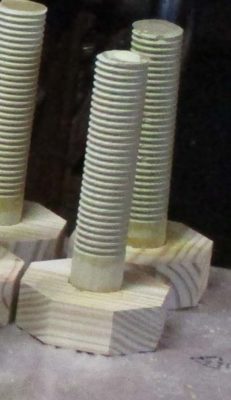
At this point the shorter screws were finished. As for the longer screw’s doubled knobs I trued up the octagons with a Shinto rasp and drilled the pass-through holes for the handles they were finished, too.
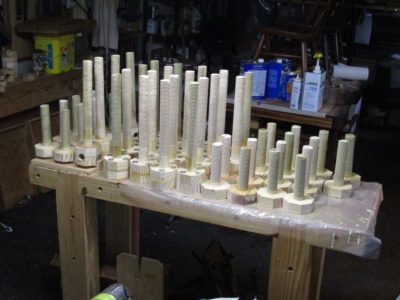
Two full tubs of vise screws and it was time to move on to the next thing.

The final day of my finishing workshop is all about the final appearance, including rubbing out and adjusting color the shellacked big panel, which had more than a dozen coats and looked like this at the start of the day.

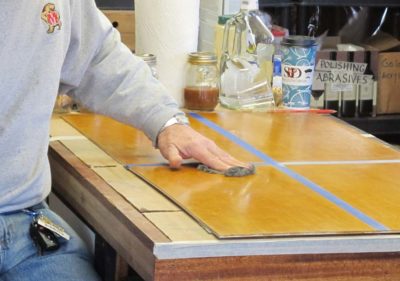
Beginning with the 24×48 panel subdivided into quadrants, each received a different treatment. One quadrant was left untouched as a reference point, then work began on the second one. It was rubbed with Liberon 0000 steel wool, then rubbed with more Liberon 0000 infused with paste wax. The result is wondrous, and this is one of my very favorite finishes. It glows visually and is irresistible for just rubbing your fingers over its surface.

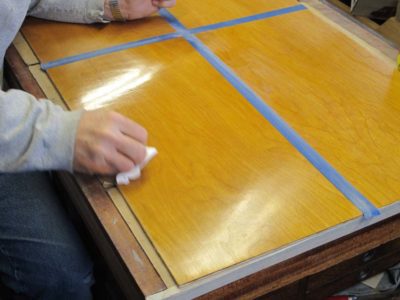
The third quadrant was polished with tripoli/rottenstone and mineral spirits, using a fine linen polishing pad nearly identical to that used for spirit varnish pad polishing. Any residue was wiped off and the surface received a light coat of paste wax. The resulting surface is absolutely spectacular.
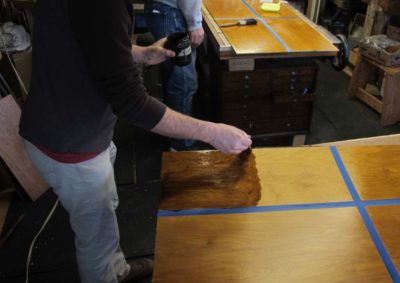

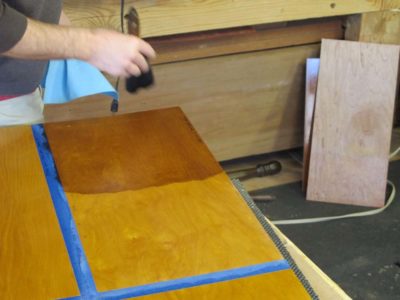
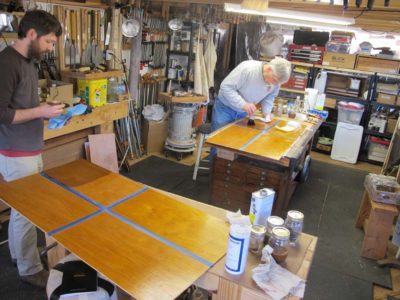


The fourth section was rubbed with dry Liberon 0000 to give it a tiny bit of tooth for the addition of colorant glazing. Two gazes were tried, the first being asphaltum thinned with naphtha and the second being waterborne shellac with goauche colorant. They work very differently but both students had excellent results of a gentle color shift. The final step was to seal the glazing with a brush coat which both saturates the color and provides an even gloss.
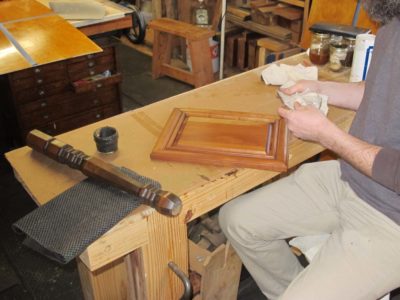
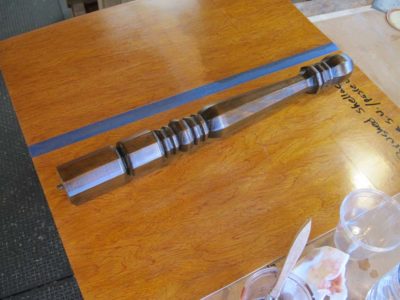
The final project completed was rubbing out and waxing the raised panel doors and the table legs.

We took pictures of their gallery of work, and they headed for home. Both had very long drives, one to Louisville and the other to Syracuse.
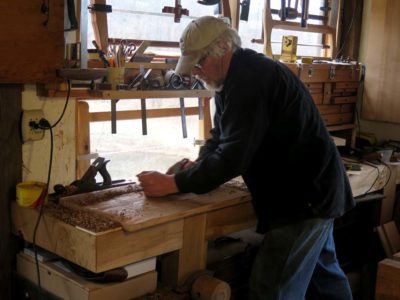
In the past week or so the website/blog passed two milestones; five years of blogging and 900 blog posts (actually this is literally the 900th post). I guess if nothing else I’ve got some stick-to-it-iveness and perhaps more to say than I first thought while living the dream of hermitude, homesteading, and craft.
Originally this was going to be an occasional post about some activity or other, but apparently it morphed into something else without me even planning it that way. I have not taken a vow of verbosity, but as long as this amuses me it will continue. I have now fallen into the routine of posting something almost every weekday — unless occupied with someone, something, or somewhere else — juggling informational content of several threads running parallel and simultaneously. The non-linearity of the postings is mostly in response to my own tendency to boredom or my putative ADD (Mrs. Barn insists I have it, I contend that I am merely hyper-curious).
I recall a chat with Chris Schwarz over dinner with the FORP I group several years ago in southern Georgia about this blogging thing. As the dinner progressed I commented on the incongruity of using methylcellulose as an adhesive to hold breading onto frozen fishsticks and onion rings, as a thickener for paste paint stripper, and as a filler for candy bar nougat. “There you go,” he said. “That’s a blog post.” Who knew?
The blog posts have chronicled the ups (HO Studley book and exhibit, the Roubo franchise, conservation projects, replicating historic furnitureall the little discoveries while in the shop) and downs (broken bones, broken pipes, ongoing battles with critters discontented with the landscape and intent on eating Mrs. Barn’s gardens) but mostly the fairly mundane and whimsical observations of trying to bring order and productivity to a big barn and carve out a congenial life four hours from the city.
The regularity of both the blog posts and the site traffic was established early on. By three months into the enterprise I was posting three to four times a week, then eventually the current five or six. Visitorship has remained faithful and loyal, reliably and stubbornly unchanging over the past 4-1/2 years. A typical weekday draws roughly 375 folks, of which you must be one, and once in a rare while attracts another hundred or even two hundred for reasons that remain opaque to me. Weekends are about a hundred fewer than week days. To be truthful I am not sure how to read the stats for the site, but I do not worry about it. Too much.
If this were nothing more than some sort of a self aggrandizing ego trip I would be concerned by this failure of the site traffic to grow, I suppose, but instead I see the blog as a two-fold undertaking, neither of which includes counting visitors obsessively. The first thing is to simply practice writing well and quickly, and I have definitely noticed a change in the way I approach this. Rather than taking a Twitter/Instagram/post-literate grunts-and-phrases approach I write a brief article almost every day, generally in about a half hour, complete with compound sentences and, hopefully, fairly standard syntax and grammar. I tend to keep thirty or forty blog posts in varying states of completion waiting my further ministrations before posting, and much to my surprise and the lamentations of other bloggers I have yet to run out of ideas. (I once undertook the challenge of writing a political column twice a week for a full year in response to a friend’s grousing about him doing so for income; it turned out to be during the Monica Blewclintsky business so the columns practically wrote themselves). Second, I’ve got a lot of stuff kicking around between my ears and blogging allows me to jettison that and fill up the newly emptied brain space with new knowledge. I truly believe that when you lose the passion for learning, knowing, and doing, you start dying. When I look at the culture around us, I feel like Haley Joel Osment in “Sixth Sense.” I see dead people.
I still have lots of plans for the site and the blog. Videos. New furniture and conservation projects. Technique tutorials. Reviving the Shellac Archive. Getting all my scholarly and popular press articles uploaded. Finishing a furniture conservation text book and posting it on the site. And maybe even serializing a thriller novel I’ve been writing since forever focusing on a derelict furniture conservator in the hinterboonies who discovers a long-lost marquetry cabinet that holds the fate of western civilization within it. The story interweaves the ateliers of 1760s Paris with the Vichy France of 1940, and today’s museum world of the Eastern U. S. megalopolis with life so far from the city that GPS does not work here. I mean there. (Mrs. Barn tells me I write fiction because I get to put words in everyone’s mouths.)
I’ll just close with thanks for those of you peeking over my shoulder, and for the real and virtual friendships I have formed as a result of donsbarn.com. They are the true treasures. How else would I ever count among my friends or correspondents, among many others, folks as far flung as a psychiatrist from Namibia, a ship’s master machinist from Denmark, a miniaturist in Moscow, a retired steel executive from Maryland, toolmakers from around the globe, and a beekeeper from North Carolina?
Thank you all for joining me on the adventure. Regular blogging will now resume.


Recent Comments