
I’ve been invited by a group of woodworker’s in northwest Arkansas to teach a week-long workshop in traditional hand-tool woodworking this summer, and the starting point for the week’s exercises is the most important tool: the workbench. Each participant will build themselves a 6-foot workbench that will not only be the work platform for the week but will serve them as a heritage tool for generations to come. The sensible choice for the form of the workbench is the English Nicholson bench, given not only the time demands but the fact that I think so very highly of the form, its ease of construction, and superb performance. I have made no secret of my preference for the Nicholson if I was a beginning woodworker and could make and have only one bench for the rest of my days. It’s a moot point for me personally as I have lots of space and the means to build whatever (and how many) workbenches I want, but for either a beginner or someone with time and resource constraints, I think this is the path to follow.
If I recall correctly Mike Siemsen shows building a Nicholson with a panel saw, brace and two five-gallon buckets, but I had my circular saw and power drill as the primary tools and used my butterfly sawhorse as the construction platform. I was able to build the basic bench before lunch time, and another half day tuning it up to full functionality.
You can follow along as I unfold the project step-by-step in the coming posts.
My love of reading and the knowledge and learning contained in books led me to adopt the moniker DonLibro when I first joined the Professional Refinishers Group lightly moderated forum (or “Groop”) many, many moons ago. This served a utilitarian function as well, as there were a couple of other Dons in the Groop, so it helped the other Groopsters know who to get mad at for any particular comment. As my eyesight fades and reading becomes comparatively less effortless, and especially when working in the shop, I have become an audio learner and am invariably listening to something on my vintage mp3 players. Given the fairly dynamic posture of working physically I find myself going through at last a couple sets of earbuds a year, and even though I buy them at the Dollar General it irritates me when I get caught on something and damage them. Such an occurrence recently led me to discover a new use of a standard shop product.

I was drilling some holes for holdfasts on a new workbench I was building for a friend, concentrating on keeping the auger bit and its drilling jig working in concert. Bending over the setup, the wire for the earpiece got tangled with the bit and was yanked out of my ear and the rubber casing thrashed. I stopped and extracted the earbud set and took them to the bench to give a look to see the damage. The whole unit was a knotted mess, and you could see the bare copper of the wires feeding the micro speakers that comprise such a unit. But surprisingly they still worked just fine. I thought about wrapping the damaged area with electricians tape but the proportions made this a ridiculous proposition. I went over to my adhesives and caulk shelf to see if there was anything there that might help. Sure enough, just on the next higher shelf was the answer; rubber grip coating for tool handles from the hardware store.


Gently unwinding the knotted cable to the ear bud I then swabbed those few inches with some of the rubber liquid, and ten minutes later the earpiece went back to work and into my ear.

Another pet peeve of mine is gloves that wear out before their time, whether they are $4 thermal “disposable” gloves from Atlas I buy by the dozen or $30 “high end” work gloves from the hardware store. I find the same liquid rubber restores and extends the life of these gloves, sometimes for another hundred hours of work, sometimes more or less.
I remain on the lookout for places I can use this material in the shop, and will report back when I find them.
I’ve waxed ecstatic occasionally about my little workbench that has been my workshop companion for three decades, a trestle-based torsion-box bench with an Emmert K1 on one corner, an end vise on the other corner, and a 48″ twin-screw face vise on the back side. I used the basic design to build a bench for my pal Tom, only a little bit bigger.


One hitch to this bench design is that the hollow top precludes a simple rising planing stop (or holdfasts) that can be easily incorporated into solid slab bench tops, and some time ago we independently figured out a couple of good responses to the planing stop dilemma. My solution to the problem was to make a simple “L” bracket that could be placed in either the Emmert or the twin-screw to allow for planing flat surfaces. Admittedly, since the workbench is only 48″ long the workpieces would not be to large anyway. (I find this accessory works perfectly in my pseudo-Studley bench as well) Anything larger would be done on my big Roubo or Nicholson or planing beam anyway.


Tom took a different route to his bench, in that he made rising stops that are affixed to both ends of his bench with screws-and-knobs running through slotted openings in the stop. It works like a charm.
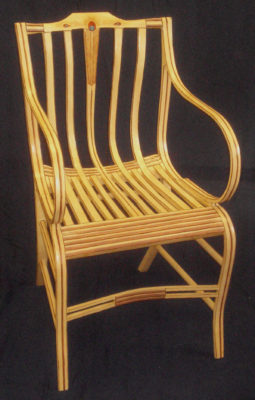
One of the projects that has been slowly percolating up the pile of “To Do” projects is the repair of my own Gragg chair, built several years ago and damaged while on display at a woodworking event when a corpulent fellow wedged himself in the chair (uninvited) and broke both of the curved arms when desperately extricating himself from it.


As I cogitate on the project of repairing the chair, even though it is my own piece and I can build another (actually I am beginning to build three more which will be recorded for a future video), I am approaching the problem as though it were a museum/historic piece and this is the execution of a conservation treatment from a formal/museum point of view.

In so doing I will be employing and implementing the decision-making model I devised almost thirty years ago, consisting of six separate questions, linked in opposing pairs. This model has served me without fail during my career in the museum, and for clients outside the museum. It has become such a part of my thinking that it almost does not register with me any more. I am hoping that as I work through this series I manage to include all the connections, but if I do not please let me know.
The strategic path for any particular conservation treatment depends on the answers to these six questions, and on balance the six answers makes that path clearer. In some cases the questions are not relevant and can be discarded, but they must be contemplated at least to the point of making that determination.
The first pair of questions is, What are the nature and needs of the object, and, What are the nature and needs of the user? While this pair is essentially a conversation between me, the advocate for the artifact, and me, the user, I hope it does not devolve into slapstick.
The second pair is, What are the technical limitations you are facing (particularly regarding the materials), and, What is the perfect, or least most desired, outcome?
And finally, What are the ethical guidelines for intervening with the object, and, What are the resources available for the project?
While the context of every object and circumstance is unique, and thus the balance of the answers can vary widely, nevertheless I find the exercise to be a powerful tool for plotting a route from Point A (where or how the object is currently) to Point B (where the object needs to go/be). In coming essays I will address each question (and answer) individually and in concert with its counterpoint question as I elucidate the chosen strategy for dealing with the project as a whole and individual procedures and choices within it. We may find ourselves in pretty deep weeds from time to time, but at least you will know how I approached the problem.
I’ll close this essay with the reminiscence of the first time I presented this decision-making model at a national professional meeting, I think in the late 1980s. In a somewhat unusual response from a “sophisticated” audience, I heard occasional hisses and boos during the presentation which directly challenged portions of the prevailing museum/conservation orthodoxy. Over the following three decades there came to be a sporadic and gradual acceptance of the model, and by the time I bolted for the boondocks this graphic was seen on the walls of museum and private conservation labs from coast to coast.
Recently I was noodling around with the gigantazoid wood vise screw that was part of the FORP package from several year ago. Since I only got my bench up on its feet in recent months, I’d had no reason to give the leg vise much thought. These screws were custom made by Lake Erie Toolworks specifically for the FORP benches, and are a thing of fearsome beauty and function.
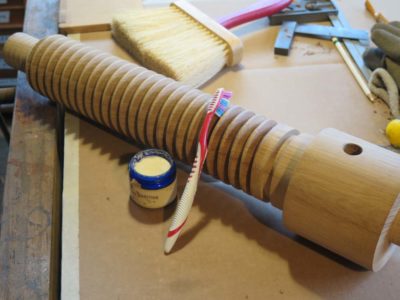
To make sure it would operate easily I ordered some unscented mutton tallow and worked into both sets of threads with a toothbrush, and sure enough it works like a charm.
Previously I had been using wax on threads like these, sometimes even a wax/petroleum jelly blend, but find the tallow to work much better. Since we live in sheep country I’ll have to see if any of the locals make it.
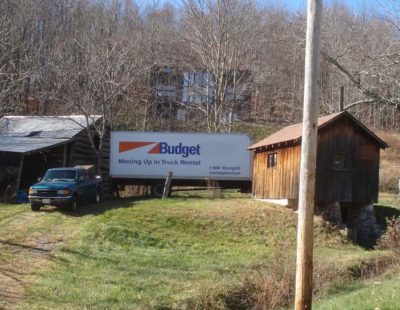


Many years ago as I was deep into the initial construction of the barn, I decided to make the flooring in the main parts of the building from 5/4 SYP, or southern yellow pine. I went to my local Amish sawmill in southern Maryland and placed the order for 4,000 linear feet, and set the date for the pick-up. On the appointed date I showed up with a large rental ruck and they loaded it into the box, pushing and pulling the bundle with the almost prehistoric machines. I drove it to the mountains and unloaded the 16-foot x 6 x 5/4 green stock into the lower log barn where it would season for a year before I could work with it. I still have the mountain of stickers that came with it.

A year later I pulled out the lumber, planed it with my little Ryobi 10-inch planer, and started laying flooring. In the years since that SYP has been burnished through foot traffic and adds a real note of character and comfort to the building.
Then several months ago I sent a letter (in the Mail!) to that favorite Amish sawmill to inquire about getting “300 board feet of clear 4/4 southern yellow pine.” The leftover inventory from many years ago was nearly depleted as I use it for all kinds of things around the homestead. I was exceedingly pleased with the quality and value of the previous load and just wanted to re-stock the pile now. By ordering material of a higher grade than run-of-the-mill even I knew I would have to pay a premium over the $0.36/b.f. I’d paid previously.
Since communication with the Amish in Maryland and Pennsylvania or Old Order Mennonites in rural Virginia is a challenge, about six weeks ago I was in Maryland and stopped by the sawmill in person. Yes indeed they had received my letter, and had tried calling my cell phone. I remain bewildered about what sorts of technology these communities are allowed to use, but anyhow they were putting together some large orders of SYP and would cull through them as they were working to pull out enough clear stock to fill my order.


Last weekend I was in Maryland and went to pick it up. The material they had for me was 16-foot x 10-inch wide x 4/4 stock. They sawed the pile in half so I could get it into my little truck, and then loaded it by hand. I helped, a little. The material was essentially 95% select grade, but they gave me a price based on the two boards that had a single knot. Otherwise they are all perfectly clear.
I dropped off several of the boards with my pal Tom, and my partner-in-ripple-cutting-machines JohnH wanted some but the rest is in the pile, awaiting my ministrations. The wood was initially cut and stickered in October (currently ~12% moisture content) so it should be ready for me to start working this summer. I could rush it if it needed to by placing it in the heated shop with a fan, but doubt I will.
I’m not a tool chest sorta guy, but I’m thinking a petite Dutch chest for teaching might be in order.
And the price? They gouged me for $0.50/b.f.!
The structure of the desk writing box was literally that, a box, albeit with only three sides and no bottom. I knew that the original was an ash box veneered with figured mahogany, so that’s what I did. I had a stash of vintage, locally milled ash boards I’d bought from an old woodworker who was moving back to the city. He was selling his lumber inventory and I bought it, including some spectacular bog oak and pine from an 1850’s crib dam down on the Rapahannock River. Some day I will make something from this and write about it, but not now.

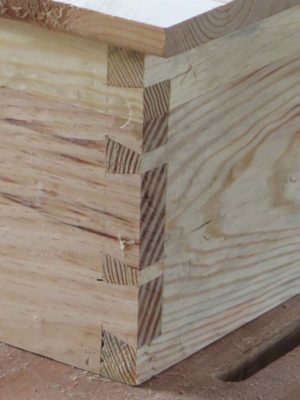
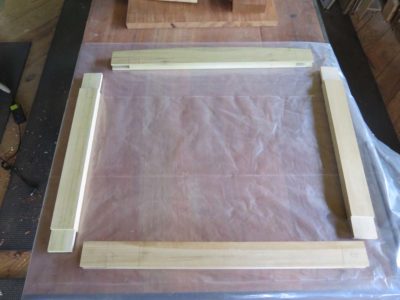
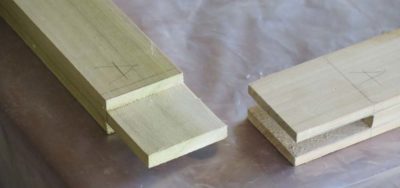
The exercise of making the writing box was straightforward, consisting of three boards for the box and an open mortise-and-tenon frame for the drawer platform. The only noteworthy thing here is that the drawer, and thus the top and drawer platform, were bowed. Not a problem of any sort, but a nice feature nonetheless. NB: some of these images might be from the practice prototype, not the final version.
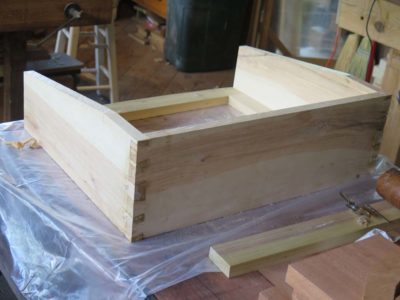
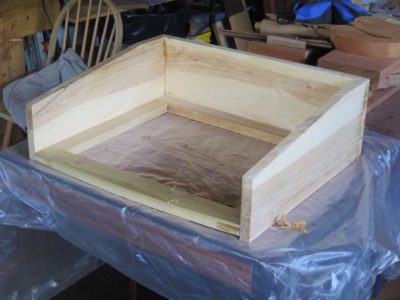
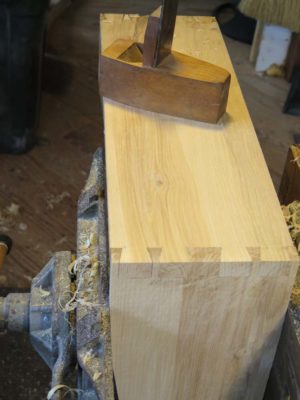
The ensemble was assembled with 192 gram hot hide glue, then placed in the incomparable Emmert K1 to plane and tooth the surfaces that were the substrates for the veneering yet to come.
The actual top of the box, the writing surface, was actually the very last step in the construction. Given how the legs and the box were attached to each other it was just easier to do it this way. You’ll see that in a later post.
On to the veneer.
During my recent foray to the annual PATINA tool tailgate flea market, dealer sale and auction, I garnered a fair bit of treasure. Some inexpensive, some not so much. Here’s the inventory of the harvest.
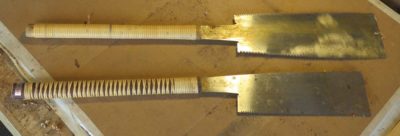
My first purchase was completely off-shopping-list, but this fellow had two timber-sized Japanese saws for $10 apiece. There was no moral argument for passing them up. I will clean and tune them up, and hang them with the rest of my Japanese tools.

Next came this stash of 6-inch Starrett satin chrome machinists scales for $4/per. I keep these both in the tool cabinet and my work apron, and scattered around the shop.

Having several work stations – barn, gardening shed, utility room in the cabin – it seems I can never have enough miscellaneous tools. Tools like these wrenches and channel lock pliers abound at flea markets, and I got these for $4/per.
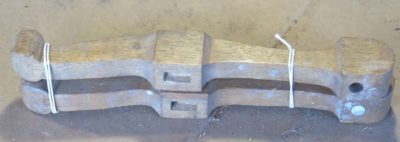
The best thing about tool flea market is that you can pick up derelict tools for very little, and can either rehab them or adapt them for another purpose without spending a fortune. This pair of bow saw arms for a petite saw was $3, and I can fiddle with it when I have the need.

This trio of 1″ dado planes was had for less than $10 apiece. Now, I have no particular need for 1″ dado planes, but I know of a tool that can be made from them.

And here is that tool, the small shooting plane that Patrick Edwards had at WW18thC. It is especially suited for trimming parquetry pieces, and since that is an art form to which I am committed, the tool was a perfect compliment to my own set. I was immediately enamored of the plane, and asking other tool aficionados led me to think this was a one-off user made tool, with the foundation being a radically modified 1″ dado plane. Soon enough I will do the same thing.

One of the fellows from whom I bought one of the dado planes also had tubs of molding planes, and I bought a mismatched pair of #8 hollow-and-round planes to complete my set. I think these were $15 for the pair. They need a little attention, but I should have them ready to roar in an hour or so.
By the time I bought these planes the inside dealer sales were open a raring to take my money.
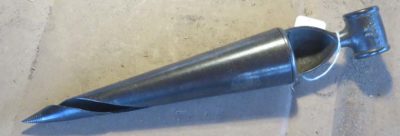
I think my first purchase was this spiral taper cutter for beer keg spigots, although I will use it for reaming the drilled mortises for staked benches and the like. I have a small shaving horse with the legs broken off in the half log base, so this will come in handy very soon. I think this was $22.
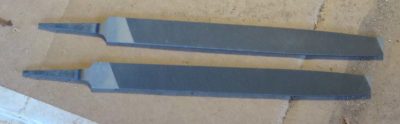

Next I found someone who had some new-old-stock files, and I bought a pair of 12″ Nicholson Black Diamond mill files, I think the pair was $10. They do not go bad.

My final dealer purchase was this knurling cutter with two sets of wheels, so that I can make my own knurled thumb screws. I am recalling this near-pristine set was $25.

I hung around for the afternoon auction as there was a power tool I wanted. This box lot was full of miniature woodworking machines used by model train makers, and the tiny table saw caught my eye. I will fit it with a 1/32″ slotting saw for cutting the grooves in the brass spine of back saws.
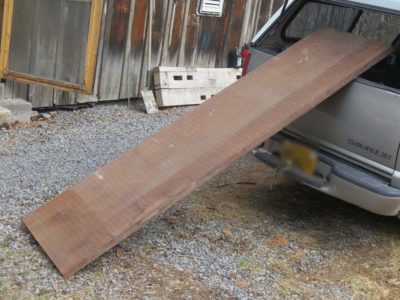
Certainly the most substantial purchase of the weekend was this slab of vintage mahogany, 8/4 x 24″ x 8-feet. My friend JohnD brokered the deal for me to buy this at a fair price from a famous toolmeister’s widow, and if I cut it carefully it will provide the tops for eight more Webster Desk replicas. Now all I need are the clients to pay for the desks.
Seriously, if you have any interest on tools you should connect up with fellow galoots and galootesses at places like EAIA, MWTA, PATINA, RATS, MJD, or the multitude of strictly local tool flea markets.
With Roubo Joinery Bowsaw Prototype tested in battle and found wanting in the lightness department, it was time to think about ways to reduce the overall weight and bring that down to a point I was comfortable with. As it was now, it was a massive beast that was simply too heavy to use as a one-handed saw for cutting tenons or dovetails.
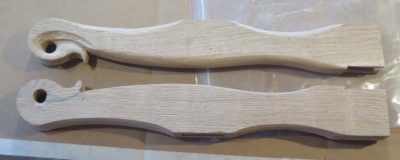
I rounded all the edges substantially, but that was not enough weight reduction.


I sculpted the tops of the arms, it was pretty but insufficient.

I transformed the stout cross-bar into a diamond cross-section with tapered chamfers providing the transitions. Nyet.
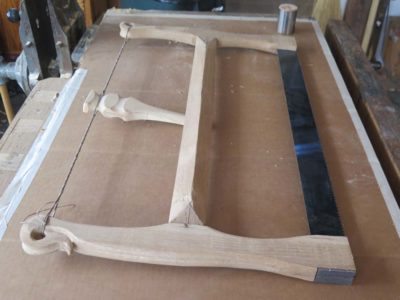
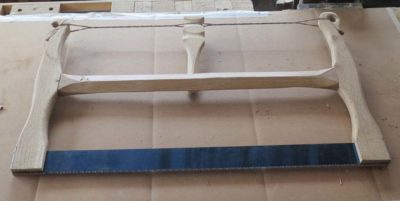
It wasn’t just a smidge heavy, it was a couple pounds too heavy. Achieving any more mass reductions would have been quicker with a new starting point since I had obviously selected the wrong one here. Since Bad Axe had sent me some new plates to my specs, that’s where I went next. We’ll see if 3/4″ white oak stock is up to the task of restraining these plates, or if I need to address this frame again with acres of carving and other diminutions. At the very least, with 3/4″ stock I would start with a 40% reduction in weight, so the idea was promising.
Stay tuned.

I set my bottle of padding varnish (1/2 pound cut of Lemon shellac) up in the window sill over the finishing bench, and did not return to it for many moons. I thought it was pretty cool to see how, left undisturbed, gravity had separated out the fractions of this natural heterogeneous exudate in solution. The clarity of the fully solublized wax-free fraction on top is a nice contrast to the partially solublized and suspended wax-containing fractions on the bottom.
Shellac: adhesive, varnish, dyestuff, condiment, pharmaceutical ingredient, cosmetic, pyrotechnic binder, and now, entertainment source. Is there anything it cannot do?


Recent Comments