No More Space for Japanese Tools?
Recently I was organizing/reorganizing my Japanese tools.


Apparently I am almost out of room for any more. But somehow I will find the space if I every get a Japanese marking gauge or a spear plane.

Recently I was organizing/reorganizing my Japanese tools.
Apparently I am almost out of room for any more. But somehow I will find the space if I every get a Japanese marking gauge or a spear plane.
Recently while en route to the SAPFM Tidewater Chapter meeting I stopped into a Michael’s store in search of one ingredient I wanted for my demonstration. They did not have what I wanted but as is my habit I took a stroll through the art supplies to see what might be on sale. My mouth probably fell open as I saw a deep discount on all their inventory of Robert Simmons Sapphire brushes, the sable/nylon blend bristles that for me are the standard by which all others were measured.

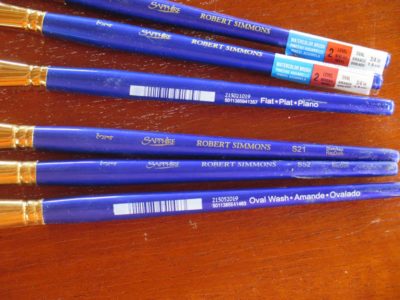
They did not have any 1″ brushes, but I bought all the 3/4″ flat wash and filbert mops they had. In doing so I added another half-dozen to my inventory (since I do so much teaching of finishing, I can never have enough good brushes), saving myself a ton of money. If I recall correctly these brushes are listed at about $70 apiece at retail, and I got these for about $10-12 each.
I do not know if this is a discount at Michael’s nationwide or if this was restricted to the one store I was at, but it would be worth your checking it out.
UPDATE: I’ve been to several Michael’s stores and found each of them to have the same discounted offer. They didn’t all have any inventory, but they all had the same discount.
With the writing box and drawer addressed and set aside it was time to move on to the fanciest work awaiting me. The veneering of the “legs” of the desk provided the showiest detailing for the entire project, and frankly consumed the most time and energy. Since I hope to continue building copies of this desk into the future it was worth spending the time to really get the process nailed. I got pretty close with this one after a considerable amount of prototyping.

As a recap, all of the materials for this project, including the veneers, were hand sawn and prepped. The highly figured veneers for the faces of the legs came from several crotch mahogany slabs I had obtained several years ago. In the meantime they had warped enough to make sawing them a challenge, and the exuberance of the grain made planing and prepping them a hassle. In the end I decided to leave the veneers ultra-thick and thin them once they were attached to the substrate.
As with all decorative pattern veneerwork the layout was the crucial thing. And, since the patterning for this project was almost exclusively circles and arcs my tool of choice would be based on a compass/divider, or in this particular case, a trammel set. Given the thickness of the veneers being cut for the pattern a stout cutting edge of the end of the trammel was called for. I first tried a utility/scalpel blade but it was not beefy enough. Ditto my LNT Latta cutter. After a fair bit of trial-and-error I settled on one of my striking knives and concocted a way to mount it to a trammel bar. This tool served to provide 99% of the work moving forward.
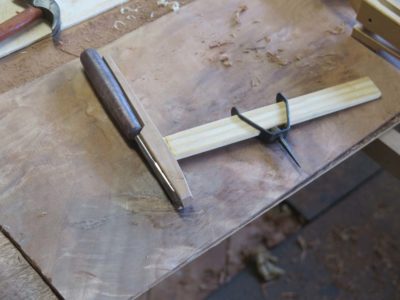

I mortised the trammel beam through the vertical block that would hold the striking knife/dovetail chisel and excavated the block such that the knife fit snugly, and attached it with hose clamps. Worked like a charm.

My first task was to true the outlines of the arcs on the legs. With my layout lines firmly established I taped a 1/8″ plywood square over the center point a struck the arc. This was a technique I used throughout the process.
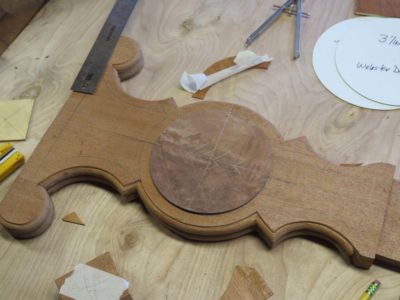


I then cut the individual veneer elements themselves (sorry for the dearth on pictures, I was too busy working to take more). These were glued in place with hot animal hide glue.

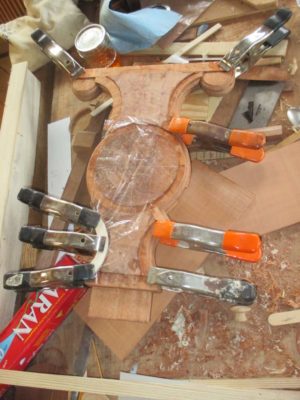
Starting first with the central crotch veneer elements then wrapping up with the outer straight grain pieces cut to fit, the composition was completed. I have no idea why I left this camera in the center of the image.

This post does not fully convey the time consumed in this aspect for both the testing and execution, but it was many days worth of work (almost two months if the camera codes are to be believed) to get it to where I was not unhappy with the end result. After the veneers were all cut, applied, and trimmed, the full surface was toothed and scraped to a uniform thickness of approx. 1/16″. .
PS I have no idea why the final picture is rotated. It stubbornly resisted my efforts to present it otherwise.
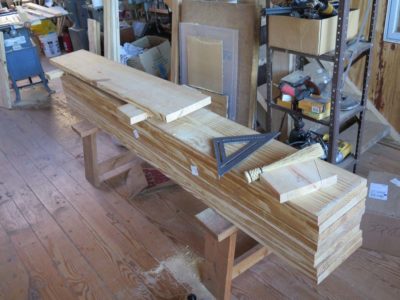
Since one of the goals for my Traditional Woodworking workshop in Arkansas this summer is to efficiently build a workbench for and by each participant, I actually did something I rarely do — make a cut list. Each workbench will consume six 8-foot 2x12s, and be accomplished in less than a day working in concert.
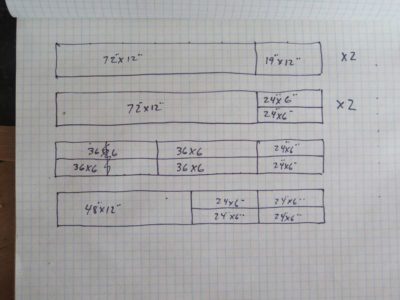
In case you are inclined to follow along and make one for yourself, here is a diagram of the cut list. Ideally the edge of each piece would have a crisp square edge, but since my big table saw is not yet set up I wound up planing them square ex poste and in situ part way through the construction. Each of the pieces ripped to “six-inches” is in reality simply the maximum width of a pair of boards you could render from the 2×12, so they turned out to be more like 5-5/8″ wide. Also, the 48″ x 12″ piece in the lower left corner should be ripped to approx 1-1/2″ and 10″, providing for a backing board for the front apron and a shelf nailer for the rear single-thickness apron, on which the top’s battens can be affixed.
After getting everything cut, the next step is to assemble the front and back halves, affix the ends, and incorporate the two 48″-long elements I just mentioned.
Stay tuned.
One of the exercises I incorporate into the syllabus for the Historic Finishing workshop is finishing a baluster spindle or two, to get the feel for brushing finish onto an undulating surface. Rather than spend a lot of time finding new ones for student use I just got a trash can full of them and recycle them as necessary. I found a very efficient way to strip them in preparing for the next round of use, a solution that I think would work for anyone who has a similar task.
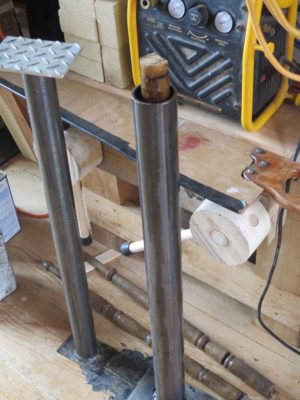
I had our local welding shop to fabricate two vertical stripping tanks (for about $80), comprised of a piece of steel pipe welded to a steel plate base. One of my standing tanks uses a 2″ pipe, the other 2-1/2″. This allows me to use (and lose) a minimal amount of whatever solvent I am using, whether paint remover for the initial treatment of painted spindles or denatured alcohol for recycling the shellacked ones.
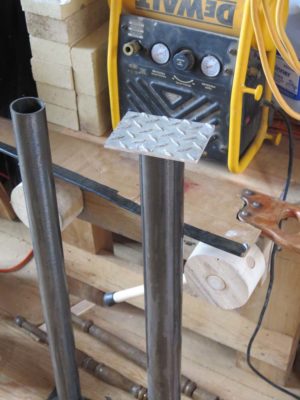
The system works like a charm, I just put the spindle in the pipe and fill it with solvent, then place a piece of metal plate on top to hold the spindle down and cap the cylinder, and in a few minutes I extract the stripped spindle, allow excess solvent to drip off, and wipe it down with paper towels It literally takes only 15-30 seconds of my time to get one done. Over a few days’ of doing this I lose only about a half-pint of solvent to evaporation, and whatever additional solvent is absorbed into the film.
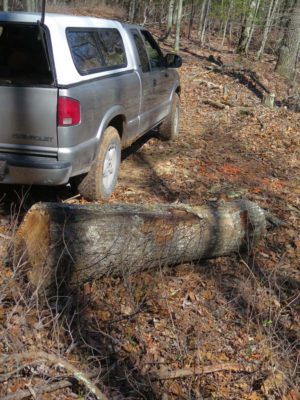
As a practice session for the impending commencement of the second video, “Making A Gragg Chair”, I trekked up the mountain to the pile of “good” logs I had culled from the firewood-harvesting sessions. One in particular caught my fancy, a large red oak about 24″ in diameter, looking straight and true for its seven-foot length. I decided to work it with “wedge and sledge” to both get my stamina up to speed but perhaps even yield enough material to make a pile of useful things.
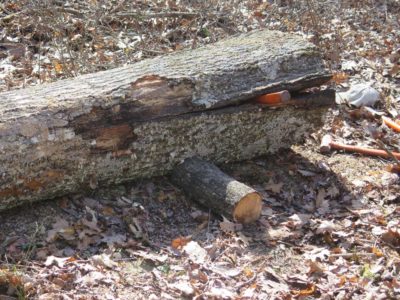
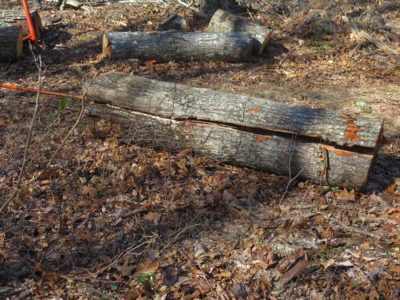

Within ten minutes I knew all I had was a pretty spectacular pile of firewood, albeit unprocessed. After I opened a nice split on the end grain and started working down the sides of the log the core of the log separated, essentially ruining it as a workpiece.
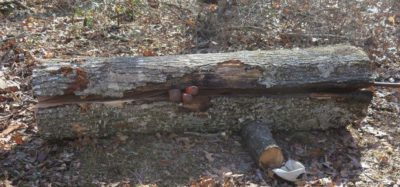
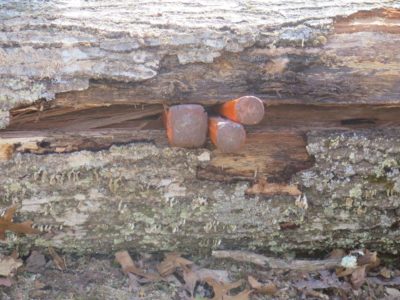
To make matters worse, the intertlaced grain inside the log caused it to start eating wedges. It took me more time to extract the wedges than anything else.
Oh well, as the Gump of the Forest says, “Sometimes log is like a box of chocolates.” And this one had something unpleasant inside. At least I’ll get another thousand pounds of firewood from the experience.
A life of woodworking is a humbling one.
Due to some students’ family emergencies I’ve had a couple openings for the upcoming Historic Finishing workshop at the Barn. If this interests you please contact me within the next week, as the class begins in ten days. You can either leave me a note in the Comment section for this Post or directly at info at donsbarn dot com. It seems as though our “Contct” link has a hiccup.
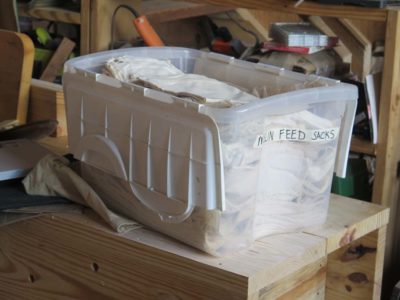 While preparing for the upcoming “Historic Finishing” workshop at The Barn the last weekend of this month I was struck by my good fortune in acquiring an excellent inventory of vintage finishing rags. This pile was particularly peculiar as it came from an antique shop twenty miles from town, out in the prairie of Nebraska. The main emphasis for the establishment was rural and agricultural collectibles, but in my browsing I came across a large box of muslin feed sacks. These had been carefully — almost lovingly — washed and folded, and were in astonishing condition. No holes, no stains, and a wonderful nap of both sturdiness and suppleness. In short, perfect for the finishing shop.

I bought the entire pile of these wondrous rags, I think for about 20 dollars. There were about 60 complete feed/seed bags in the box, which means a price of 33 cents apiece. I’ve seen similar items going for up to $10 at shi-shi antique boutigues (seriously who “decorates” with feed sacks?).
Students in the upcoming workshop will get to give them a test drive as each will make several polishing pads, some for applying spirit varnish, some for abrasion polishing with pumice and tripoli.
So always be on the lookout. You just never know when you might come across a box of treasure.
In Eastern landscape design (as in “the Orient,” not New England) is the concept of creating spaces where the mere addition of snow creates sculpture.

We got to see that a couple weeks ago, as winter was fighting hard against the inevitable encroachment of Spring.
Exquisite
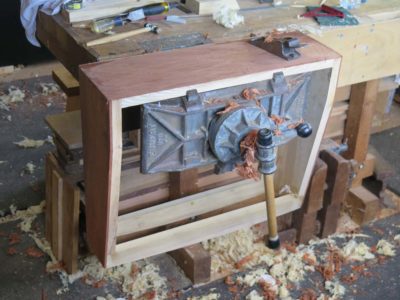

Veneering three sides of the writing box was so straightforward it almost does not deserve its own blog, except for that fourth side, the one with the drawer front. On the two sides and back it was simply a matter of cutting the veneer and gluing them down. I used cauls and clamps because the veneer was so thick I simply was not confident of my skills in hammering veneer of this thickness.
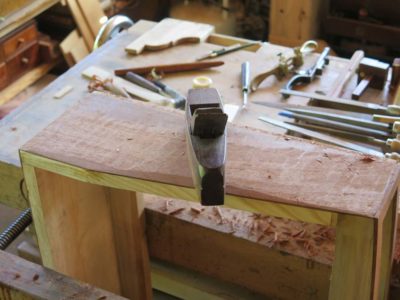
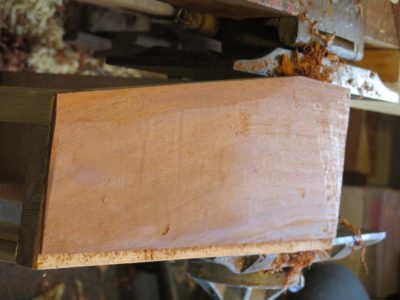
Once again the beauty of sawn veneer revealed itself as the thickness allowed for the surfaces to be planed once the application was complete.
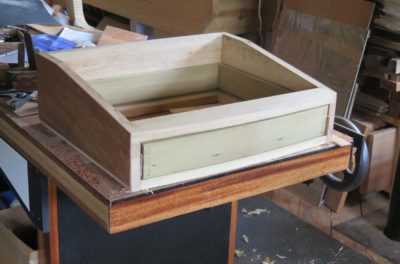
The drawer front was actually a challenge and a lot of fun, as I wanted the veneer to present an uninterrupted grain pattern. That meant I had to cut out the field of the drawer front from the border on the writing box itself.
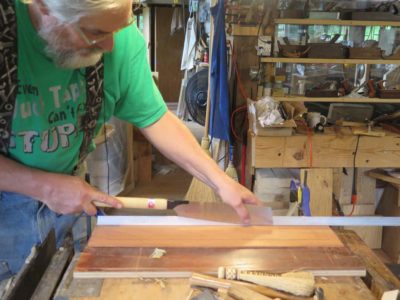
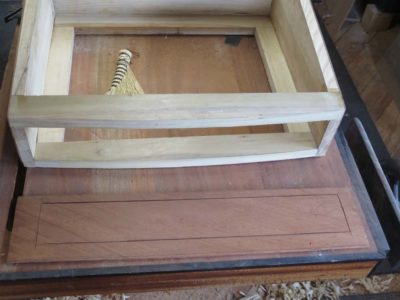
Using a straightedge and one of my Japanese saws with curved teeth I carefully layed out the cuts and started making them.

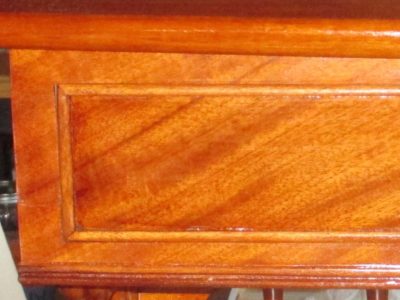
Once that was done the veneer was glued to the drawer front and the surround, mirroring precisely the veneer from the opposite side. The result was not unpleasing.
I added the beadwork drawer trim and set the writing desk aside while I went to work on the veneer “fancy work” on the legs. That took several weeks and by the time I returned to the writing box and drawer to begin the finishing, catastrophe struck.
Stay tuned for that tale of woe.
© 2024 Don Williams

Recent Comments