Just a few days ago we were out and about in t-shirts, and this is what greeted us this morning in Shangri-la. The expected high today is in the 20s.

Mrs. Barn said a ferocious storm front came through around 4AM, but I slept right through it. That’s when the snowfall began. When I went out to sweep off the solar panels the snow was as deep as my balled fist.
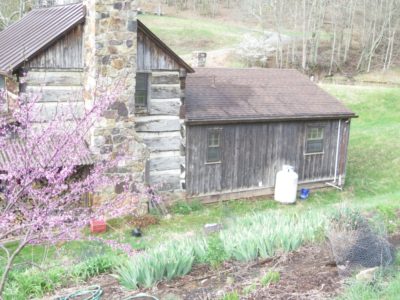
The past three years have seen the dramatic improving of the envelope of our domicile, part of which is a c.1890 chestnut log cabin and the other a c.1985 modern kitchen, dining room, and bathroom. Three years ago we had the stone/block walls of the crawlspace underneath the whole insulated and the ground underneath sealed with heavyweight plastic sheet (depending on your physics literacy the system was either wicking cold in or wicking heat out like a champ, the only thing that was for certain was that before the insulating and sealing the floor was icy all winter long); two years ago we had the cabin completely re-chinked with all the old chinking stripped out and new chinking skillfully installed. The combination of the two improvements made the floor much warmer, room temperature as opposed to refrigerator temperature, and reduced the air flow ~90% or so. Not a small thing when you live in a windy, wintery place.
Last year we intended to continue the trajectory by having all the windows in the home replaced. The extant units were all of modest quality from the 80s, with the sash windows augmented by aluminum triple-track storm windows. One feature of the latter is that they provide excellent ventilation, open or closed, year-round. Ever since we moved there in 2013 I have been taping plastic over the windows every winter just to keep the interior somewhat congenial.
We ordered the new, high-performance windows about eighteen months ago, but given the disruptions to the manufacturing and supply chain the windows did not arrive for more than a year. When they finally did arrive, a local contractor installed them lickety-split, replacing more than a dozen old windows in two days, all finished.

Except for Mrs. Barn’s prized new bay window in the dining room.

That one took four days of work, reframing the opening and installing the new custom unit. It transforms the whole house.

Extending the schedule of the bay window project was the need for me to fabricate all new trim for the unit. We decided to go with some of my vintage cherry lumber to be harmonious with the built-in cherry china cabinet already in the room. The only hitch was that none of my cherry boards were long enough for the upper and lower trim boards, missing the mark by just a few inches.
Next time you will learn about my board-stretching technique.
Stay tuned.
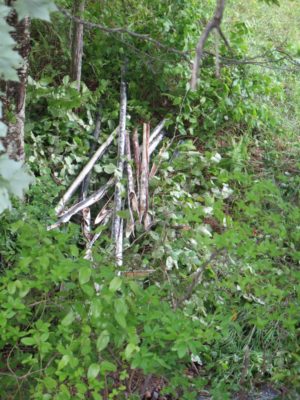
The first of what eventually grew to several piles of thrashed pipeline.
For many years my seasonal regimen for the hydroelectric system has been fairly routine: I drain the waterline some time in November, depending on the temperature trajectory, then recharge the line sometime late in March. I use the descriptor “For many years” because our first winter here also saw the coldest temps since we bought here in 2000 with overnight lows reaching -15F, and my dream of running the system year-round was dashed. The water froze in the pipe, resulting in my need to replace almost 600 feet of pipeline the following spring.
At one time I was rethinking the scheme of having the pipeline above-ground and wondered, could I get it buried beneath the frost line? Since the answer to that question turned out to be, “Of course, all it takes is something north of $75k, and oh by the way it will completely destroy your creek and everything adjacent to it,” I’ve just stuck with the original concept.
So now, every late autumn as soon as we get a string of days with sub-freezing daily high temperature, I shut it down to preserve the line. Notwithstanding that I’ve had to do a little repair every spring, virtually all from trees falling on the line and breaking it (once was from a bear gnawing on it) the routine has worked well.
No big deal. A half-day of work and we’re ready to roll.
Until this year.
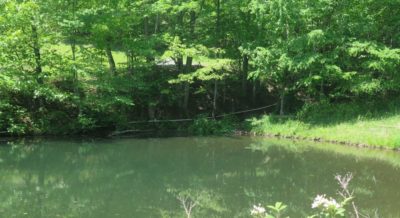
The replaced section near the bottom of the system.
For starters, between travel and yard duties I did not even begin to turn my attention to the hydro system until a couple weeks ago, a full two months later than usual; since I have not been in the shop much and there has been plenty of sunshine, the solar panels did more than enough to keep things copacetic power-wise in the barn.
When I dove into it this week, I encountered almost two hundred feet of shredded pipe near the bottom of the system. The damage was the typical helical fracture pattern of bursting due to water freezing in the pipe. This perplexed me since I had drained the line last fall. My annual draining protocol is to disconnect the pipeline just below the capturing box at the top of the system by loosening the hose clamps holding it together, then moving the pipeline aside a bit. And that’s where the problem this year started. To quote the famous LBJ line, “I reserve the right to be smarter than I used to be.”
Now I are smrt smarter than I used to be.
What almost certainly happened was a fierce rainstorm occurred after the disconnect, with the resulting water flow in the creek high enough to pour into the open disconnected water line and refilling the line. And when the line subsequently froze, BOOM! A couple hundred feet of pipeline turned into confetti.
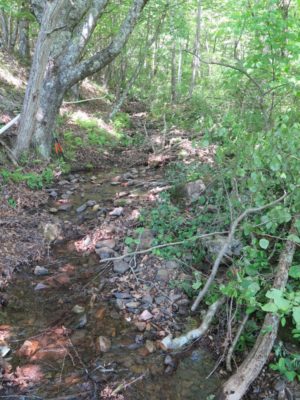
Treacherous footing abounds. One false step can land you flat on a bed of rocks.
I spent this week working on the damaged area, which is an exhausting undertaking. Every footstep has to be considered and calculated given that every single space is uneven, loose rock, most of it slippery from being in a creek bed. Even wearing my best old lumberjack boots, it is treacherous. Especially since it requires good vision to navigate the terrain, a feature I do not possess. (Monday I will be having my 22nd eye surgery, which will provide no enhancement to my very compromised vision but should help to preserve what little vision remains in my used-to-be-dominant eye). Trying to traverse treacherous ground with zero depth perception is a challenge.
I was able to make the repairs with the last of my original inventory of 2″ x 20′ PVC pipe. When I had the first catastrophic winter damage I bought a complete bundle of the necessary pipe, I think it was 80 pieces, and have been using a piece or two every year since the first one.
Yesterday morning I walked to the top of the system and much to my dismay saw serious damage up there too – not from freezing but from destructive/tumultuous water flow in the creek — which I repaired fairly quickly, then reconnected the water line. Just downstream from that repair I discovered another breach. Drat. Walking the line yesterday afternoon I found dozens more breaches, and hundreds more feet of shredded pipe. Double drat. The air was pungent with not-appropriate-for-Sunday-School epithets.
I went to the local farm coop and bought all the pipe they had but still I am way short. This morning I will check with the hardware store the next town over. I’ve gotta get enough material to finish the project next week and bring the hydroelectric turbine back on-line.
Remember the full bundle I bought ten years ago? It was roughly $11 per piece. Now the price is $36 per piece. Ouch.
Lesson learned, albeit a very expensive lesson – put a $1 cap over the end of the pipe intake when you disconnect it, stupid.
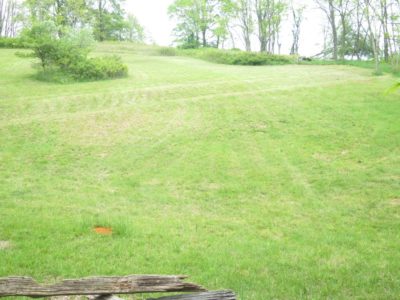

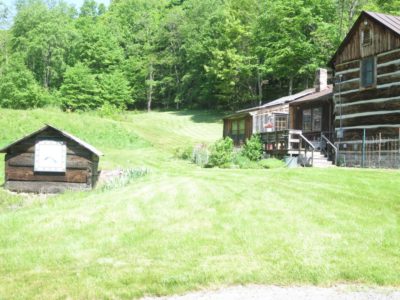
The big yardscaping push after extensive travel is winding down to the “ongoing maintenance” of summertime, when the living ain’t exactly easy trying to keep three or four acres of hillside under control. The grass was so deep here it took three back-to-back-to-back mowings to get it under control, some even required using the DR brush mower.
I am hoping we are now down to a routine weekly mowing, but even then it takes two or three days to get it all done.

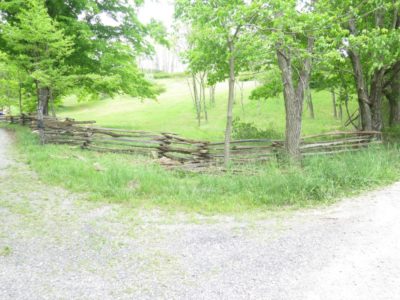
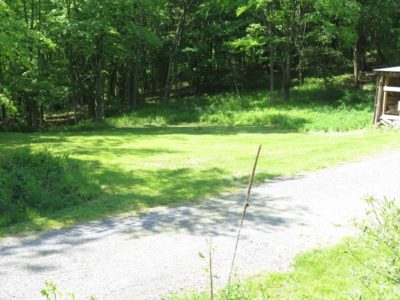
One of the unexpected tasks on our return was to rebuild the split rail fences alongside the driveway. While we were gone there was such severe weather that sections were blown over, and if one section of stacked split rail fence goes down you pretty much have to restack the whole length.
I made a couple rookie mistakes on the photos. First, I did not take a “Before” picture of the split rail fence all falled down, and 2) I forgot to check the camera settings which had been adjusted to reflect much different light conditions of a different project.
Sigh
I am trying to get caught up enough to begin erecting the greenhouse by the end of next week. Wish me luck.
Since arriving back home last week we have been pedal-to-the-metal yard work and garden work. This means almost all day every day I am outside here in Shangri-la, riding the lawn tractor to get the grass under control, using the smaller trim mower to get the places where the riding mower can’t fit, and using the bush hog as a mower on the portions of the hillsides where the mower would be too tippy. I’ve already flipped the riding mower over on to me — remember the episode with me winding up in the chilly creek with almost a half ton of machine trapping me underneath? — an accident that by all accounts should have killed me had the mower rolled over just a little more and the steering wheel crushed my chest. Nowadays I am much more cautious because Mrs. Barn does not want to scatter my ashes just yet.
Yesterday was exasperating in part as I just tuned up the little push mower and hit a hidden stump, bending the brand-new blade less than an hour into its lifespan. Off to get another as soon as I finish this missive. Then more mowing, including using the DR walk-behind on the hillside just above the greenhouse terrace. I don’t really need to post pictures of me mowing the homestead, do I?
At least today it will be cool and cloudy, probably about 60, which will make it a pleasant day to be doing some heavy walking, rasslin’ a 500-pound brush hog. Oh, and it will be cooler at the burn barrel as I work my way through a pile of brush.
Punctuating all of this is the occasional trip to purchase plants as Mrs. Barn gets her summer gardens, both flower and vegetable, up and running. In addition she tends gardens at church and the local library, so her appetite for plant shopping is prodigious. I am delighted to help her with the set-up of the gardens, erecting the structures, hauling bagged composted manure, etc.
My neighbor AM will be getting a greenhouse kit tomorrow and I will be helping him assemble it. Partly to be a good neighbor, but truthfully just to check out the structure. Since we are on the cusp of erecting a greenhouse ourselves I want to see if I should order a kit myself or instead order a truckload of lumber to build ours.
All in all a good time to be on the homestead, although tonite may get down into the 30s.
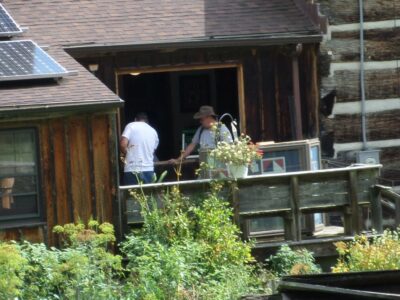
In addition to the first lawn mowing of the year, signifying (we hope) the end of winter (although our frost-free planting date is still six weeks off), our little cabin underwent a transformative few days as the new windows we ordered last summer were finally installed. We can generally work in one big project per year, and this is the one for 2023. Since the weather was sunny we were both working in the yard and did not get to watch/photograph every detail, plus the fellows worked so fast, but here are a few images.
The old windows were inexpensive double hung units with a triple track storm window grafted on to the outside, probably from the early 80s. They were looking pretty shabby but even worse their performance could best be described as providing excellent ventilation, open or closed, year round. Since we moved here I have had to tape plastic sheeting over the windows every winter. Hint – if you have to do this THE BEST material to use is the transparent shower curtains from Dollar General.


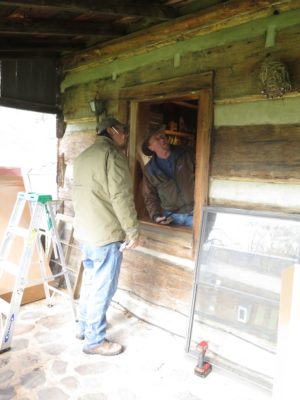
Like I hinted, the fellows hit the ground running Monday morning. They have done a lot of this so knew exactly what to do. Actually, the window units were held in place only by the trim molding directly against them so once that was pried off the units just popped out. I was amazed at the pace of work.
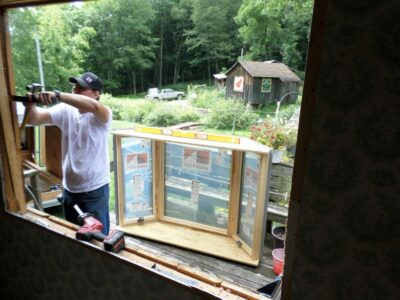
Sorry about the image quality, it was binding bright outside and our usual grotto inside.

The new Anderson units popped in place lickety split, and the trimming out was actually the slowest part of the process. The living room windows went in first, and on Tuesday we were glad for that as the wind howled all day and into the evening, probably 30-40 mph. Working out in the yard was like getting sandblasted. But that evening as we were watching our nightly episode of The Chosen, there was not even a breath of air coming off the windows onto our necks. Superb.

The most spectacular transformation is in the bedrooms upstairs. It seems like the light coming in is twice as much as before. That cannot be literally true but the new visual atmosphere is pretty wonderful. BTW the trunk underneath the window is my suspenders repository, and it is almost full. I rotate them out regularly.
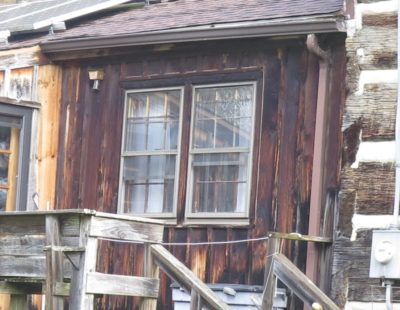
The last part of the project is to replace the double windows in the dining room with a custom-made bay window which will both brighten the space and provide a shelf for some of Mrs. Barn’s plants.
We saved all the old window units and they will be repurposed into hot beds and cold frames for the garden. That is in keeping with the motto of folks in the hinterlands: Use it up, wear it out, make it do, or do without.
I can’t speak for or about any other place, but here in the hinterlands we have a big rodent problem. Not just the critters that burrow into Mrs. Barn’s garden (causing my sweet natured bride to pick up a pyrotechnic projectile tool and start blasting away at the bunnies and groundhogs), not just the critters that occasionally find their way into the house, but the real exasperation comes from mice and similar evil creatures infesting and damaging vehicles. These incursions are never ending and remain a constant source of work for local mechanics as mice chew through gas lines (yup), chew through brake lines (yup), chew up the insides of cars and trucks (yup), and especially get up behind the dashboard to either establish a colony (yup) or to eat the tasty wire insulation until they get electrocuted (yup, it’s why several of my dash gauges do not function right now). Up there. Behind the dashboard.
I think I’ve got such a case right now. A month ago I noticed the stench of death in my truck, and despite a thorough search I could not find the source. I have to assume that I’ve got a decaying mouse carcass somewhere hidden in the cab. I was advised to place a car air freshener inside the cab as mice hate the smell and it will act as a repellant, plus it will mask the stench of the decaying corpse.
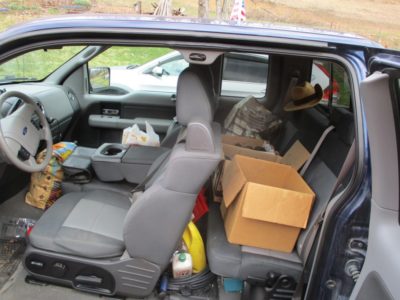
I did, and all I accomplished was a whole new layer of stink to the truck interior. It didn’t even discourage the mice, as I noticed this morning that the peanut butter on all the mouse traps had been cleaned and none of the traps had any trophies. For the moment all I can do is keeping reloading the mouse traps, adjusting them to have the hair-est-trigger possible, and load as much charcoal as I can into the cab to eventually scrub the air passively. I put the charcoal in a few days ago and have convinced myself I can notice a difference, but still the peanut butter keeps disappearing off the traps. I expect that if I ever do excavate behind the dashboard I will find a complete mouse condominium there.
Stinking rodents!
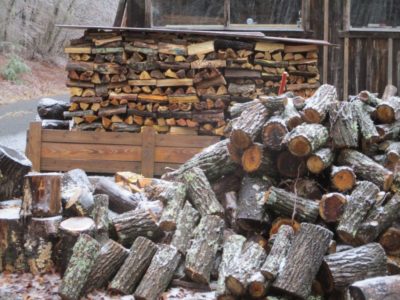
Pretty much every day that is not inclement here on the homestead sees at least a few hours of firewood splitting and stacking, banking the inventory of BTUs for the coming winter(s). With the splitting and stacking of most of the mountain I started with I’m almost to the point of needing to head up the hill in the 4WD S10 (220,000 miles) with my chainsaw and log handling devices to gather several more pickup loads of sawn bolts.

By the time I get the last two 48″ x 42″ pallets piled 6-feet high like the others we’ll be well set for next winter, especially once the new insulated windows actually arrive and get installed replacing every window in the cabin.
It’s just part of the perpetual routine in my life of ease, living the dream in the hinterlands. If you are contemplating the life of a recluse on a remote homestead, your hobby and passion better be living the life of a recluse on a remote homestead.
We are now firmly into the wood-stove-heating season, and it happens that this year we have a lot of black walnut to burn. Not anything furniture-worthy, I set all that aside for use in the shop later, but the branches and such. Since we felled several walnut trees two years ago there is a lot of that “clean up” to burn, and burn it we are. One thing is clear in my observation — walnut may be great for furniture making and bowl tuning, but as a firewood? Meh.
For the number of BTUs per unit volume of wood it really fails to deliver. Yes, of course it burns and provides heat as a result. But compared to everything else on the menu for wood burning it falls way short. Plus, it is really ashy, as bad as soft maple.
In fact, walnut comes in dead last in my hierarchy of firewood I can harvest from my own ~70 acres of forest.
The top of that list is occupied by locust, which seems to be almost as BTU-dense as the coal I burn in the shop stove. It can’t be, of course, but goodness I love the output of heat vs. volume and ash I get from locust. I’ve got a lot of it including two stupendous fallen trees up near the ridge property line near the cabin. Even one of those trees will suffice for a complete winter, so I am anxious to bush-hog enough to get my little 4WD truck right up to the windfall. In fact, the two remaining standing trunks are so big I need to hire my pal Bob to come and bring them down. I just do not possess the experience, skill, or saw to bring them to the ground.
Next comes oak, which we have a fair bit of but not as much as locust (firewood-wise). Given the amount of windfall of other species we have up the hill I do not cut much oak. But when I do, once seasoned it is a premium source of heat.
As is ash, of which I have very little. The characteristic of ash that makes it a good firewood is that it needs almost no seasoning to be ready for the woodstove.
Cherry and maple are also good source of heat, and we have a lot of both. The difference between them is that maple is a lot more ashy than cherry for the amount of heat provided. When we burn a lot of maple we have to clean out the stove about once a week. With cherry it would be every two weeks. For oak and locust it could be every three weeks. About equal to cherry is the surprise pick of black birch, which we get a tree or two every so often.
We do not have any tulip poplar so the last spot is occupied by black walnut. It’s just the way it is. We’ve got a very large walnut tree that is ailing and through which the power and phone lines travel. I hope the tree recovers, but if not there’s a huge pile of lousy firewood waiting to happen.
BTW I am almost done splitting and stacking the firewood for next winter and will likely wrap that up with a couple of good days after New Year’s and will weave more occasional firewood processing into my routine thereafter. A couple hours here, a couple hours there, and the mountain of cut wood will turn into a mountain of split and stacked wood.
While this blog is not really about my family, there are times when it needs a good mention. Such posts may not interest you, but quoting Mollie Hemingway, “My spiritual gift is that I do not care what you think about anything.”
The cabin is hauntingly quiet now after a long weekend with both daughters, one son-in-law, and L’il T filling every cubic inch with love and joy. Even when he is fussy (teething) L’il T is a joy and truly a Godly blessing. He is completely captivated by this white fur on my face, stroking it every time I held him. Heart-melting moments.

One of the motivations behind the visit was a celebration of LtCdr’s birthday, but even more was it was deer hunting season. He spent several days sitting up in the woods for hours at dawn and dusk, bow-and-arrow at the ready. Of course, his only score was at dusk on their last night here. We spent until almost midnight dressing the carcass. My mouth is almost watering in the anticipation of the venison roasts yet to be cooked.
The skill set related to hunting is not one I possess, so it was a grand time of bonding with the father of my grandson. Given my age and visual limitations it is not likely I will ever be a good hunter, or even any kind of hunter, but I learned a lot about hunting in conversations with LtCdr over their visit. No doubt it could come in handy as the nation seems hell-bent on becoming Venezuela, where things got so bad they ate the zoo animals.

Recent Comments