While browsing around the interwebz over the weekend I noticed that Rex Krueger featured Roubo’s winding-winding-sticks-on-stilts from our Roubo on Furniture volume. He is to be commended for bringing the message of hand-tool woodworking to a new audience.
One of my fond memories from my formative years as a woodworker was the period of three years hen I was a patternmaker in a foundry, which is where I learned what “precision woodworking” was all about. To be truthful it is a standard applicable to very little of my work ever since, but it was elucidative nonetheless. Most of our work was pretty heavy machine-oriented, but we did have a selection of hand tools for shaping the forms. Because, another lesson from the patternmaking days was that we were, in essence, fabricating sculpture, most of it being sculpture based on blueprints, but sculpture just the same. But for most of our work we relied on stack lamination and shaping components with large disk sanders, working to the center of a knife strike line.
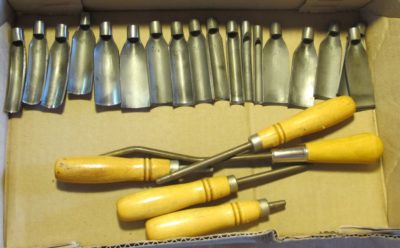
Every so often we had to really sculpt pieces by hand, hence the inclusion in our tool kits of tiny spokeshaves that I find so integral to Gragg chair work. Another peculiar tool set for sculpting foundry patterns was the interchangeable thin-walled gouge set made by Buck. For many years after leaving the patternmaking shop I searched for a set of these gouges, and then all of a sudden I found myself with three complete sets. I still use these tools in the shop with regularity although I am down to two sets. When my dear-friend-I-have-never-met Rob Hanson related the tale of losing his house and shop during the California fires two summers ago, I began sending him “care” packages full of tools to get him re-started, concluding recently with a barely used Record 52-1/2 vise. Somewhere along that trek I decided I did not really need three sets of these gouges and sent one to him. I have not yet figured out how to integrate these tools into Gragg, but I will.
The small spokeshaves are fine for convex surfaces and larger concave shapes, but for concave surfaces with smaller radii we relied on a set of tools we called draw-spoons. For shaping the rear seat rail and wallowing out the seating deck of the Gragg chair tools like scorps, travishers, and inshaves do not work for me but the drawspoon fits the bill perfectly. There were a range of drawspoons in the patternmaking shop, but there was only one set and I never had the opportunity to make another. The larger of my tools came from Garret Wade back in the day, now I think they are available from Woodcraft as a spoon plane. I have a smaller set that came from AMT back in the Stone Age, I do not know if they are available anywhere any more. Lee Valley makes a drawspoon but it is too large for the purposes I need.
I have found that I simply could not make Gragg chairs in any meaningful way without the drawspoon, and if you want to make them you will need at least one as well.
To judge and tune the angles of the square I first establish the right angle to be as perfect as possible with my Vesper square, which is the reference I use for anything 90-degrees in the shop.
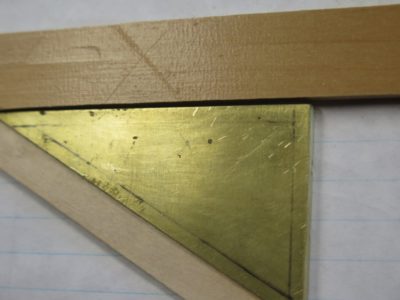
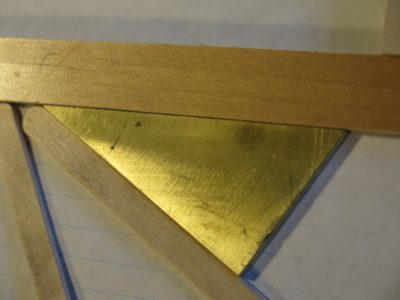
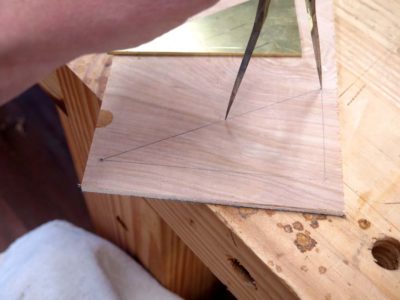
With with my brass triangle laid out as closely as possible to the geometric model of the base being exactly 1/2 of the hypotenuse, I begin to mark the 30-degree angles cumulatively to form a half circle or even an entire 360-degree construct. I have found that simply marking the angle with a pencil and building the angle construct from that is not accurate enough to get it exactly 30-degrees.
When I am creating the sawing and shooting jigs for parquetry I have to keep in mind that in order for the assembly to be perfect the pieces have to fit tightly together by incorporating twelve lines — six starburst pieces with two sides each. For every fraction of a degree of angle the triangle square is off, that error will be magnified twelve times in the final assembly.
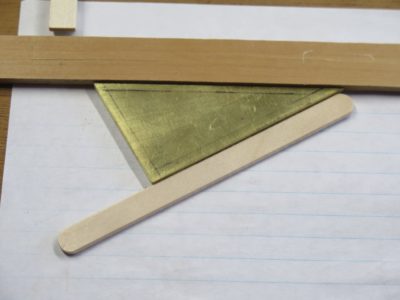
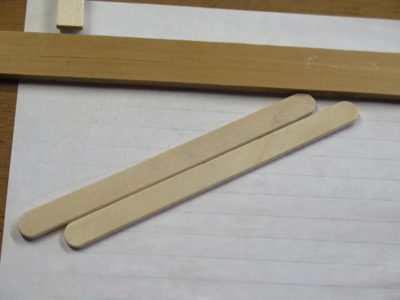
Once that is accomplished I set the square down against a line, then lay a popsicle stick along the angled line.
Removing the square and placing a second stick as the mating surface I now have the reference line to establish the second 30-degree angle. I continue this process until I get to the stage where, if perfect, the first line and the last line are perfectly in accord.
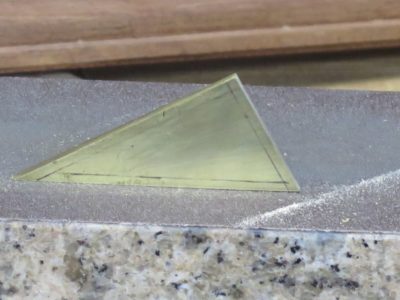
This never happens, the aggregate is always off by a tiny bit and the hypotenuse needs a bit of adjusting, in this case less than 1/64th”.
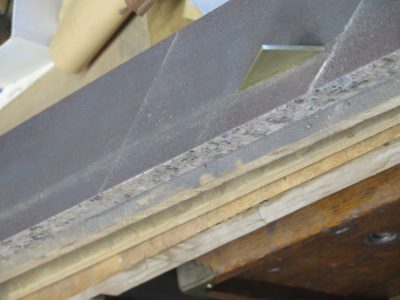
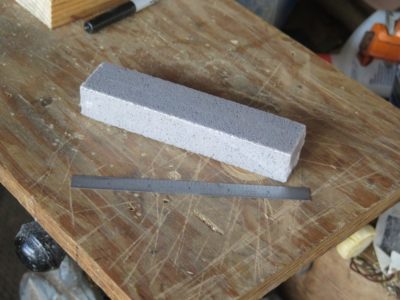
I do this on my granite block with a roll of 60-grit sanding medium, gently pressing the toe or the heel of the hypotenuse to kiss the angle a teensy bit one way or the other.
It usually takes me a few brief sessions at the granite-and-sandpaper before I am satisfied with the six-angle exercise.
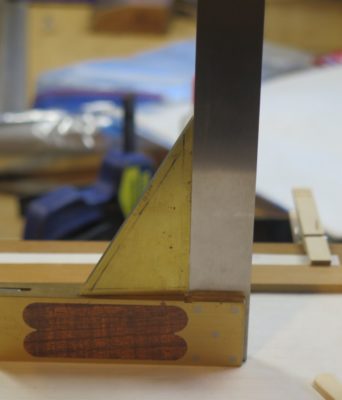
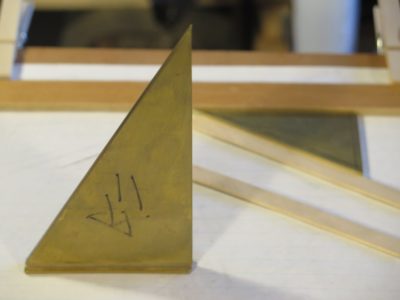
Once I get to that point I can solder the shoe on the short leg of the square and finish it off, calling it “done.” This example is the bigger sibling of the current one, made during the workshop two summers ago. I trued this square the exact same way, and it is a joy to hold and use.
In many instances, cutting dovetailed open mortises through a Roubo bench top for example, a 30-60-90 layout gauge only has to be “close enough,” however you define that term. All one layout line has to do is match another layout line, and as long the two lines are struck with the same tool off the same reference plane all is well.
During last year’s workshop we all made one or two of these triangles, and like I said above, they work just fine. Laying out the hypotenuse with dividers was all that really needed to accomplish (the hypotenuse of a 30-60-90 triangle is exactly twice the length of the short leg), using my Chris Vesper sublime refence square for the 90-degree corner.
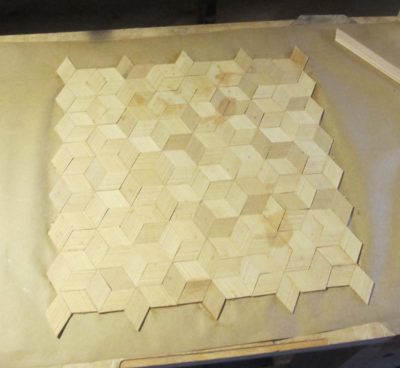
But what happens when you have to create a series of lines coming from different places, and they establish the perimeters of pieces that must match each other precisely? That is exactly the case of laying out a basic “starburst” or “dice” pattern parquetry composition. I used to be content with simply laying out a sawing jig using a small plastic triangle from a middle school geometry class set, but since I have moved to shooting the edges of all the lozenges to minimize the joints even more, I needed to make myself a truly precise triangle square to set the fence for the shooting board.
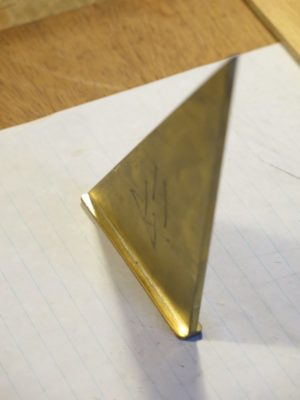
Starting with one of the brass triangles left over from the workshop two summer ago I determined to make a 30-60-90 square that fit the bill. Once I had the angles perfect I could then solder on the shoe to the short leg of the triangle.
Tomorrow I will show how I did just that with a bench top geometry version of a Covid/PCR test, using a piece of paper and two popsicle sticks.
Over the coming weeks I will be posting periodically about the tools I use to make a Gragg chair in order to help next August’s class attendees begin to assemble their tool kits. I will emphasize the peculiar tools and perhaps describe how they are used in the process. The tools will be presented in no particular order, merely in the sequence they pop into my head.
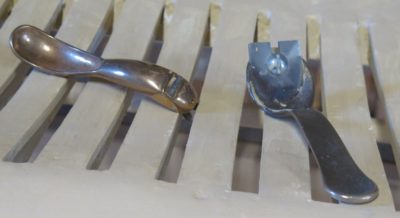
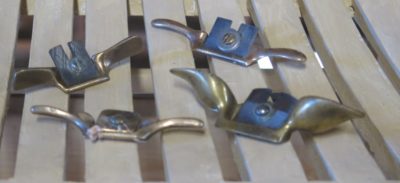
I will say that tool #1, the spokeshave, or more particularly brass mini-spokeshave(s) is integral to establishing the lines of the curved contours and thus spends a lot of time in my hand. I use about a dozen different small spokeshaves, but that is because that’s what my inventory of spokeshaves consists of. Petite wooden spokeshaves are also fine, but I only have one of these and have not been able to find many more. Certainly my favorite (upper right) is one we made when I was working as a patternmaker in a foundry and cast our own tools. As I recall the iron for the tool was made from an old saw blade. Its sole is shallow enough that it can work on concave, convex, flat, and chamfered surfaces.
The spokeshave on the upper left might be the one most familiar to you as it was sold in a three piece set, one flat, one convex, and one rounded, from a number of tool purveyors back in the day. I am pretty sure I bought four sets of them at the time and there are still large numbers of these floating around the interwebz and tool swap meets. The two spokeshaves on the bottom were picked up along the journey over the past 40 years, the one on the left very similar to the one I had from the pattern shop and the one on the right is from a pair of “lamb’s ear” spokeshaves from some auction somewhere.
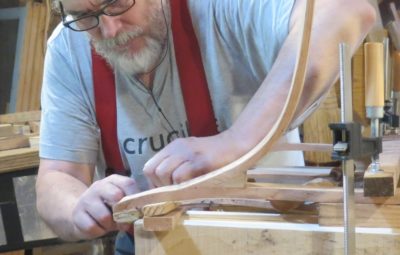
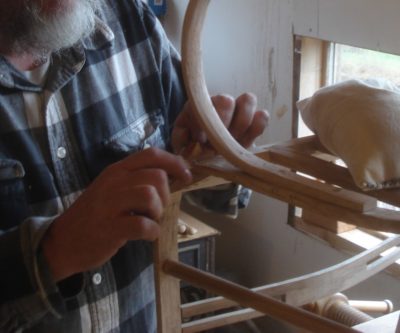
Given that the ultimate elegance of the Gragg chair is only partly due to the sinuous bent elements, much of the remaining contribution is through the further shaping of those elements via spokeshaving. Once the chair is assembled from the steam bent pieces, almost each of those pieces gets sculpted in place with the spokeshaves to present the unified whole. I have tried to shape all these elements prior to assembly but found that even then I had to go back and harmonize them all, so now I just do almost all of the shaping of those cross sections after the chair is all together. This requires very small spokeshaves to get the job done.
A few days ago blog reader (and the Lou Gehrig of the woodworking blogosphere) RalphB asked about my use of the pumice block to smooth the surface of my parquetry Kindle case. The use of pumice blocks is well documented in historical accounts, although explicit or specific details are often missing.
I use a pumice block from the plumbing section of the hardware store (I order them by the case). Normally they are used for deep cleaning of porcelain and enameled fixtures to remove mineral deposits and stains. They work equally well for evening out irregular wood surfaces such as those found when assembling parquetry or marquetry from sawn veneers, where regardless of the care in the initial veneer sawing a fair bit of irregularity is manifest.
I generally use a pumice block as the step following the toothing plane/Shinto rasp, moving the block in a circular fashion on the substrate, yielding a fairly smooth and even surface about what you might expect with 60 or 80 grit sandpaper. Following the pumice block with a card scraper and polissoir, the result is quite pleasing.
Like almost all Testosterone-Americans of my vintage I began my journey into the inexorable gravitational universe of Toolism at the local Sears store, buying Craftsman tools when they were the standard of excellence,
My very first purchase at Sears was my black Cub Scout folding knife (I did not last even a year in Cub Scouts due probably to my antipathy towards organizational authoritarian constructs, but I’ve still got the knife) when I was 11 years old. It was $2.95 if I remember correctly.
My first power tool, purchased with yard work/handyman money was this hand drill when I was 14, for$19.95 (I got the “Best” from the Good/Better/Best delineations you may remember) , a princely sum to a kid from a poor family making fifty cents or a buck for mowing the neighbors’ yards or helping to clean out a garage.
In the intervening years the only service/improvement the drill ever received was replacing the original keyed chuck with a keyless chuck about 30 years ago.
While working on some new decking at our daughter’s house we needed two drills so that we could both be productive, so I pulled this old beauty out of semi-retirement. Still works like a charm, but I probably need to replace the brushes and lubricate everything inside.
51 years, people, for an ordinary off-the-shelf hand drill. 51 years. Are you listening, Makita/DeWalt,/Craftsman/Bosch/Ryobi?
A year ago I purchased a pair of brand new Nicholson patternmaker’s rasps to add to my inventory — I do not have a “file” problem, it’s just that I do not think having hundreds of files and rasps on hand is excessive — and have used the finer one a good bit in working on the Gragg Chairs up in the fourth floor video studio. The coarser one remained in my second floor workshop getting very little work until I was doing some rough shaping on green wood burl last week. Given the wet nature of the burl, the rasp clogged pretty rapidly. As I smacked the tool against the side of my workbench to knock out the offending material, the rasp, with only an hour or two of bench time (none of it abusive), shattered into four pieces. Obviously in hindsight I should have used a wire brush or file card to clean the rasp, but I was pretty disappointed at how fragile the tool was.
Somewhere in the distant mists of time I obtained two propane-type smelting furnaces, thinking I was going to get into metal casting in a bigger way than I have. I now have no expectation of this, instead focusing on smaller castings using my electric smelting furnace. These two have simply become space eaters and I just want them gone from taking up space that is more valuable for storing yard equipment and firewood. If you want them or know anyone who does, just let me know.
These do not have burner nozzles nor the requisite plumbing but that is pretty straightforward AFAIK.
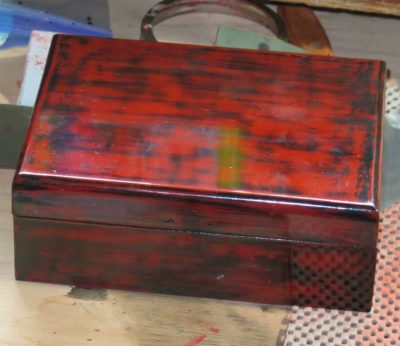
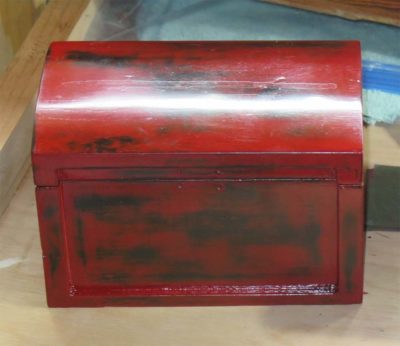
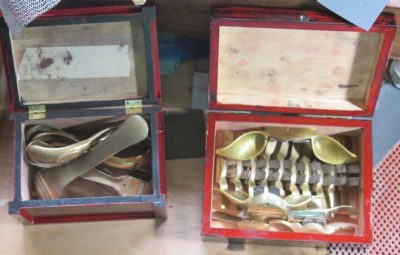
Today I wrapped up (mostly) three of the “rubbed through” boxes and have put two to work to hold some of my smaller Gragg sculpting tools.
This one is black-over-red.
This one is red-over-black.
I did both of these with pigmented shellac with lemon shellac as the film forming component. I added Bone Black and Vermillion Red powders to taste, then three or four clear coats over the top after composing the pattern with wet sanding. Since these will get jostled at least if not outright “beat up” I have no plans to bring them to a mirror surface. I might rub them out with some Liberon steel wool and Mel’s Wax once the surfaces get really hard in a few weeks.
It is nice to have most of my smallest brass spokeshaves in the same box. I bought four sets of the ones offered by many tool merchants 35(?) years ago and am delighted to have them on hand. With duplicate sets I have total freedom to modify them as needed. These tiny tools are amazingly productive but it takes strong finger tips and a good “feel” for using them. Fortunately Mrs. Barn lets me massage her feet for a couple hours most evenings so my hands are up to the challenge.








Recent Comments