Back in the day when I still watched broadcast television there was a strategic plotting device known as “the story arc,” wherein minor plot threads would be interjected into numerous episodes even though the prominent episode themes were stand-alone. With life on the homestead settling down, a bit at least, and (hopefully) become more manifest after barndottir #1’s wedding in a couple weeks (plus barndottir #2 has Lil’T’s sibling in the oven), the “long arc” will likely become an occasional feature on the blog. Not THE feature, but A feature. It’s just that many of my upcoming and ongoing shop projects are just that, ongoing. And going, and going…
Prominent among them will be making new and salvaging and repurposing old tools. While I still use The Accidental Woodworker as my go-to reference for a lot of tool restoration, I’ll let you peek over my shoulder as I indulge my own whimsies in this realm.
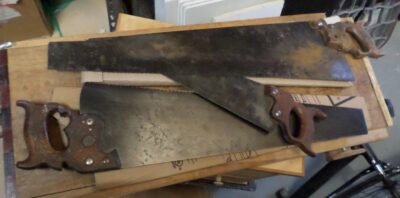
First up will be some accounts of rescuing and modifying old saws, including my advice on buying old saws and the methods I use to salvage and sharpen them.
Repurposing my old and tricking-out my new traveling tool boxes.
And my creating a special case of the former, repurposing a vintage tool chest (probably late 19thC) to house my 18th Century-style woodworking kit.
And lots of other stuff that isn’t popping into my brain right now.
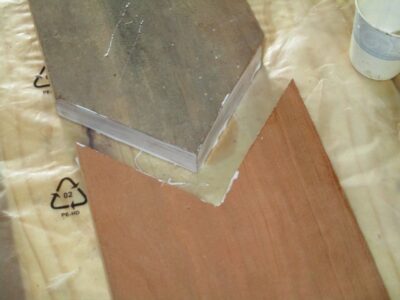
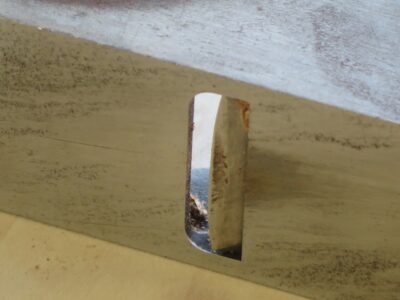
Looking through my lumber inventory for vintage cherry boards from which to make the trim for the new bay window, I found some beauties. Unfortunately, all the boards I had on the top of the pile were about 4″ shorter than I needed for the lintel and base trim. The deeper into the pile I looked, the more frustrated I got as these were too short also. Aaaargh!
After many days of ruminating on the problem, including contemplating a trip to a sawmill to get some new lumber, I settled on a plan to stretch my boards by grafting in some diamond “dutchmen” as decorative elements into the center of the boards I had. I rough cut the boards with my circular saw and a fence, then fed them through the lunchbox planer.
I laid out the dutchman on the inlet, clamped the inlet board and the longer board together, and cut the angles with my reciprocal saw and a speed-square fence. The kerfs were smoothed with my Iwasaki float to fit them together well.
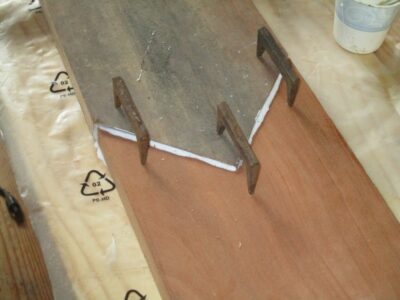
Using pinch dogs on the verso as the clamps (indispensable accessories I first used in the foundry patternmaking shop when I worked there 45 years ago), the glue margins drew together very tight with nice squeeze-out of the PVA I was using as the adhesive.
To counteract the slight curling induced by the pinch dogs being only on one side of the assemblage, 10-pound bricks were placed on each end of the gluing-together element to press them flat on the bench top.
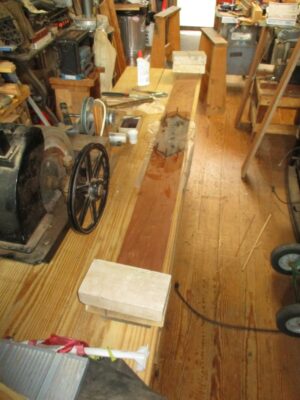
The next morning they were ready for me to work by hand.
My fundamental operating preference is for almost all of my hand plane irons to have camber, or some degree of curve along the cutting bevel. About the only plane irons that are not cambered are 1) block planes, of which I have many and use nearly every day, 2) smoothing planes, 3) “miter” planes for use on shooting boards, and 4) rabbet/dado planes for crisp shoulder/joinery work. Otherwise, pretty much everything is cambered.
And, since it such a routine part of my work, I have developed a simple, easy, and straightforward process to deal with inducing camber and sharpening cambered edges. It has to be simple and easy or I would not go there.
Exactly how much camber depends on the use of the tool. For general-use bench planes like jointers it’s a teensy bit (the precise technical description) and for scrub planes it is a gob of camber (again, the precise technical description), and jack planes and foreplanes somewhere in the middle. How much camber, and when to induce it, are almost whimsical at this stage of my life after decades of creating and maintaining them. That said, the basic process is the same in that it depends on how my hand bone is connected to my arm bone, and my arm bone connected to the shoulder bone.
The most basic truth is that the hand/arm/shoulder joints function as pendulums (pendula?) and their pivot points. As a result, while I use a sharpening jig to establish the bevel on a new or really trashed old iron, virtually all of my sharpening at the stone is designed to overcome or counteract this pendulum imperative. I will not go into depth here on my theory and practice of sharpening (ask three woodworkers about sharpening and you are likely to get 74 opinions), in routine sharpening I am a freehand sidewinder, and in the world of cambers this is an added benefit.
Here is how it works for me.
Holding the iron so tha the bevel is flat on the stone surface, when pushing the iron away from my body I press down hard with my thumb. On the return trip, pulling the iron back towards my body, I press down hard with my index finger. With this simple process camber is induce. Exactly how much camber depends on how many strokes you move fore and back, and how coarse the stone is.
With the iron bevel-down on the sharpening stone, I establish (or discover) the bevel angle moving the blade fore and back. Here’s the sublime part, camber-wise — all I have to do to induce the camber is press more on the trailing edge on the push stroke and on the pull stoke to begin a rocking action and remove more material in a near perfect curve on one side for the push stroke and the other side on the pull stroke.
Simple as that.
Again, exactly how much camber and when to induce it depends on the purpose of the iron. For bench planes I induce it at the 600-grit stage of the sharpening process. NB – my progression for a new or derelict iron edges is to work up through very coarse silicone paper or diamond stones to 220 diamond to 600 diamond to 1200 diamond/1000 water stone to 8000 water stone, followed by stropping with micro-abrasive impregnated into a wooden board.
=================================
BTW I am playing with creating short shop-based videos, and if there is enough interest I could easily feed this topic into the pipeline.
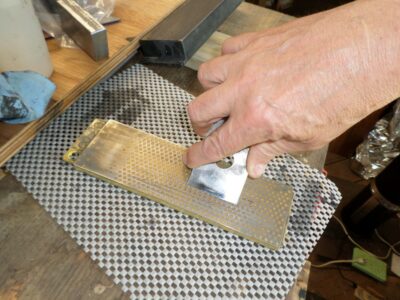
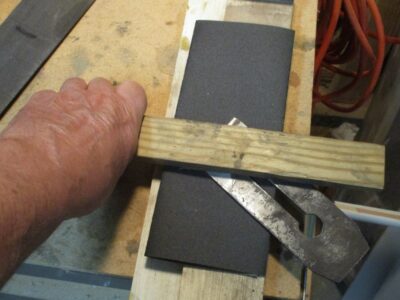
When restoring a plane iron my starting point is always flattening the back, a frequently arduous task as a surprisingly few irons have undergone such a corrective action. As a result, the time and energy for this step is an outsized proposition. Even with coarse stones, diamond plates, or abrasive paper, flattening the back of a derelict iron can be a real workout. Generally, I’ve found that it is practically impossible to work the iron too hard on the abrasive, whatever it is. And, although I have pretty big, strong hands, it can be wearying session. To make it less of a nuisance I need a force multiplier.
This is where The Magic Stick comes in handy. This fundamental tool was introduced to me by my late, lamented and much-missed work pal Mel Wachowiak (his obituary is still tacked up in my shop), who in turn learned it from somebody working on a Japanese plane iron. The tool is beyond basic but required for a new Japanese blade as the “grabbable” real estate for handling the blade is roughly half that of a Western blade.
With the Magic stick you can really, really bear down on the blade when working it on the stone or sandpaper or diamond or whatever.
By gluing a piece of very coarse sandpaper on the bottom of the stick with epoxy, and pressing that coarse surface against the upper side of the iron, you are no longer limited by hand strength and endurance for flattening the back. You can basically impose the downward force of your entire upper body on the workpieces with surprisingly little effort. This approach cuts my work time for the initial set-up of the back by at least 75% and at times 90%.
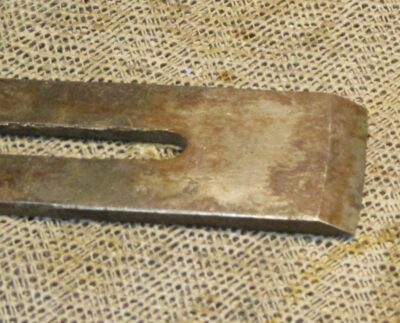
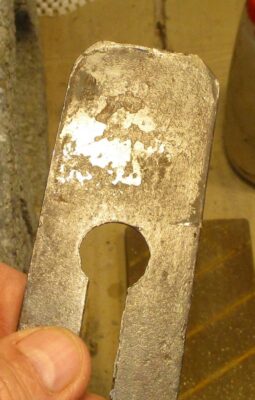
Recently I brought up to snuff a narrow coffin plane that had been originally used as a semi-scrub plane, and it had been worked mighty hard if the mushrooming of the iron heel was any indication.
Looking closely at the iron I saw that the bevel had been established on a bench grinding wheel or something similar. But the edge had never been honed and the back never flattened. The iron was essentially straight-from-the-factory forge. I knew this because the fire scale had never even been touched! (I’m still kicking myself for not getting better pictures of this.)
Fire scale is the deposit that forms on the surface of metals when they are worked at high temperatures, it is the stuff that sloughs off when a blacksmith is working a piece of wrought iron or steel. Not being a metallurgist I am not 100% clear on the composition of ferrous fire scale. All I can tell you that it behaves carbide-ish, hard and tough. Very hard. Very tough.
So, on this blade I had a lot of fire scale that needed to be ground off to accomplish the preparation of the vintage iron blade. Just abrading it on a diamond stone was brutal work by hand, but with the Magic Stick it was doable in about 10 minutes. BTW, the carbide-ish ferrous fire scale was so tough that it trashed my 120 grit diamond stone. Absolutely trashed it. I wound up doing most of the work on a piece of folded silicone carbide paper.
Working my way up through the grits on diamond and water stones, a dozen seconds at a time, was a piece of cake thanks to the Magic Stick. This blade is not the previous one with extreme camber, but an example of a blade back that was prepped in just a few minutes.
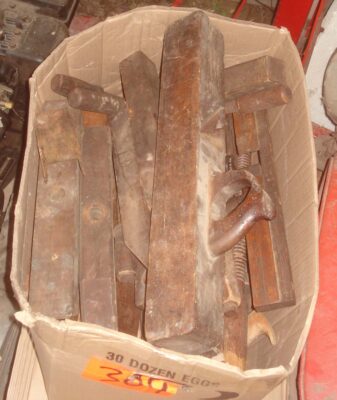
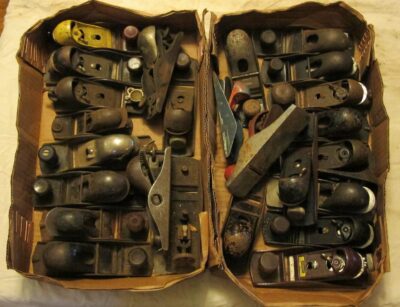
I am not a tool collector per se. I am a tool acquisitor, but that is a whole different mindset. I own fewer than a dozen collectible tools – my Robert Towell and Raney Nelson planes, a Chris Laarmans finger plane, a Laarmans router plane, a set of Otner-Botner luthier’s planes, perhaps a couple others — but my inventory of acquired tools is always in flux. I am always on the lookout at flea markets and tailgating events to find tools that I can rehabilitate and find them a new home to someone who needs one of them. Sometimes the refurbished tools go to family, some go into the wooden box marked “tools for Lil’T”, and some go to friends or even friends I’ve never met. Such was the case a couple years ago when I was able to send several boxes of tools to Rob Hanson in the aftermath of his shop and all its contents turning to ashes in the Paradise Fire in California. I counted it as joy to send them even though we had never met, because it was the right thing to do.
One of my very favorite things is to buy boxes of old block planes to tune up and give away to new woodworkers. One sharp tool can make a difference in charting someone’s passion for woodworking.
I often purchase wooden body planes even if they have no iron, and often purchase irons even if they have no plane. As long as they are basically in good shape I can eventually make something of them, combining an iron from my drawer full of irons with a body who needs one. Then I can find some body who needs the finished tool.
NB — for guidance on restoring all manner of iron planes and other woodworking tools, Ralph Baumenot’s Accidental Woodworker is the reference, a must read for me on a near daily basis.
I am currently rehabbing a series of wooden body plane irons, good projects in that they can be worked on a few minutes here, a few minutes there.
When working on an iron that is in really rough shape, or even sometimes brand new, I find my most valuable tool to be “The Magic Stick,” two versions of which are illustrated above.
You’ll find out the Why and How next time, along with a cut list.
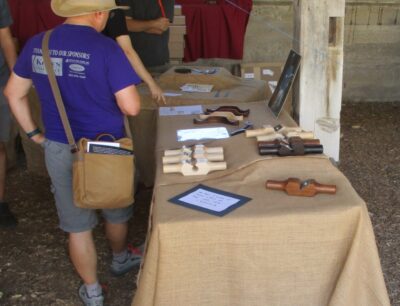
Saturday foot traffic to the booth was less than Friday’s, although the demo and product interest remained the same. Since John and I had zero time to wander the town on Friday we each took an hour in the early afternoon to do just that. There were scads of toolmakers I had never seen, although to be honest I was unable to browse HW2015 (Studley tool cabinet exhibit) or HW 2017 (working the booth all alone).
Here’s the pictorial travelogue with minimal commentary. NB – My effort of traveling photojournalism was greatly hindered by the crowds, which were much more than in the Festhalle. Still, I hope you get a taste of the many flavors present.
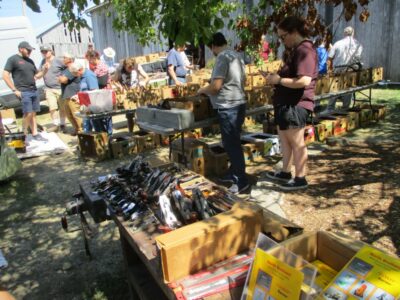
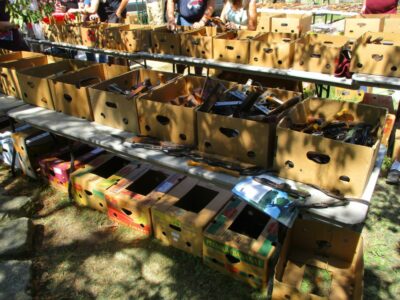
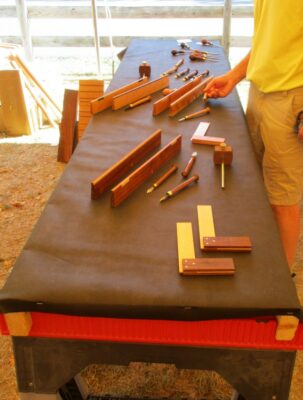
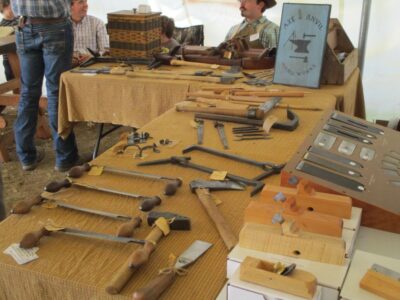
Just outside the Festhalle was this most impressive inventory of vintage tools.
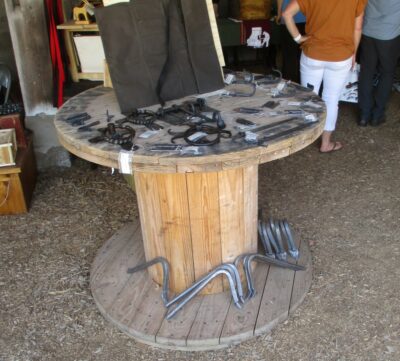
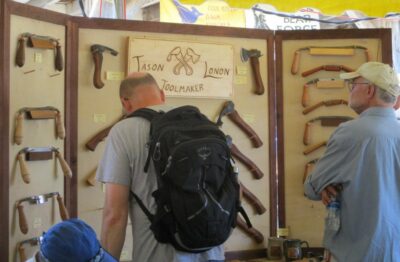
Wandering over to the stable area with its big circus tents, the feast continued.
Immediately adjacent to the stables were a pair of circus tents, chock full of baubles but mostly packed with people (hence the paucity of images).
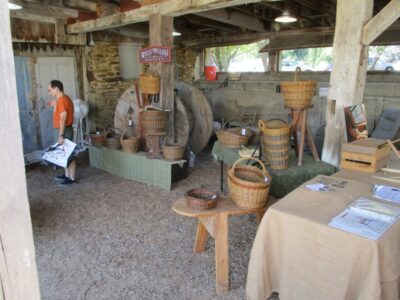
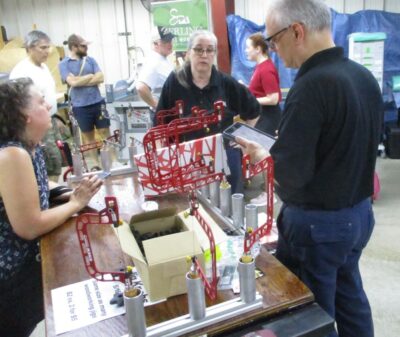
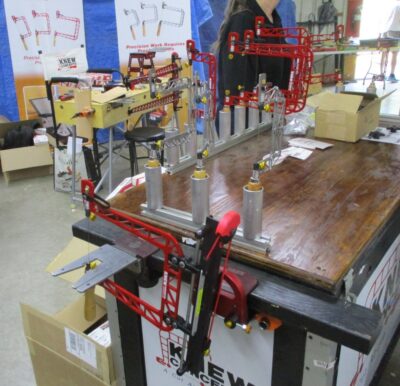
Wrapping up the walking tour at the Amana Furniture warehouse room, I was especially impressed with the Knew Concepts display, including the large vertical chevalet, for which I was an enthusiastic collaborator an own Serial #1, and its new little brother.
The crowds in the stable, tents, and warehouse were such that I was only able to photograph about one third of the offerings there.
Then it was time to get back to the Festhalle and finish up the day, pack up, and head for home first thing the next morning.
I am a sucker for anything to do with artisanal brush-making, and this one on fabricating urushi lacquering brushes had me from the get-go.
The only way it coulda been better if there was another one. Oh wait, there is.
And another…
In fact, in the year-plus since I really browsed deep into urushi videos on youtube there is a whole new inventory of them, including these really cool ones about lacquer brushes.
Recently while visiting our older daughter and her posse I snuck down to the basement workshop while the rest were up in the dining room playing board games (have some pity on Mrs. Barn, she loves board games and dancing, two activities for which I have near-zero proclivity), spending some time assembling sub-units of the tool cabinet parquetry. It’s an easy project I can take with me in a shoe box.
This parquetry topic will play an increasingly prominent role on the blog over the next year.
The work itself is fairly mindless, giving my attention plenty of opportunity to wander here and there. One of the ruminations it settled on was the numerous work spaces I inhabit, and the many sets of tools these places are populated with.
Of course there is my workshop in the barn, with its plethora of tools for woodworking and metal working.
That’s the first pile o’ tools.
Even in the barn there is the subset of tools up on the fourth floor where I build Gragg chairs. I created this space and its accoutrements after getting mighty tired of walking up and down stairs every time I needed this or that.
Thus, a second pile o’ tools.
Just down the hill from my main barn is the vintage log barn, originally a livestock housing but now a storage bin for lumber. Attached to this barn is the lean-to where all the lawn equipment is stored. And stored along with the equipment is the substantial collection of tools requisite for keeping things in operating order.
Third pile o’ tools.
Just across the creek from the lean-to is the cabin, and like almost every domicile it has a fairly extensive set of tools to keep everything there running smoothly, from electrical to plumbing to woodworking to who knows what else.
Fourth pile o’ tools.
Then we’ve got three vehicles, each with their necessary tool kits in case anything goes wrong while on the road.
Tool piles five, six, and seven.
Then there is the aforementioned workshop at my daughter’s house with fairly complete workshop in the basement (pile #8) and my carpentry tools and power machines in her little barn (#9).
Even though I do not have a workshop nor tool collection at my other daughter and son-in-law (he’s got an excellent inventory himself) I’ve got a couple selections of tools I take whenever we go there.
Piles 10 & 11.
Some might say I “have a tool problem,” I refute the accusation vigorously. I do not have “a tool problem,” I have a lot of tools.
For as long as I can remember I’ve been wearing carpenter pants with a side pocket (for a while my favorite jeans from Bailey’s had them on both sides!), into which fit perfectly the best little flashlights I ever used. These were machined aluminum case Ozark Trails flashlights, one of the proprietary brands from WalMart. The first crack in this edifice was when WM discontinued this particular line of flashlights in favor of lesser but presumably more profitable models. (I can only imagine Sam Walton spinning in his grave at the thought of what a malevolent entity his empire has become) The old ones were robust almost to the point of indestructability, a determination at which I arrived when I drove over one in my truck and it emerged functionally unscathed, although a little scratched. It took a lickin’ and kept on tickin’.
But then came the inexorable tyranny of, to quote the inestimable David Bowie, “F-f-f-fashion.” With the emergent ubiquity of “smart” phones (I think they have uses but on balance make the populace stoopider) the narrow confines of side pockets, originally configured for a folding carpenter’s rule, grew in size to accommodate these surveillance devices most American now carry. What, you thought their purpose was communication? Now, that’s funny!
Anyway, the newer larger side pockets were ill suited for my small flashlight as the flashlight just sorta wallowed around inside the bigger pockets, falling out whenever the opportunity arose. Like whenever I sat down in my recliner or in a car. I cannot recount the number of times I had to retrieve my flashlight from one of these locations.
This frustration led me to search for a new flashlight that fit the larger side pocket a little more better. There are lots of options on-line but I generally like to purchase items after I can examine them in person. Durning a recent trip to the hardware store I found a DieHard brand flashlight whose configuration fit the requirements perfectly. It was a bit more expensive than its predecessor, maybe, ($35 2023 dollars vs. $15 2005 dollars) but fit the new side pocket size perfectly and was touted as a better, brighter tool. I plunked down my money and started carrying it a couple months ago.
The real bolt-of-lightning occurred shortly thereafter, when I remembered just before bedtime that I maybe left the glue cooking on the coffee cup warmer and rather than fuss about it all night long I walked up to the barn to check it out (I had turned it off but had no clear memory of the event, a phenomenon that rears its ugly head periodically as I approach 70). As I headed up, then back down, I turned on the new flashlight and WOW I was accompanied by a wall of light in the rural darkness. My old flashlight was 150 lumens and the new one is 1000. Just wow.
The new flashlight also appears to be a solid aluminum case, but I’ll only be able to confirm its robustness when/if I drive over it and it keeps on tickin’.
My Every Day Carry inventory has now been upgraded.
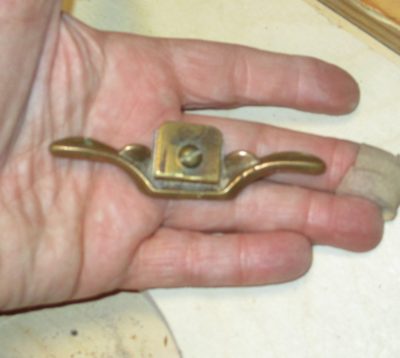
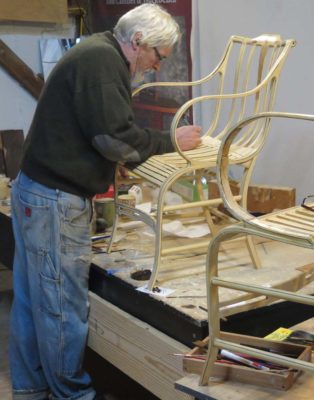
This third and final installment of “Near Miss” planes is an eccentric one revolving around the fact that I am not a chair maker. I am a Gragg Chair maker, a definite distinction. It might be a distinction without a difference, but it is a distinction. My only rationale for including this/these tools here is that indeed they are integral to that work but are probably not true panes. They are plane-ish. Yes, they have sharpened irons held inside a body but they are different enough to call their type into question. This/these tools are the micro spokeshave and its cousin, the drawspoon, sometimes called an inshave or scorp.
I was first introduce to the micro spokeshave in the foundry pattern shop when I started work there around 1978. At its core, when it came to the types of patterns we were often tasked with making, patternmaking was essentially no different than curvilinear sculpture. I was astounded the first time I watched the shop master John Kuzma lay waste to a glued-up stack-laminated helix that was to become the rib of a dredging cutterhead.
Almost hidden in his hand, this tiny tool soon had created a pile of shavings as the almost organic contour and surface took shape. While I had used “full sized” spokeshaves before, this little jewel was new to me and I have been a convert ever since. When I parted with the pattern shop in 1981 to marry Mrs. Barn and give college one final try — first college credits in 1972, tripe major degree finally in-hand in 1986 — John reluctantly bid me farewell (he could be an irascible sort but we got along famously; he came from the rough-and-tumble world of Cleveland factories and taught me obscenities and associated linguistic constructs that would make John McWhorter proud) he handed me as a farewell gift the micro spokeshave we had cast in the foundry. That tool remains one of my personal treasures.
The micro spokeshave we made in the foundry and John gave me as a farewell gift is the one in the upper right.
Flash forward to my first in-person encounter with a Gragg chair. Even underneath many coats of paint the processes and tools of Gragg were readily apparent, and a small spokeshave was integral to his work as well. Thus, when I started making replicas of his chair I was well equipped. Every curvilinear element of a Gragg chair is worked with this tool or one of its analogs (I own about two dozen micro spokeshaves and happily they are still being made)
The drawspoon on the left was made by AMT, and IIRC the one on the right by Ohio Tool. As far as I know neither is in production today. Perhaps the pinnacle of this form was made for a short while in Rhode Island by the Otner Bortner company. I am in the market for a set of those…
Another sorta cousin to the micro spokeshave to which I was introduced in the pattern shop was the drawspoon, used often in concert with the spokeshave. The spokeshave deals with the outer surface of a curvilinear shape, the drawspoon handled the inner curve. Unlike the shave, the spoon was restricted by its size and curvature so we had a set of them ranging from 1/4″ radius to 3″ radius. Try as I might I have never found another set like ours, perhaps not too surprising since we made them in the foundry ourselves. One of my great regrets ex poste is that I never copied the patterns for the shaves and spoons, and when I returned to visit the patternshop many years later all the tools and patterns of those tools were gone — rather than being a wood-based shop it was now a polymer-composite-based shop with body grinders replacing the woodworking tools.
Like the shave the spoon is plane-ish, but also like the micro shave it is integral to my working the seat deck of the Gragg chair. NB – I made a few modifications to Gragg’s original techniques and configuration, and introducing a modest swail to the seat deck with the spoon was one of them. That make the sitting ever more comfortable.
So, the micro-shave and the spoon are “near misses” in the Essential Planes menu only because they are plane-ish. If your work is different than mine these might not even appear on the radar, but in the context of my work they would be ranked #1A right behind the bench plane.


Recent Comments