Mrs. Barn and I do not have a television that is hooked up to much more than the DVD player and an internet thingy so we do not watch any broadcast or cable television (hence our comparative sanity), we basically stick with movies checked out from the library or the occasional internet video. Lately I have been binging on a channel that comes from James Townsend and Son, a company I first learned about twenty years ago when our daughters were doing 18th Century reenactment encampments with their history teachers. Townsend provides clothing and accoutrements for the vast world of historical reenactors. I am not going to steer you towards their commercial enterprise, you can find that easily enough, but rather to their youtube channel with almost eight hundred excellent educational videos wherein the participants are re-living history. There are lots of videos on historic crafts that just might suck you in for an hour or a day, week, whatever.
Here is a charming video where they are building a primitive shaving horse with even more primitive tools. Enjoy.
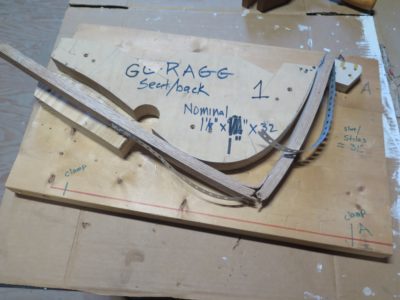
I cannot deny that our spirits were vexed at the end of the second day when we had a nearly 100% failure rate bending the seat/back slats. We re-thought our process and examined the broken elements. It was then that I noticed ex poste all the failed bends were in kiln dried stock that I had planned for a different used and they accidentally went into the “bend” barrel. D’oh! We enacted a couple of minor ex ante revisions and combining these with the proper selection of wood we had perfect results and reveled in a couple days of almost 100-percent success (I think we had one failure and that might very well have been my impatience, bending the piece faster than it could stand).
I’ve had good and bad streaks of steam bending, but these were the most stark examples of the challenges inherent in taking wood to the brink of what it can be forced into doing. We rejoiced as the inventory of chair parts grew into that which was needed for next August.
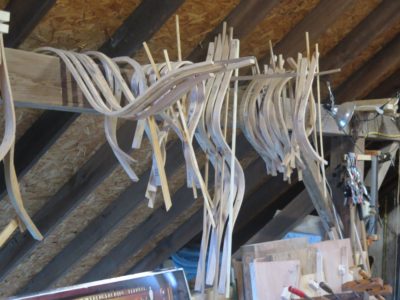
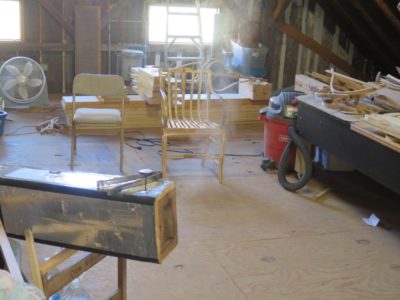
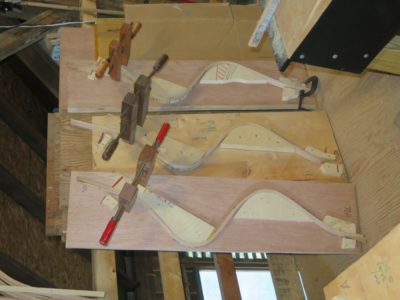
For now the chair parts are just hanging off the beam, seasoning until used by the workshop students. I have some more Gragg projects of my own to work on so there will undoubtedly be more experience interacting with wood, steam, and forms.
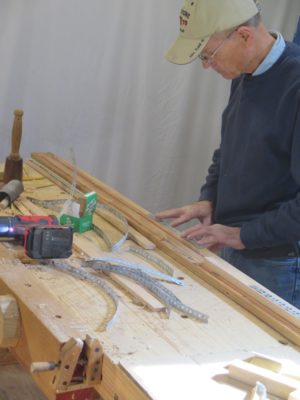
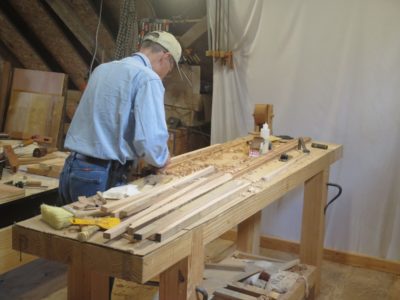
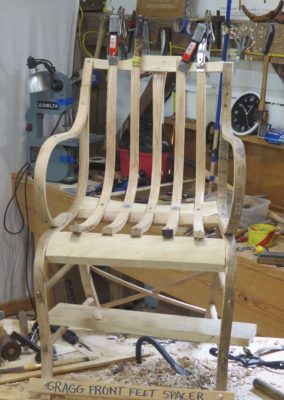
During our recent days of work preparing for next August’s “Build A Gragg Chair” workshop my friend John and I prepped a lot of wood sticks, and bent them to the forms required to become Gragg chair parts.
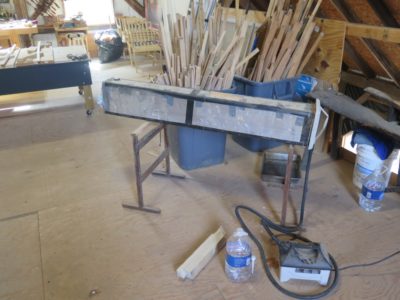
We got the steam box set up, the forms set out, and set to work.
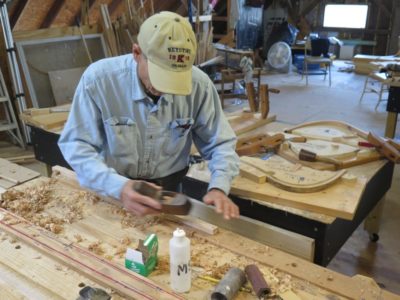
John hand planed dozens of chair pieces to get them ready for the thermodynamic adventure.
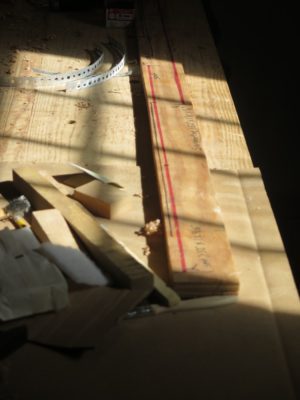
Once he had five or six pieces ready to go, he used the template board I created for this purpose and affixed the bending straps to all the pieces. When you have to execute two 90-degree bends only twelve inches apart in a dozen seconds, bending straps are pretty much mandated. We used flanged sheet metal screws and plumbing straps and attached them BEFORE they went into the steam box because the brief time to get the bending done after steaming does not allow for the straps to be put in place afterwards. And since the chairs get completely painted, any staining or screw holes can be dealt with.
I placed them into the already heating box and waited for them to reach maximum temperature, which in my set-up is about 200 degrees.
Using a state-of-the-art steam box seal we set the timer and waited the requisite time, 25 minutes for the arm and serpentine pieces, 45 minutes for the bent seat/backs.
On the first day we had good success especially with the thin pieces, only one failure out of eight or ten attempts, but on the second day we had a string of failures approaching 50% when bending the continuous seat/back slats.
At that moment we could discern no reason for the degree of failure We needed to re-think our process.
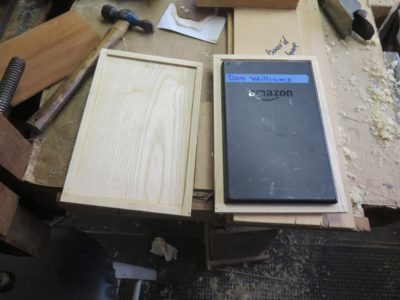
With a new Kindle in-hand, and wishing to protect it more attentively than the previous one, I’m making a case for it using the home-made epoxy/ash veneer plywood I described earlier. It will not be particularly fancy, just the <1/8″ plywood as the flat panels and the ~3/16″ plywood as the case walls. These will also serve as the ground for some nice French-style parquetry using up some of my re-existing lozenge and trim inventory. Not sure if “Pimp my Kindle” is a thing.
There is no “joinery” in the project, the case walls were just 1/2″ wide strips of the plywood glued to the 1/8″ panels around the template of the old dead Kindle.
My excitement is building as the fancy work is now imminent.
I could probably maintain a steady stream of posts exhorting you to prepare for the ongoing (and upcoming) societal chaos, but since this is a mostly woodworking blog I’ll just keep it there. My commentary on the global status quo mostly remains reserved for private correspondence.
Since deciding to host and teach a “Make A Gragg Chair” workshop next August I have been focusing in on preparing the fourth floor space and the necessary chair-making elements for that enterprise. This week my dear friend John has come to work with me in both aspects, which include the mundane (tidying and reorganizing the space) and the sublime (steam bending all the elements needed for five chairs — I will be making one right alongside the students so they can witness the way I do things, not simply receive my instructions on that).
I described myself to some visitors last week as “someone who is congenial with well-developed social skills but is entirely comfortable being alone for weeks and months at a time with just Mrs. Barn for company,” I find the circle of friends whose company I seek out is pretty small. John is one of those men. Our week will be one of productivity, in-depth discussions of forbidden topics, and maybe even some way-out-of-bounds activities reflecting the fact that I live in a just-barely-free jurisdiction and he does not (some/many/most? “public officials” have clearly mistaken 1984 as an instruction manual rather than a cautionary tale.).
So together John and I will take a pile of sticks and turn them into chair parts.
Going back to the drawing board for my self-fabricated plywood yielded excellent results.
The problem presented by my previous attempt, unique in my experience of making several other plywood pieces from veneers, led me in a different direction. Given the performance needs of the completed panels the obvious option of hammer-veneering the laminae with hot animal hide glue was not a realistic option as the panels need to perform in a variably hostile environment. Instead I went back to an old favorite for this sort of gluing — marine epoxy.
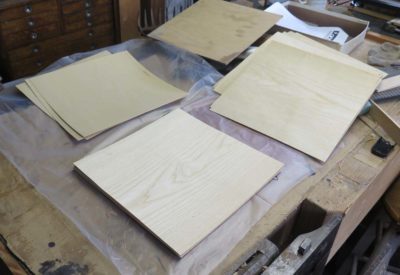
I repeated the same steps as before using another couple of sheets of the prime ash veneer but substituting old favorite West System Epoxy for the PVA, eliminating any delierious moisture response in-process.
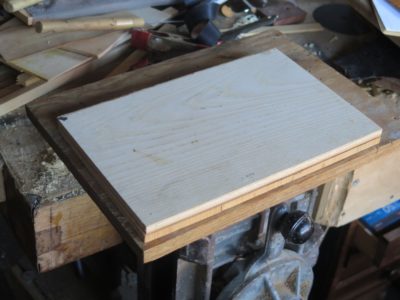
The results were entirely satisfactory, yielding 5-ply panels just under 1/8″ and 7-ply approximately 3/16″ so I can now proceed with the project.
Quoting the title of my least favorite song from probably my most favorite current band, I recently had a spectacular failure on something entirely mundane in the shop.
The locus of the action was my Kindle. I love having a Kindle, the ability to download and have a multitude of audio and textual books in-hand on a wisp of a tool is intoxicating. Plus, I can make the font size as large as I want, no small feature for someone with my eyesight. However, the Kindle is not a particularly robust tool and I fractured the screen soon after getting it. Nevertheless I continued using it without incident for a year until the design flaw in the re-charging port caused the unit to fail entirely and I replaced it. Mrs. Barn is on her second Kindle for exactly the same reason.
When my new Kindle arrived it was instantly apparent that the geniuses at Amazon recognized the re-charging port problem and upgraded the hardware considerably. Still, that would not really help me if I abused the unit physically to the point of breaking it. So, I decided to make a lightweight rigid case to house it. I had looked at a number of manufactured cases and even bought one but remained unsatisfied, hence my desire to make my own. I might have used some 5-ply 1/8″ aircraft plywood but unfortunately my inventory of this esoteric and very expensive material was inadequate for the project.
Instead I tried making my own, an undertaking I had engaged in numerous times. Over the years I have accumulated a sizeable pile of veneer sheets and this was a perfect time to consume a tiny bit of it.
Cutting several pieces from the long veneer sheets, I glued up some 5- and 7-ply panels using some PVA adhesive.
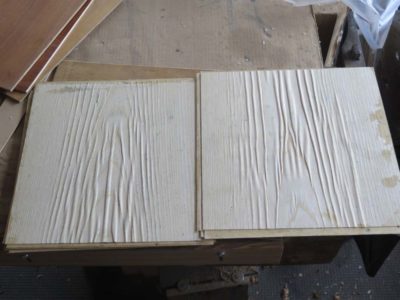
I stacked the wet panels on top of each other with a sheet of food wrap between them, as I done done many times before. Since I do not have a veneer press I added flat cauls and a couple hundred pounds of firebricks on top and let it sit overnight.
What I found the net morning on disassembling the set-up was not what I wanted, to say the very least. One of the plywood panels’ faces was perfectly flat, but the other was puckered beyond repair, or at least beyond any repair I wanted to spend my time on. Besides, I have a lot more veneer to play with.
I’ve hit the 24-hour mark of the Gragg Chair Challenge with completing the fitting of the uni-piece bent seat/back elements into the rear seat rail. I’m expecting to finish fitting these into the front seat rail and crest rail somewhere around hour 28, and then chop the mortises for the front and rear rungs. The next big step after that is to disassemble the chair and glue everything together stretchers. After that the only major elements to add are the short seat slats. Then the real sculpting begins.
I’m getting a very good feeling of optimism about a Gragg Chair Workshop in late August 2021. If this interests you, let me know.
I remind you that the goal for the workshop would be the basic construction of the chair. Completing the chair would take at least another week of time. Still, my goal a couple years ago was to get the time expended to complete a chair from raw sticks to delivery at under 150 hours. I’m pretty sure I can get there easily. My next goal will be 120 hours.
When we acquired Shangri-La in 2001 I was especially delighted that there were standing outbuildings suitable for a variety of purposes. The largest of these was a small-ish chestnut log barn that had previously housed livestock. For our use as a storage facility the original tiny doorway was a hurdle, it being only about 5-feet high. In short order I sawed the next higher log section to open the entrance to one that was not an undue burden to use, even though it was still not large enough to pass through without ducking.
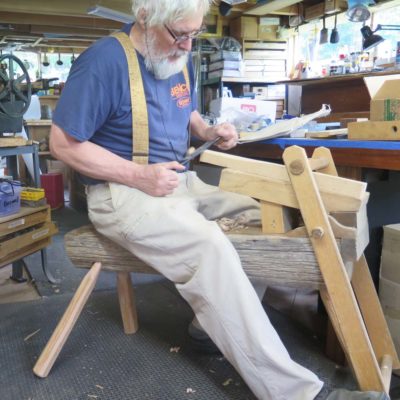
After opening the doorway I had a piece of chestnut log about 3-1/2 feet long by a foot wide and perhaps eight inches thick. It had been notched with edge tools when originally built so that log scrap had a flat side from the git-go. Some time around then I saw The Woodwright’s Shop with guest chairmaker Don Weber who described what he called “a bodger’s shave horse.” John Alexander’s 1978 Make A Chair From A Tree, was already a long-time part of my personal library, and his infectious evangelism for primitive woodworking inspired me even though my own work was not centered in this direction. Those two paths intersected with the chestnut log chunk and it wasn’t very long before I took that and a bunch of other pieces from the scrap box and made a short length three-legged shaving horse. I used it for many years as a traveling demonstration tool.
During the ongoing video project to document making a Gragg Chair I was vexed at being unable to locate and use this small shaving horse and instead had to use my gigantic one (6′ long), another almost-castoff I bought cheap at auction since the pivot rod housing was busted. I fixed it in an hour. It is a fine tool but not my favorite.
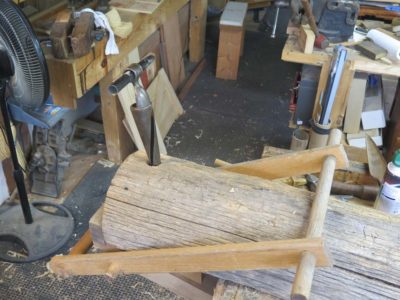
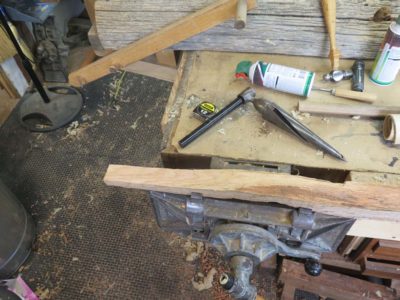
Recently I was rooting around the basement of the barn and came across the remains of the scrap chestnut horse. I do not have any memory of it making the trip from Maryland eight years ago, so I wonder of someone else tossed it into the big rental truck. I say “tossed” because all three legs were missing, and two of them had broken off inside the tapered mortises.
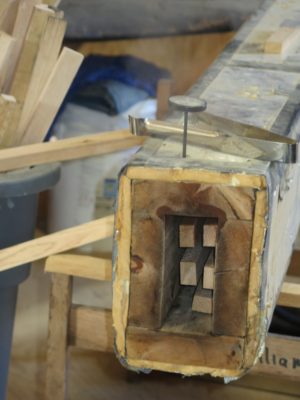
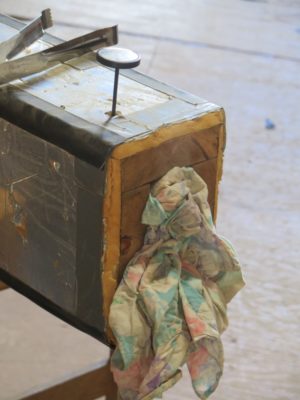
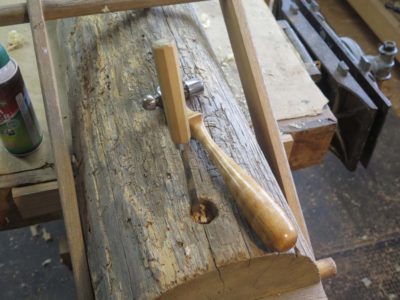
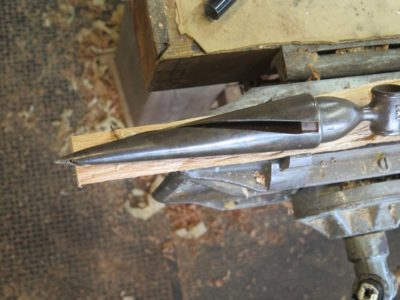
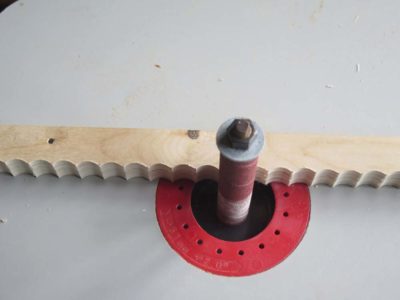
I cleaned out the detritus in the mortises then re-reamed the holes with this sweet tapered spiral reamer I got at a tool flea market for $12. It is beefy, precision-made, and still sharper than all get out. Two or three complete rotations is all it took to get the mortises perfect for new leg tenons.
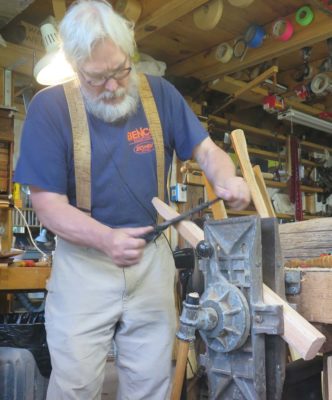
Using the reamer as the pattern I shaved three new legs from waste stock up in the Gragg workshop/video studio up in the fourth floor attic.
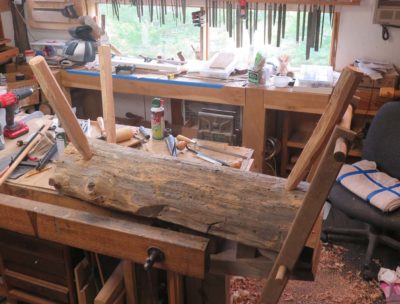
In about an hour of total time I had the new legs cut, tapered, installed and trimmed to length. I flipped it over and it was ready to be put to work.
It is good sometimes to have scraps just laying around.
Last month my friend Ripplin’ John and I spent a week in the barn working on and brainstorming about our respective ripple molding machines, trying to get a model ready for the show-n-tell of Handworks 2020 (this is before we knew Handworks 2020 was being postponed by the Wuhan Virus). I had made a little progress on my machine since Ripplemania II but he had made great strides with his. During the week his main emphasis was on the lateral “wave” cutting function of his elegant machine while I was simply trying to get my newly designed cutting head to work properly.
Prior to our most recent week together I had also been working on the notion of improving the method and form of the ripple patterns themselves. I tried a number of different methods and jigs but wound up realizing that precision layout and careful workmanship was the key to producing a crisp, precise concave pattern. Throughout our week we discussed this issue and I am now thinking that concave is not the way to move forward, convex patterns may be the future.
As John was assembling his machine, a fairly lengthy process since it was totally disassembled to fit into hi vehicle, I was puttering on mine.
My new cutterhead was now configured with the cutter being positioned at the end of a long weighted swing arm rather than inside a spring-loaded modulating frame structure.
I reasoned that the swing arm was a simpler approach and determined to give it a try. Unlike John I narrowed the scope of my machine to do only one thing, namely cut ripple moldings of approximate 1-1/2″ stock width and 1/2″ thickness. No wider, no thicker. Thus my machine structure was much more restricted than his with approximately zero adaptability.
John had been working on two important evolutionary steps. First, the machine could cut but ripple moldings and wave moldings within the same overall machine structure. Second, that the machine could be mechanized and automated thus making it a more practical device for producing large quantities of moldings. As he recited a truth to me, “Turning the platen drive handle gets old after a surprisingly short time!”


Recent Comments